OP
OP
- Joined
- May 31, 2022
- Threads
- 113
- Messages
- 1,866
- Reaction score
- 3,824
- Location
- Los Angeles
- Website
- evsportline.com
- Vehicles
- Rivian R1T, R2 res, Tesla S, 3, X, Y, Cybertruck
- Occupation
- Upgrading Electric Vehicles
- Thread starter
- #1,936
Thanks for sharing, yes Eric is THE man - he's been eating, breathing, and living all things running boards and rock sliders since day 1!Hey Folks!
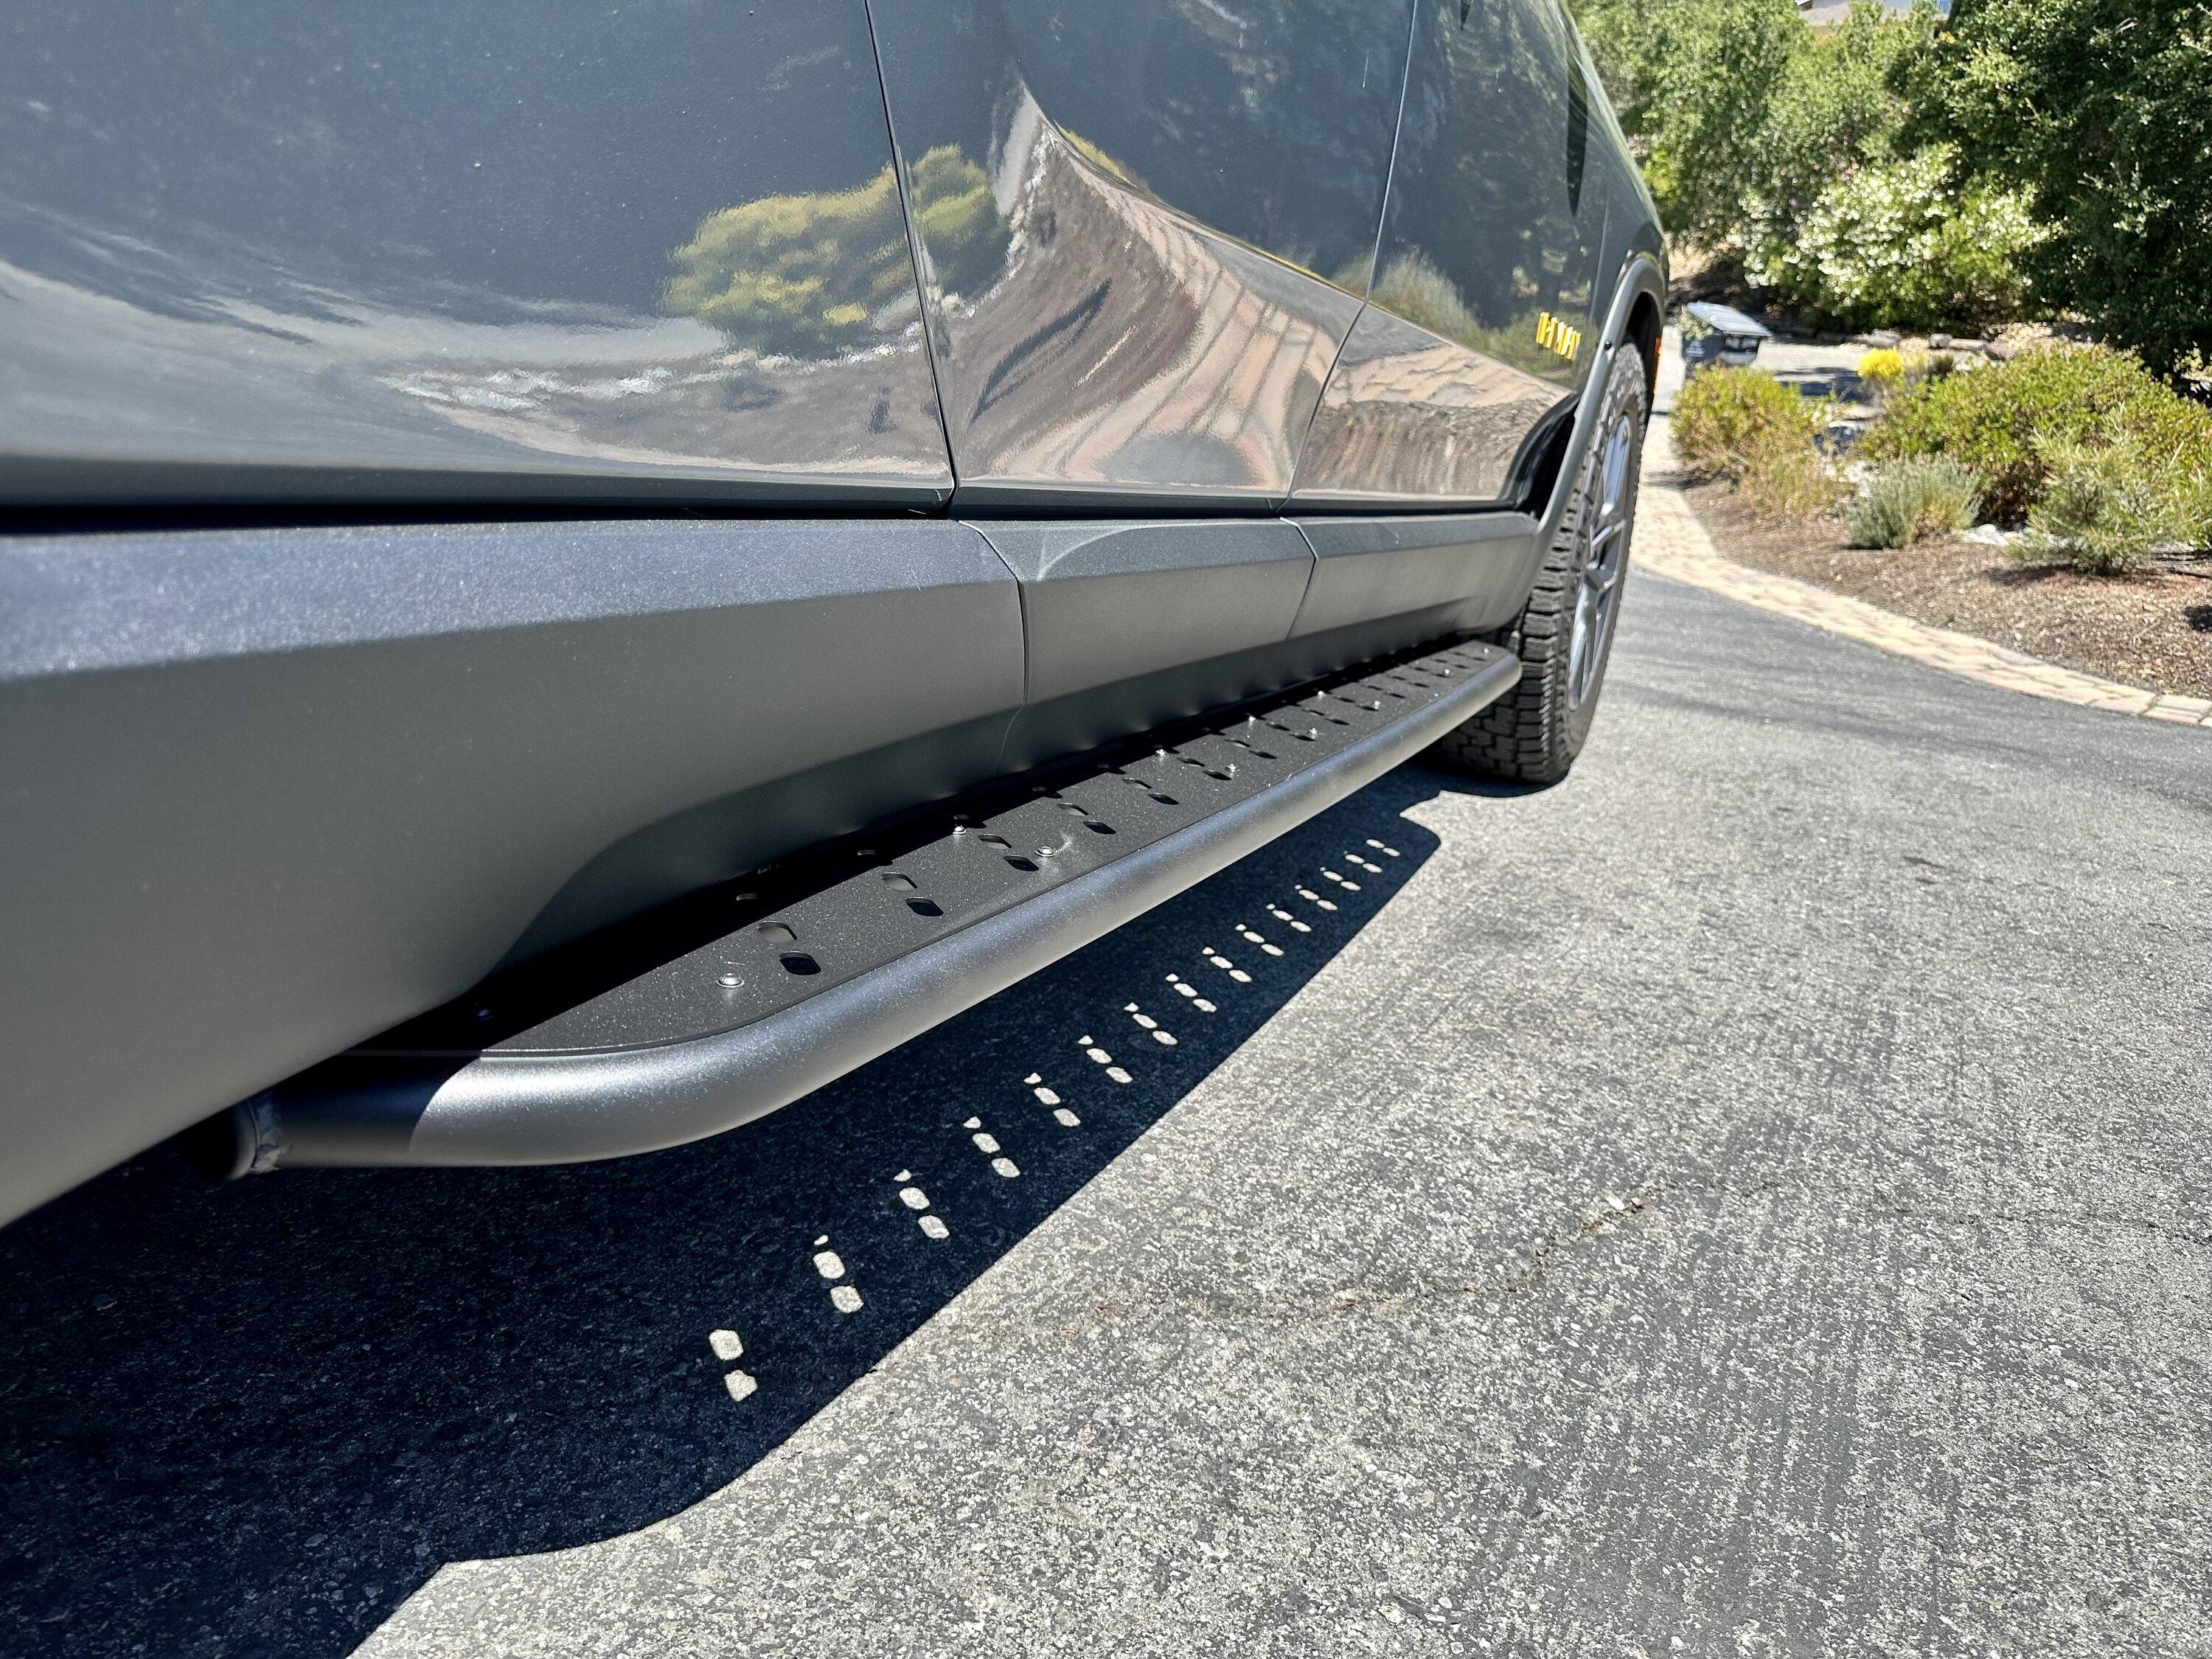
I am pleased to report that I have officially received AND installed the RMAXX R1T Rock Sliders! TLDR - WOW, WOW, WOW. AMAZING PRODUCT. ABSOLUTELY WORTH THE WAIT.I need to give a huge shout out to Eric, the dude in the install videos. I ran into a few questions (which I will try to address), and was fortunate to be able to communicate with him directly via phone and text. That man is a LEGEND in my book.
Now, a few notes from the install…
Timeframe: I was able to complete this install by myself, working in short intervals over a period of about 2.5 days (Easily could have been done in a shorter timeframe... but I live in a sauna called Texas and was only working for a few hours each morning/evening). I am not a mechanic, but the video and written instructions were very clear and allowed me to confidently move through the install. I recommend going through the video/written instructions BEFORE you get started… that will definitely help get you up to speed with what to expect when you first get under the truck and how to get organized. I didn’t do that…The first side took me a while, but the second side was done in ~1 hour. If I had to do this again, it would be a very quick install.
Tools: The tool I used the most was a Dewalt 20v Max XR 1/2” Impact wrench (DCF899B). I know others have run into issues trying to get the TP55 bolts off… but never once did this impact wrench even stutter. 5 out of 5, would recommend. You’ll need a variety of impact sockets and a torque wrench (min 15 ft/lbs - max 80 ft/lbs). Also handy to have around is a weighted rubber mallet.
Extras: Blue Loctite and Black RTV Silicone (I went with Permatrax Ultra Black RTV). The RTV is only for the 10 bolts (five on each side) that mount into the underside of the battery tray. For everything else… literally everything else… use the blue loctite.
Install Questions & Tips (by step):
Step 5: The first question that I had was on Step 5 of the written instructions. Basically, it asks to remove two 13mm hex heads and replace them with lower profile button heads (which were not in my supplied bolts). Eric was able to confirm that THIS STEP IS NO LONGER REQUIRED. They made a design modification to the slider frame that allows for those bolts to remain in place.
Step 6a,6b,6c,7a: Make sure that all the bolts that are being used to initially hang the frame are completely unscrewed… and then hand screwed back in two full rotations. This will ensure that each bolt is hanging low enough (and equally) for the slider frame to grab onto.
Step 9: ***IMPORTANT*** When you are starting to tighten the RED and YELLOW bolts, there will be a little bit of play between the slider frame and the bolts. You will want to ensure that the slider frame is seated as far to the OUTSIDE (away from the truck) as much as possible. The reason for this is that the armor plate is very tight fitting and it won’t be able to slot into place if there is not enough clearance (more on this later).
Step 14: It states to save two of the removed bolts to use later in Step 17… this is now optional as they supply two new bolts. I elected to use the new bolts.
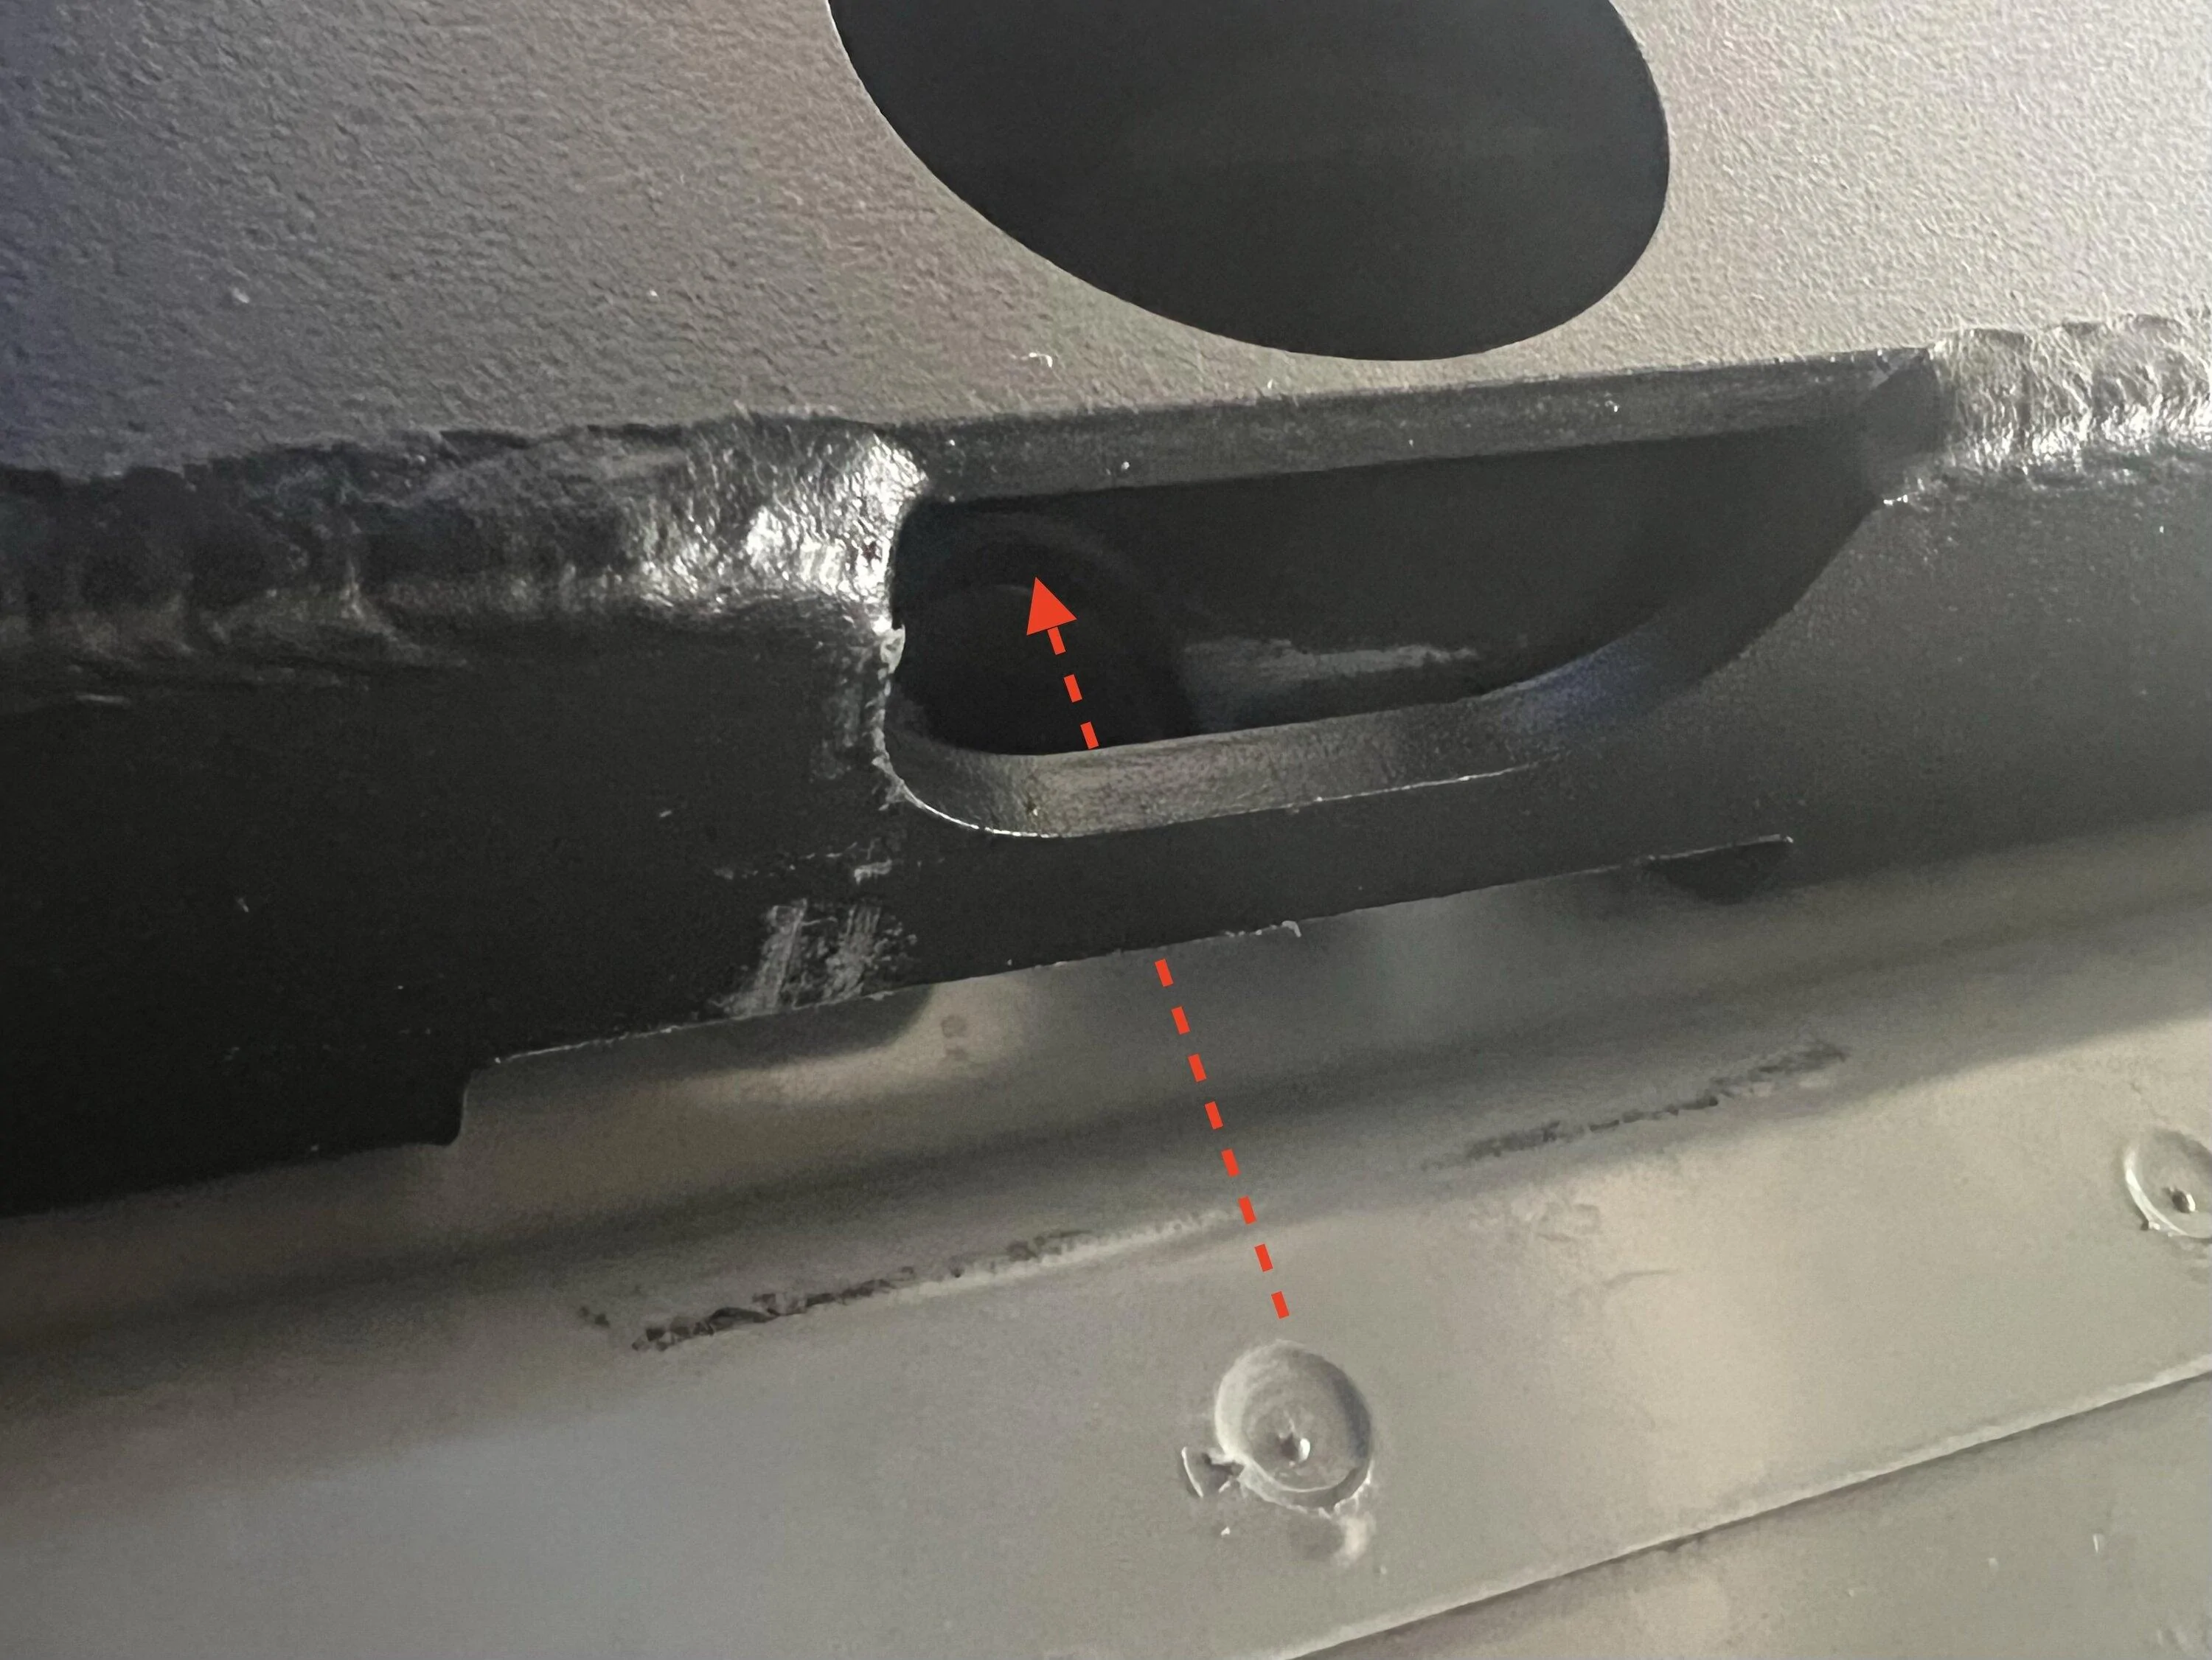
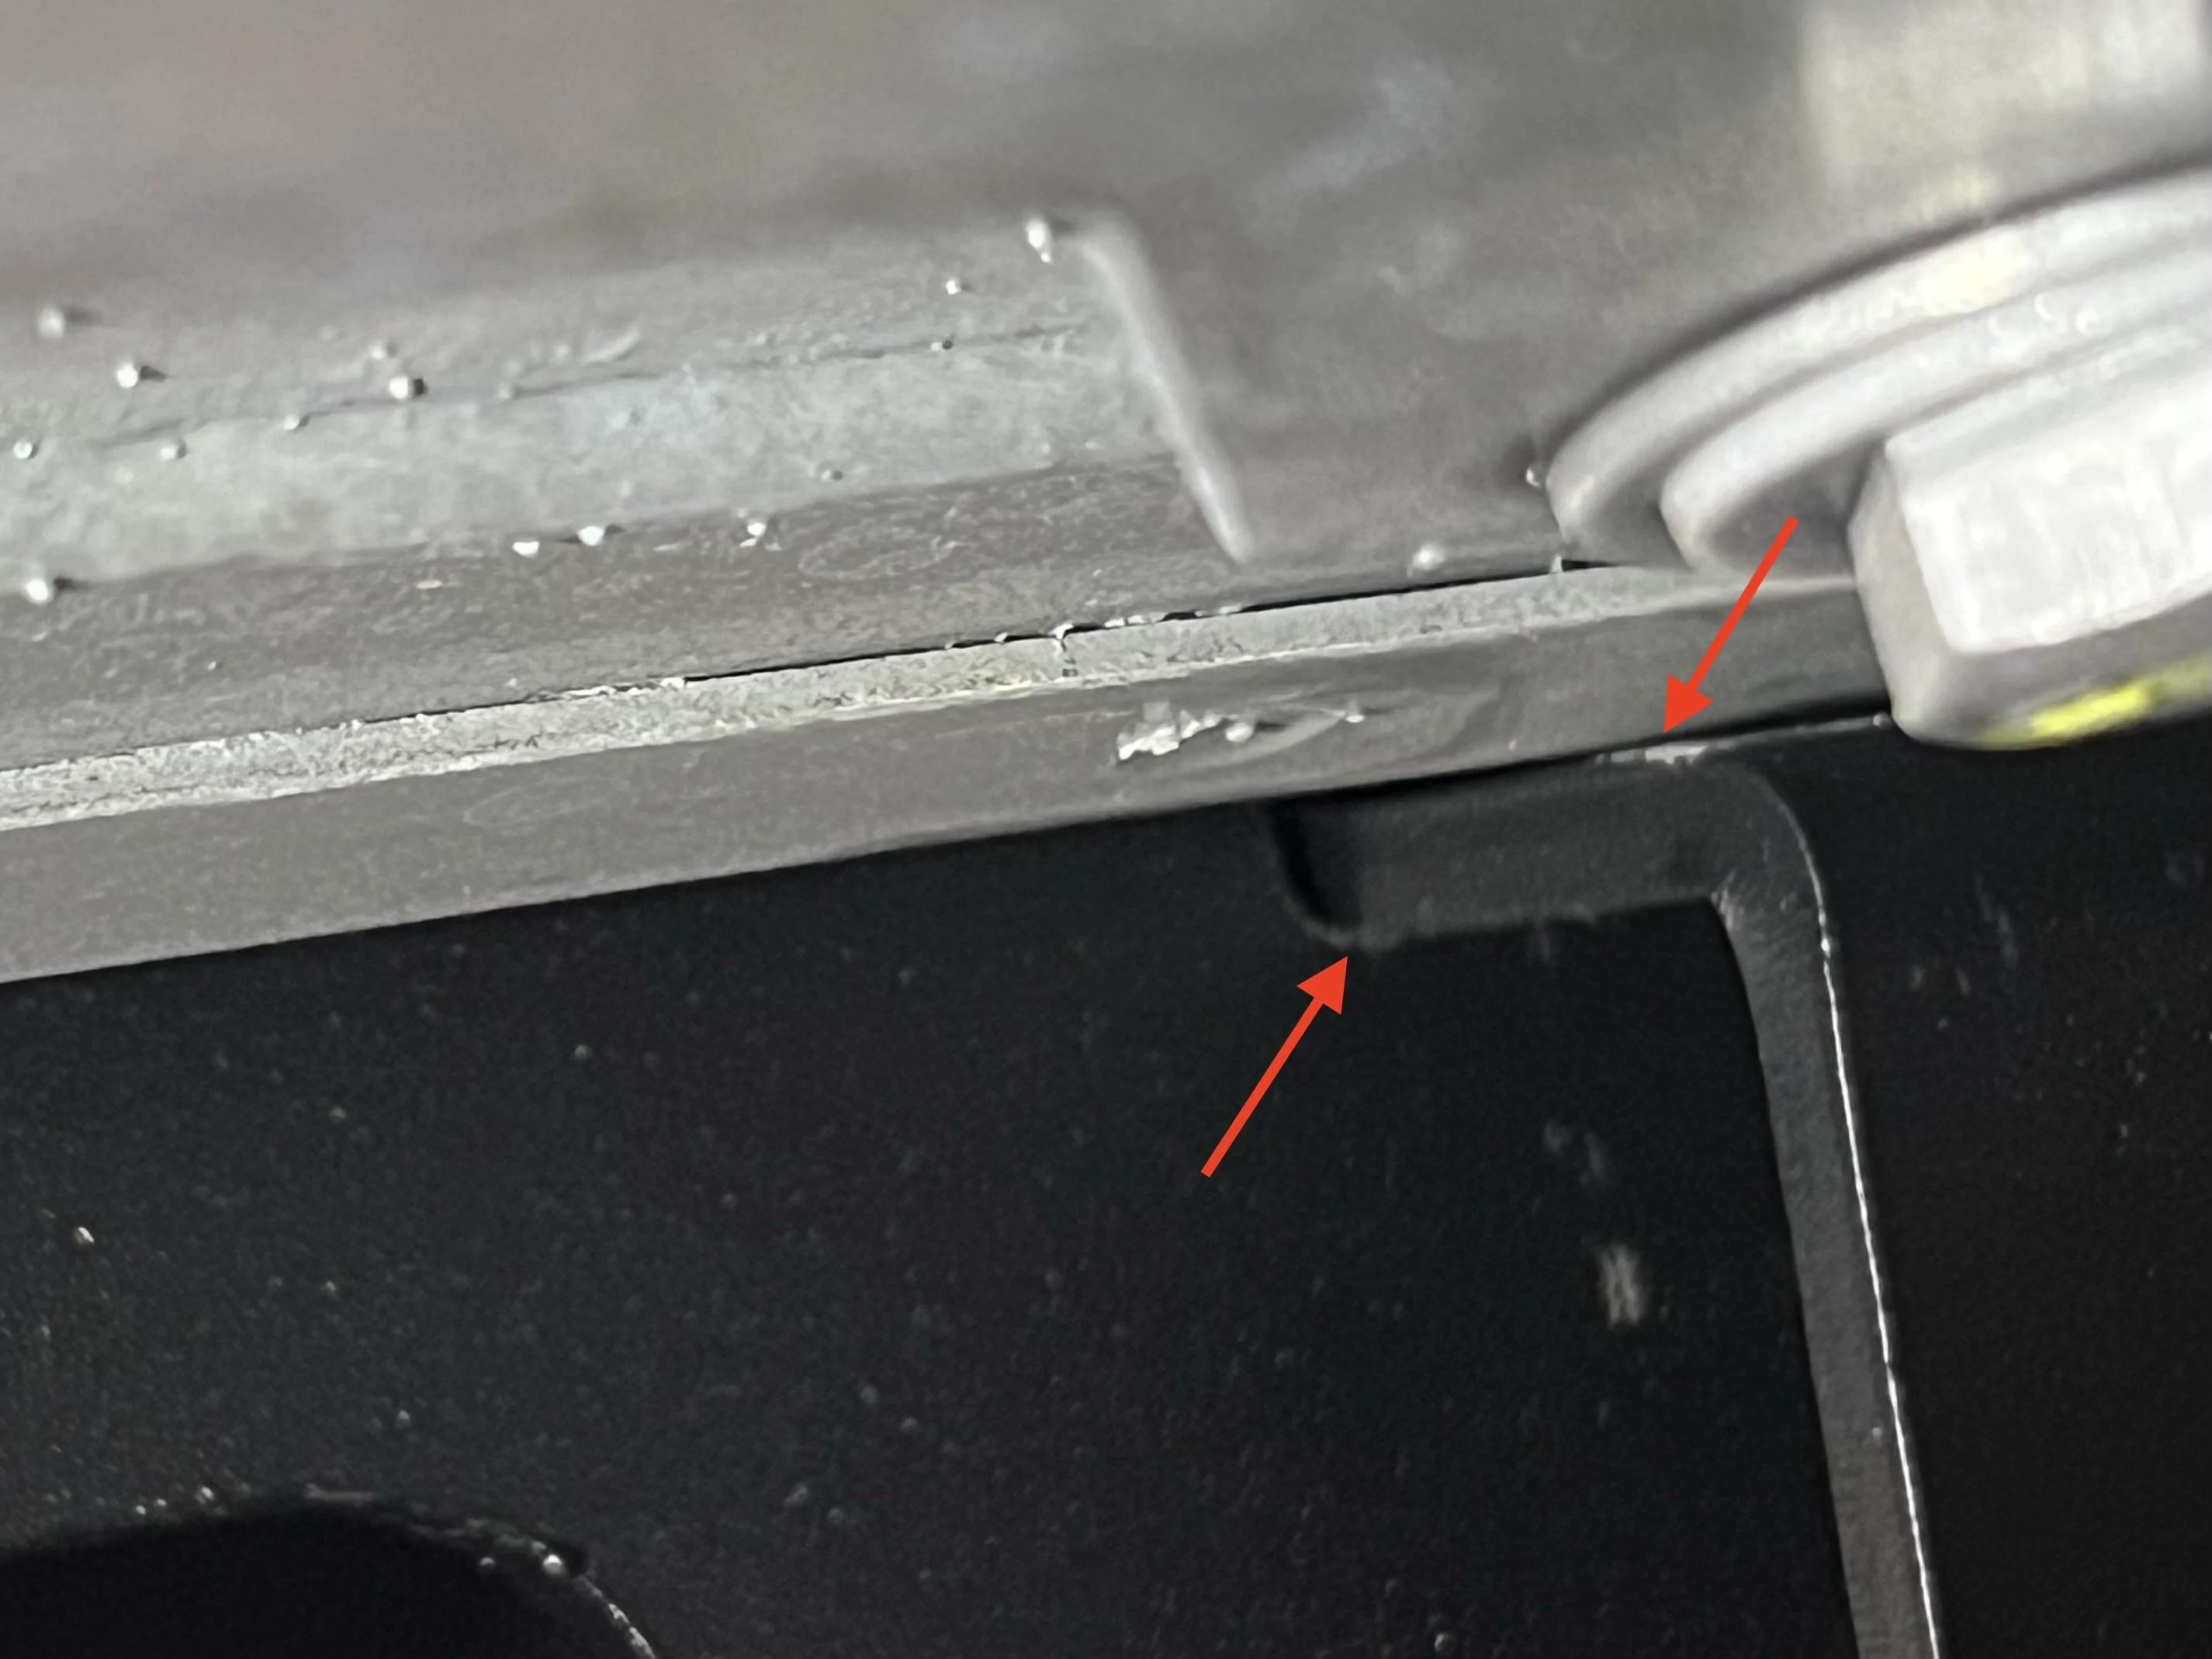
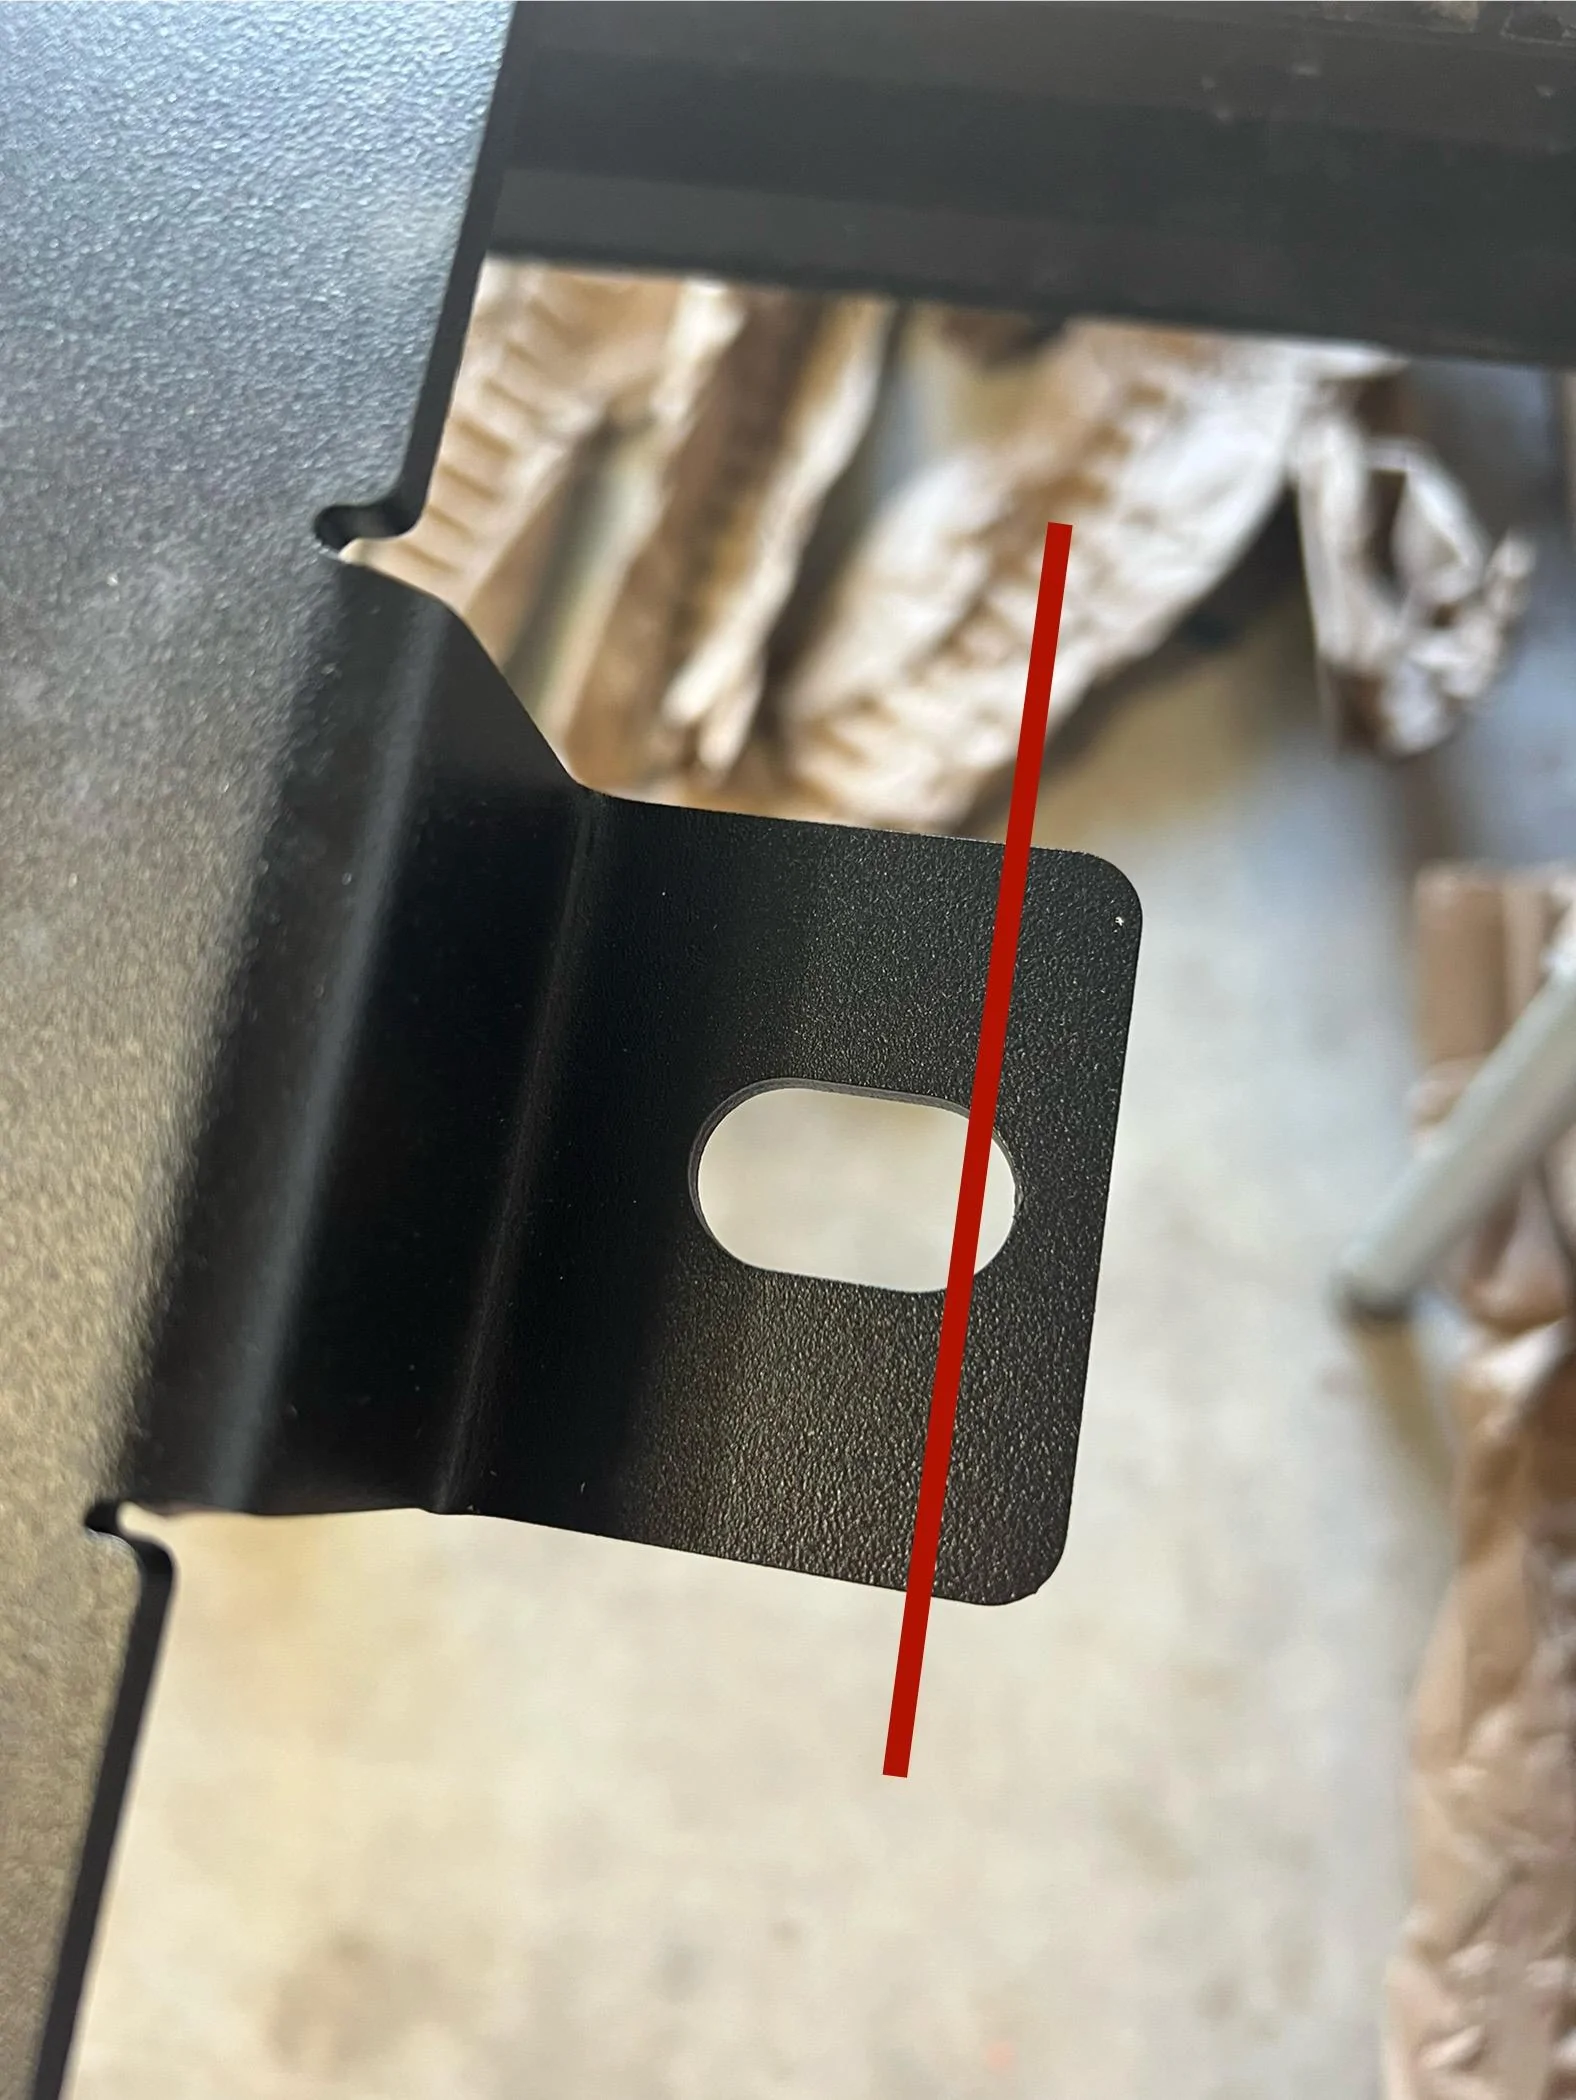
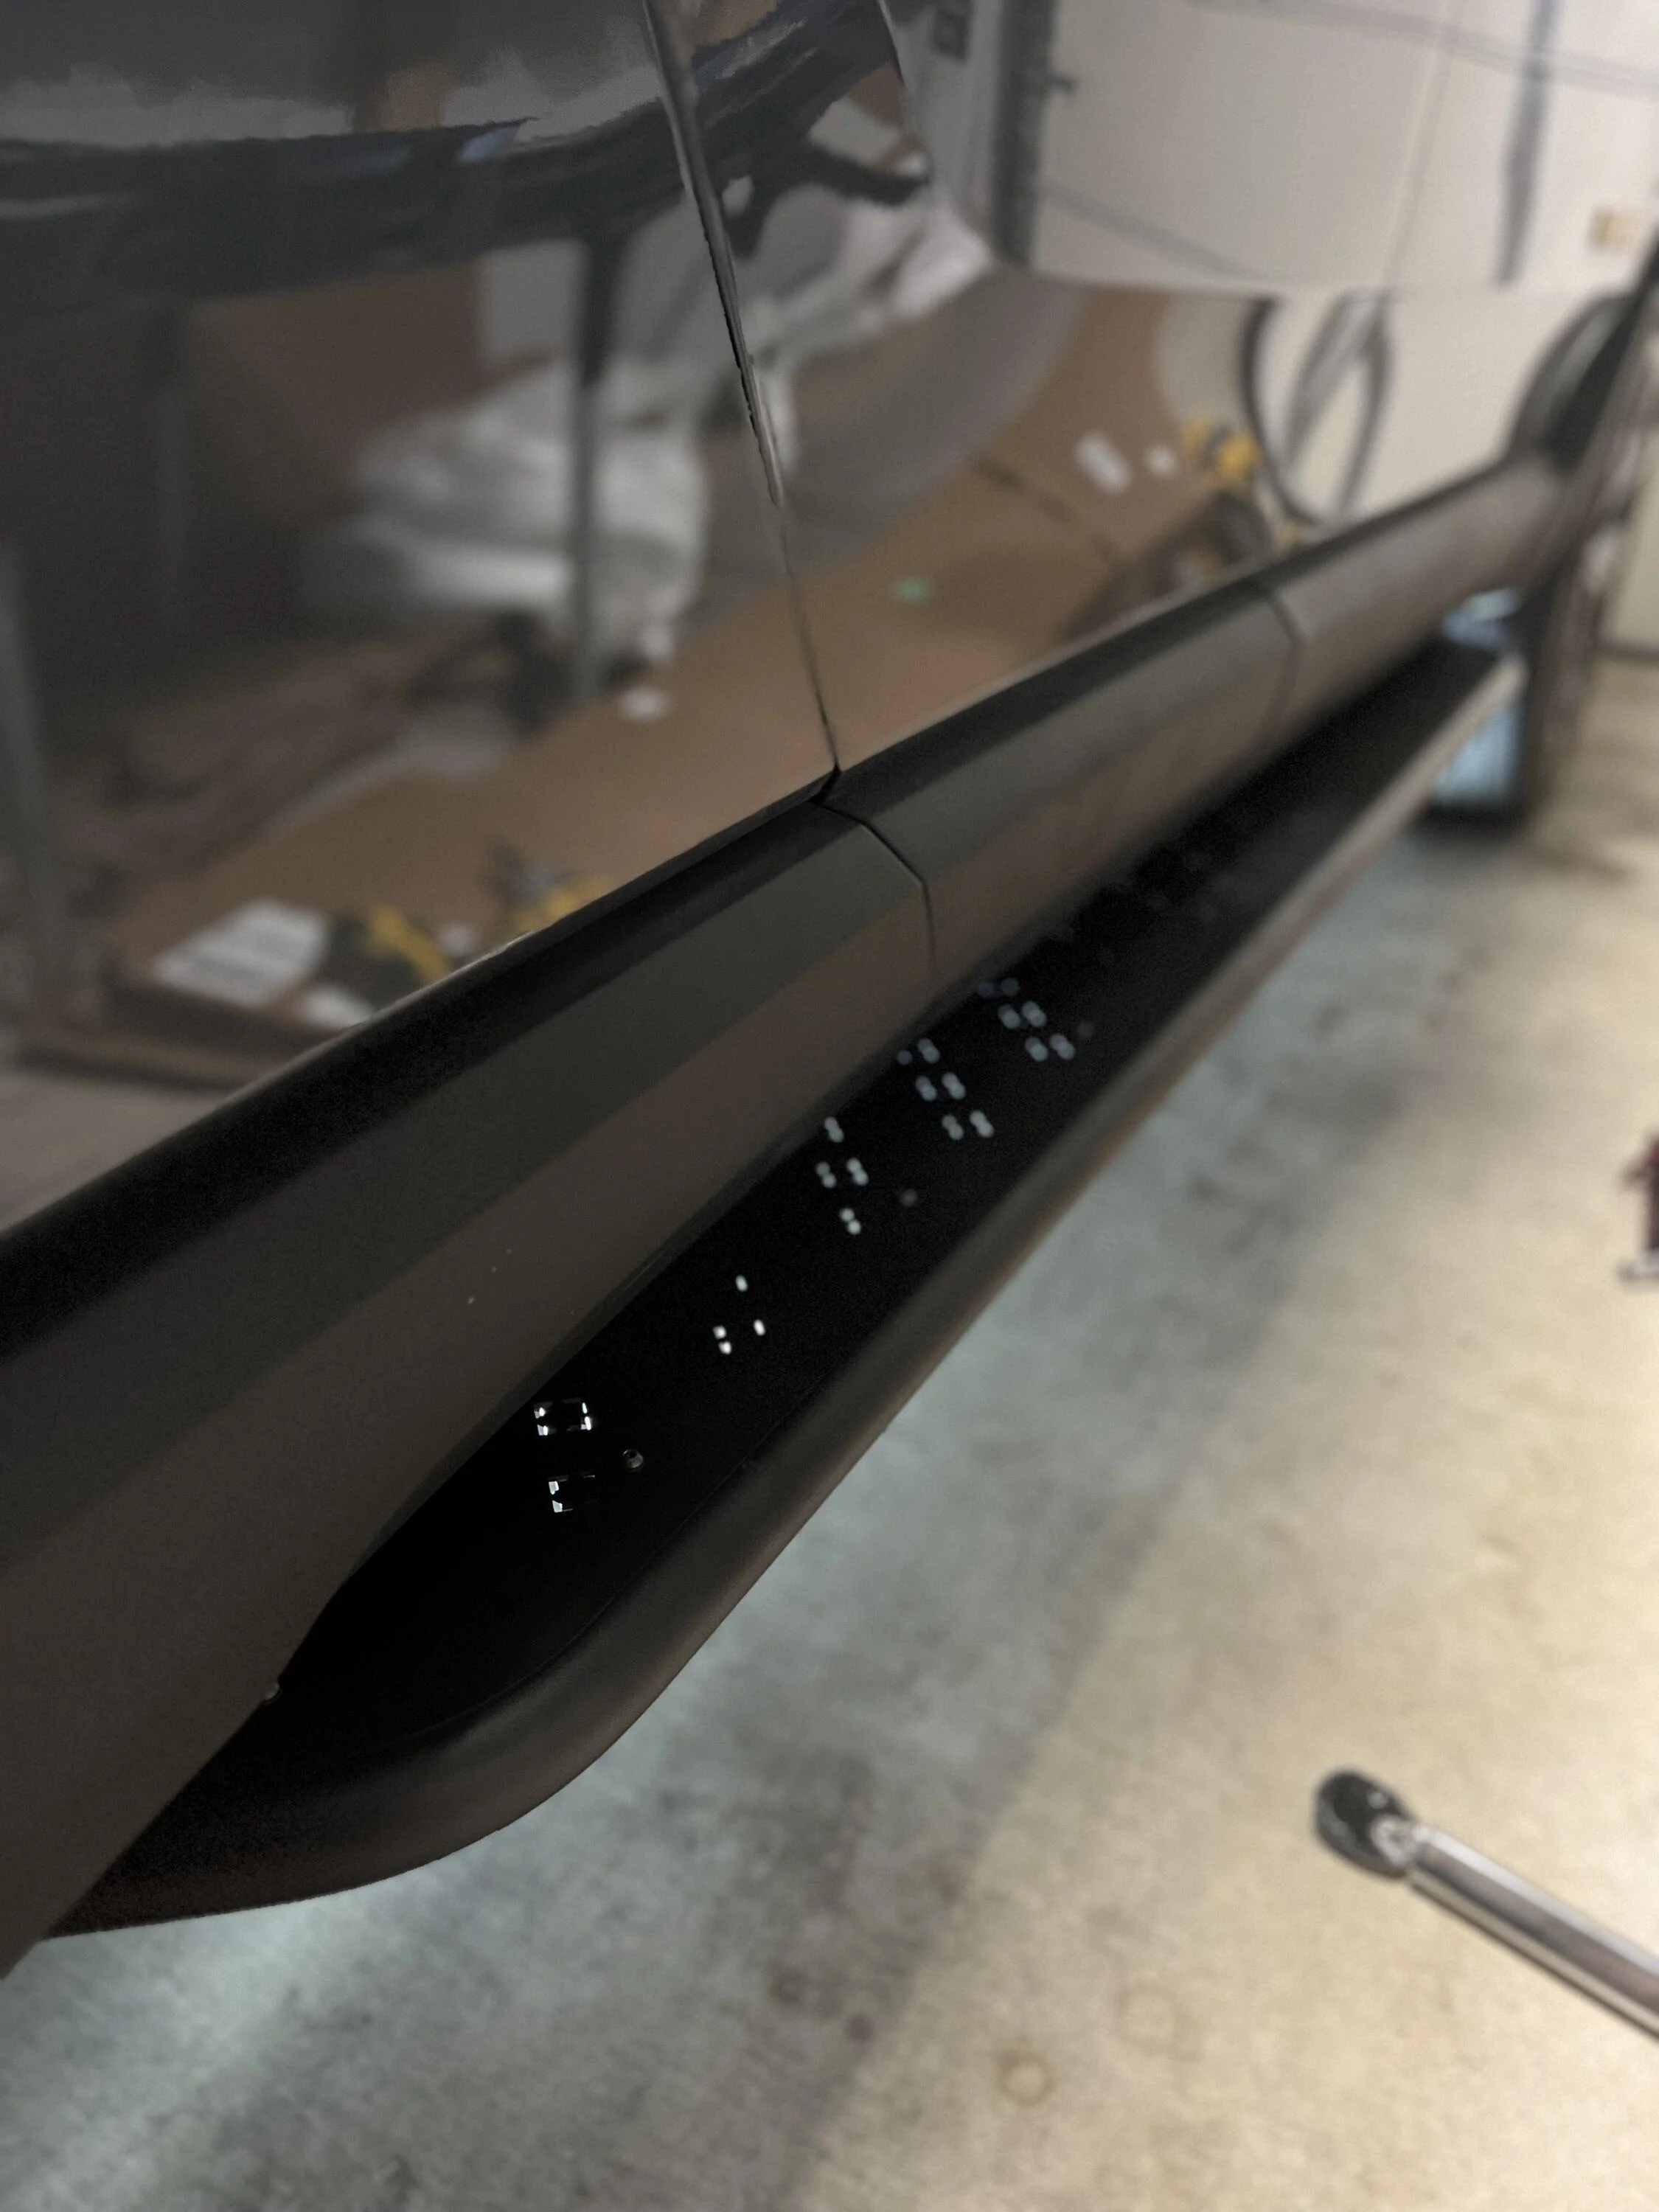
Step 16: THIS WAS MY BIGGEST CHALLENGE. Slotting the armor plate into place is a VERY tight fit. One side did not give me much issue (a couple SOLID whacks with a weighted rubber mallet and the armor plate slid into place). However, the other side (the passenger side in my instance) was not even close. Despite the advice I had been given to mount the slider frame as far to the outside as possible, it was clear that the armor plate was not going to slot into place. I have included photos... which might be tough to figure out… but basically, all three slot tabs were hitting a choke point against the underside of the truck, and regardless of how hard I pushed or hammered, it wasn’t budging. I could tell that if I cut the slot tabs just a little bit shorter, it would help alleviate the binding/choke point and allow it to slot correctly. After confirming my decision with Eric, I cut the tabs as shown and the plate slotted into place. I am 100% certain that this modification did not affect the overall function seeing as how it gets bolted down and torqued to 80ft/lbs. I also applied a rust prevention tx and re-painted the exposed metal.
***Eric mentioned that each truck is built with slight variability one to the next. They have done a terrific job at trying to allow for those variances in every step of the build, but my R1T was just extra special. It is very likely that none of you will have this issue (the other side fit without modification).***
Step 17,18,19,20: Make sure you have the forward most and rear most screws in place (the ones that are threaded into barrel nuts you added) BEFORE you tighten any of these bolts. Trust me.
Step 21: Just a reminder… DO NOT OVER TIGHTEN THESE BOLTS. Use a healthy amount of RTV and just snug them up.
AND THAT’S IT!!!!
If you haven’t picked up on it by now, I am more than pleased with the outcome of this install. The wait was long… but absolutely worth it. These things look and feel OEM, they are super solid, there’s no loss of clearance, and they leave the underside more protected. Amazing product EVSportline.
Cheers,
PD
BTW, If anyone is in the Austin, TX area and would like a second set of hands, let me know. I’d be happy to help (and supply tools if needed).


Sponsored


")