Sponsored

Rivian R1S Inno Wedge cargo box

Venasaur

New Member
Joined
Oct 17, 2023
Threads
1
Messages
2
Reaction score
0
Location
Bay Area, CA
Vehicles
Rivian R1S
Occupation
Engineer
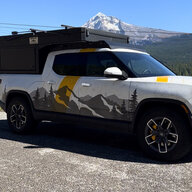
Hi all. I just received my R1S along with the Rivian crossbars. Has anyone been able to fit an Inno cargo box? I think the clamp system is very similar to a Thule but I wanted to see if any other owners out there have used an Inno on the Rivian crossbar. Thanks!
Sponsored
 

jjswan33

Well-Known Member
First Name
Joshua
Joined
Sep 17, 2021
Threads
135
Messages
4,455
Reaction score
9,880
Location
Sandy, OR
Vehicles
Rivian R1T LE, Hyundai Ioniq 5 Limited
Occupation
Engineer
Clubs
 
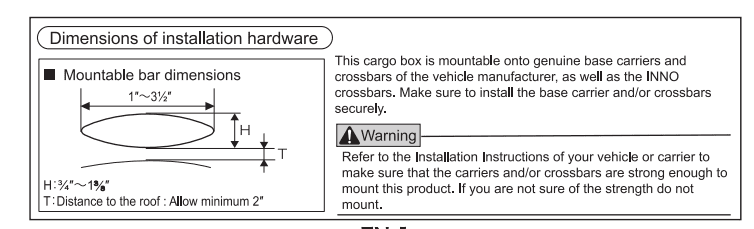
In my experience the clamps worked fine on my R1T cross bars but I never actually used it because I didn't want it on the roof and it wouldn't mount over the bed (the space between the cross bar and the cab was too short). My suggestion is try it out if you already have it and if not buy it from REI (or similar) so you can return it if it doesn't work out. If you look at the allowable dimension the Rivian cross bars are right at the edge at 3.625".

The INNO is my favorite box for sure. I had the wedge+.


Rivian R1T R1S Rivian R1S Inno Wedge cargo box 1697585973584
 
OP
OP

Venasaur

New Member
Joined
Oct 17, 2023
Threads
1
Messages
2
Reaction score
0
Location
Bay Area, CA
Vehicles
Rivian R1S
Occupation
Engineer
Thanks for your input! I’ve been looking at Thule’s but now I’m kinda leaning towards Inno. Specifically the Wedge series. Glad to hear you have a positive experience with this brand.
 

Sethsak

Member
Joined
Sep 30, 2023
Threads
4
Messages
23
Reaction score
31
Location
Oregon
Vehicles
R1S
Thanks for your input! I’ve been looking at Thule’s but now I’m kinda leaning towards Inno. Specifically the Wedge series. Glad to hear you have a positive experience with this brand.
Did the Inno Wedge end up fitting on the OEM crossbars? Looking at the same setup for the winter on our R1S.
 

Sethsak

Member
Joined
Sep 30, 2023
Threads
4
Messages
23
Reaction score
31
Location
Oregon
Vehicles
R1S
Just sharing that I picked up the Inno Wedge and looks to me like it fits great, I have it on our R1S on the two rear mounts. It has two curved claw-type grips that hug the bars. The grips don’t come all the way around to the point where the tips touch, but I don’t think that means it doesn’t work. Feels sturdy to me.
Def a challenge to get the Rivian racks fully seated with the “second click”, but that’s a whole different thread…
 

Sponsored

VSG

Well-Known Member
Joined
Oct 3, 2022
Threads
4
Messages
3,358
Reaction score
6,314
Location
WA
Vehicles
R1T LE/RB/OC/20
Def a challenge to get the Rivian racks fully seated with the “second click”, but that’s a whole different thread…
They do adjust you know. But as you say, different thread(s). Search will find it for you.
 

Sethsak

Member
Joined
Sep 30, 2023
Threads
4
Messages
23
Reaction score
31
Location
Oregon
Vehicles
R1S
They do adjust you know. But as you say, different thread(s). Search will find it for you.
Yeah, I tried getting the rubber “boot” off but it wasn’t easy. Also couldn’t find much beyond “they’re adjustable”, no descriptions/videos of how others were able to get the rubber boot off, which screws adjusted which tension and when you needed to adjust one vs the other. Felt like I was just going to be feeling my way through the dark with a bunch of trial and error.
 

FooF

Well-Known Member
First Name
FooF
Joined
Feb 24, 2023
Threads
9
Messages
950
Reaction score
1,351
Location
Mountain View CA
Website
foof.me
Vehicles
2022 R1S Launch Green
Occupation
DJ
Clubs
 
Yeah, I tried getting the rubber “boot” off but it wasn’t easy. Also couldn’t find much beyond “they’re adjustable”, no descriptions/videos of how others were able to get the rubber boot off, which screws adjusted which tension and when you needed to adjust one vs the other. Felt like I was just going to be feeling my way through the dark with a bunch of trial and error.
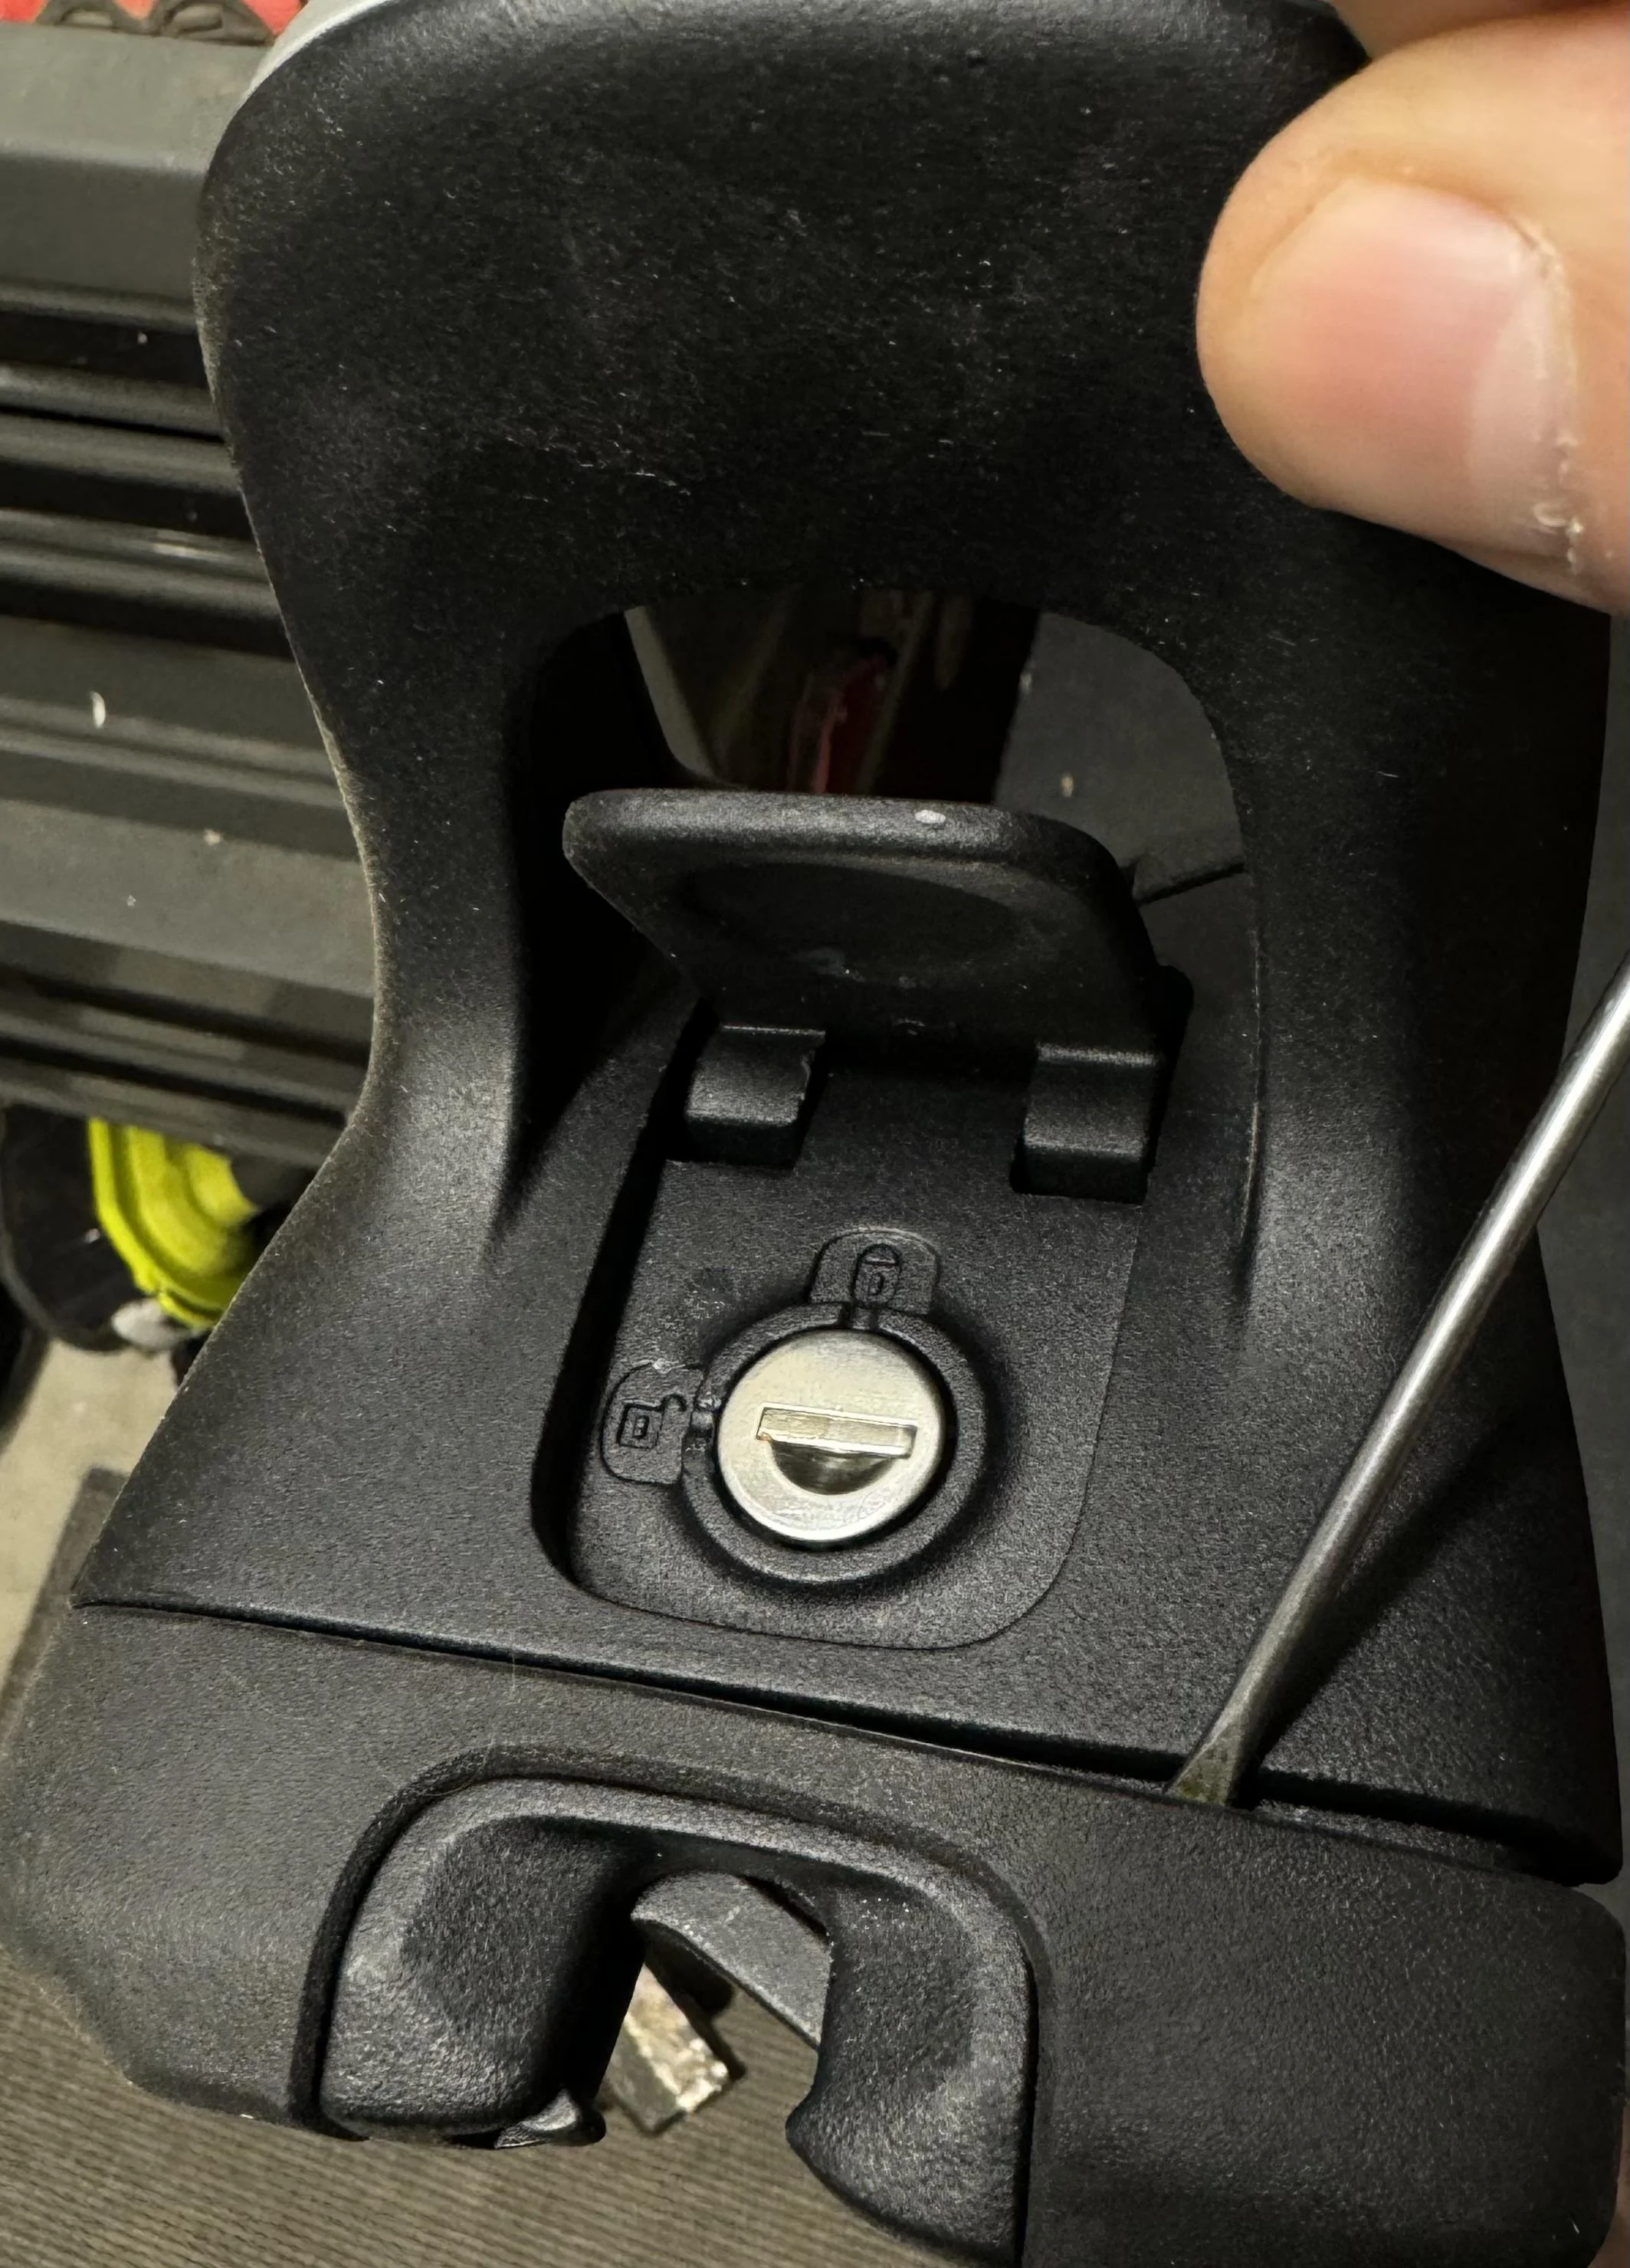
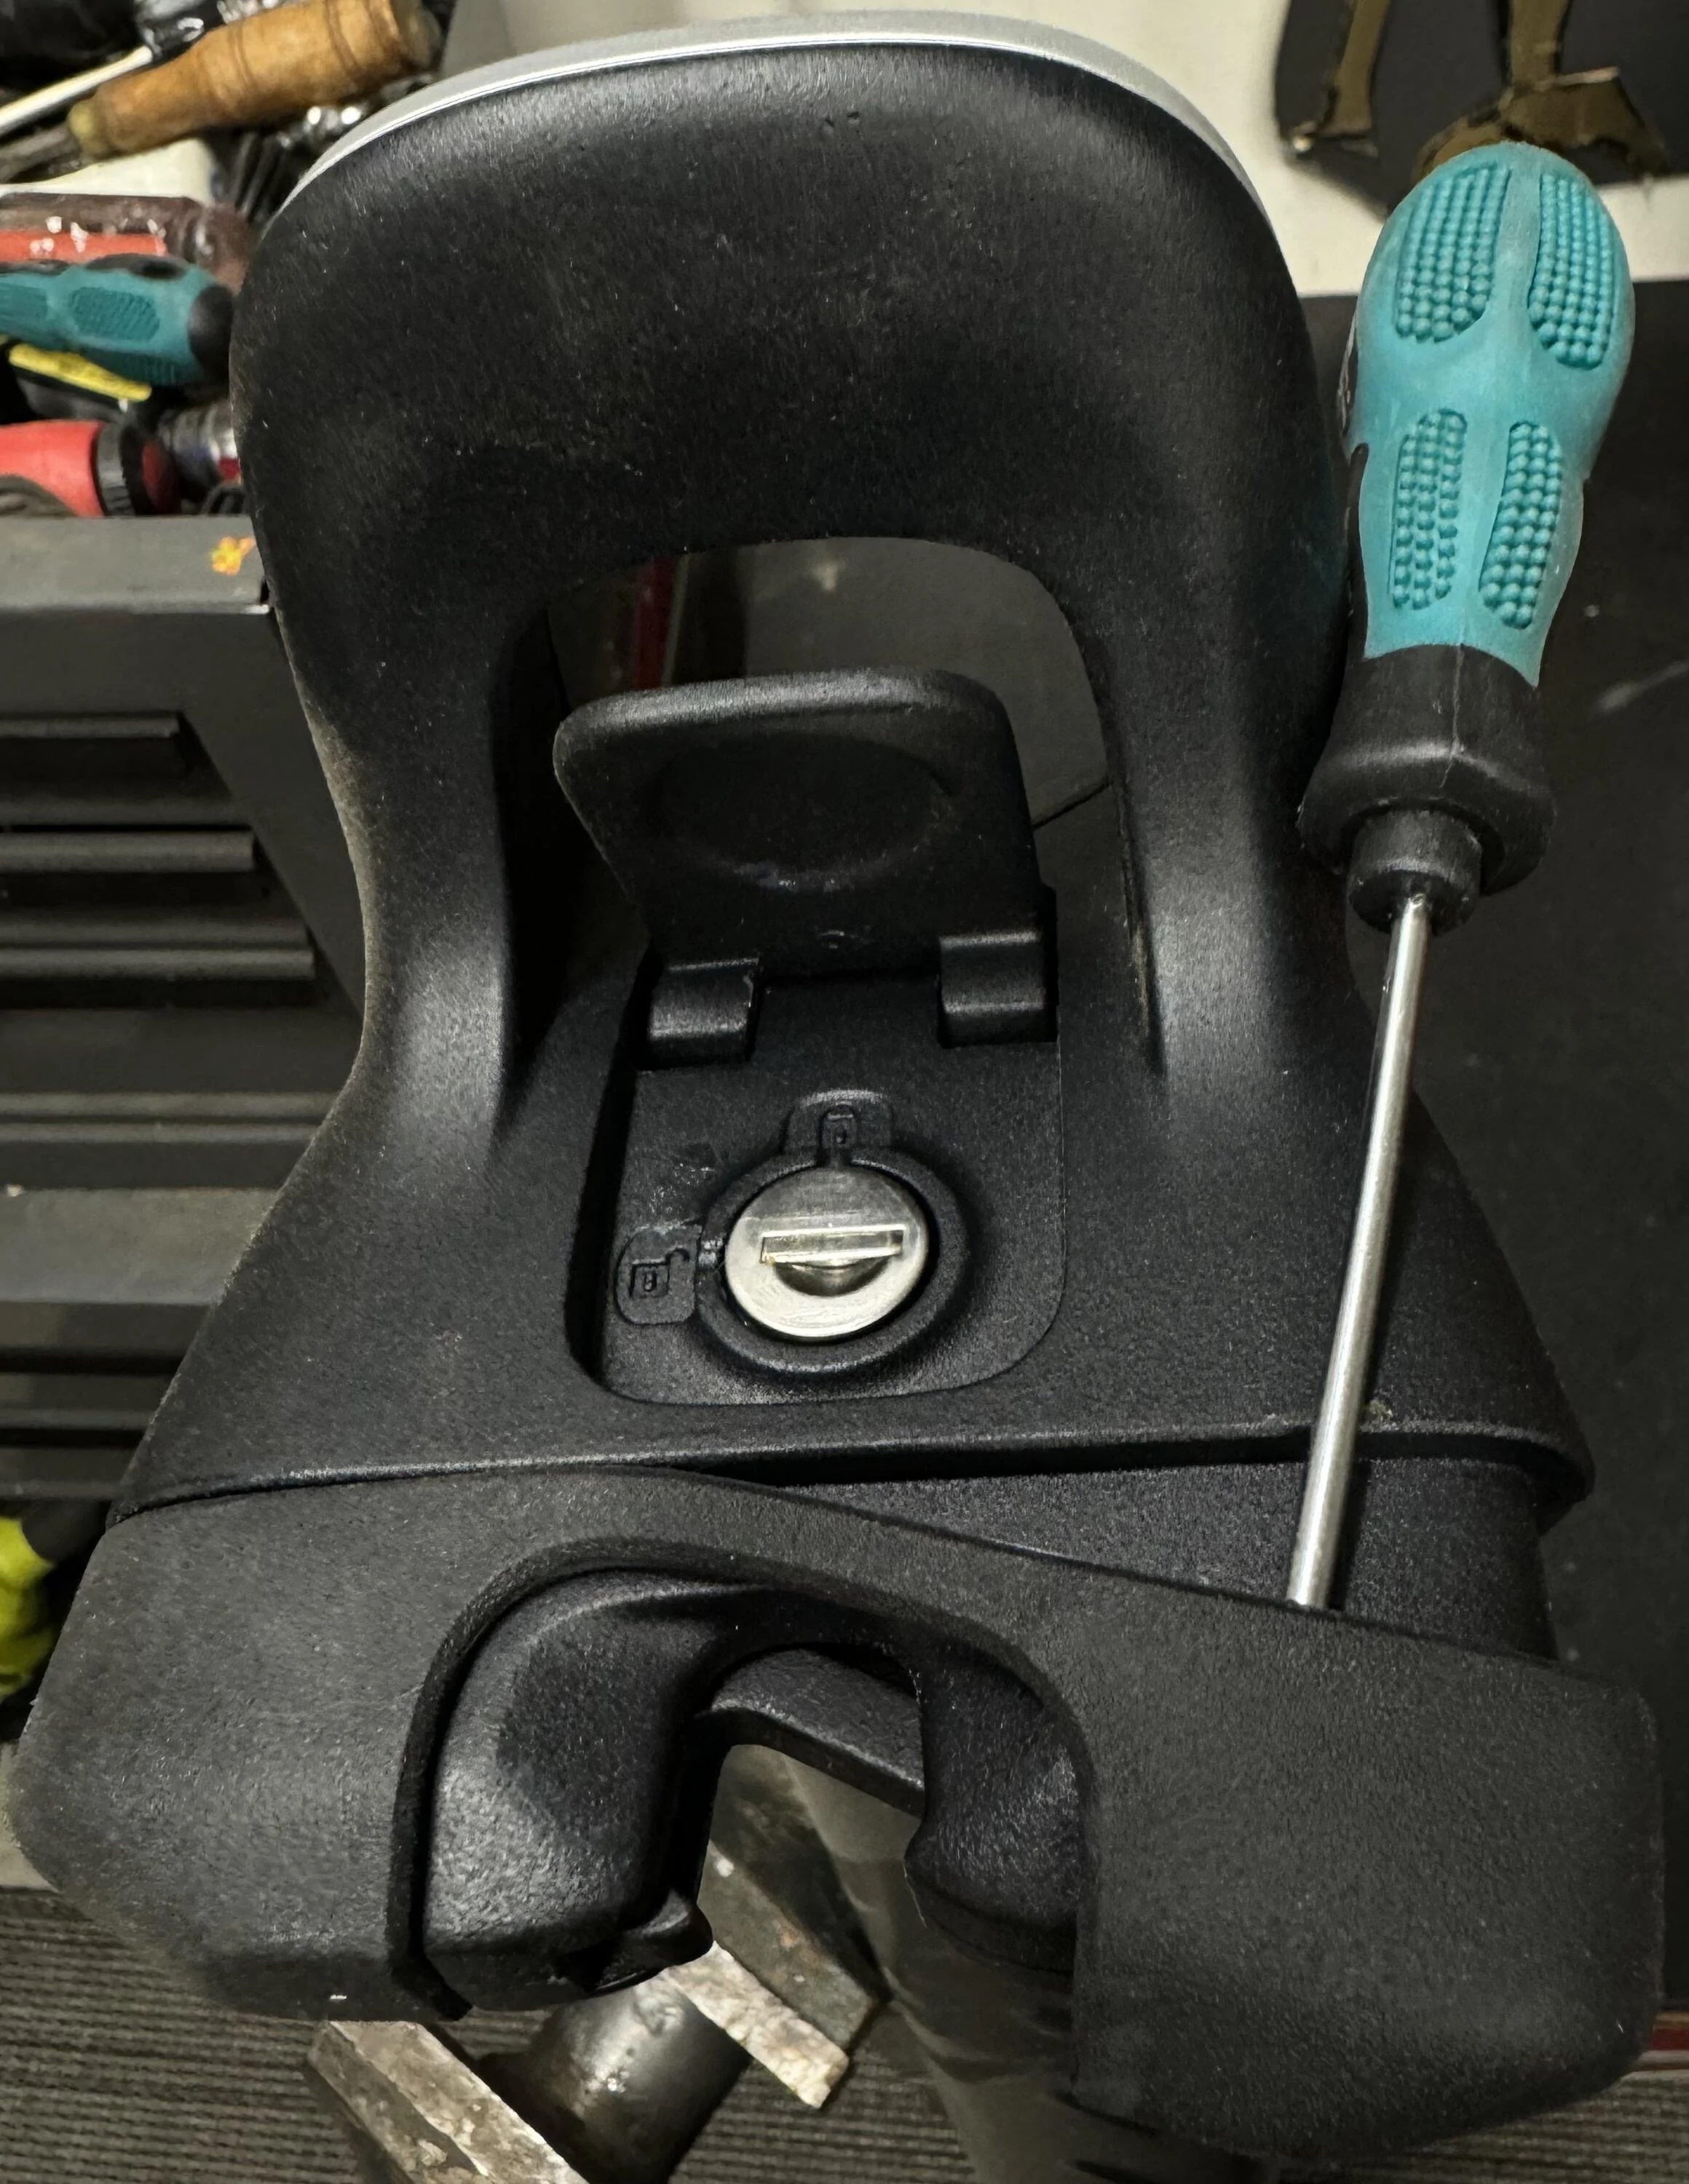
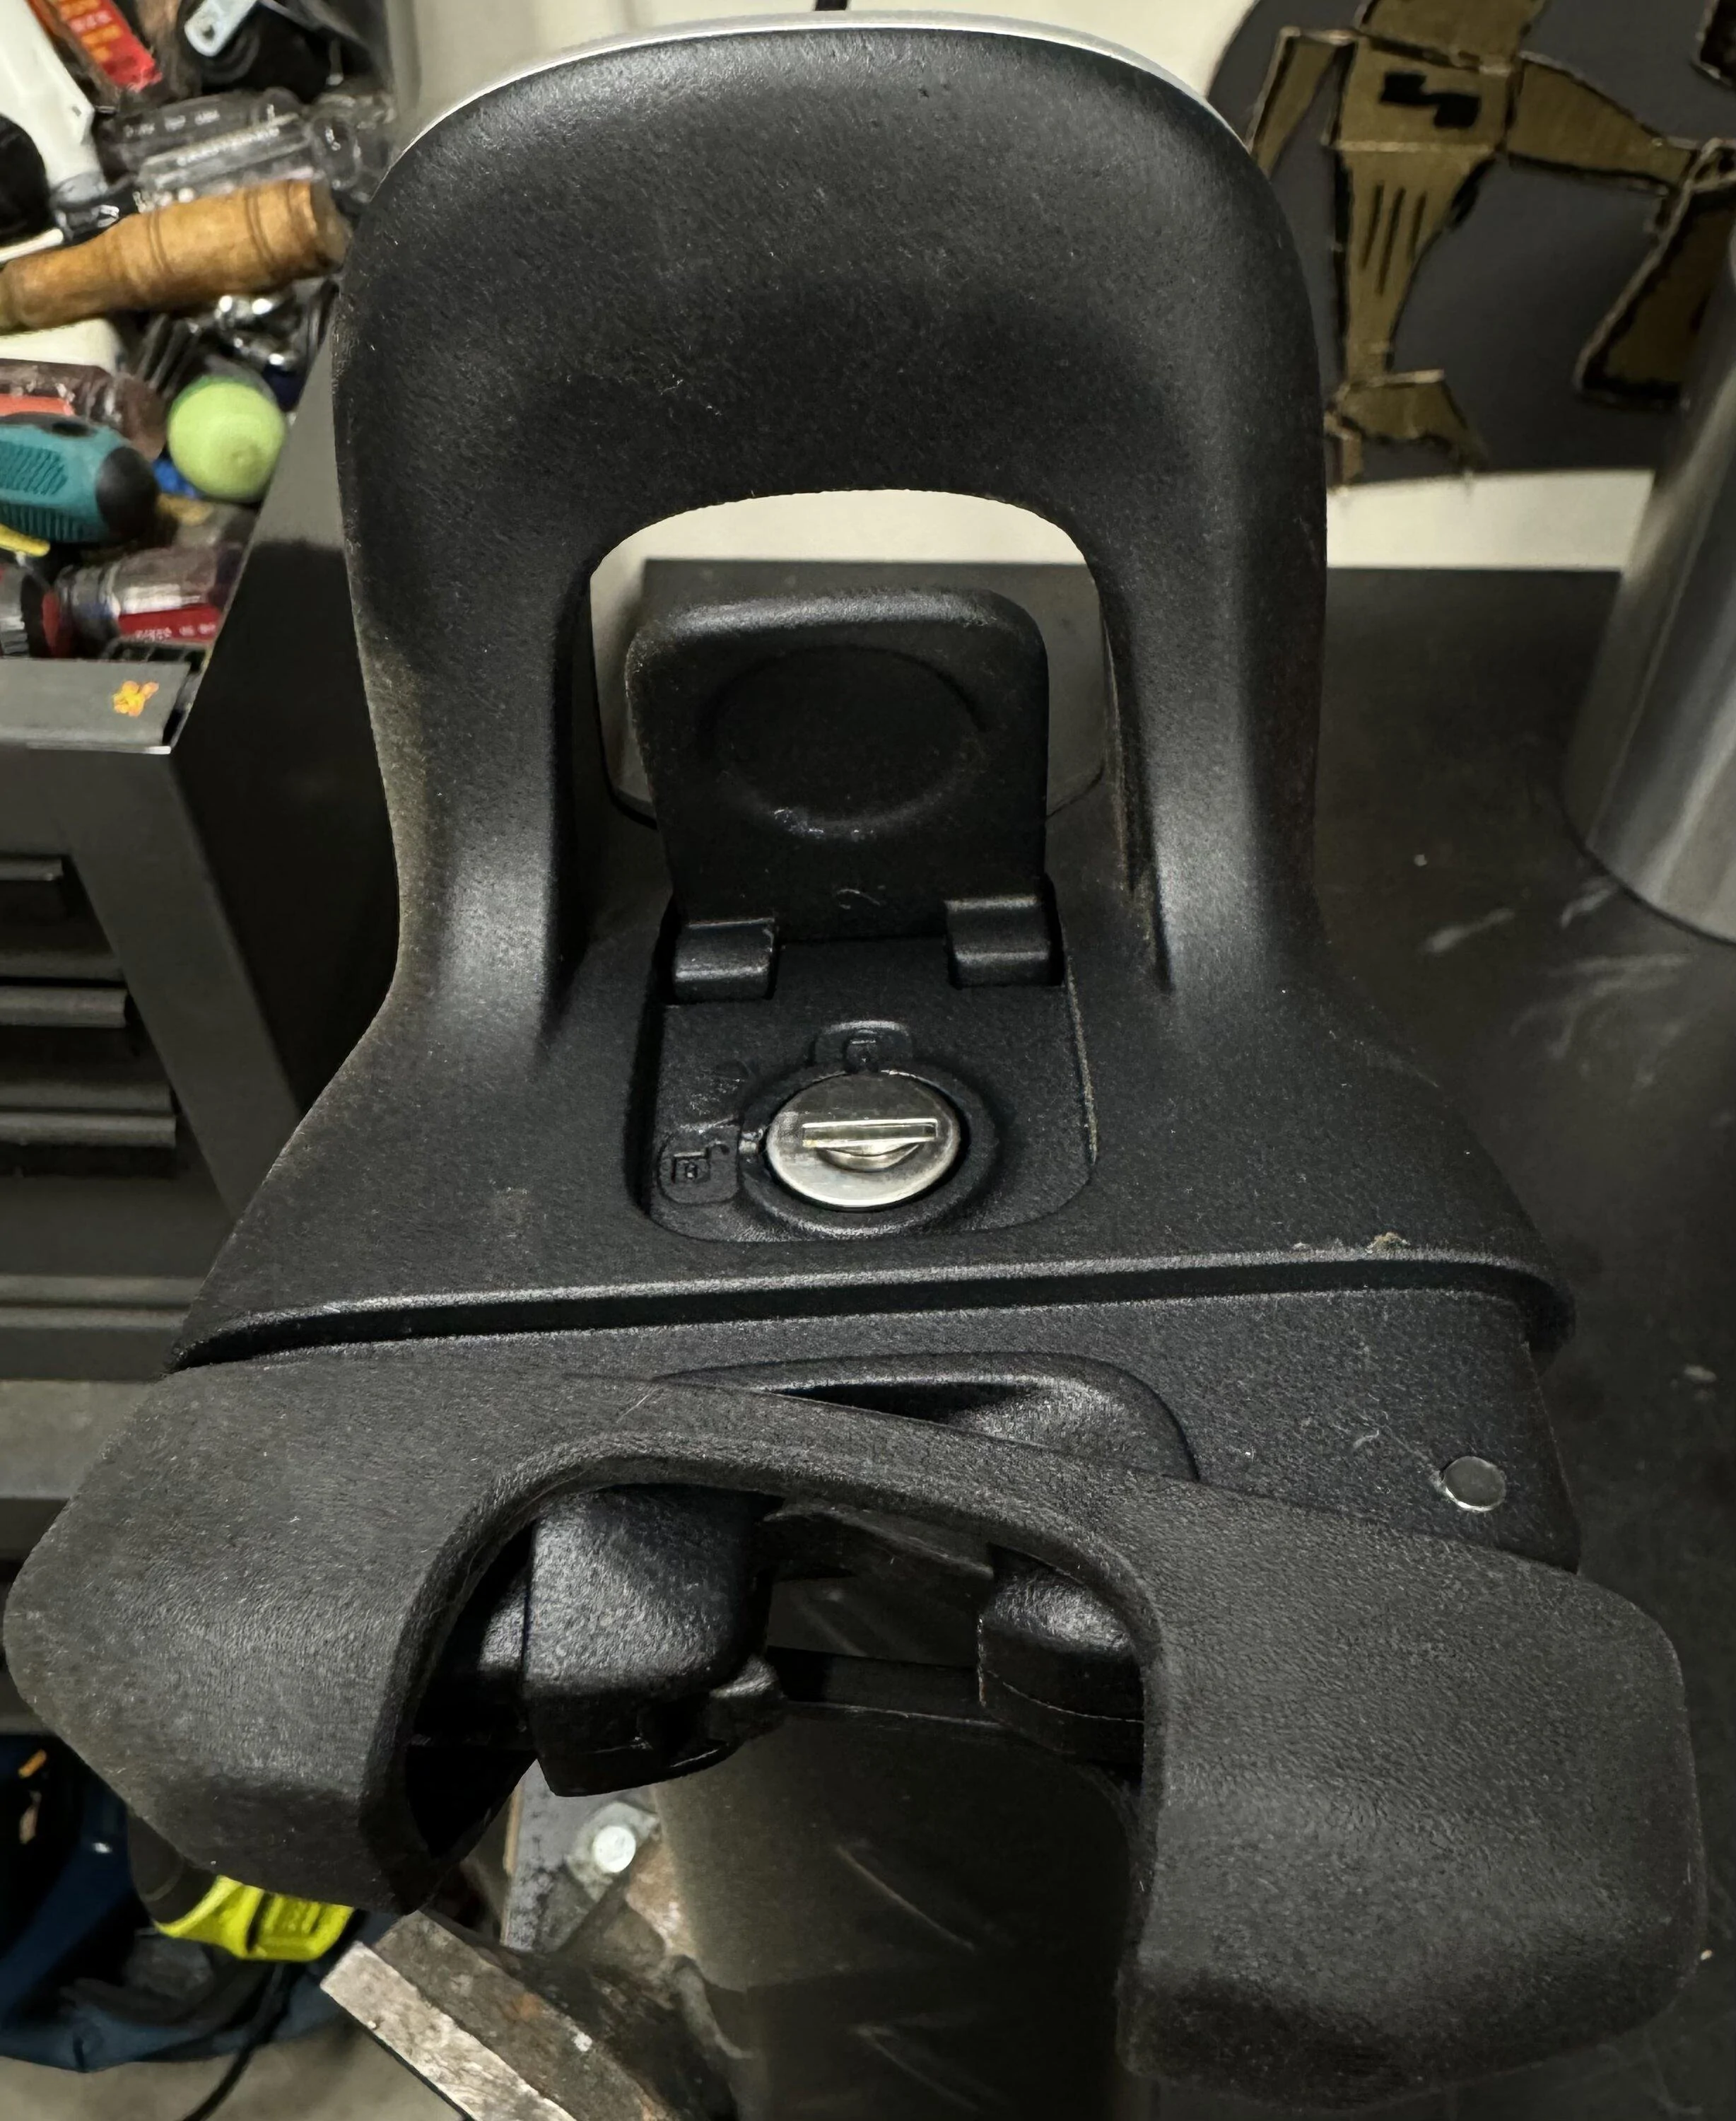
Rubber boot comes off easily just slip small flat blade screwdriver along the upper edge and slide boot down towards the latch.

How to adjust:

When you mount your crossbar it should click once when you place it onto the mount and a second time when you push in on the latch.

The crossbars should not have a lot of slop when they are fully latched, if so they need adjusted to tighten them. If latch is difficult to get it to click when you push it in it is too tight and needs to be loosened a bit.

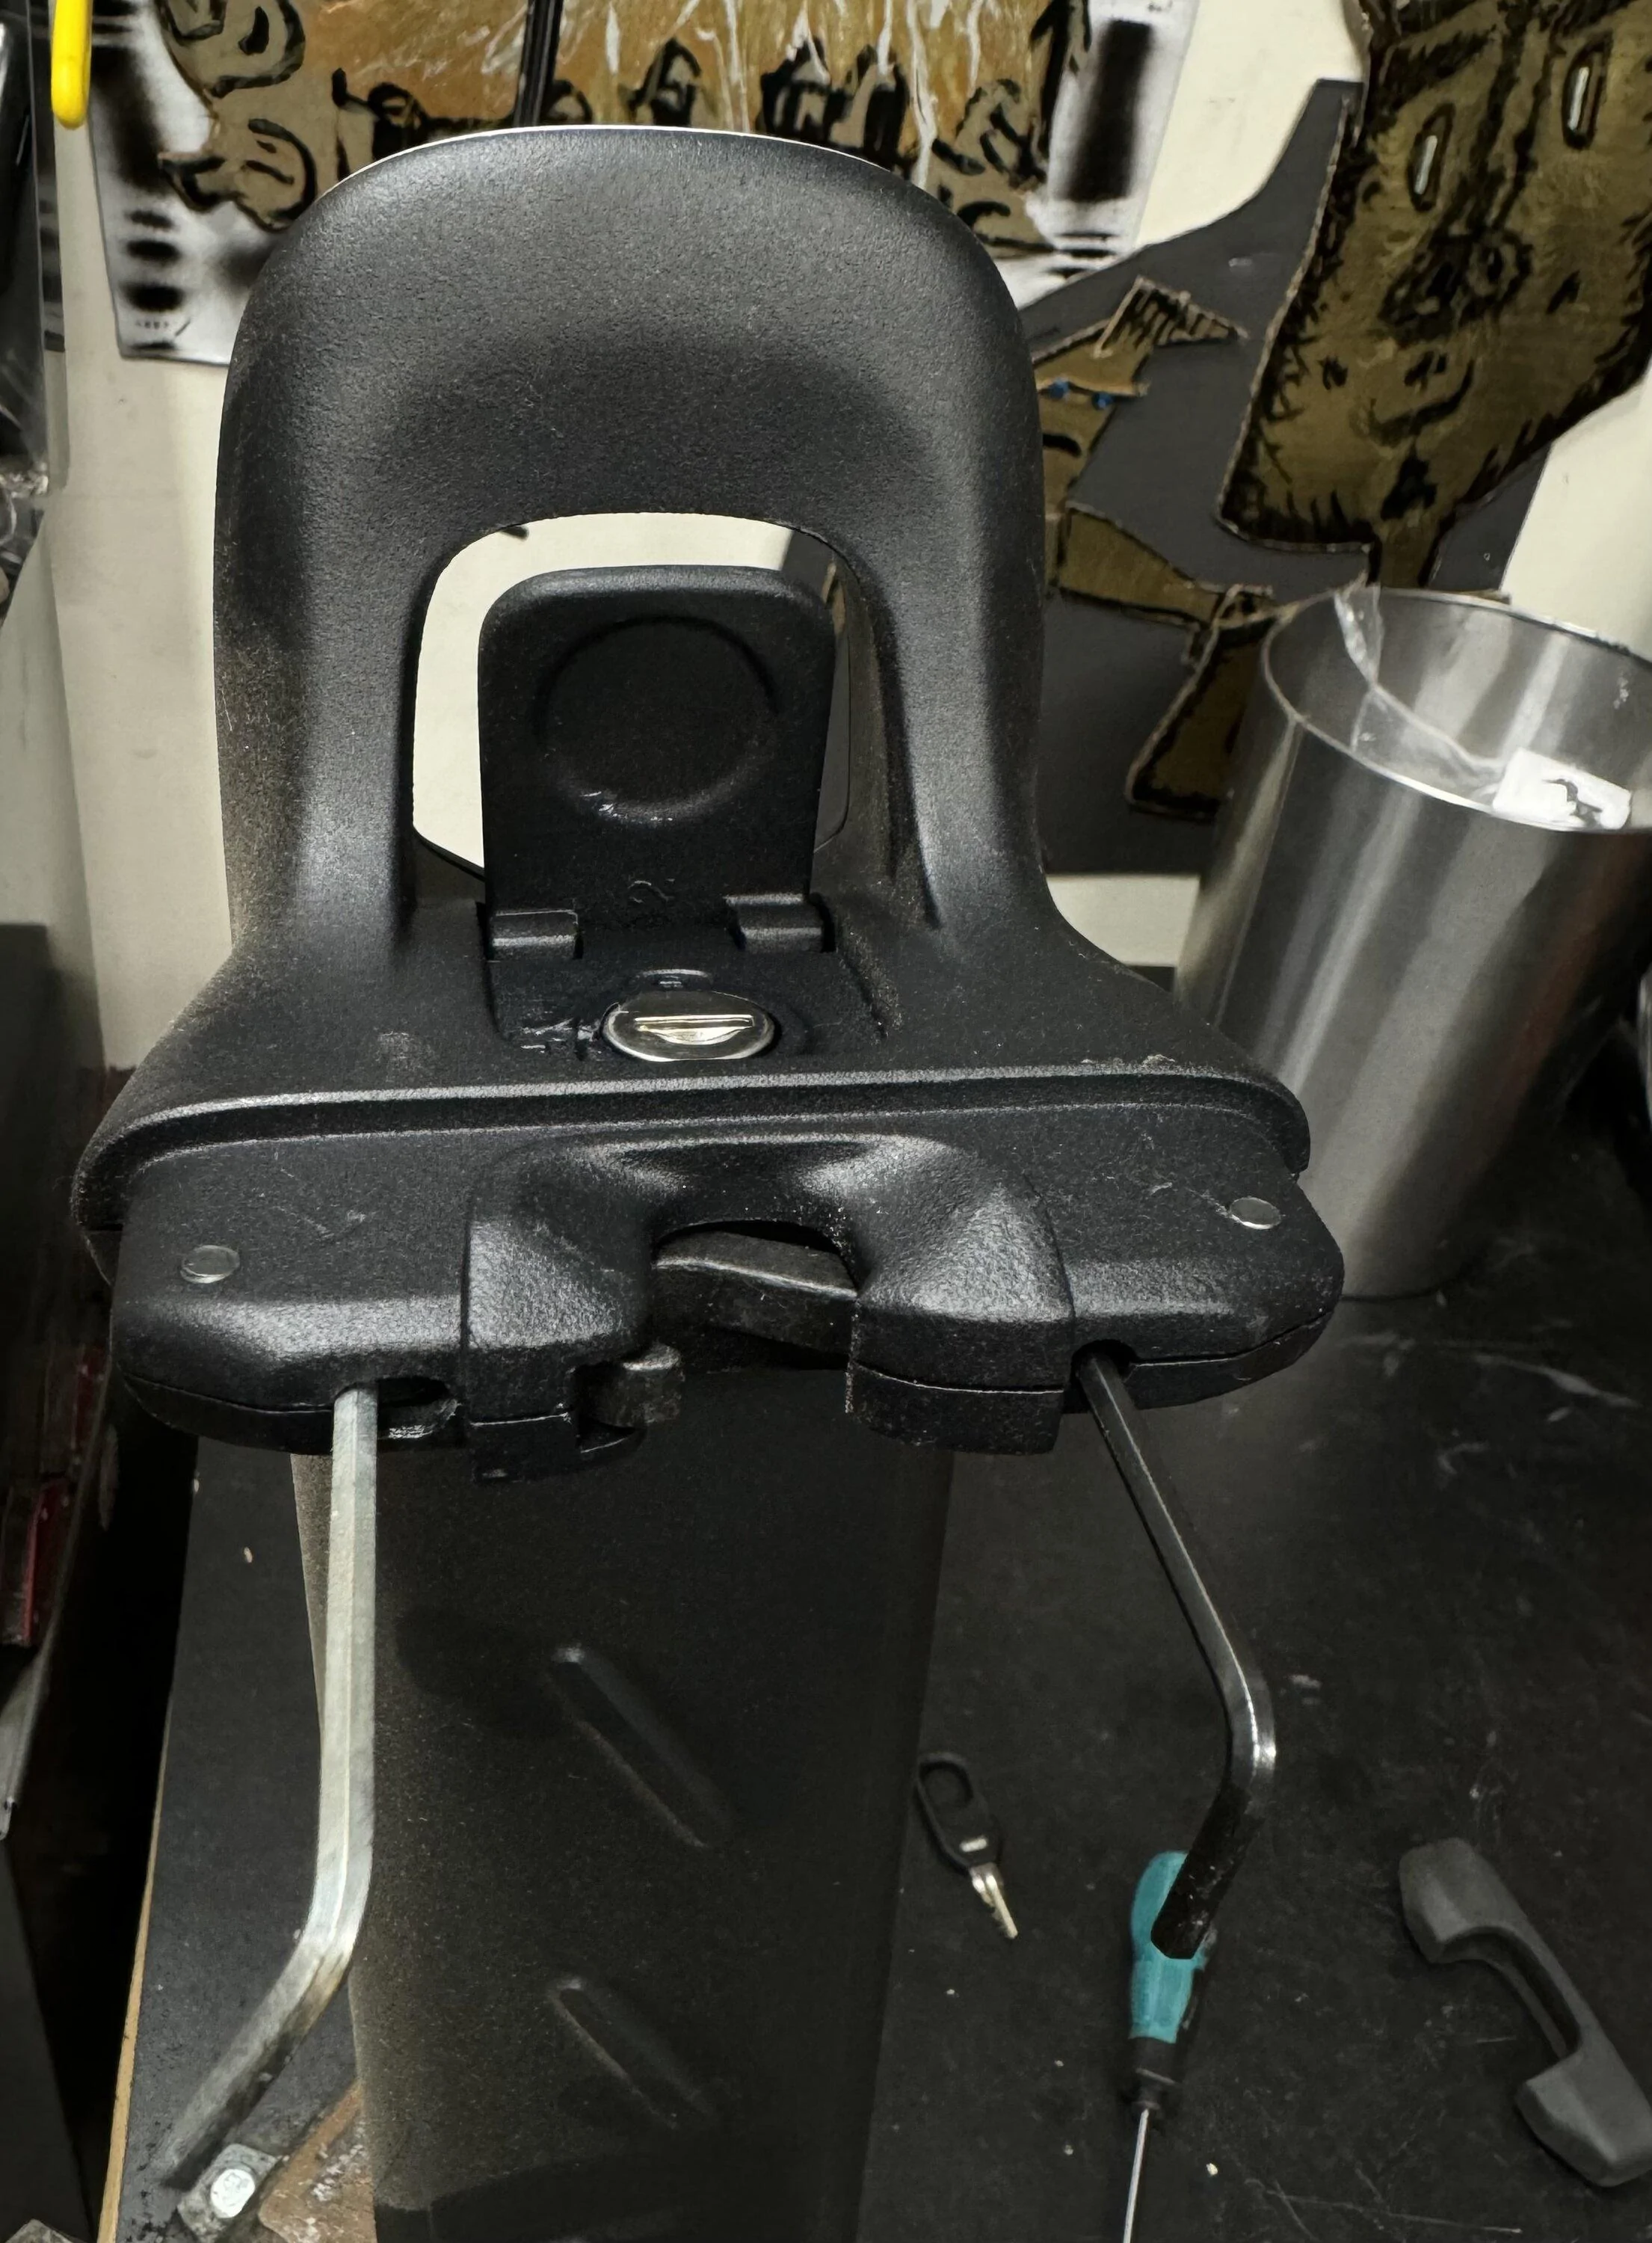
When you are looking at the underside of the end of the crossbar with loop facing you there is a rubber cover. Under the cover there is a left and right Allen.

Make small adjustments (1/8 turn) and replace rubber cover to test fit.
If too loose clockwise on right Allen to tighten or counterclockwise to loosen.
On left Allen click latch pushed closed and it clicks adjust until latch door until flush and you can get the click when you push the latch in while mounted to crossbar without having to pull down or wiggle crossbar.

You should have the opposite side of the crossbar latched in position while adjusting each side. You can place a rag under the bar to keep it off of the roof and extend past the roof edge for easy adjusting. Don’t forget the rubber cap between adjustments.

I had a whistle when the latch was sticking out a tiny amount and not flush. I was able to adjust all latches so the click easily and crossbar does not move no slop. I also took a paint marker under the latch to note mounting position so that I always mounted to the same mount points each latch was adjusted to fit.
 
Last edited:


Top