Budman
Well-Known Member
- Thread starter
- #1
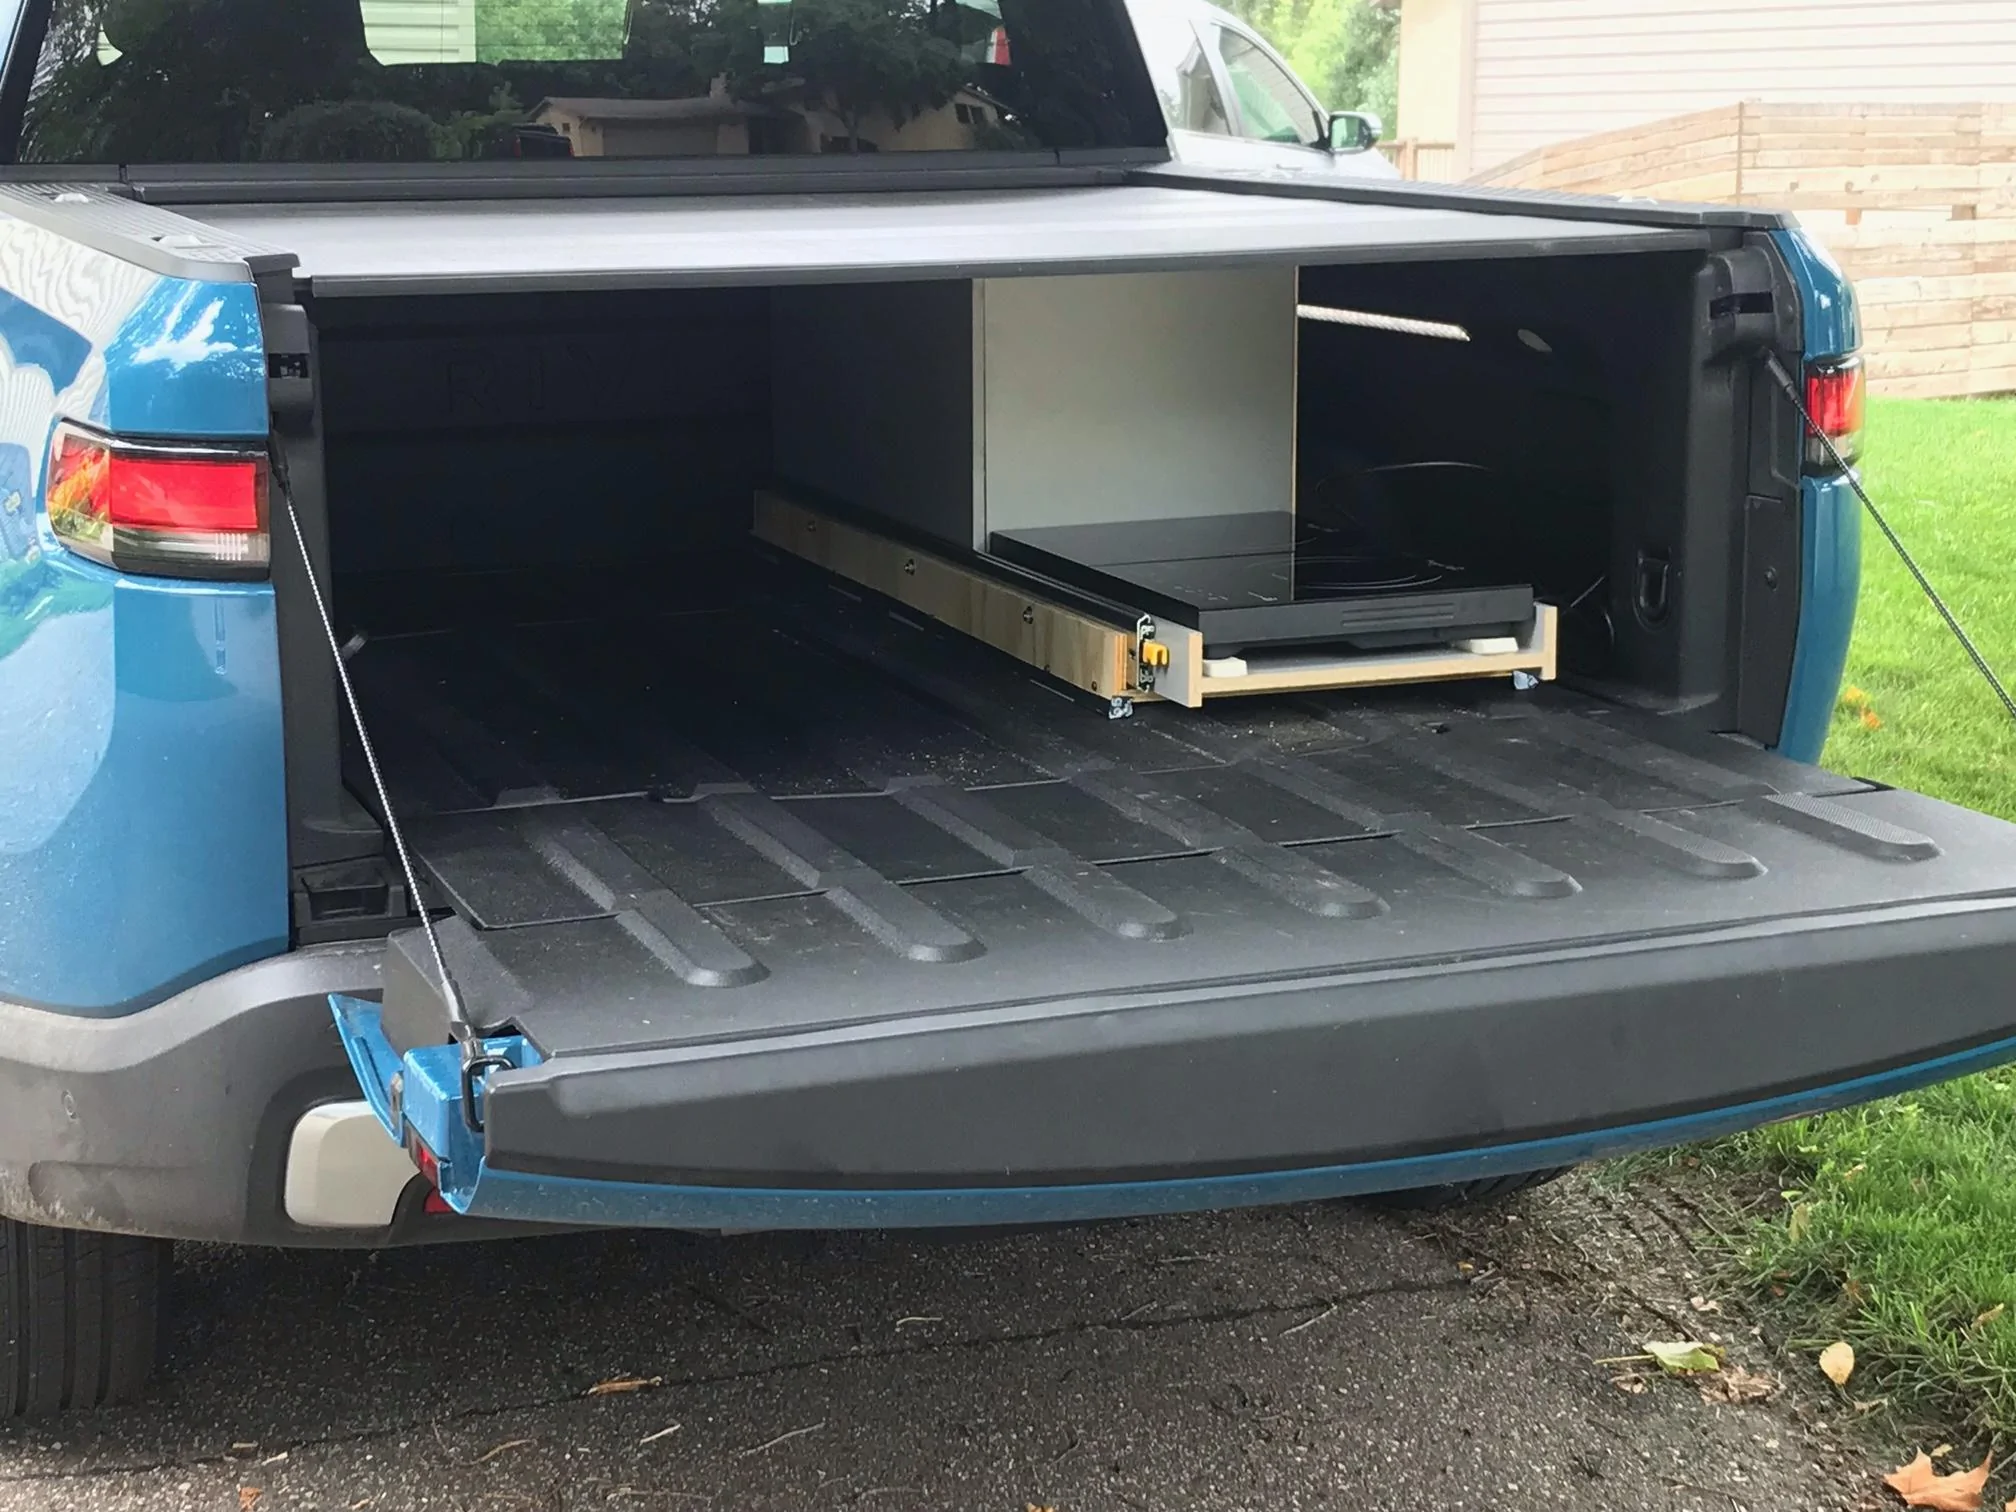
My wife and I came up with this solution for a camp kitchen. A few key design goals listed below:
1). We decided on a bed mounted design instead of a gear tunnel design because the gear tunnel is just to useful as it is and a bed mounted design would be easier to build (square vs trapezoidal).
2). No sink. In our experience car camping you end up hauling your dish pan and dishes to a designated spot for washing or disposing of water so a build in sink/water tank isn't all that useful. The space could be better utilized for other things.
3). Two induction burners. Induction burners are so much better than propane camp stoves!
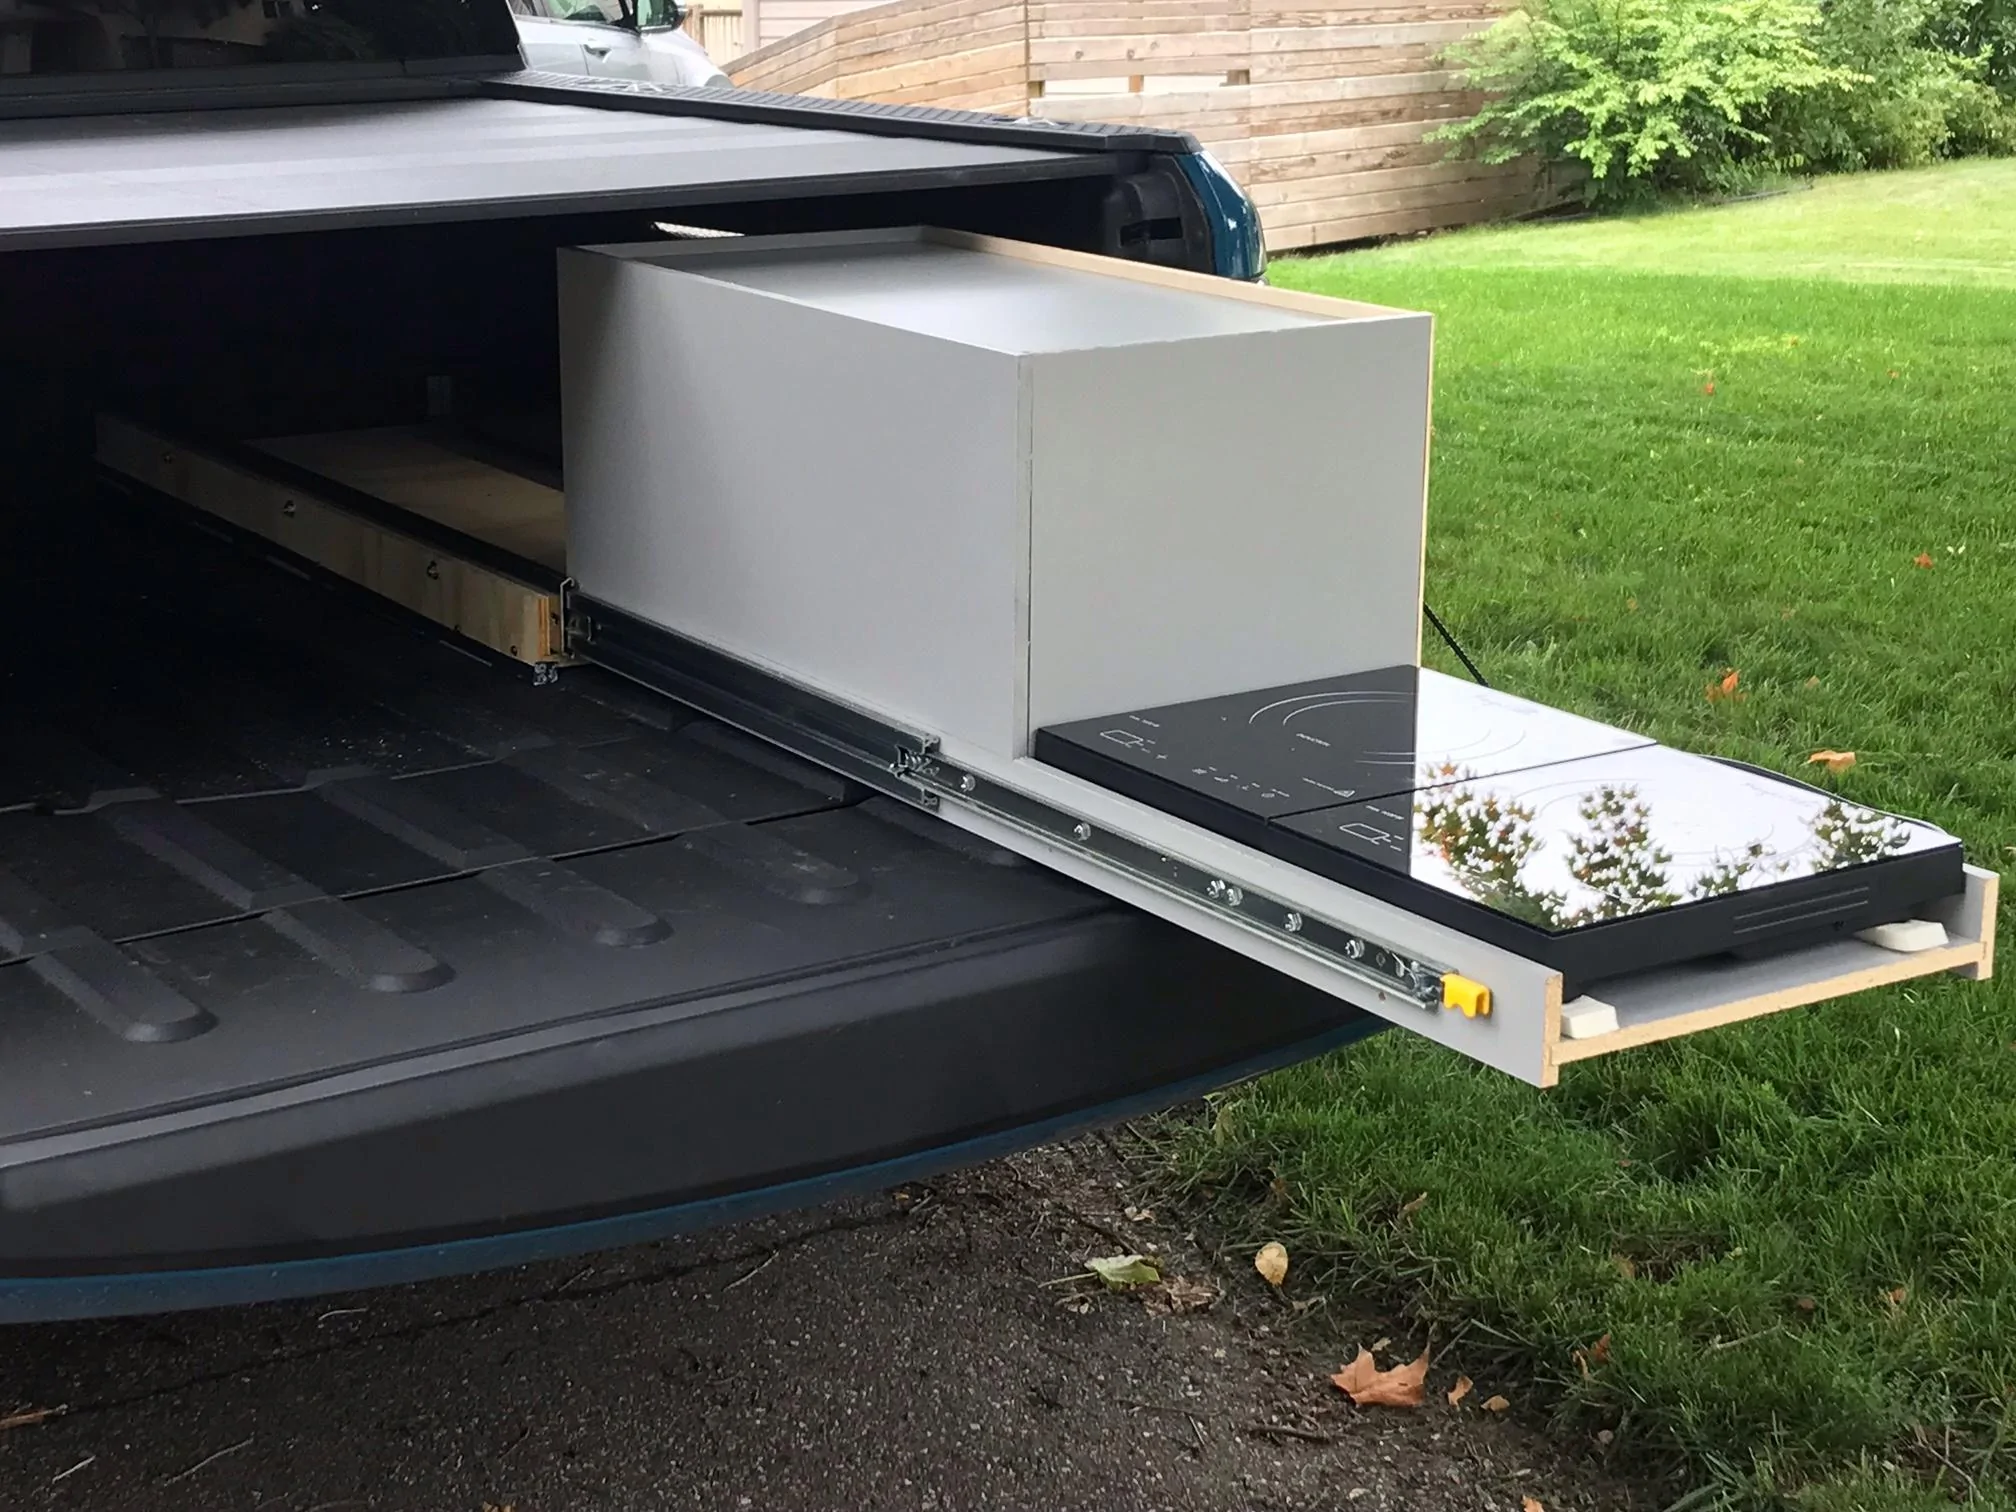
I constructed it out of 1/2 inch melamine. If I had to do it over I would use 1/2 inch plywood. Melamine is too hard to work with and not very strong. But, all the joints have glued dado joints so the joints are very strong. Dado's are stronger than pocket screws and not all that hard to make. Screws were used for reinforcement in key areas.
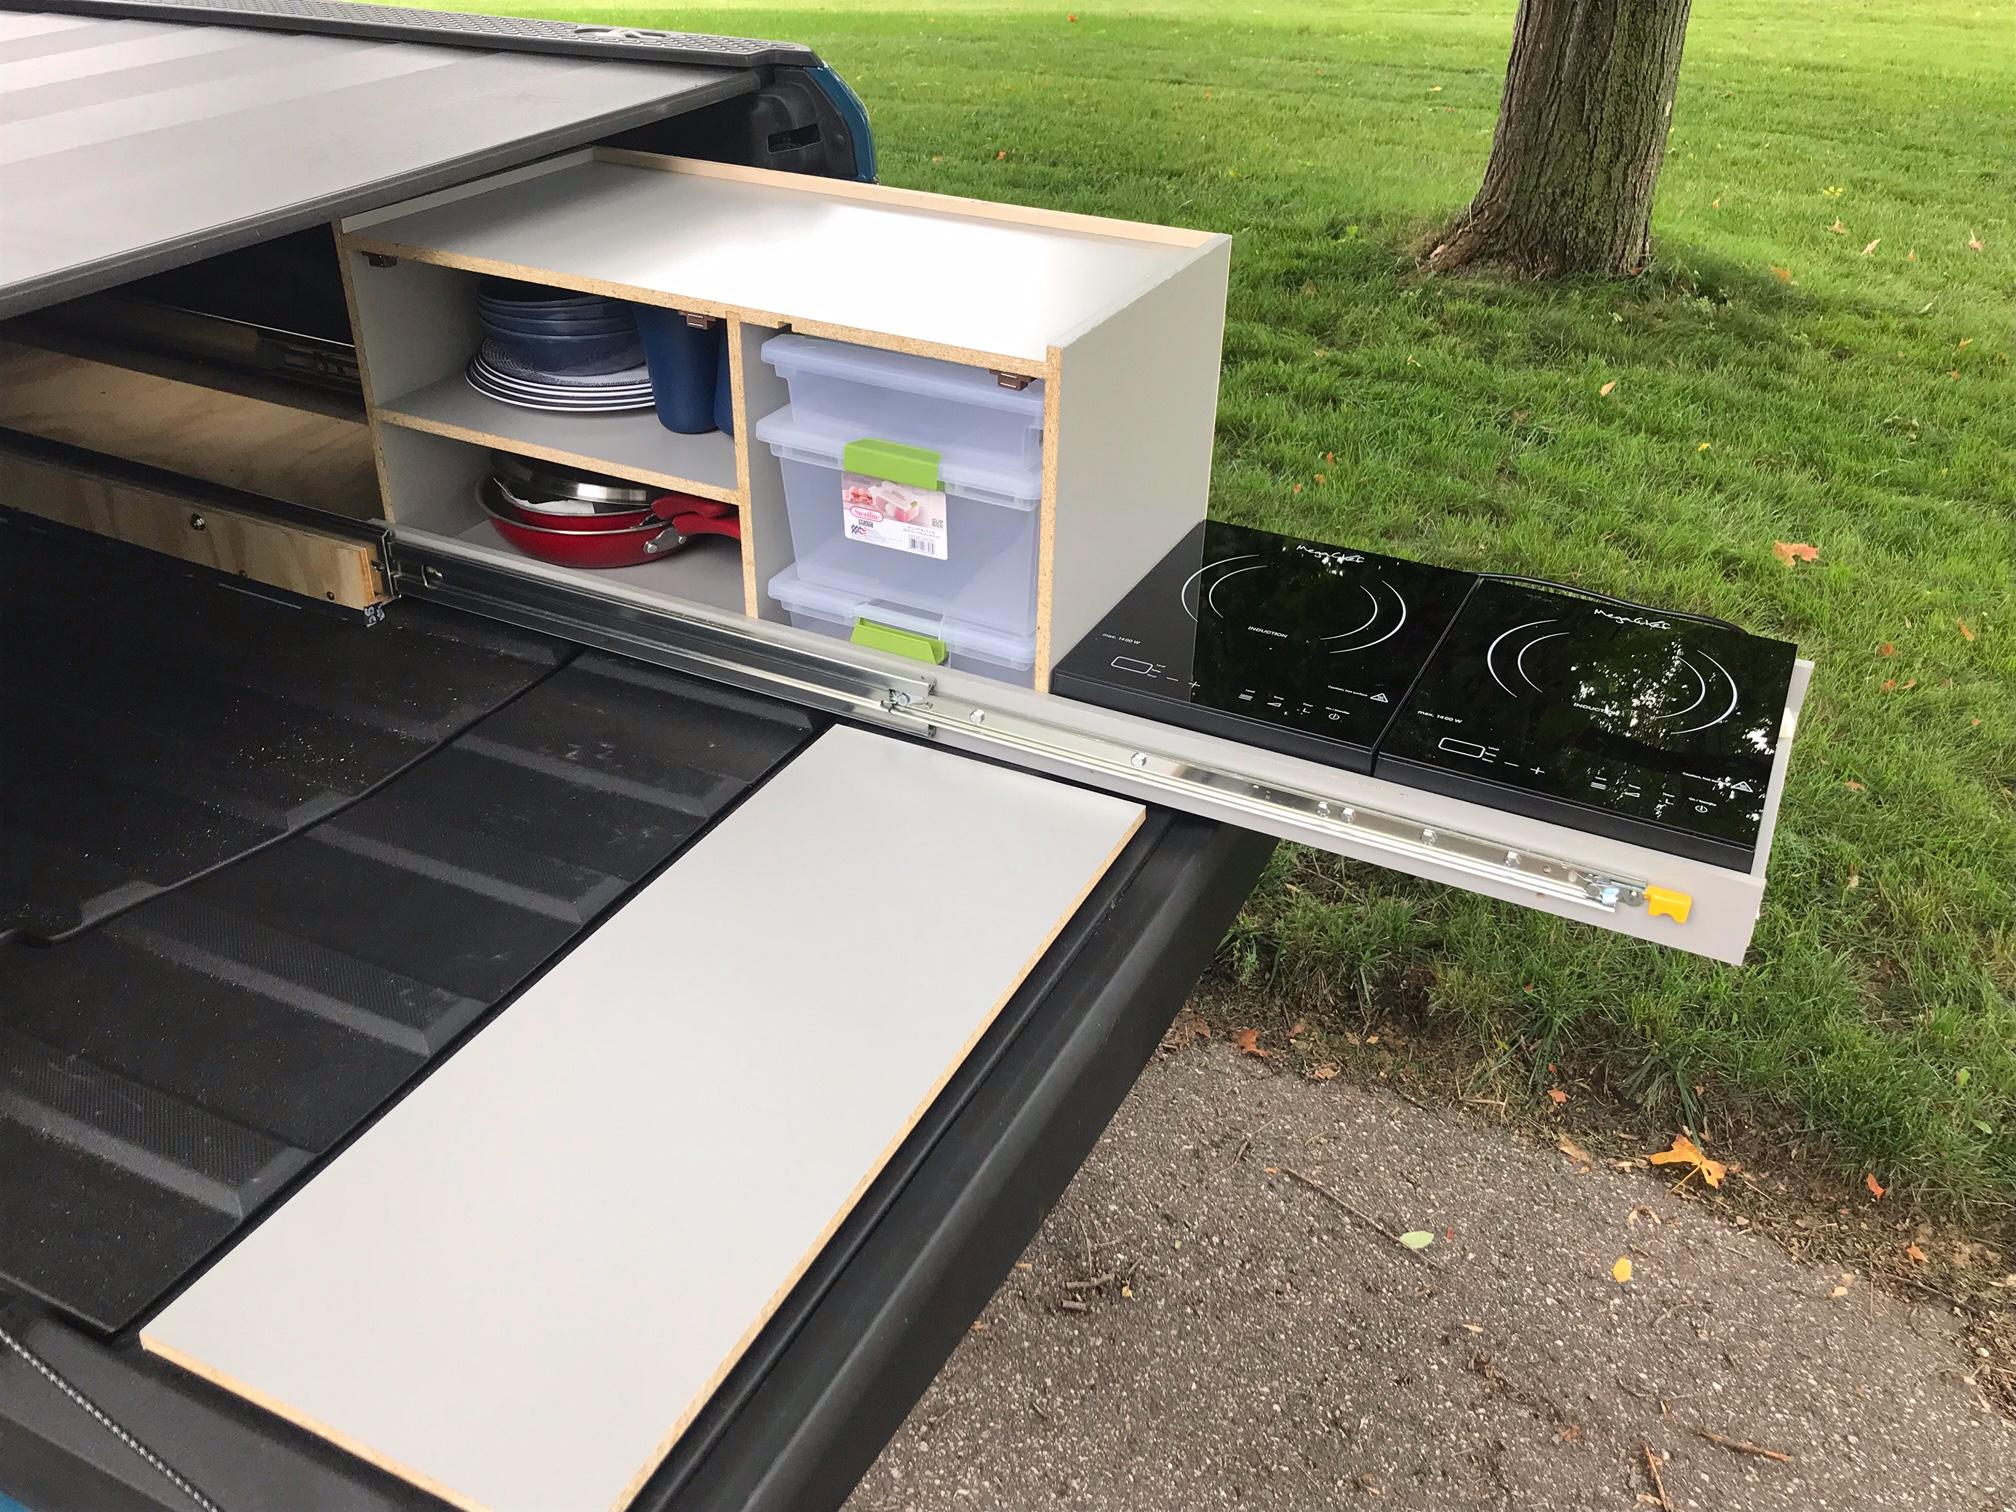
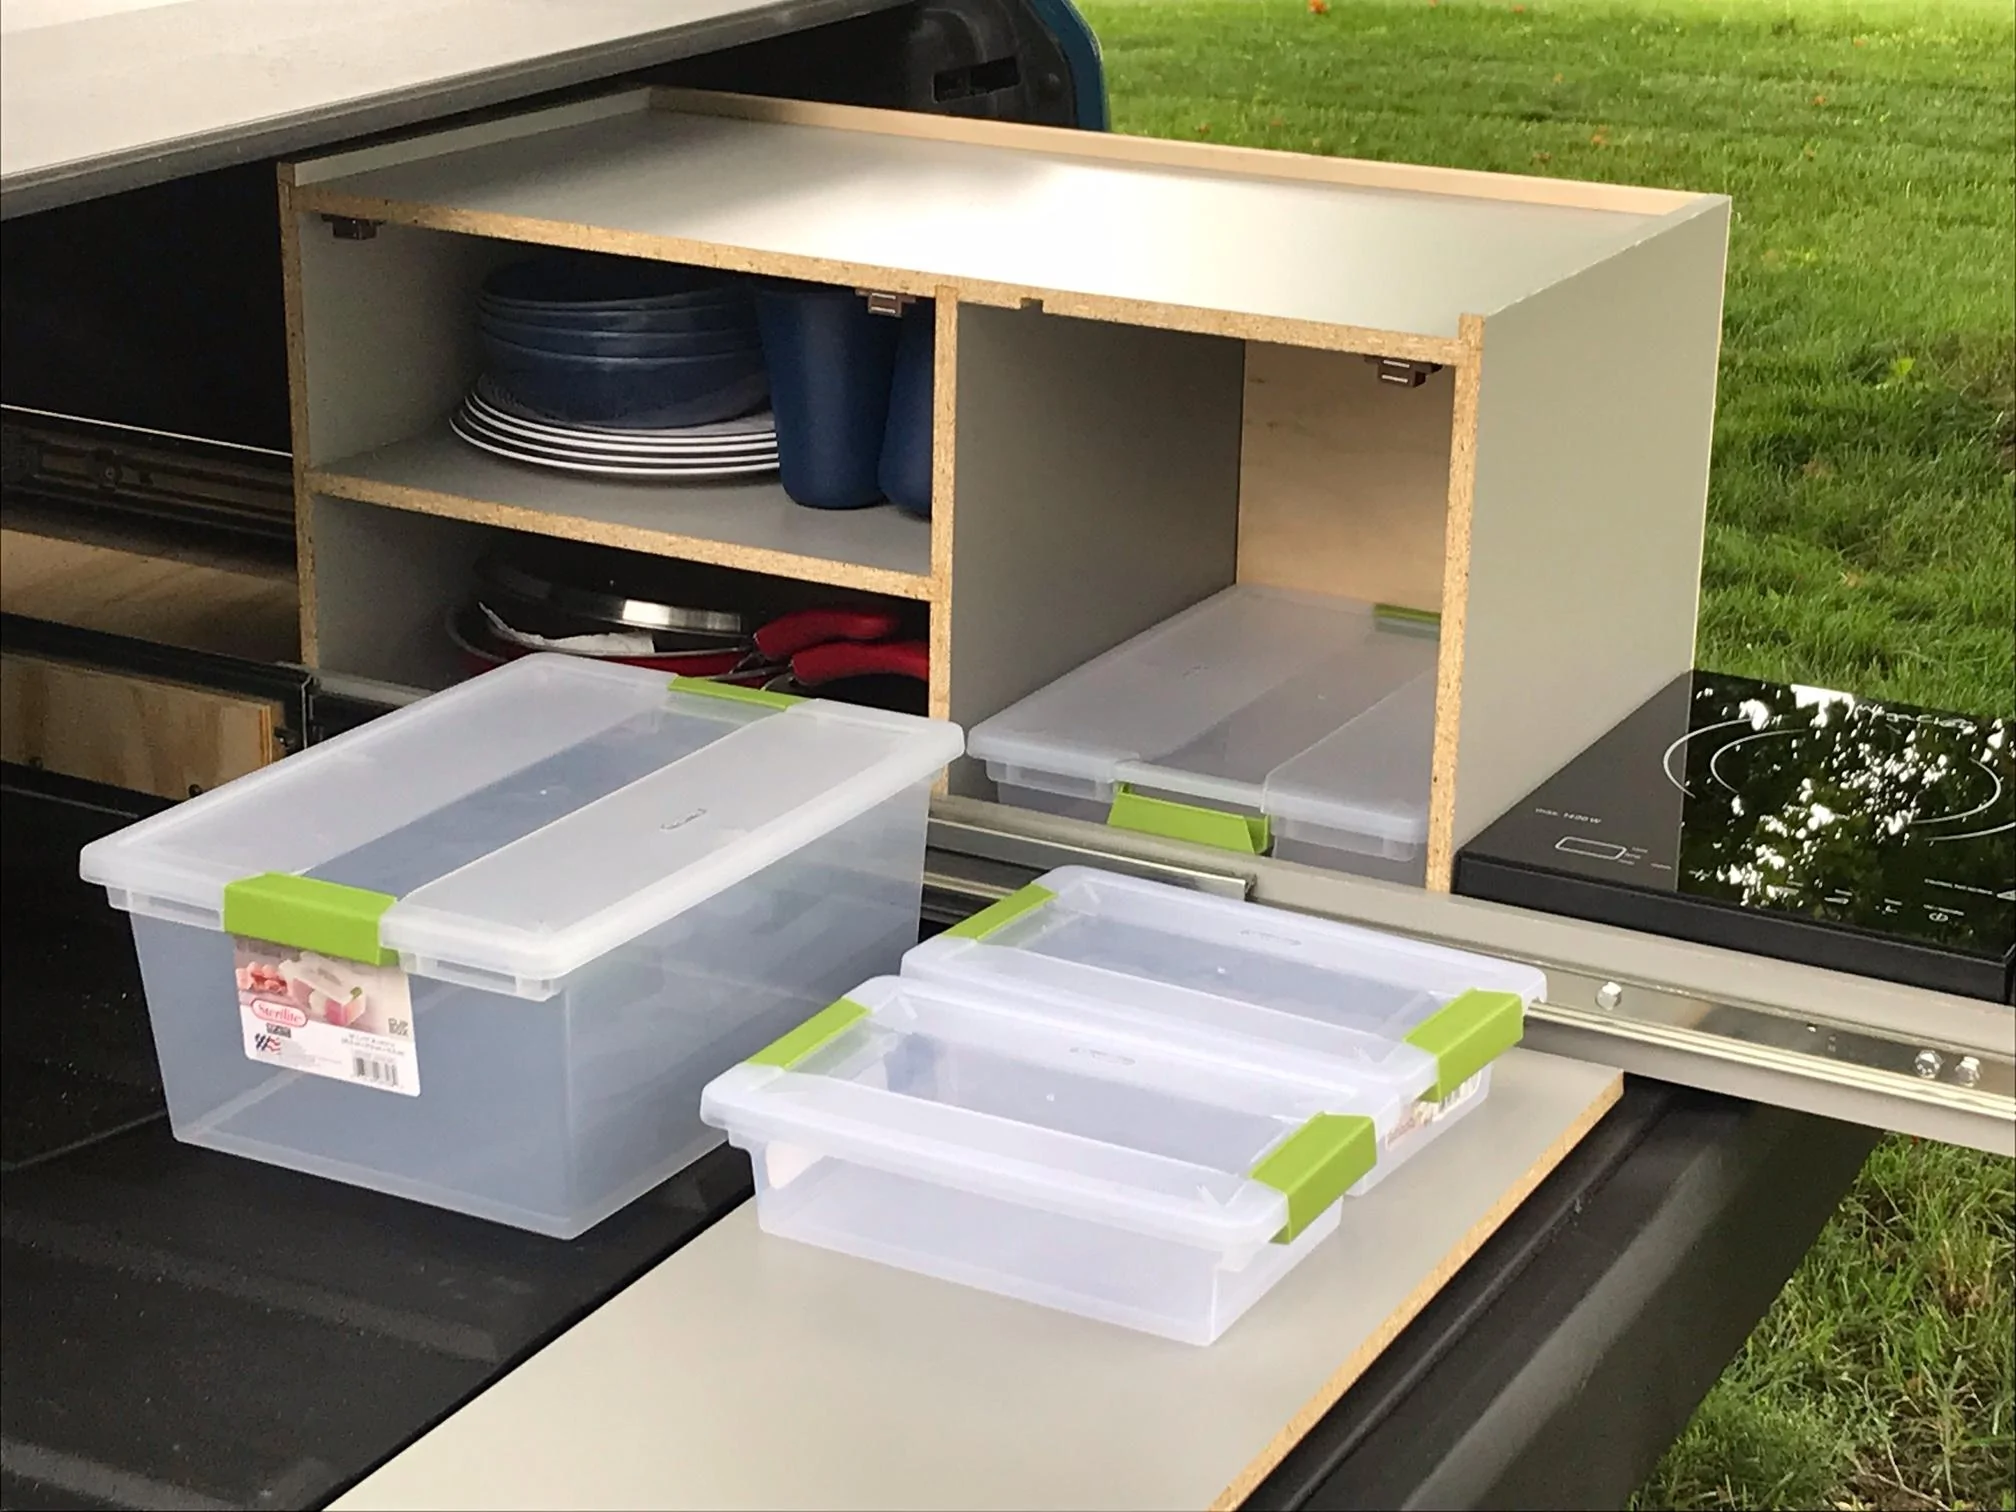
I used 48 inch full extension slide outs. We found a nice set of stackable containers for kitchen supplies, utensils or dry goods. The "pantry" was sized around those containers for a nice clean, efficient fit. We have two induction compatible skillets so the other side of the pantry was sized for that. The pantry door is held in place with magnet latches and when removed and placed on the bed it becomes a nice flat work surface.
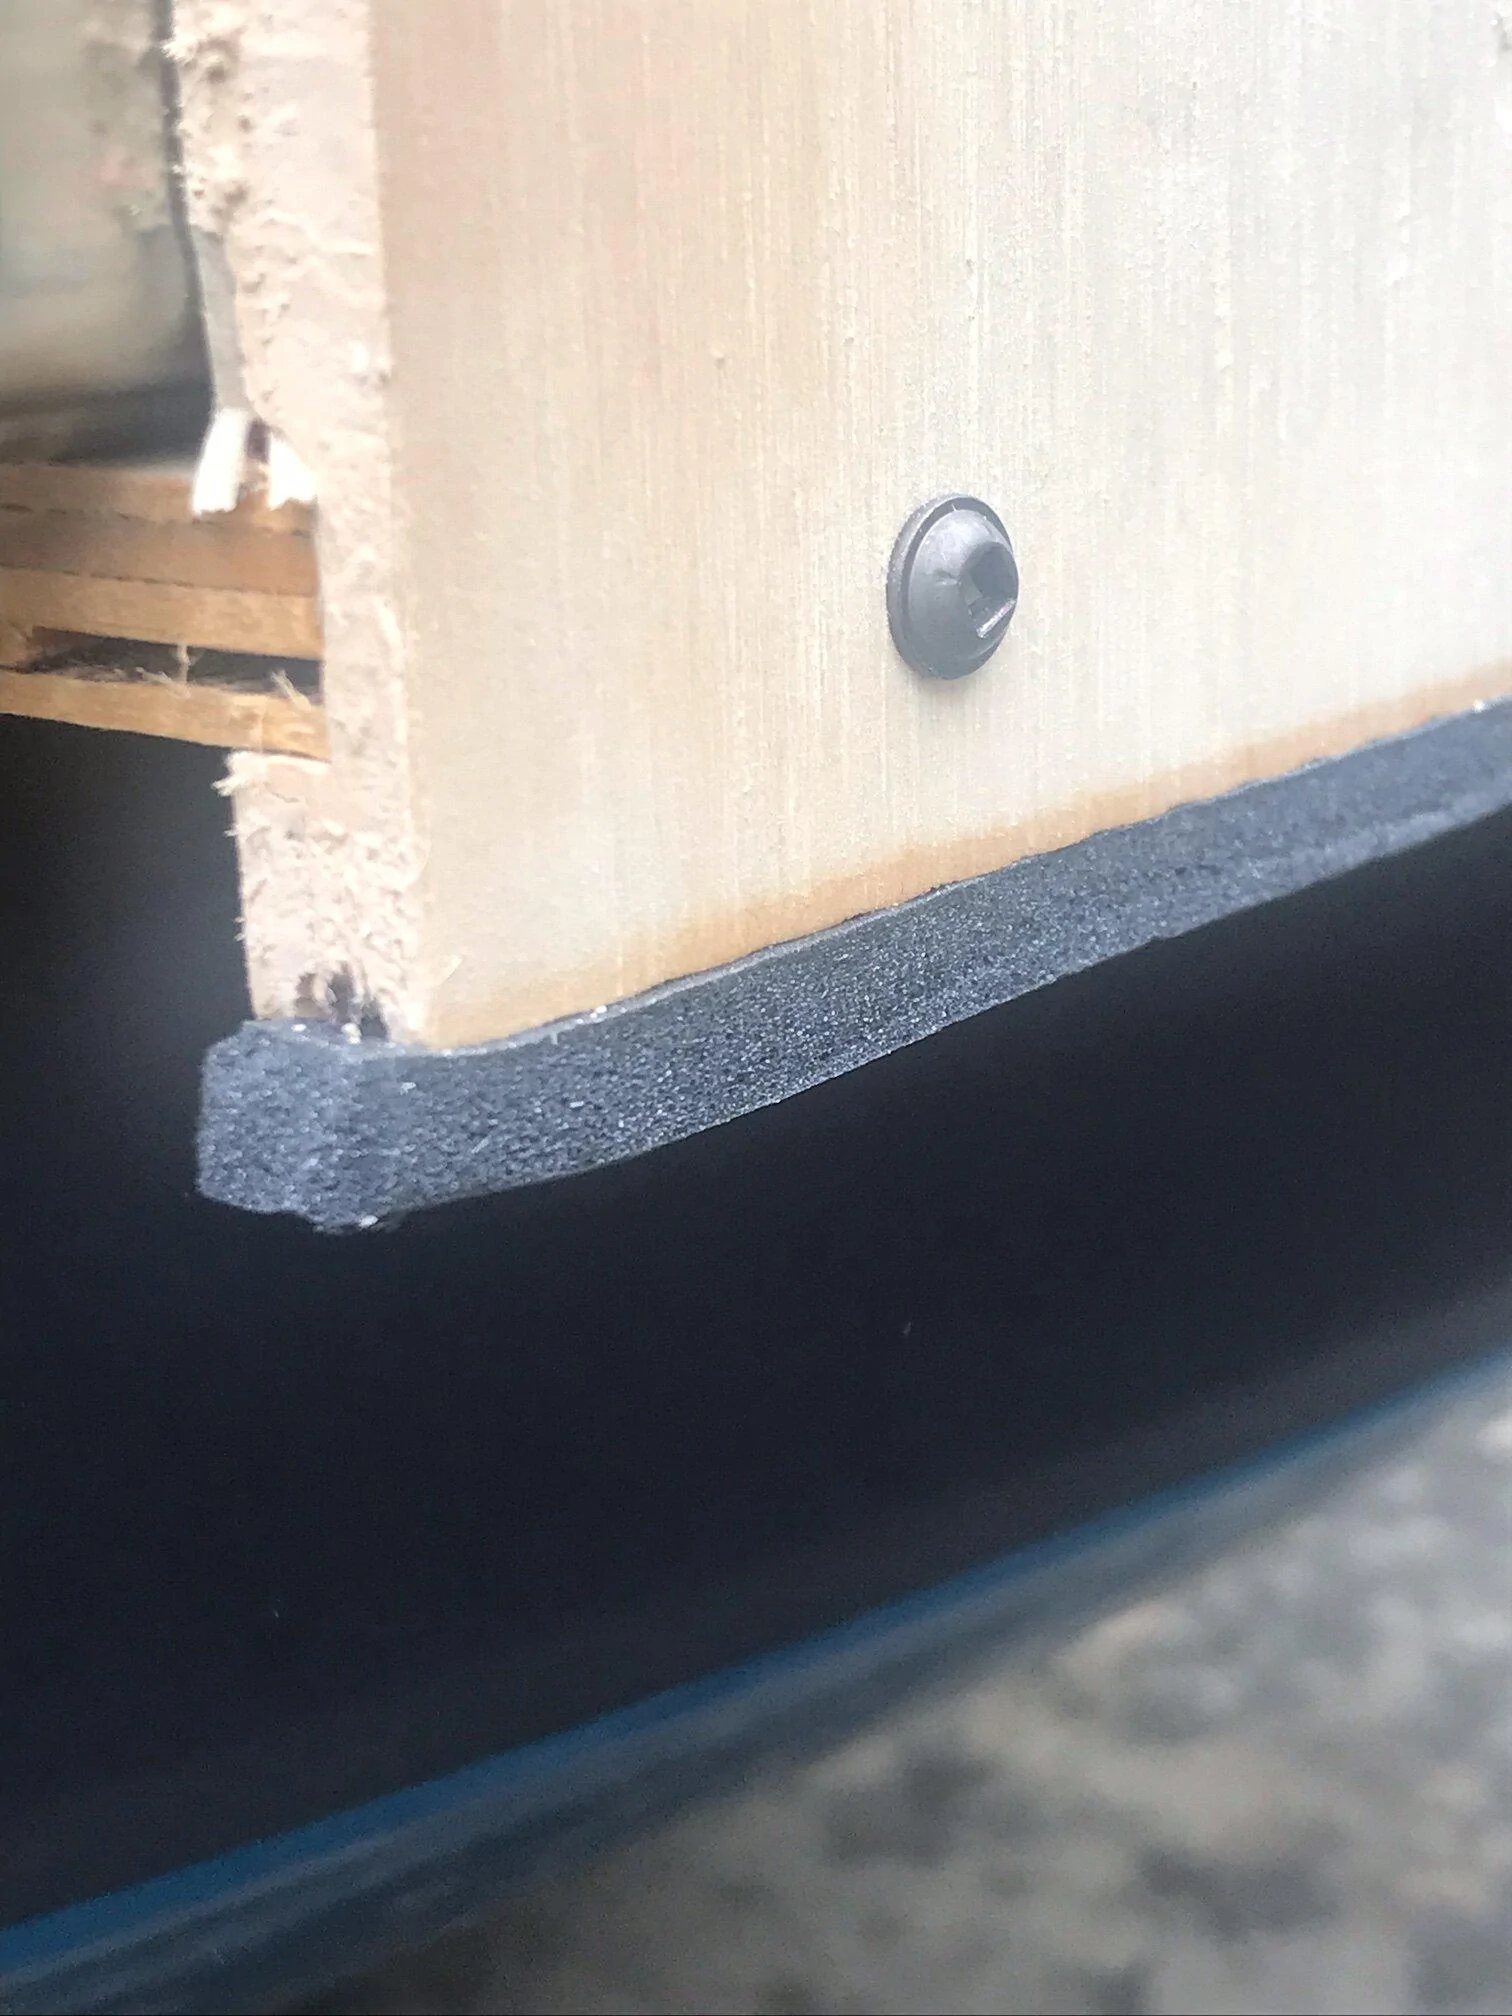
The portion that holds the drawer slides and rests on the bed has foam weather stripping for cushion/vibration isolation and is wrapped in window flashing. The flashing protects the plywood from water that may be on the bed floor and is a nice slippery material to ease sliding the kitchen in and out of the bed during installation/removal and it protects the bed from getting scratched. There is another set of foam weather stripping under the feet of the induction burners for more vibration isolation of those units.
The 120V outlets on the truck allow us to run both burners are 1/2 full power which is enough to get water boiling in both pans.


1). We decided on a bed mounted design instead of a gear tunnel design because the gear tunnel is just to useful as it is and a bed mounted design would be easier to build (square vs trapezoidal).
2). No sink. In our experience car camping you end up hauling your dish pan and dishes to a designated spot for washing or disposing of water so a build in sink/water tank isn't all that useful. The space could be better utilized for other things.
3). Two induction burners. Induction burners are so much better than propane camp stoves!
I constructed it out of 1/2 inch melamine. If I had to do it over I would use 1/2 inch plywood. Melamine is too hard to work with and not very strong. But, all the joints have glued dado joints so the joints are very strong. Dado's are stronger than pocket screws and not all that hard to make. Screws were used for reinforcement in key areas.
I used 48 inch full extension slide outs. We found a nice set of stackable containers for kitchen supplies, utensils or dry goods. The "pantry" was sized around those containers for a nice clean, efficient fit. We have two induction compatible skillets so the other side of the pantry was sized for that. The pantry door is held in place with magnet latches and when removed and placed on the bed it becomes a nice flat work surface.
The portion that holds the drawer slides and rests on the bed has foam weather stripping for cushion/vibration isolation and is wrapped in window flashing. The flashing protects the plywood from water that may be on the bed floor and is a nice slippery material to ease sliding the kitchen in and out of the bed during installation/removal and it protects the bed from getting scratched. There is another set of foam weather stripping under the feet of the induction burners for more vibration isolation of those units.
The 120V outlets on the truck allow us to run both burners are 1/2 full power which is enough to get water boiling in both pans.

Sponsored
