Sponsored
OP
OP

camping123

Member
Joined
Dec 15, 2022
Threads
2
Messages
12
Reaction score
85
Location
Michigan
Vehicles
Rivian, Jeep
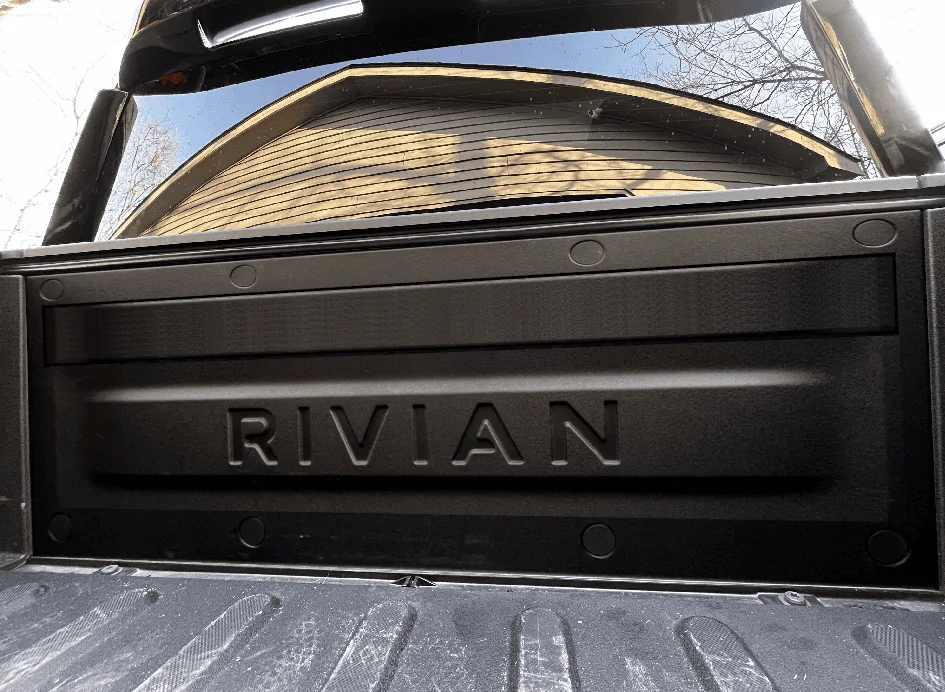
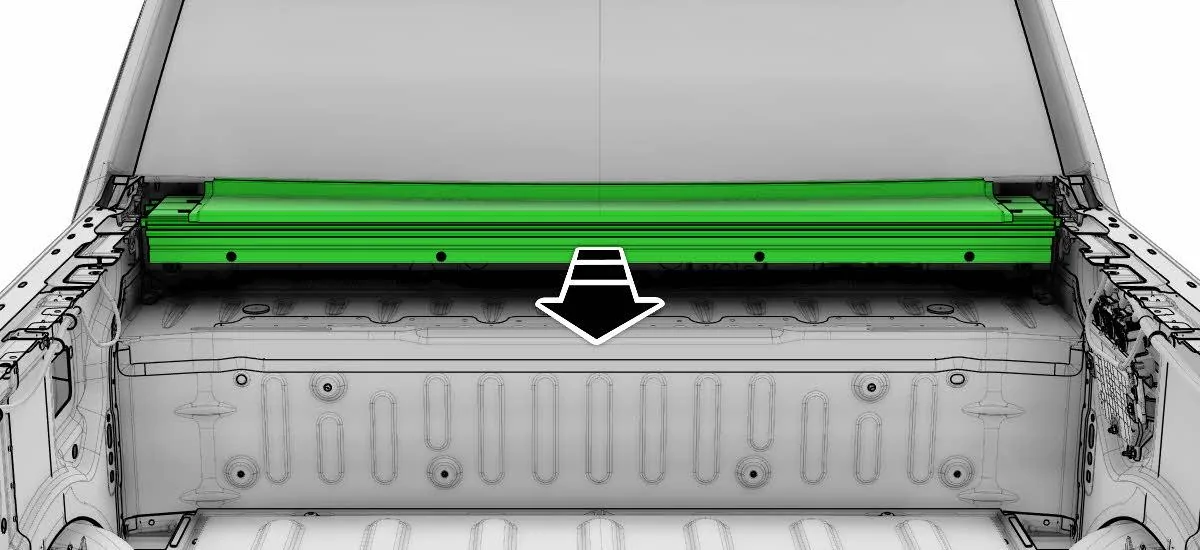
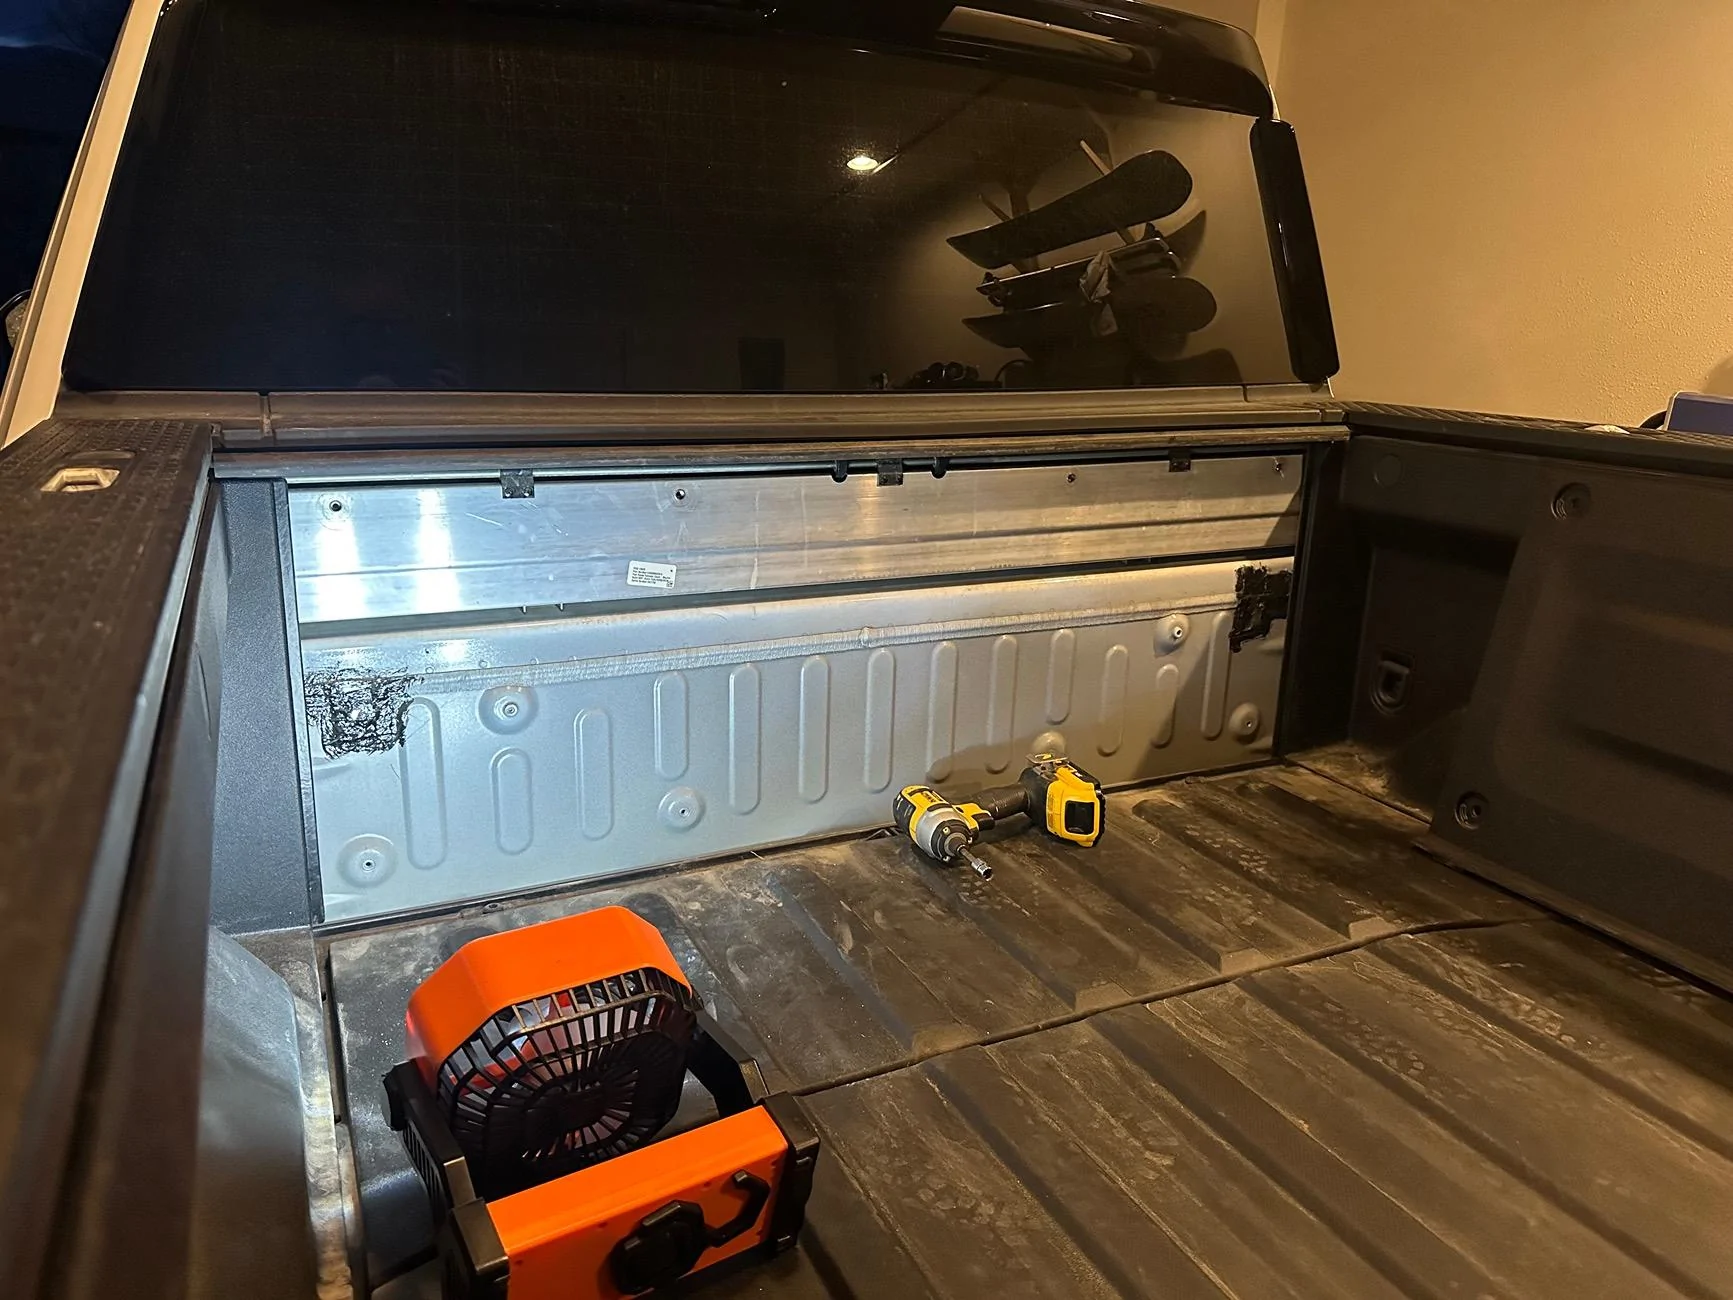
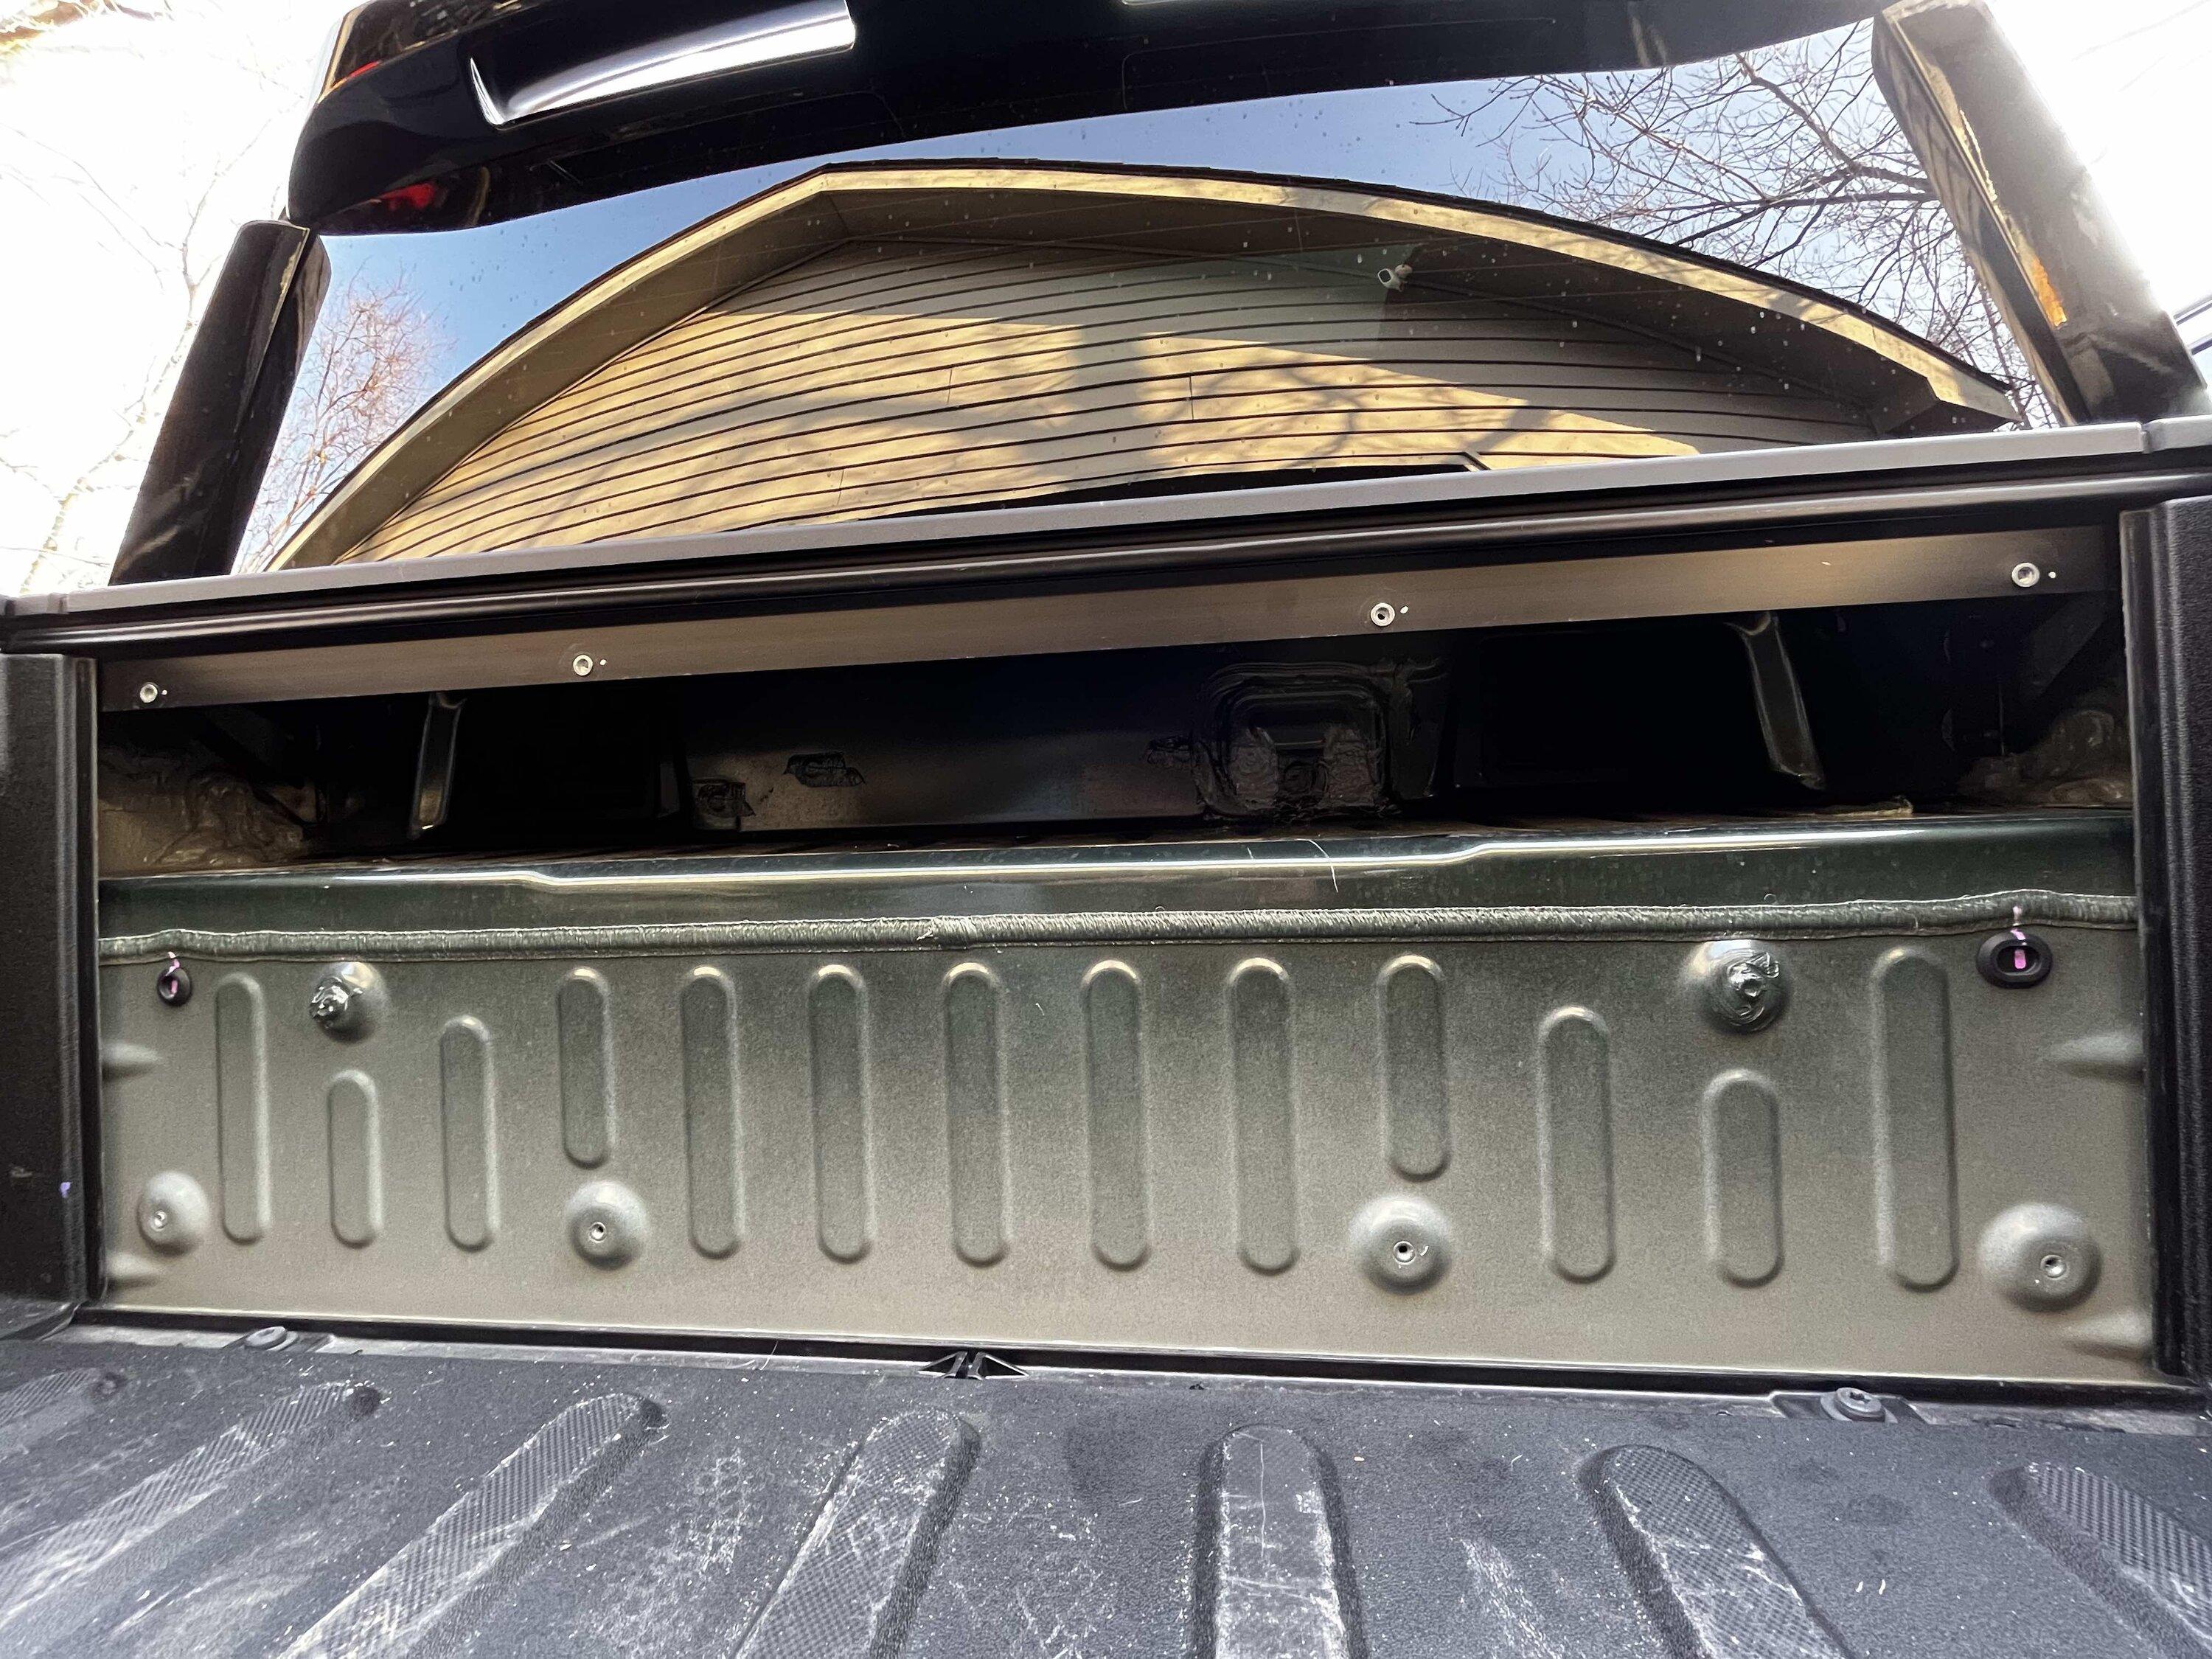
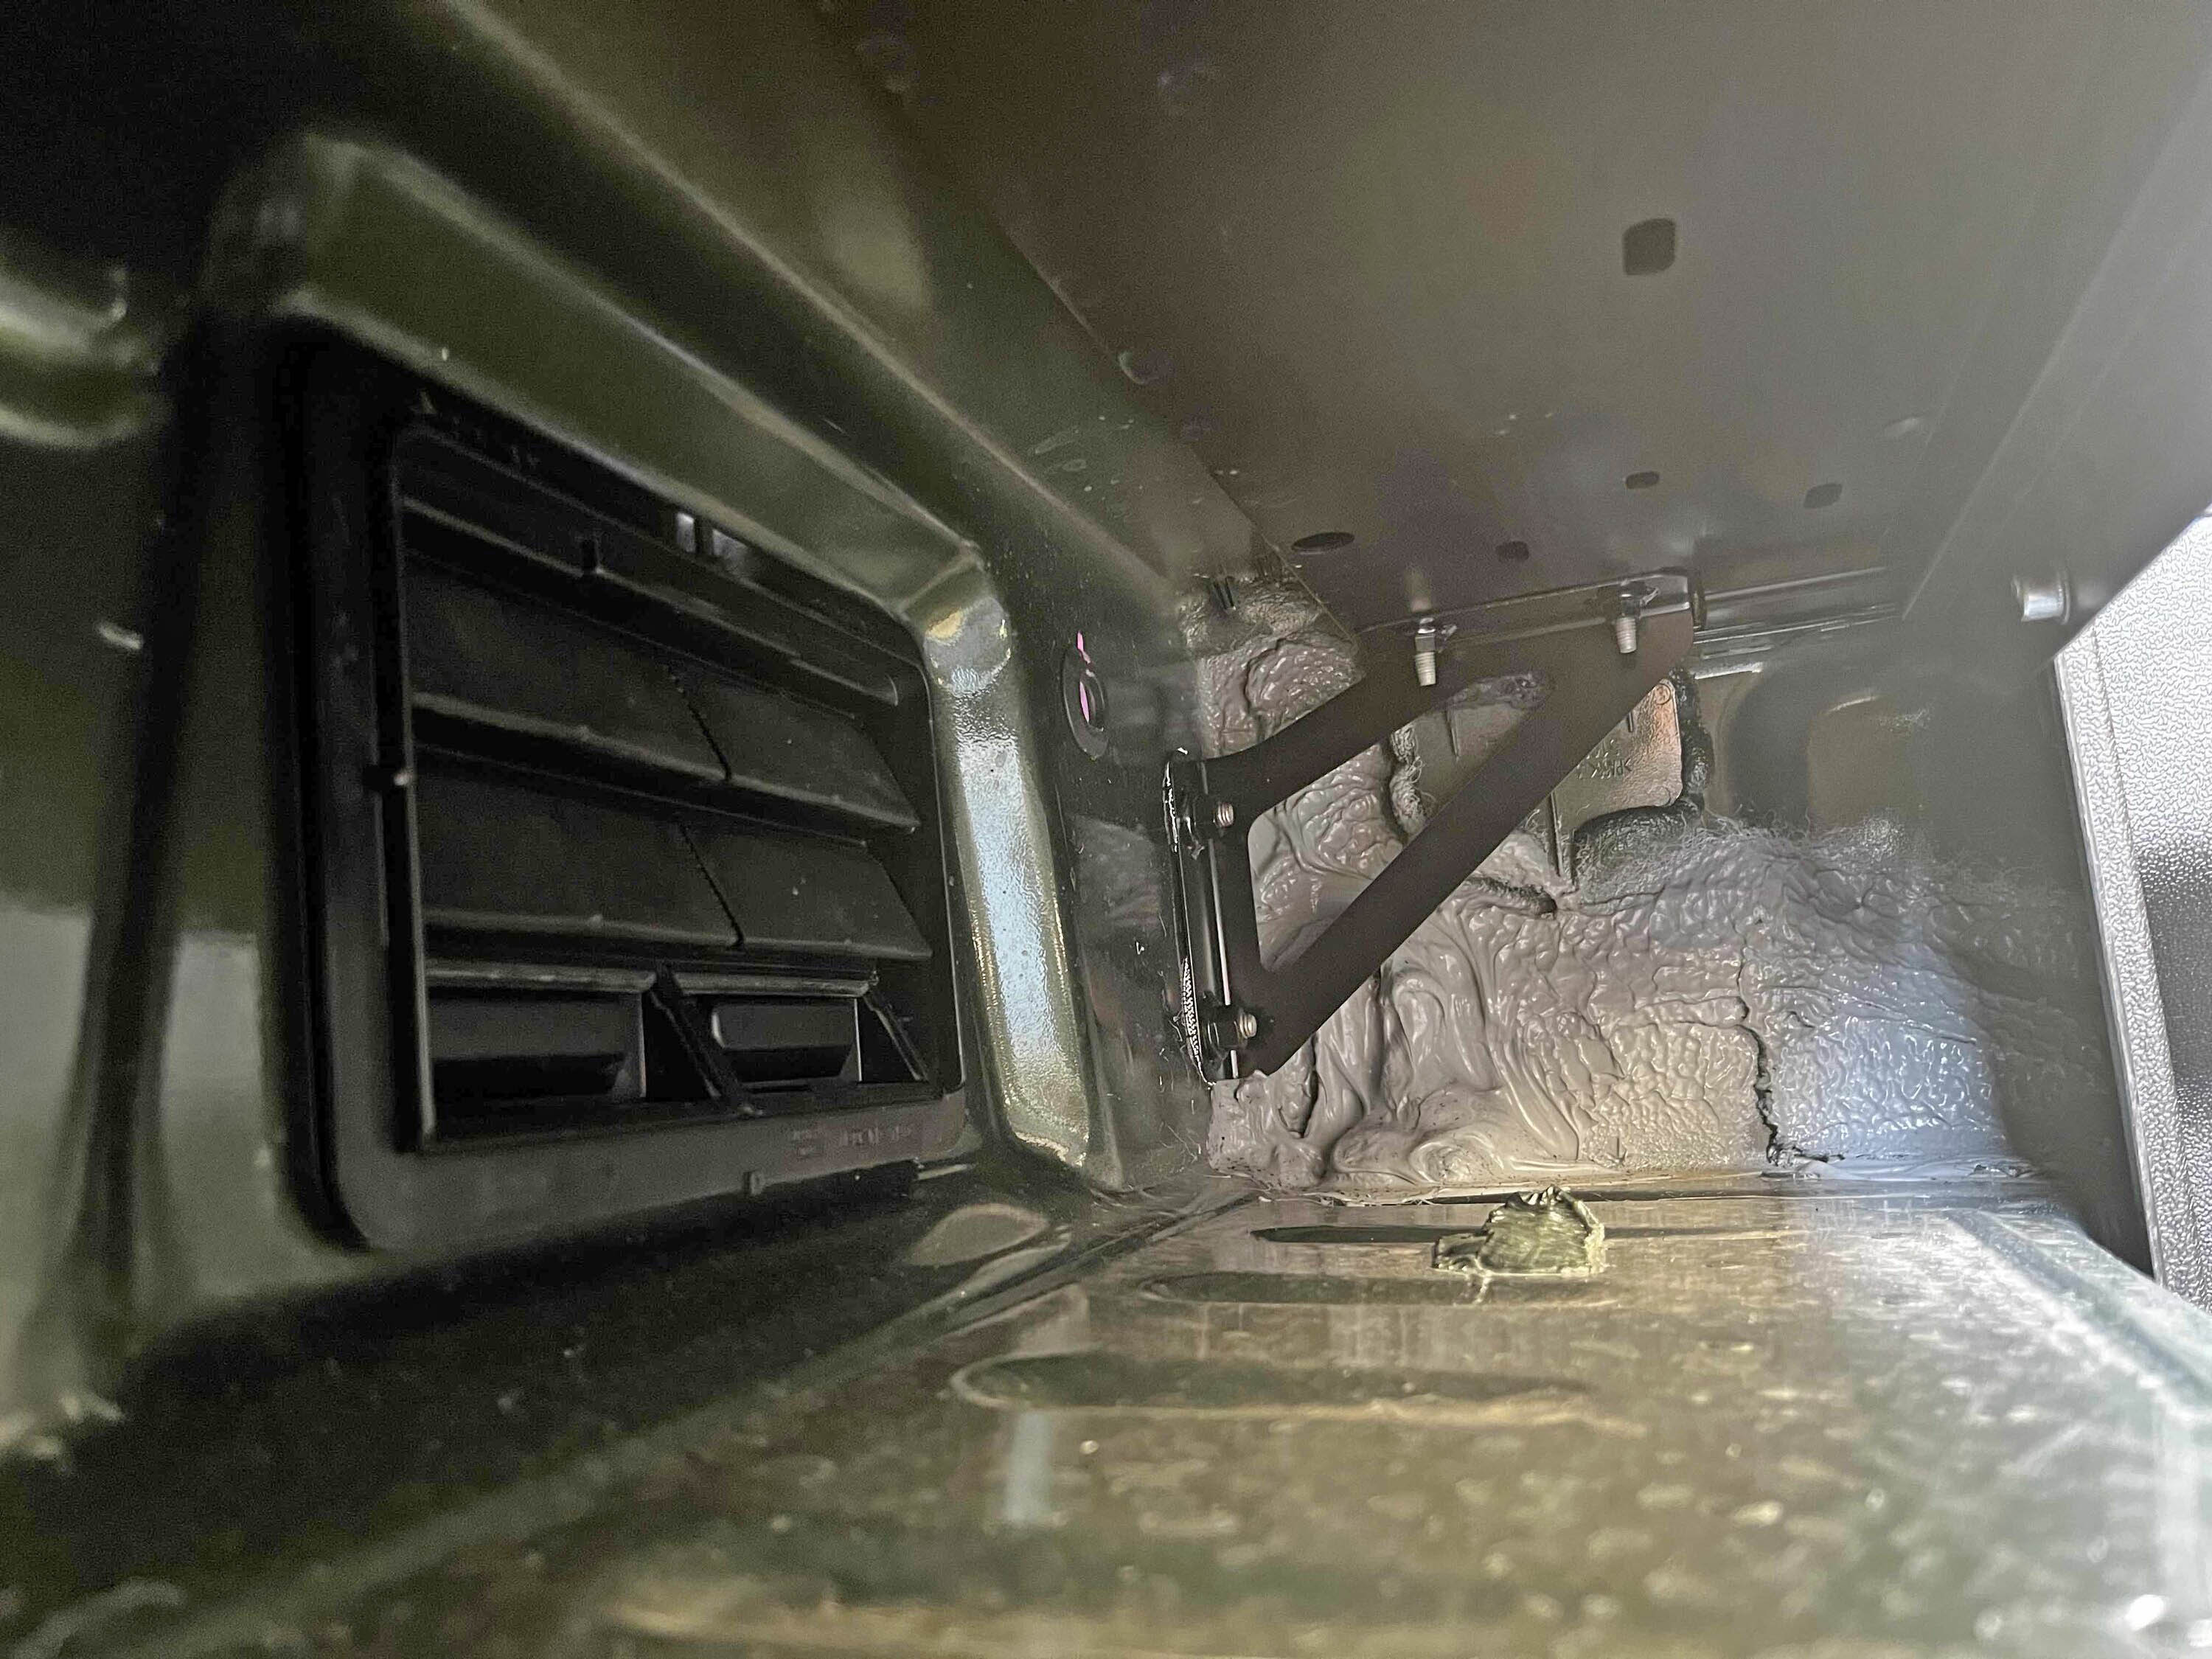
I was getting a lot of water intrusion even with a manual tonneau cover and ended up putting all the gear in waterproof bags. I don’t think that adding a gasket around the edge will help as I’m pretty sure water is coming from above around the flat top plastic piece and that water is meant to drain through that area.
Sponsored


Wing

Well-Known Member
First Name
James
Joined
Oct 27, 2023
Threads
11
Messages
402
Reaction score
335
Location
Ottawa
Vehicles
R1T Launch Edition LG/OC 20-inch
Ok good to know, thanks! I think the gasket will make the cut look better though ;)
 

cadueitt

Member
First Name
Charley
Joined
Mar 12, 2025
Threads
0
Messages
10
Reaction score
3
Location
Salida, CO
Vehicles
2022 R1T Launch
Sorry for reviving an old thread here. Any chance that someone grabbed the part number for the non powered tonneau shelf assembly?
I have the powered version but with my canopy camper install I am losing the ability/ no longer need the ability to use the tonneau. I’m mocking up some plans to utilize that space to heat/cool my camper and I’d love to not have to drill through the aluminum plate on my powered tonneau setup.
 

Sponsored

Riviot

Well-Known Member
Joined
Mar 29, 2021
Threads
121
Messages
6,435
Reaction score
10,832
Location
Kitsap, WA
Vehicles
R1T
Clubs
 
Sorry for reviving an old thread here. Any chance that someone grabbed the part number for the non powered tonneau shelf assembly?
I have the powered version but with my canopy camper install I am losing the ability/ no longer need the ability to use the tonneau. I’m mocking up some plans to utilize that space to heat/cool my camper and I’d love to not have to drill through the aluminum plate on my powered tonneau setup.
Pretty sure it's this:
PT00949439-A
Cargo Bed Front Cross Rail Assembly - Manual Tonneau Cover

And used to be variations of this:
C100052985-G
Cargo Bed Front Cross Rail Assembly - Manual Tonneau Cover

It's called the "bracket". Doesn't look like you get much space after removing it though. You can just have a gaping hole, the whole assembly is needed to fill specific gaps.

Rivian R1T R1S Reclaiming empty powered tonneau cover space 1000003116
 

cadueitt

Member
First Name
Charley
Joined
Mar 12, 2025
Threads
0
Messages
10
Reaction score
3
Location
Salida, CO
Vehicles
2022 R1T Launch
Perfect thank you so much. I spent several hours today trying to find that part number and failed.
It’s not a lot of room but I would feel better about it than taking a 4” hole saw to mine. No functional risk but still hard to do.

Rivian R1T R1S Reclaiming empty powered tonneau cover space IMG_5832
 

Riviot

Well-Known Member
Joined
Mar 29, 2021
Threads
121
Messages
6,435
Reaction score
10,832
Location
Kitsap, WA
Vehicles
R1T
Clubs
 
Perfect thank you so much. I spent several hours today trying to find that part number and failed.
It’s not a lot of room but I would feel better about it than taking a 4” hole saw to mine. No functional risk but still hard to do.

IMG_5832.jpeg
Sending PM with removal instructions.
 

FormerRotor

Member
Joined
Mar 27, 2025
Threads
1
Messages
11
Reaction score
10
Location
USA
Vehicles
R1T
All done with the first version. [...]
IMG_2024.jpg

[...]General design and dimensions:
IMG_0011.webp
@camping123 Thanks for taking the time to innovate & discover for us and for posting all of your photos & measurements. These sorts of things are invaluable!

For our use case (constantly having some things mounted into the bed), we'll probably do 3 separate access panels (1 between each set of retainer bolts) so that we can still access the panels regardless of how much gear we have pinned against the front of the bed. We are considering (a) using fully sealed boxes and (b) incorporating the built-rite molle panel. Basic options would be...
1. Just use access panels w/ existing Rivian cover (cheap but reasonably clean & effective)
2. Make one to three of the openings attached to fully-sealed bins in the back for cleanness of appearance and water-tightness (though we'd inevitably lose some of the storage space).
3. Incorporate the panel(s) into modified built-right molle panels for the sake of mounting some of the additional more permanent accessories we'd be using. (most expensive but also most comprehensive solution)

It will be a week or two before I'll have time to put too much thought into it, but curious: does anyone have any preferences on a solution they'd like to see to replicate/refine?

[PS: I know its an old thread, but continuing the conversation here based on forum etiquette rather than starting up a new thread]
 
Last edited:

BigSkies

Well-Known Member
First Name
Brian
Joined
Sep 4, 2021
Threads
17
Messages
1,237
Reaction score
2,657
Location
Denver
Vehicles
R1T, Model Y
Clubs
 
@camping123 Thanks for taking the time to innovate & discover for us and for posting all of your photos & measurements. These sorts of things are invaluable!

For our use case (constantly having some things mounted into the bed), we'll probably do 3 separate access panels (1 between each set of retainer bolts) so that we can still access the panels regardless of how much gear we have pinned against the front of the bed. We are considering (a) using fully sealed boxes and (b) incorporating the built-rite molle panel. Basic options would be...
1. Just use access panels w/ existing Rivian cover (cheap but reasonably clean & effective)
2. Make one to three of the openings attached to fully-sealed bins in the back for cleanness of appearance and water-tightness (though we'd inevitably lose some of the storage space).
3. Incorporate the panel(s) into modified built-right molle panels for the sake of mounting some of the additional more permanent accessories we'd be using. (most expensive but also most comprehensive solution)

It will be a week or two before I'll have time to put too much thought into it, but curious: does anyone have any preferences on a solution they'd like to see to replicate/refine?

[PS: I know its an old thread, but continuing the conversation here based on forum etiquette rather than starting up a new thread]
I had missed this thread revival until now.

What are the chances that space could be used to secure rotopax water containers in a way they wouldn't slide around? I'd love to use that space for extra water storage if feasible.

Otherwise, I think option #2 is better than #1, simply because having stuff sliding around back there would get really annoying.
 

Sponsored

FormerRotor

Member
Joined
Mar 27, 2025
Threads
1
Messages
11
Reaction score
10
Location
USA
Vehicles
R1T
Agreed with regards to things rolling around, @BigSkies! It looks like our selected bed fit-out options (tonneau, gear, etc.) are going to limit access to this space. We did identify some "glove compartments" and pass-throughs designed for Boats that we thought would be a good fit, but are currently planning to allow the space to remain unused(ish) except for some solar wiring. Will update with links if we get the chance in case anyone wants to pick up where we left off.
 

ENVErider

Well-Known Member
First Name
Tyler
Joined
May 2, 2025
Threads
1
Messages
184
Reaction score
176
Location
Oakland, CA
Vehicles
2022 R1T Launch Edition
Occupation
Mechanical Engineer
Curiosity got the better of me and I wondered what exactly is in that powered tonneau cover space on the manual/no tonneau versions. How much or little of the hardware is there and how difficult is the space to access?

No surprise, all the hardware is gone. I didn't check to see if any of the wiring for the motor or open/close button was still present. But I was surprised to see how easy it was to access the empty cavity. Just 8 plastic covers and bolts to remove the back panel in the bed and you can gain access to the space.

It's not a huge amount of space and I'm guessing that water could run through there, but it would be handy to store some tools or recovery gear. I'm thinking of making a new panel to go here out of wood or plastic with a hinged door and tumbler lock. The stock panel dimensions are roughly 48.25" x 17.5" and it sticks out about 1.5" at the bottom which I may not try to copy.

Looking to get some feedback from the community on any other ideas or suggestions for using the space.


IMG_1975.jpg

IMG_1971.jpg


Corner of the space with the one way flaps into the cabin. Lifting the flaps you can see the foam cushioning of the rear seats. Too bad the rear seat backs don't fold. That would be convenient access.

IMG_1973.jpg


Part number info for the plastic bed panel. If I could source another panel, I'd cut one of those up instead of making one out of plastic or wood.

Screenshot 2023-03-02 at 8.46.48 AM.png
Thanks for sharing the photos; it's great to see what's inside that cavity. I could see an opportunity for either a split back panel, hinged above the Rivian logo, or a grooved vertical track to slide the top part down like a sleuth gate. While you could use some nice stained plywood, getting a second panel to cut from a junkyard might have good results; you can go back to the original if you need to sell or it doesn't turn out looking nice. Would love to see a posting of a completed retrofit project.
Sponsored


Top