joey128
Active Member
- First Name
- Joey
- Joined
- Mar 20, 2023
- Threads
- 5
- Messages
- 40
- Reaction score
- 31
- Location
- San Francisco, CA
- Vehicles
- R1S, Audi A8 & Q7, Ford Exc PSD
- Occupation
- Tech
- Thread starter
- #1
There has been many posts about the wimpy horn so I won’t get into that. And, there are plenty of posts describing how to remove the frunk tub so refer to those for instructions. Total cost ~$50 and 2 hrs of time.
Here’s how my horn sounds after (just a quick blast to not annoy neighbors):
The video speaks for itself about the significant improvements. Not only can it now be clearly heard by other drivers but also as a theft deterrent as part of the car alarm.
Parts:
1. Mini 2-tone air horn
https://a.co/d/f3EMSTb
2. (1 set) DT 2 Pin wire harness - for horn connector
https://a.co/d/c87qXV9
3. (1) M6 1.0 (SS) lock nut - to secure relay to existing stud
4. (1) Round head M8 1.25 SS bolt - to secure horn to wheel well
5. (2) SS washers - for mounting the horn
6. 2' of 16 gauge tinned copper wire and water-tight crimp connectors
Horn location: Mounted horn to the plastic wheel well which required drilling a 1/4” hole (see photo).

Crimped mini horn relay to Male DT harness —> to plug into vehicle’s wiring (horn switch)
Mini horn relay crimped to a Y connect with 1 end to Female DT harness to plug original horn and the other end to the new mini horn. (That’s right, I am re-using the existing horn AND adding an additional 2-tone mini air horn)
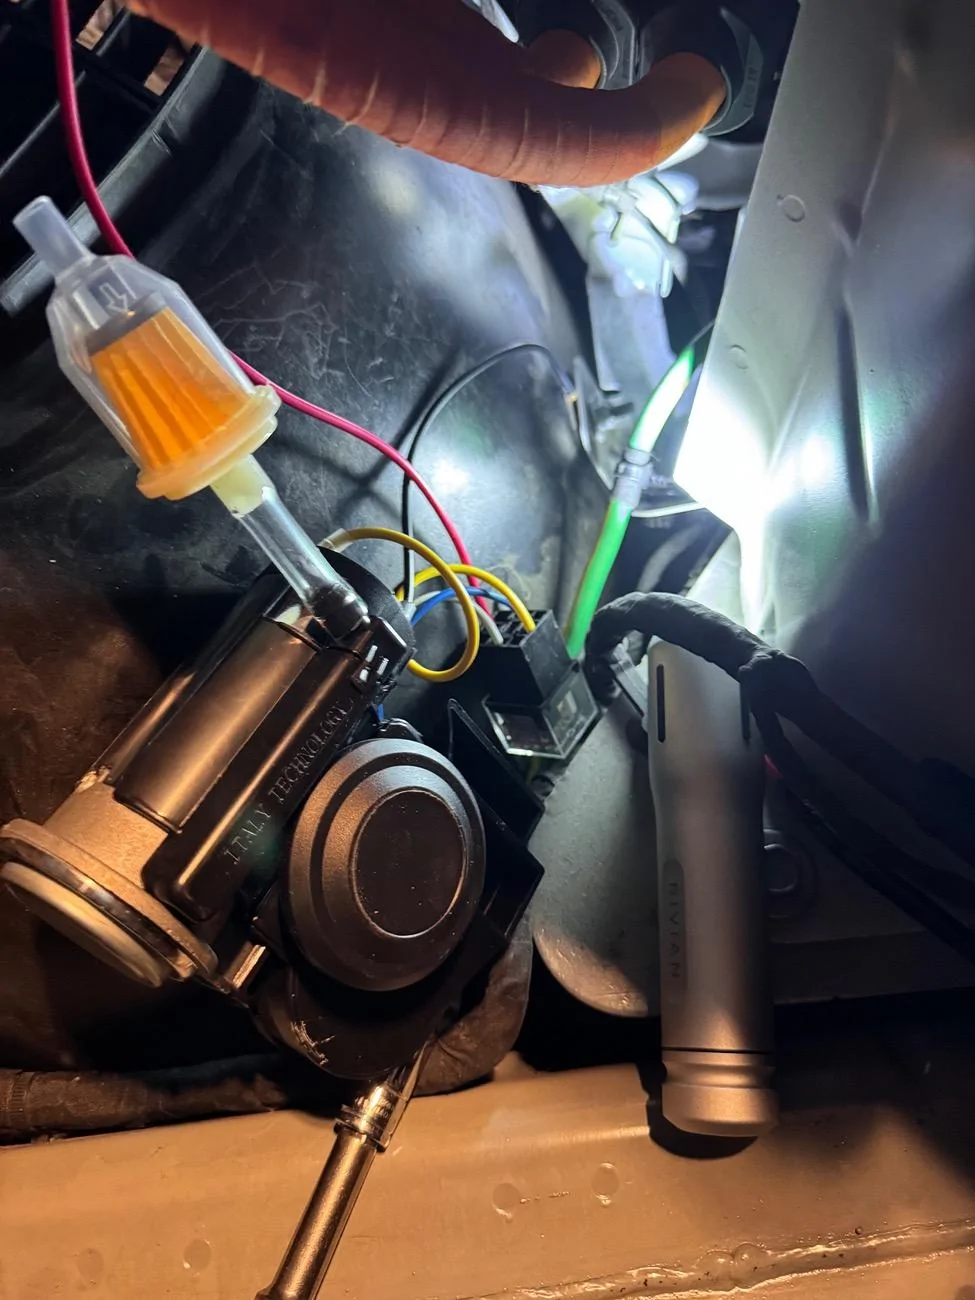
Mini horn relay location: I mounted the relay underneath the 12v distribution block.

There is a cavity on the underside of the block with a M6 threaded stud (see photos). I bolted the relay to this stud as well as ran a (-) ground off of it to the horn. I also feed (+) power from the relay to the 12v block.
So, existing horn switch —> relay —> Y connector to original and new horns.
Relay is feed (+) from the 12v block and grounded (-) to the stud.
- Used DT connectors to horn switch and original horn, so no splicing into any wiring
- All wiring between the relay to horns were cleanly zipped tied down to look as OEM as possible.
Here’s how my horn sounds after (just a quick blast to not annoy neighbors):
The video speaks for itself about the significant improvements. Not only can it now be clearly heard by other drivers but also as a theft deterrent as part of the car alarm.
Parts:
1. Mini 2-tone air horn
https://a.co/d/f3EMSTb
2. (1 set) DT 2 Pin wire harness - for horn connector
https://a.co/d/c87qXV9
3. (1) M6 1.0 (SS) lock nut - to secure relay to existing stud
4. (1) Round head M8 1.25 SS bolt - to secure horn to wheel well
5. (2) SS washers - for mounting the horn
6. 2' of 16 gauge tinned copper wire and water-tight crimp connectors
Horn location: Mounted horn to the plastic wheel well which required drilling a 1/4” hole (see photo).

Crimped mini horn relay to Male DT harness —> to plug into vehicle’s wiring (horn switch)
Mini horn relay crimped to a Y connect with 1 end to Female DT harness to plug original horn and the other end to the new mini horn. (That’s right, I am re-using the existing horn AND adding an additional 2-tone mini air horn)
Mini horn relay location: I mounted the relay underneath the 12v distribution block.

There is a cavity on the underside of the block with a M6 threaded stud (see photos). I bolted the relay to this stud as well as ran a (-) ground off of it to the horn. I also feed (+) power from the relay to the 12v block.
So, existing horn switch —> relay —> Y connector to original and new horns.
Relay is feed (+) from the 12v block and grounded (-) to the stud.
- Used DT connectors to horn switch and original horn, so no splicing into any wiring
- All wiring between the relay to horns were cleanly zipped tied down to look as OEM as possible.
Sponsored
Last edited: