R1Thor
Well-Known Member
- First Name
- Joe
- Joined
- Aug 9, 2023
- Threads
- 8
- Messages
- 1,537
- Reaction score
- 2,426
- Location
- Lancaster, PA
- Vehicles
- 23QM R1T, Limestone + Ocean Coast, 21" & UBS
- Occupation
- Mechanical Engineering Lead
- Thread starter
- #1
Someone had asked about options for Mud Guards, here https://www.rivianforums.com/forum/threads/mud-guards-options.18331/
Which reminded me that I had splash guards on my last 2 vehicles. A 2014 STI with Rally Armor mudflaps and OEM Volvo Splash Guards on my 2018 Volvo V60. I really liked the Rally Armors, so I recommended them. In came some debate within that thread (linked above), and I decided "what the heck, let me try these out for the R1T." From order to delivery was 2 days (nice and fast--but then for that price point, I would hope it wasn't super slow!)
I understand taste is subjective, but I really dig them. My only initial disappointment is that they didn't have a Rivian-matching Yellow logo, so I did some back and forth with customer service and they offered up what I ended up buying, and I think it works well with the rest of the accents.
SO, I post this here for anyone interested in seeing what they'd look like on their Rivian. Granted, when I bought a kit back in the day for my STI, I think they were closer to $110. Nowadays, the sticker shock is pretty huge (almost $300). So, time will tell if they were worth it, but in my experience anyway, they were excellently robust and lasted the 6 years I owned my STI (every time I washed the car, they looked brand new again). Hopefully I have the same luck here.


Rally Armor does cut relief for the front aero


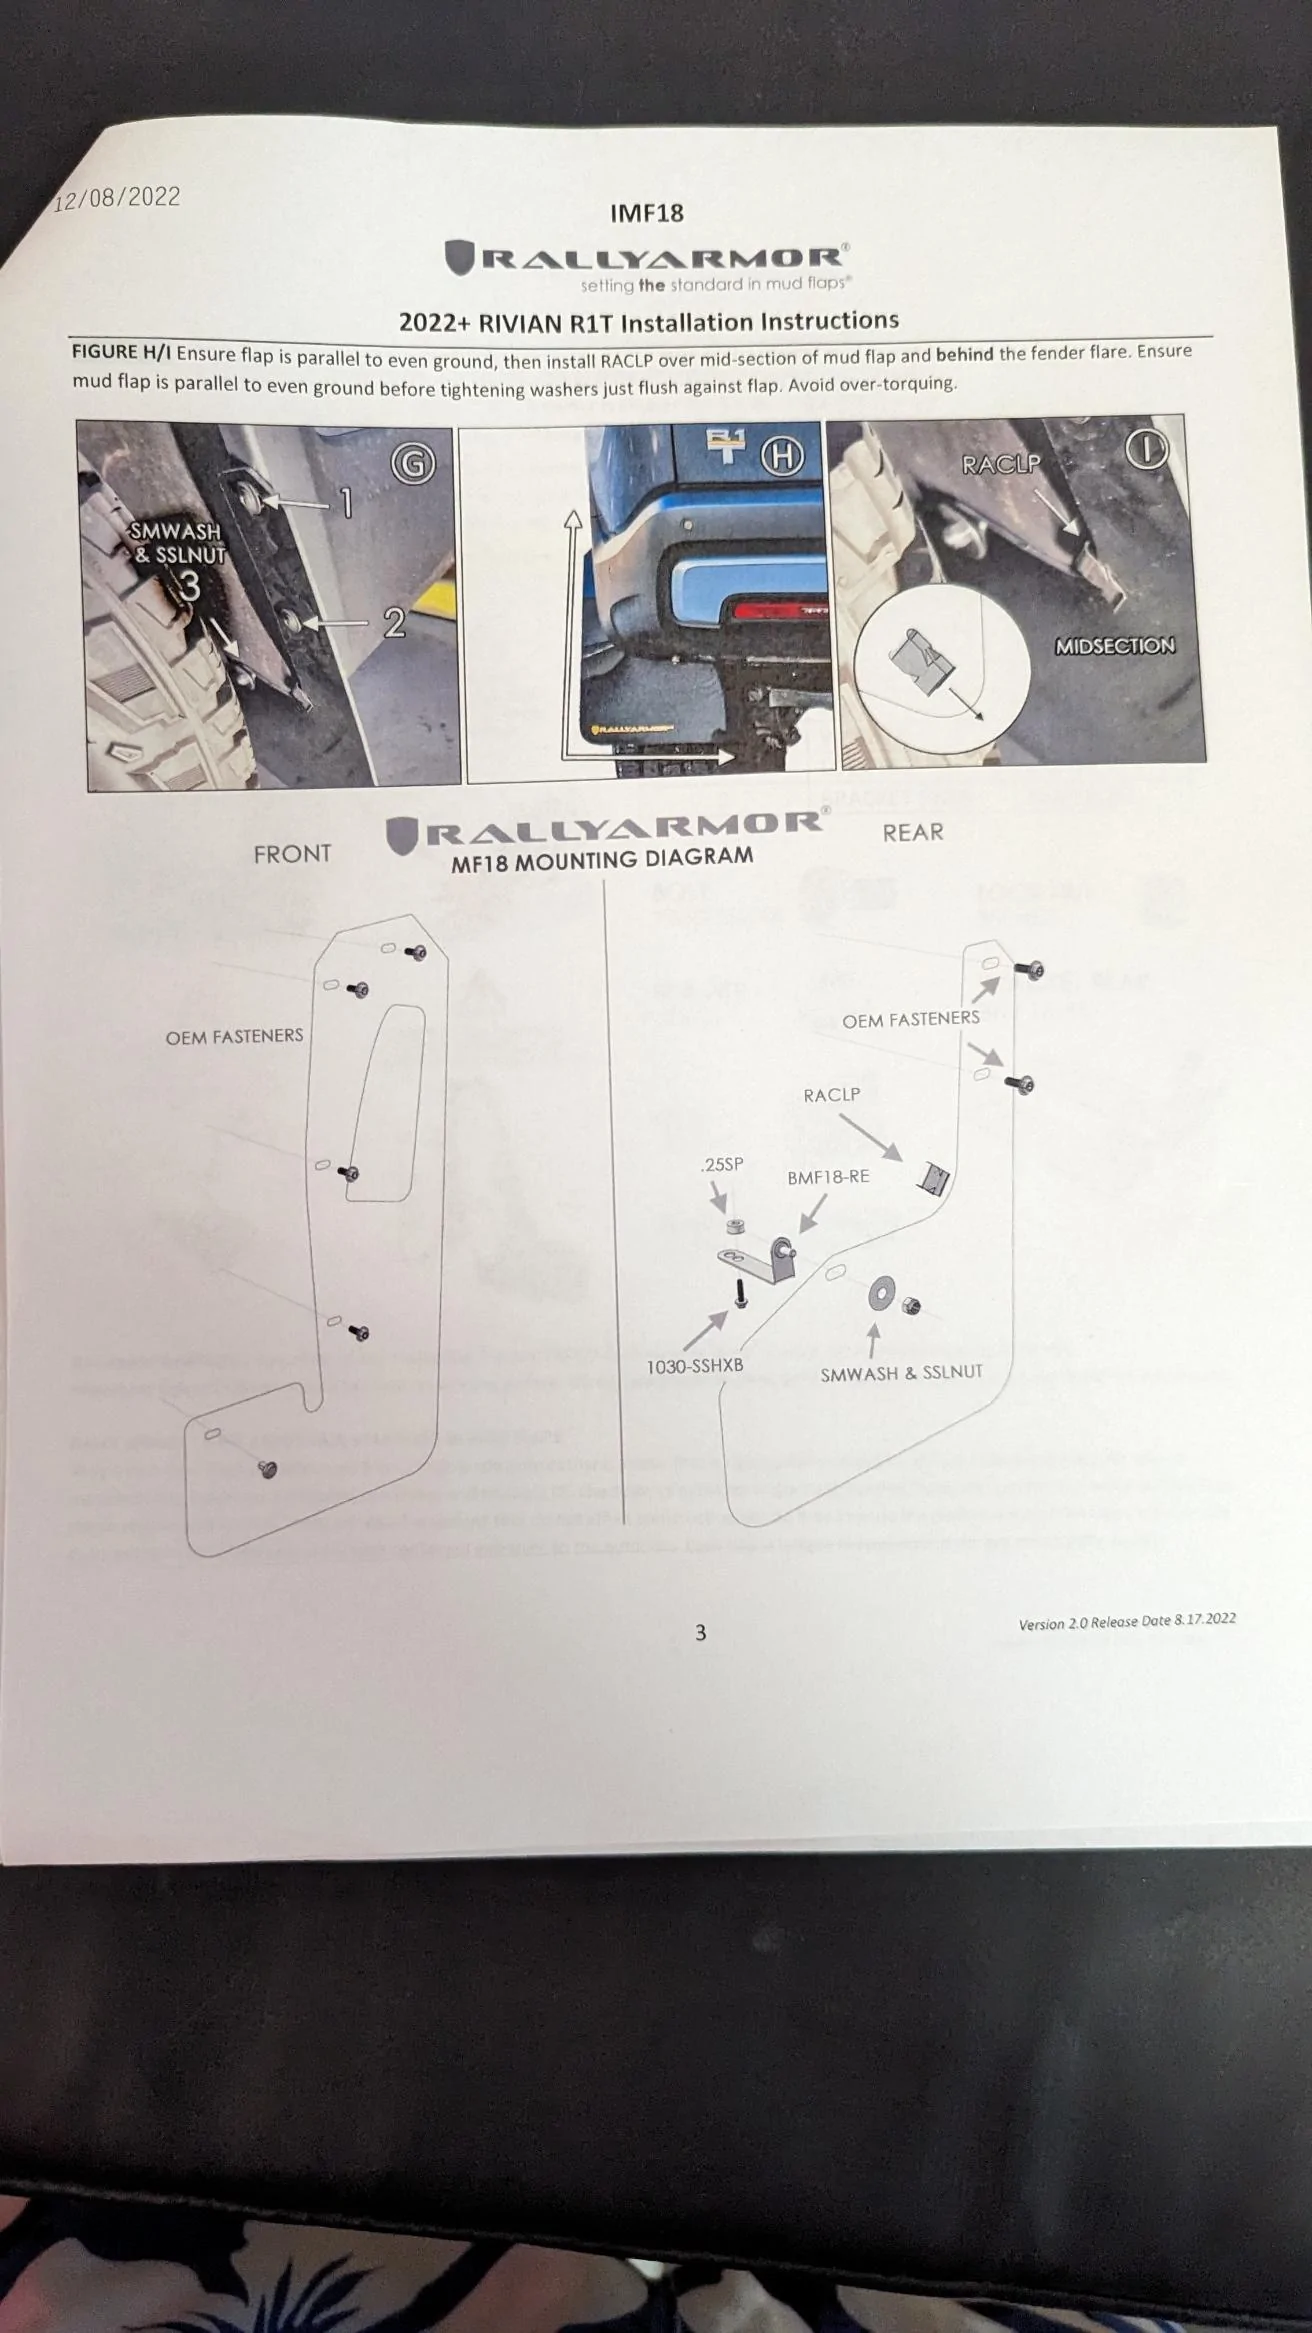
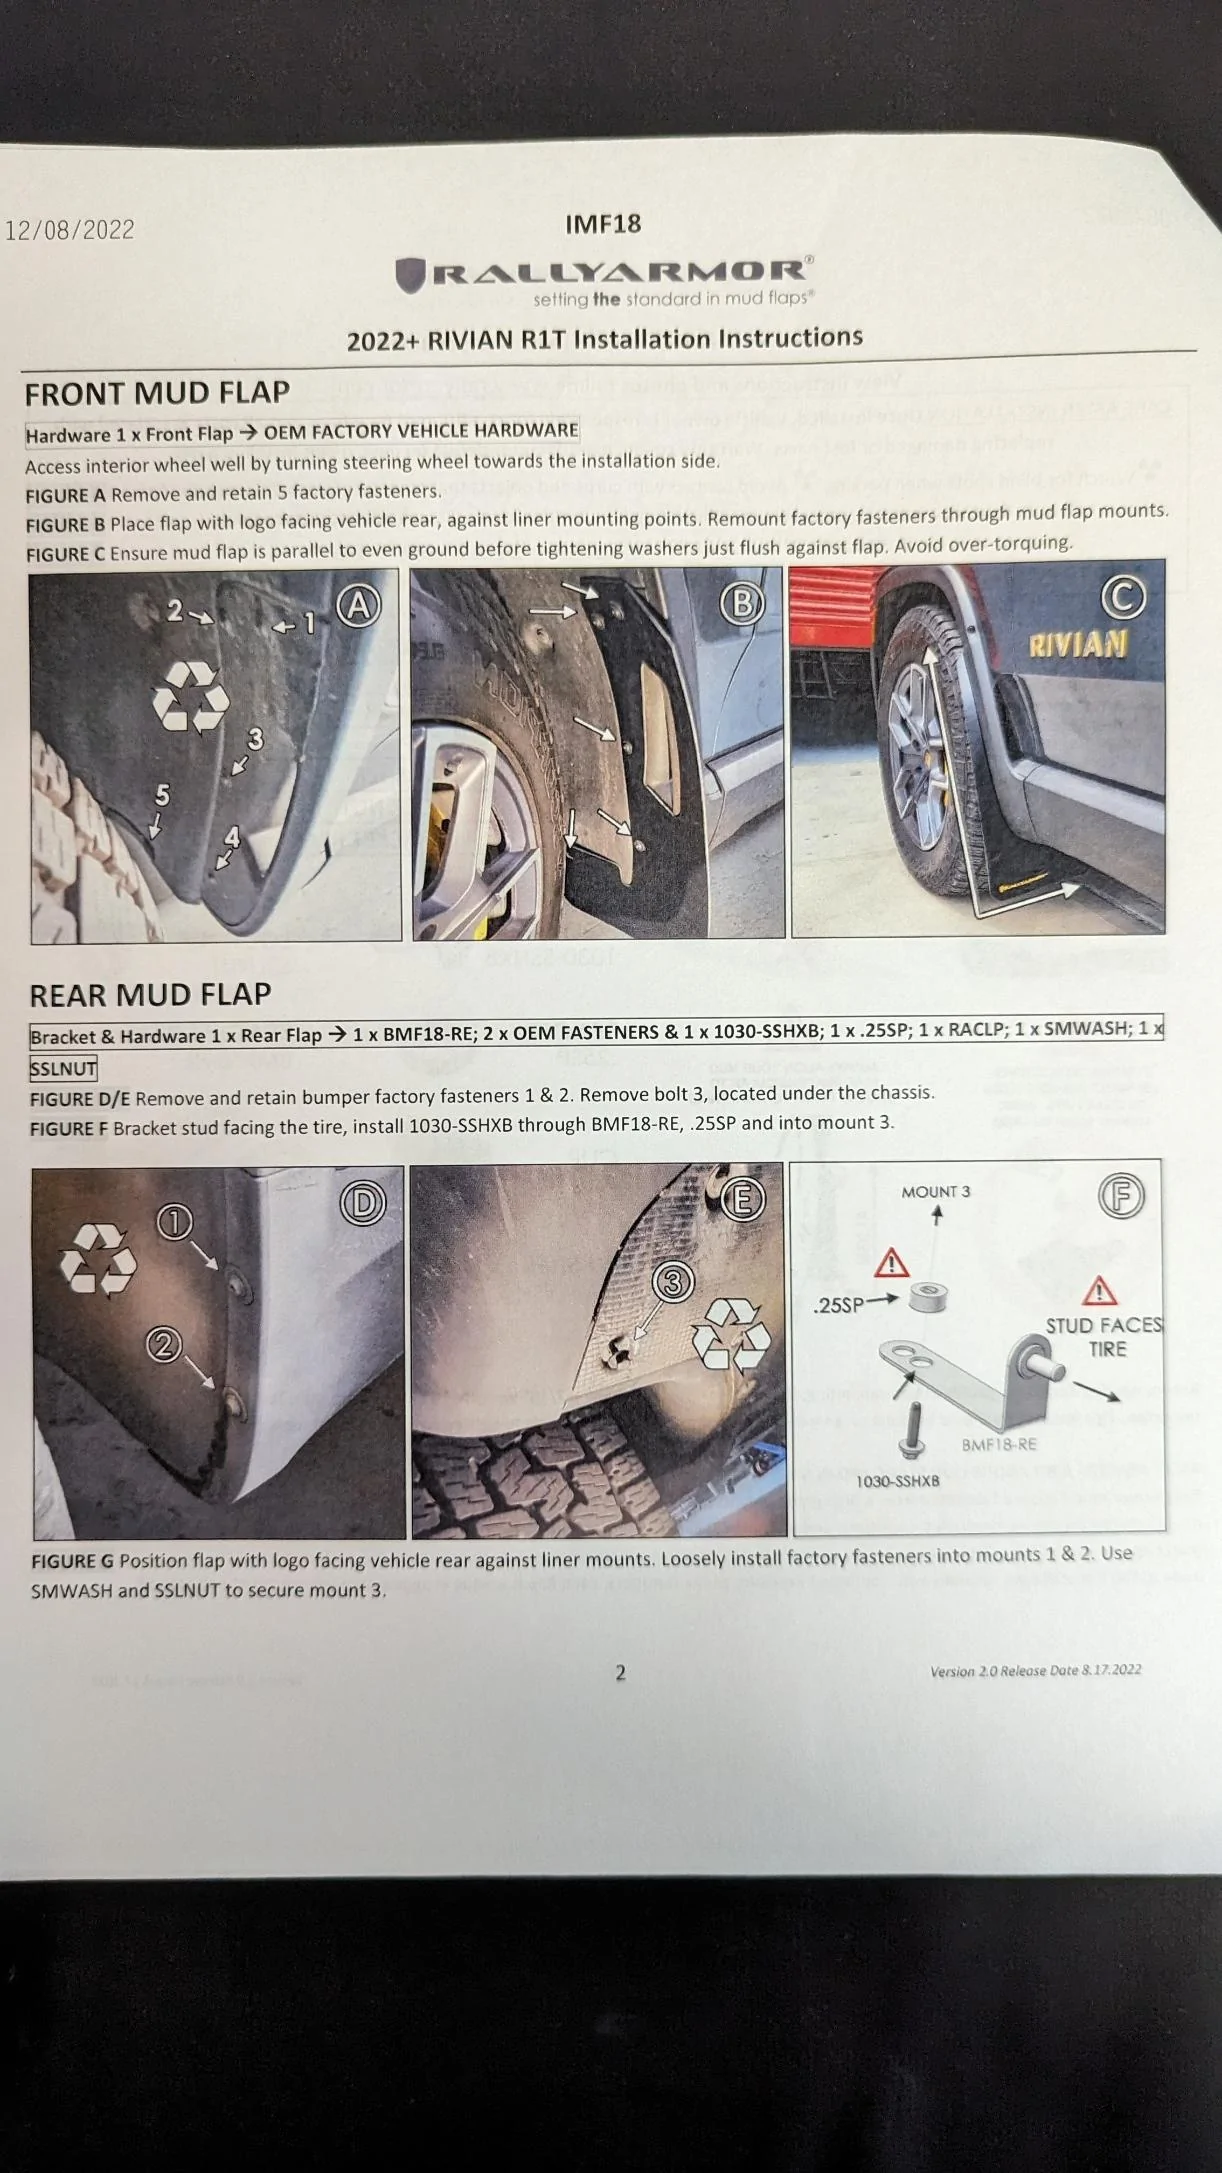
The front flaps reuse all factory hardware.
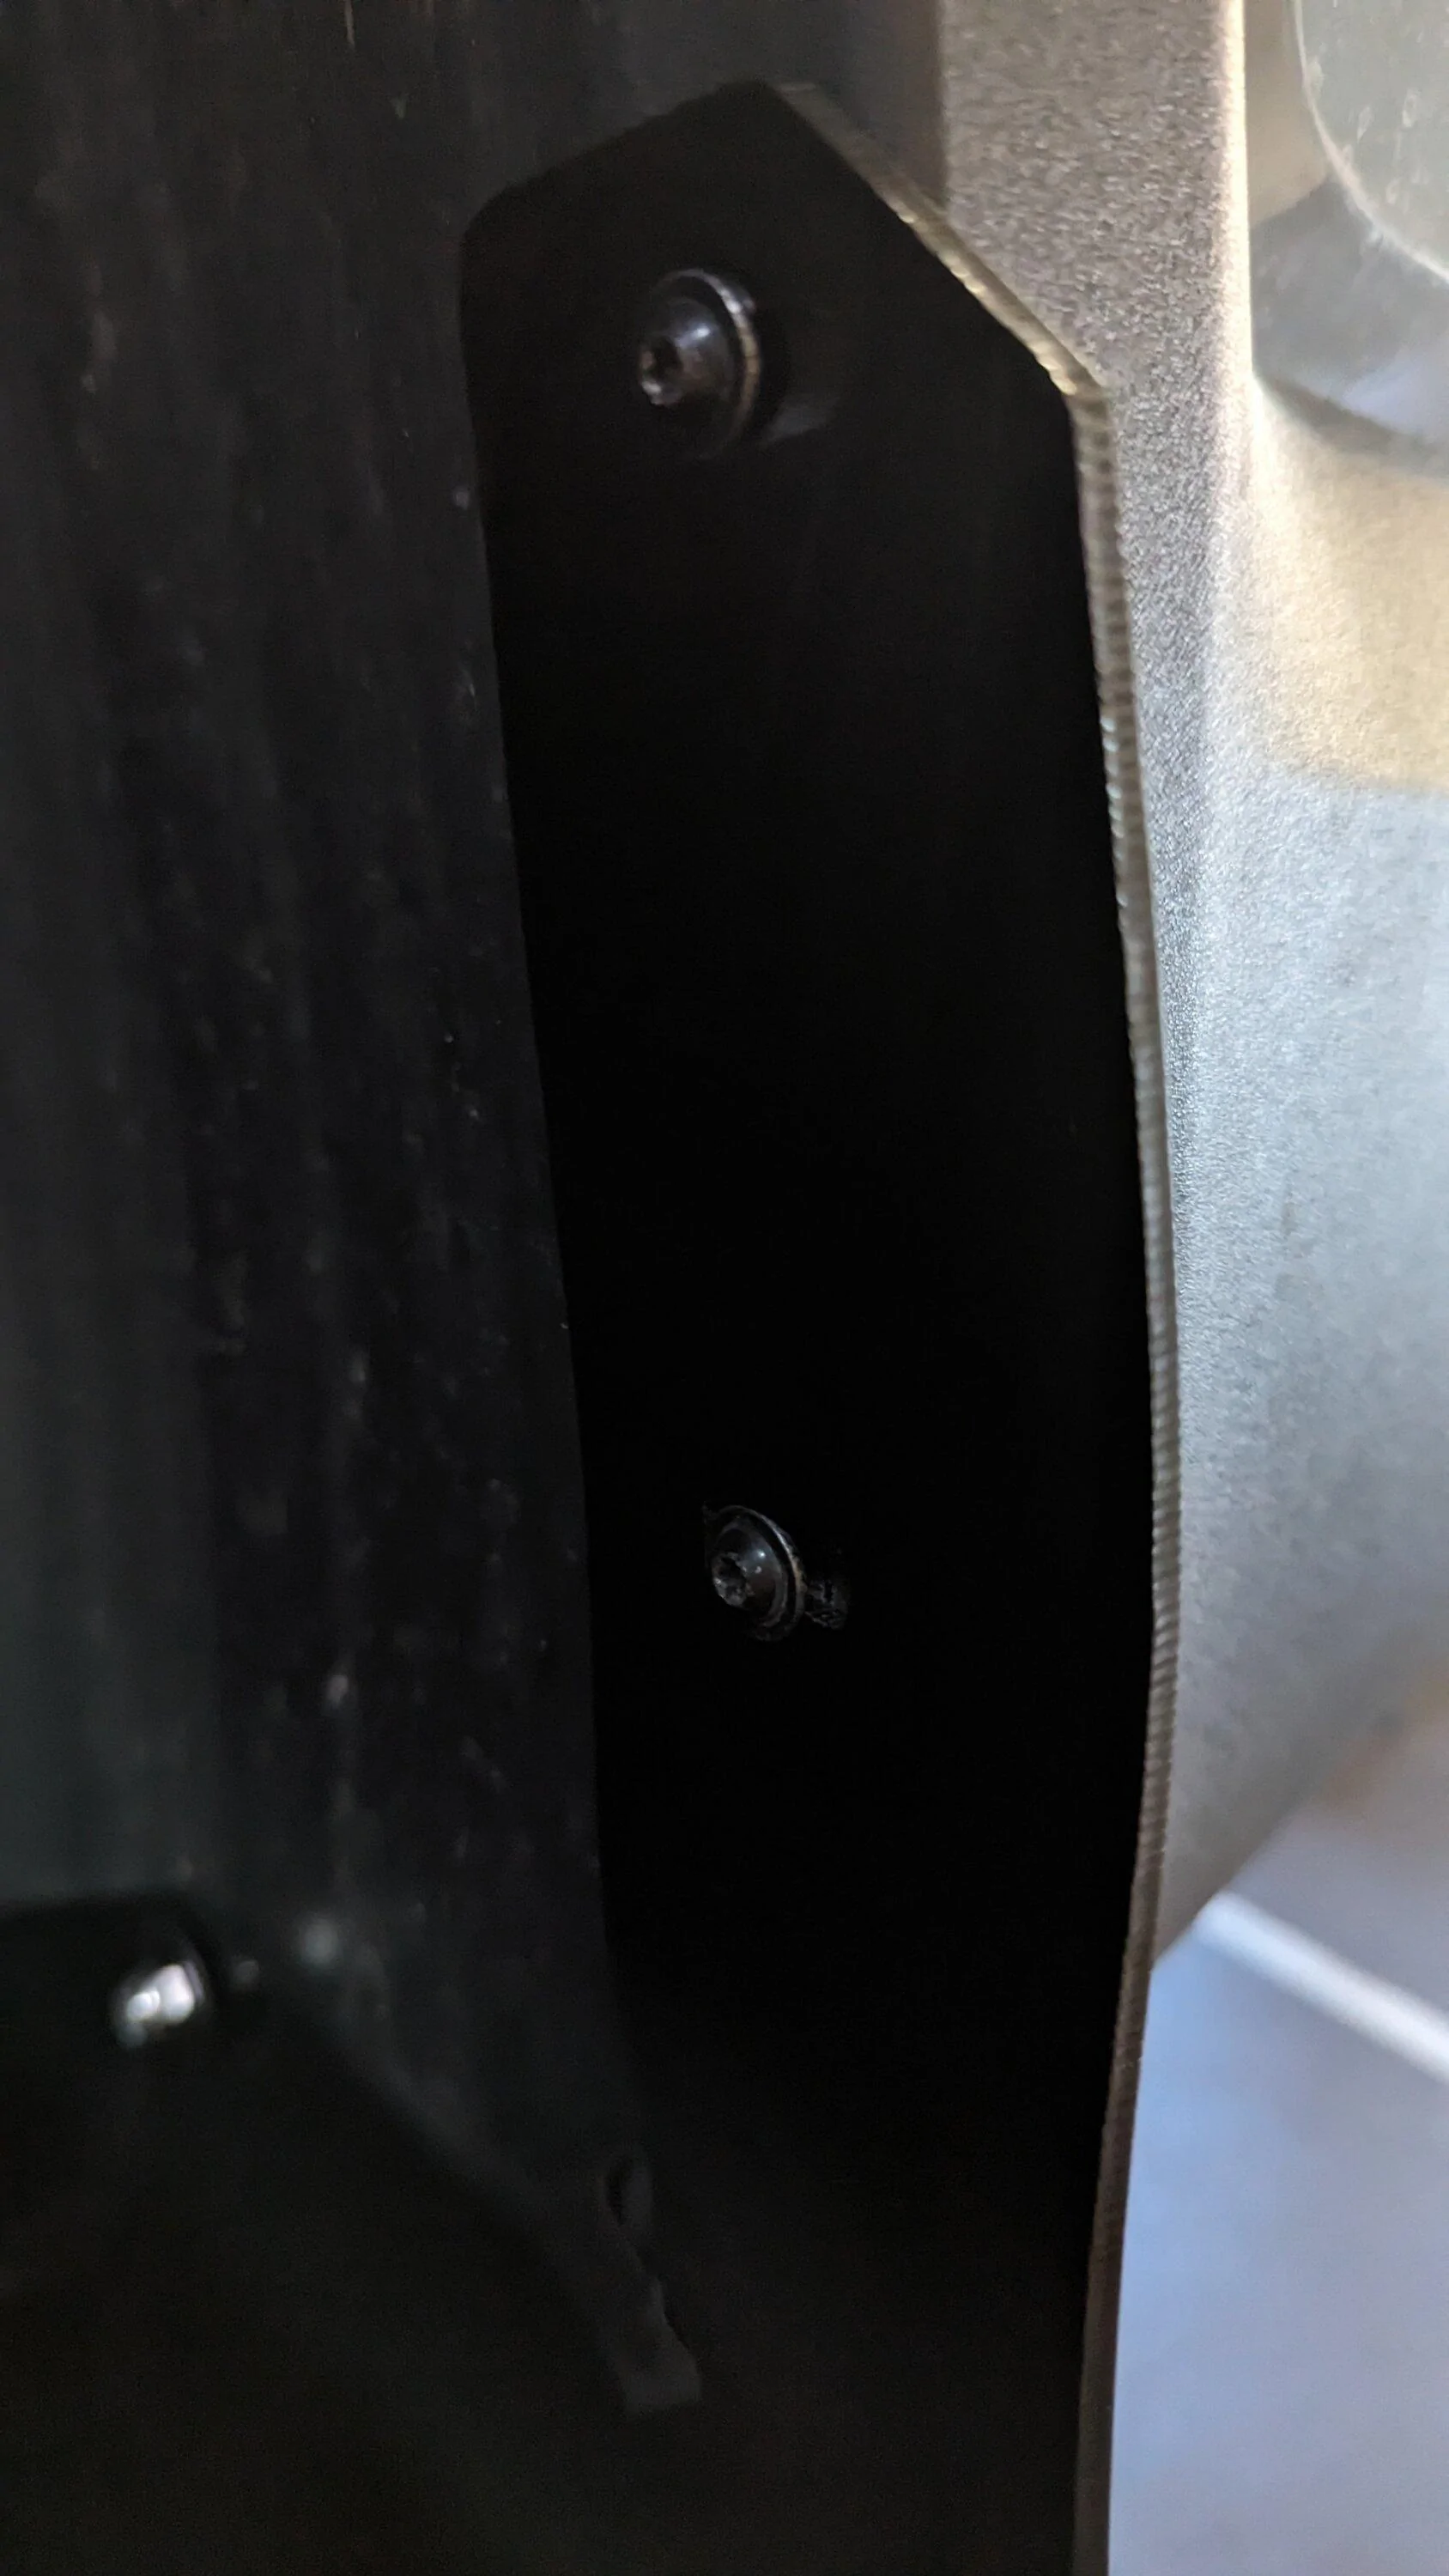
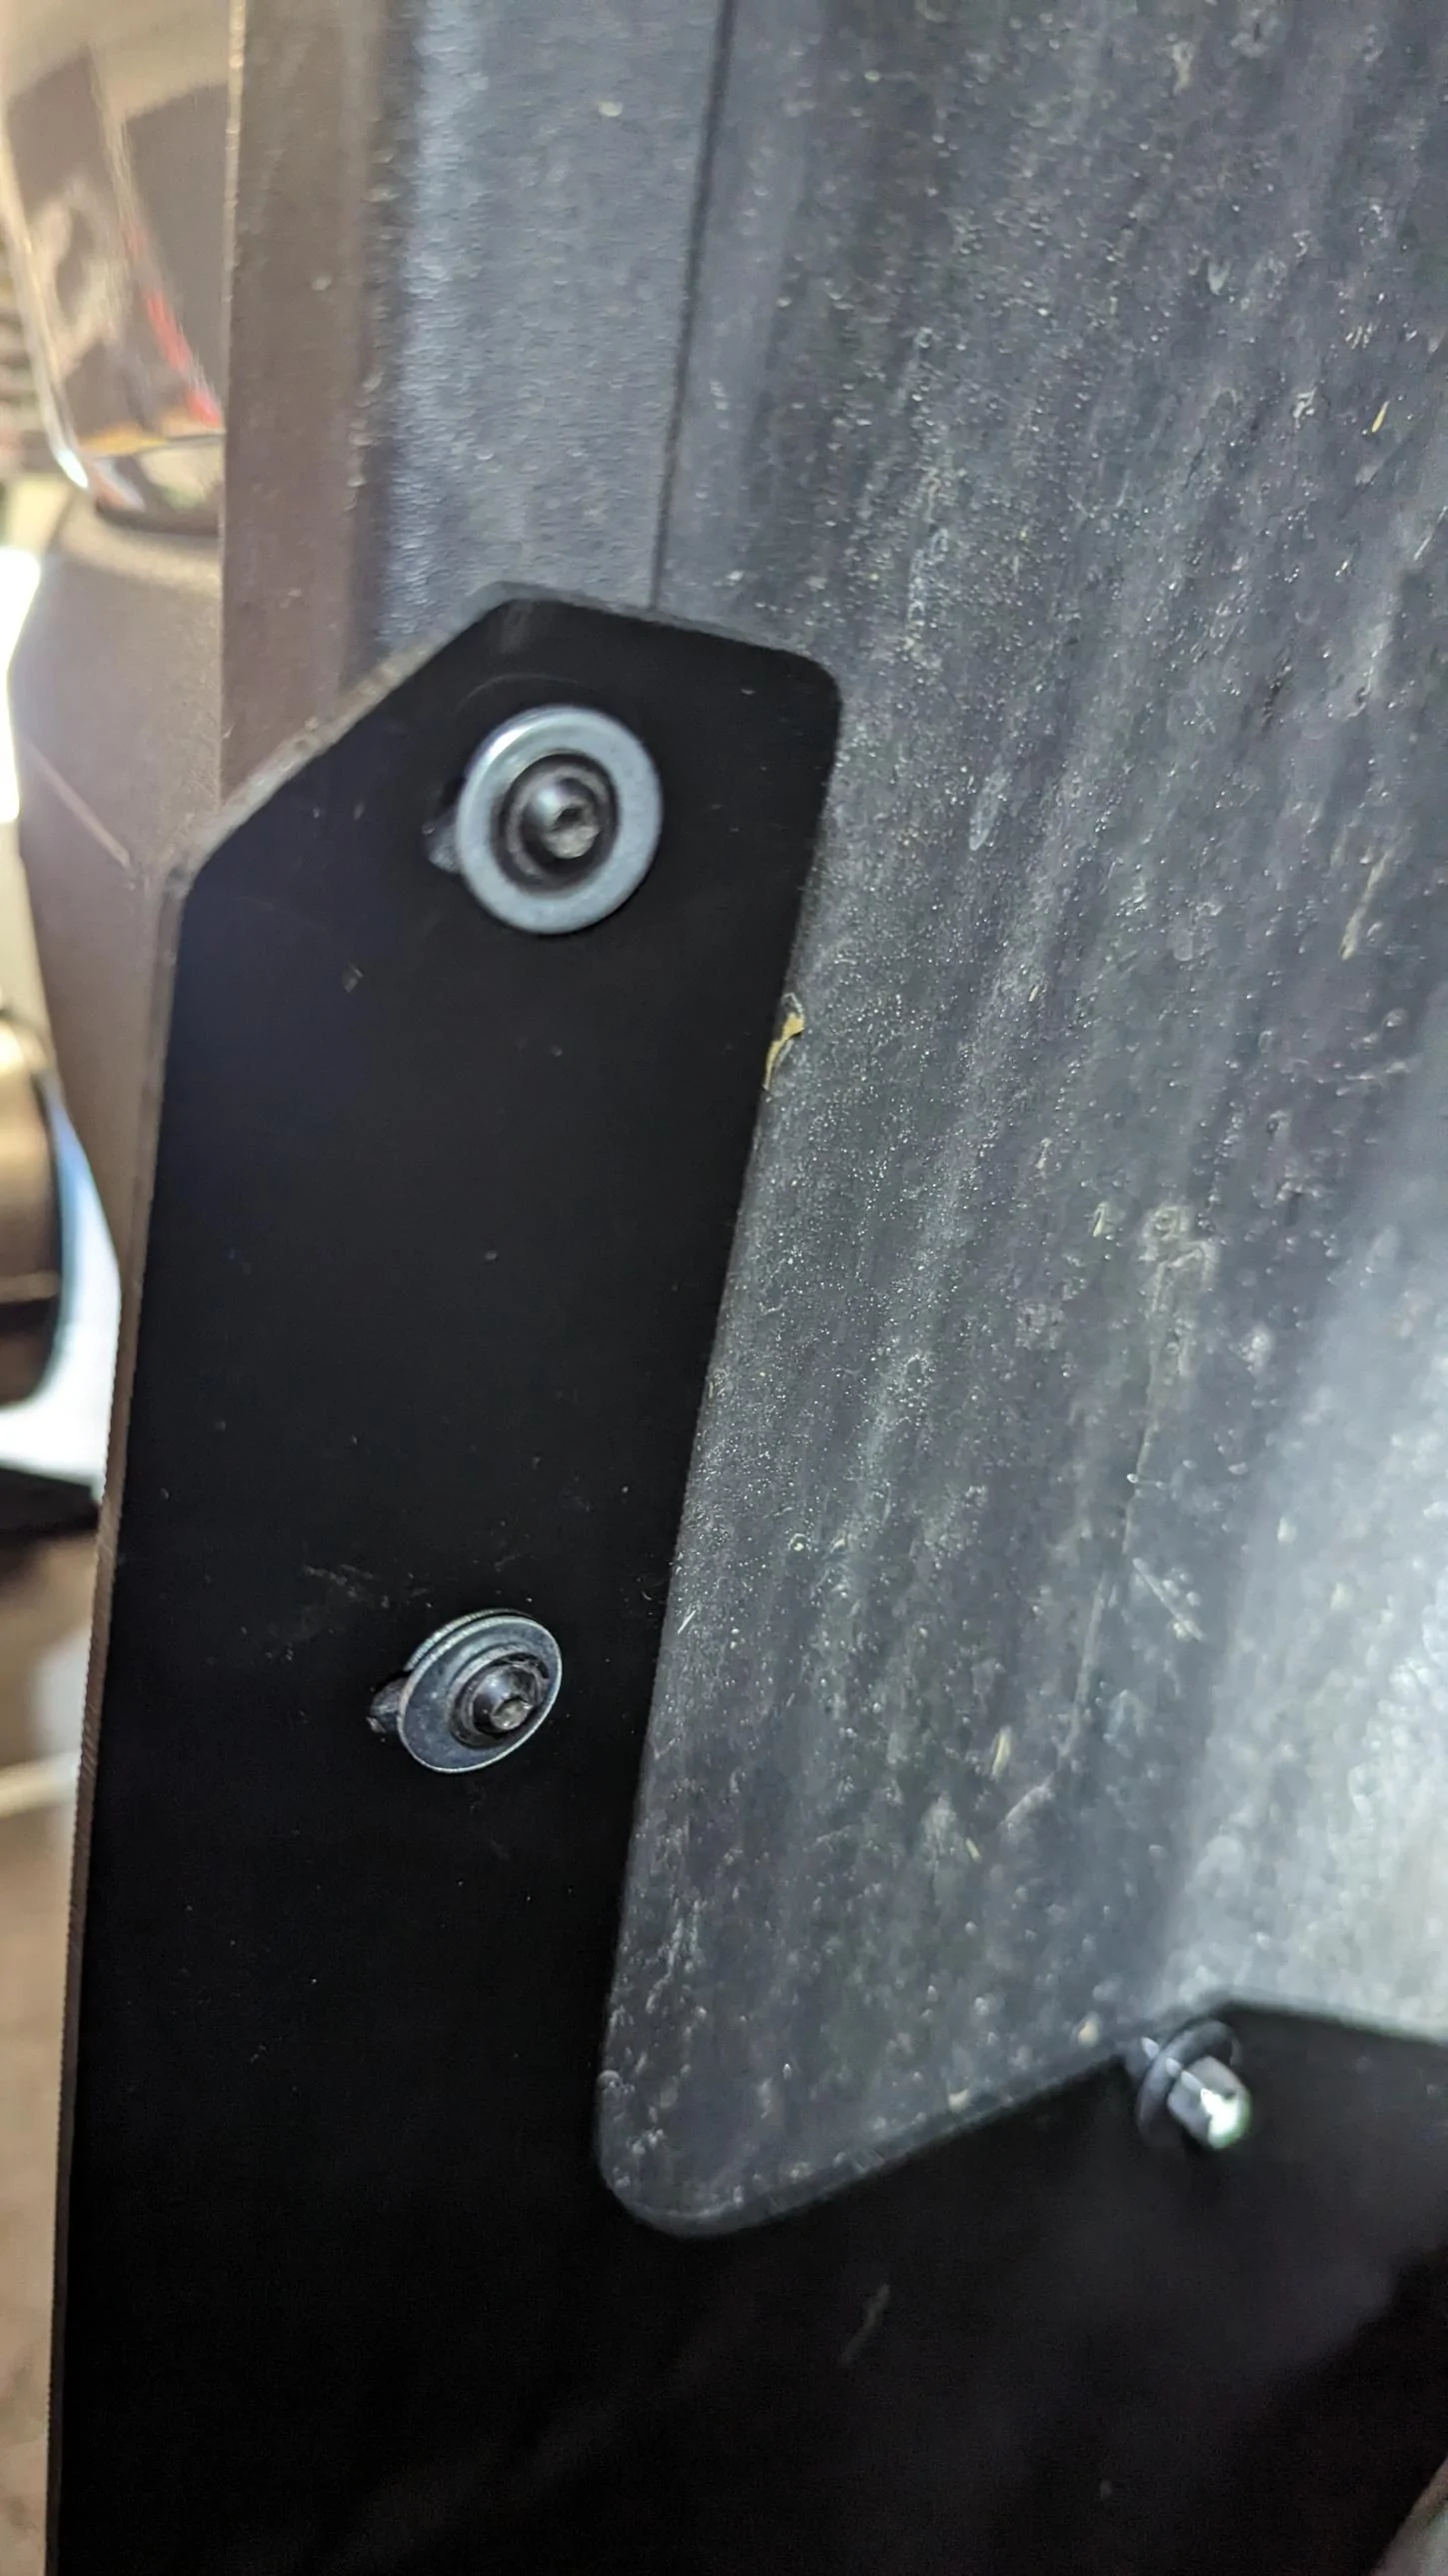
The rear has a bracket and clip for the bottom, and reuses the factory hardware for the top. I did add 2 washers of my own (the stainless in this photo) because the factory Rivian hardware outer diameter was just a little too close to the slot height of the flaps. It overlapped...enough..but I felt like a good tug might move the hardware thru the slot in a way as to 'release' them. Probably very low risk, but I have tons of hardware laying around, so I didn't mind giving up 4 washers:

Instructions were straightforward and it took me probably 15 minutes total to install.
They recommended turning the wheels for easy access to install the fronts, but I honestly didn't need to. I had right angle ratchets and a nice torx bit set. I just set the R1T to its highest height and had plenty of space.
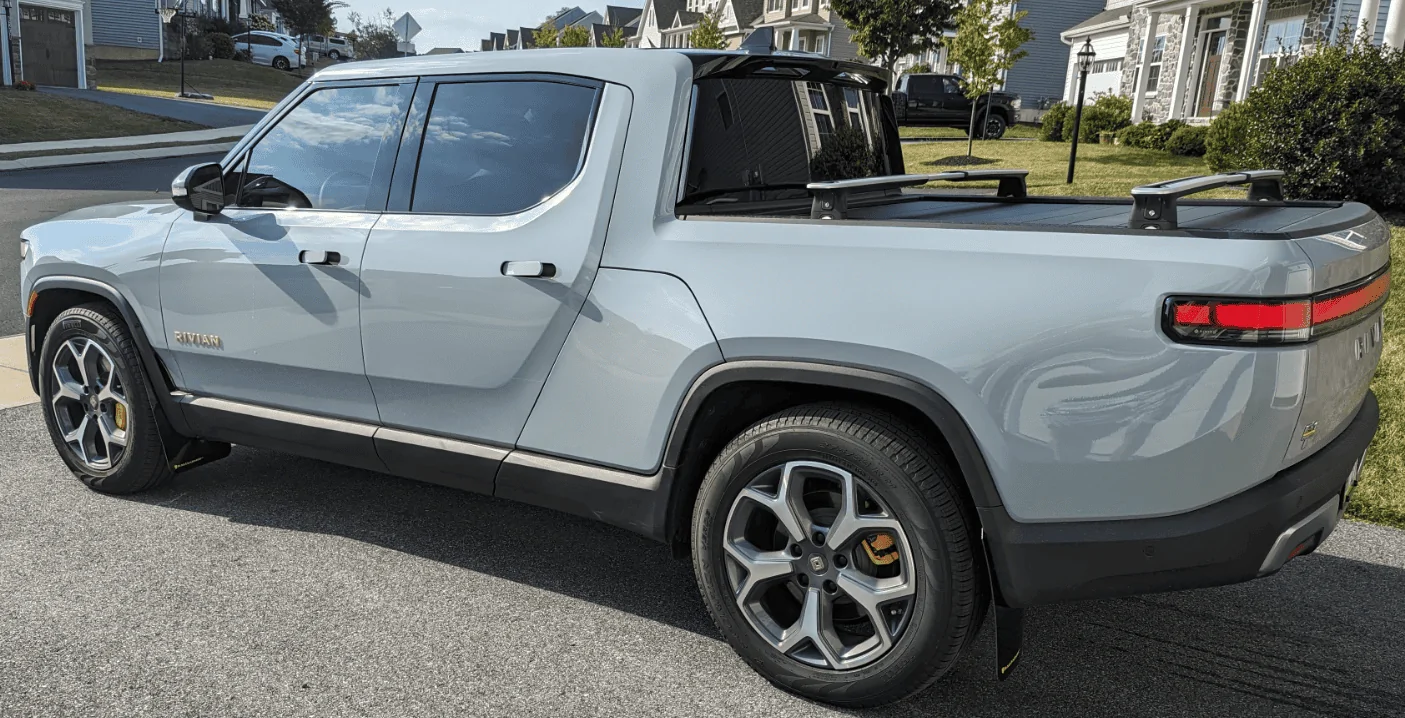
Which reminded me that I had splash guards on my last 2 vehicles. A 2014 STI with Rally Armor mudflaps and OEM Volvo Splash Guards on my 2018 Volvo V60. I really liked the Rally Armors, so I recommended them. In came some debate within that thread (linked above), and I decided "what the heck, let me try these out for the R1T." From order to delivery was 2 days (nice and fast--but then for that price point, I would hope it wasn't super slow!)
I understand taste is subjective, but I really dig them. My only initial disappointment is that they didn't have a Rivian-matching Yellow logo, so I did some back and forth with customer service and they offered up what I ended up buying, and I think it works well with the rest of the accents.
SO, I post this here for anyone interested in seeing what they'd look like on their Rivian. Granted, when I bought a kit back in the day for my STI, I think they were closer to $110. Nowadays, the sticker shock is pretty huge (almost $300). So, time will tell if they were worth it, but in my experience anyway, they were excellently robust and lasted the 6 years I owned my STI (every time I washed the car, they looked brand new again). Hopefully I have the same luck here.
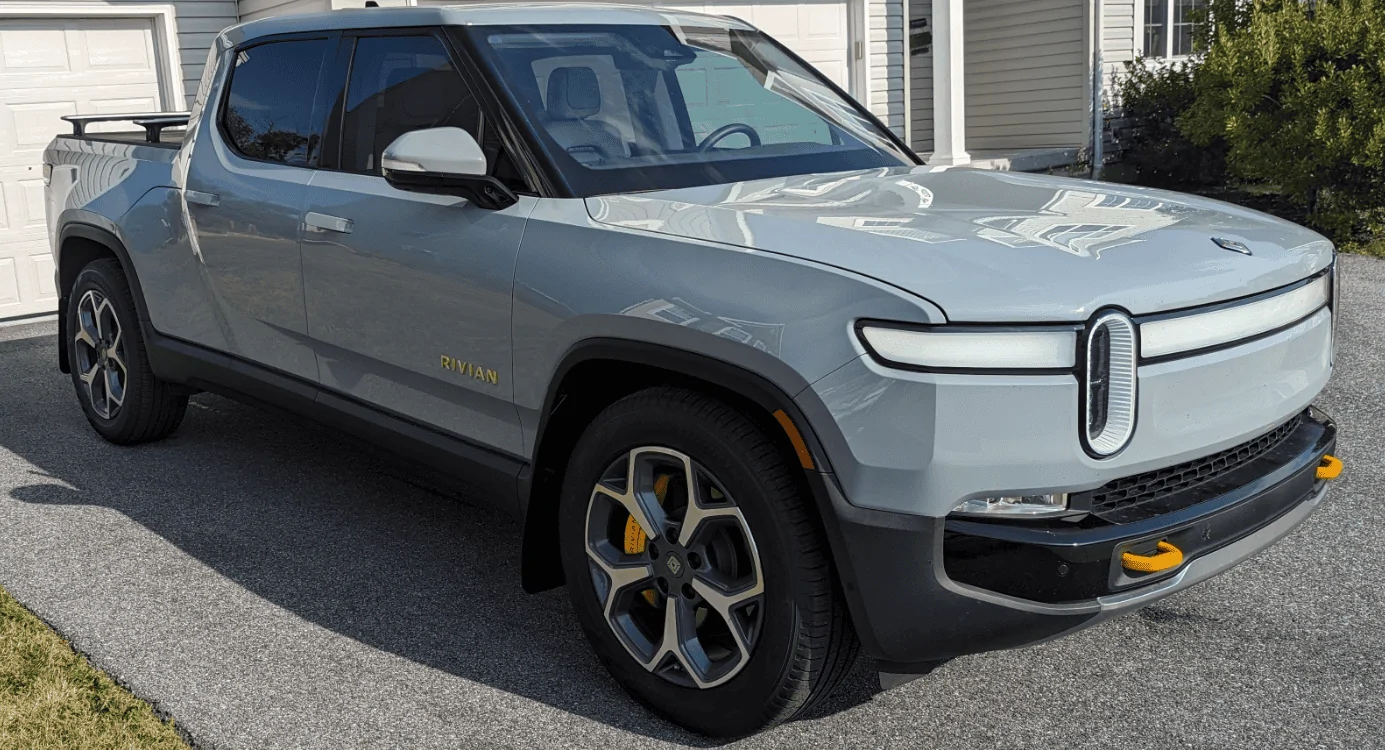
Rally Armor does cut relief for the front aero
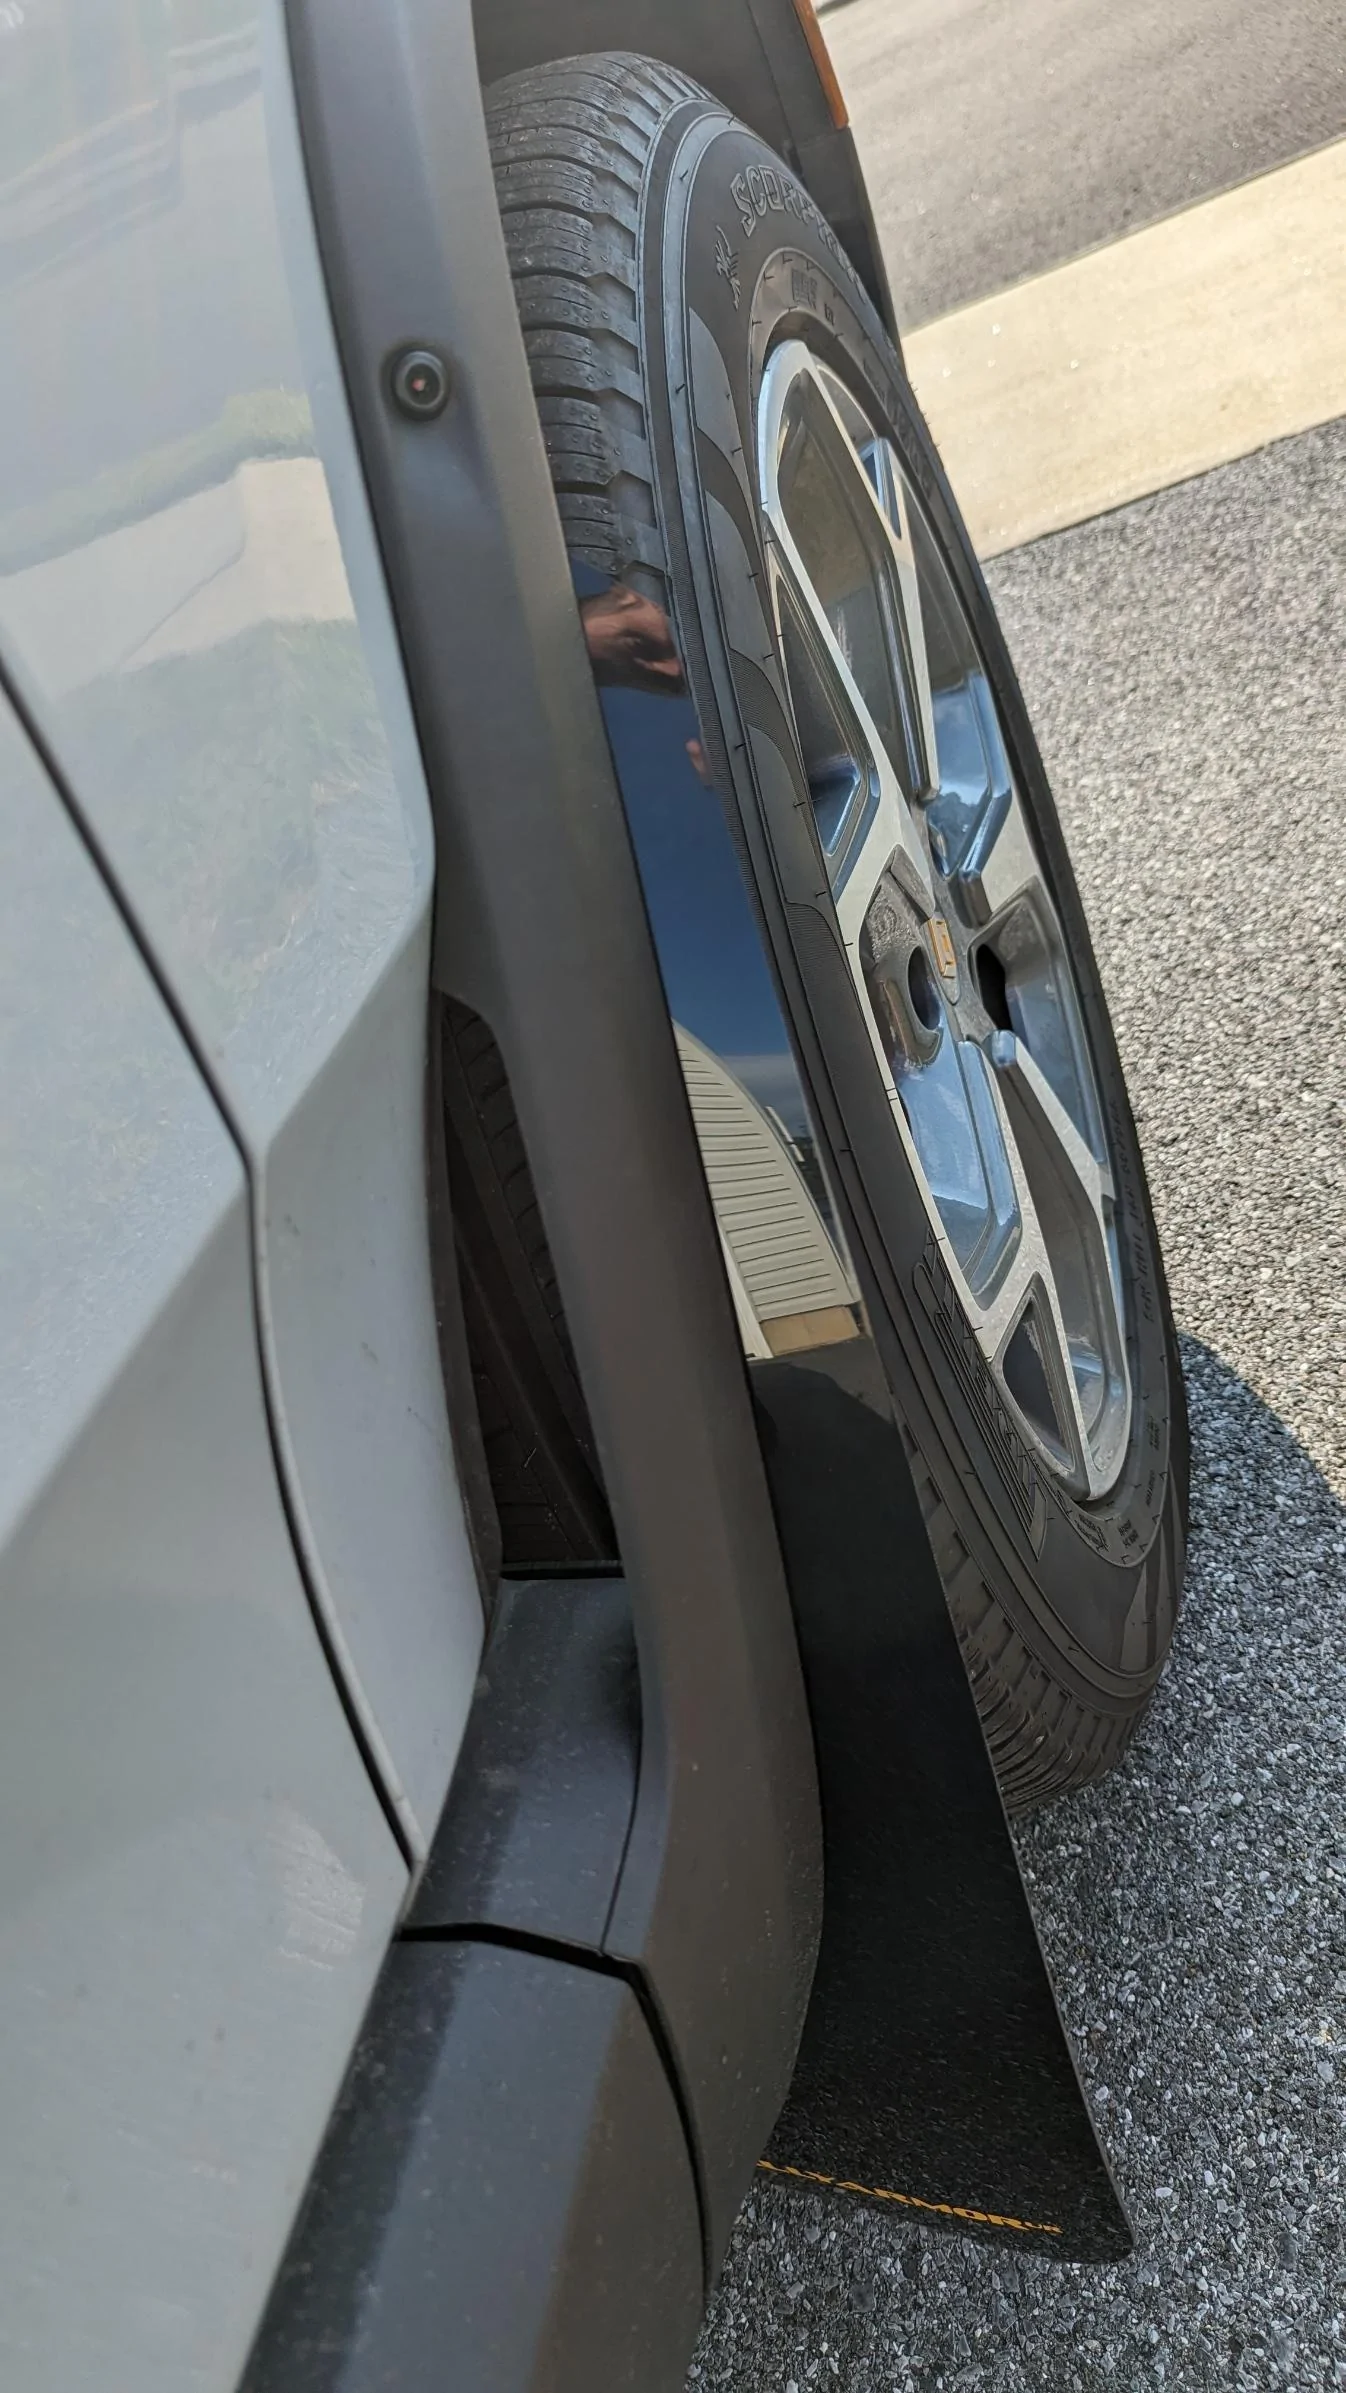
The front flaps reuse all factory hardware.
The rear has a bracket and clip for the bottom, and reuses the factory hardware for the top. I did add 2 washers of my own (the stainless in this photo) because the factory Rivian hardware outer diameter was just a little too close to the slot height of the flaps. It overlapped...enough..but I felt like a good tug might move the hardware thru the slot in a way as to 'release' them. Probably very low risk, but I have tons of hardware laying around, so I didn't mind giving up 4 washers:
Instructions were straightforward and it took me probably 15 minutes total to install.
They recommended turning the wheels for easy access to install the fronts, but I honestly didn't need to. I had right angle ratchets and a nice torx bit set. I just set the R1T to its highest height and had plenty of space.
Sponsored
")