Kelvn
Well-Known Member
- Thread starter
- #1
2026-01-19 UPDATE
So lots of things have been moving on this project/effort. I received and have been running the new "secret" solution for about a week now and I feel ready to share the latest.
As mentioned before, this has been a free time home project so new knowledge and resources have been gained with each implementation. The following was found:

I learned that I can get sheet metal bent. This opened up the new solution. It is a direct replacement for the Awning side Kammok bracket.
Note two things:
Not all things are positive however, this solution is a more complicated solution and the costs are a bit more than the original plate only solution. Includes new extended bolts, essentially with the Rivian x Kammok awning and the Kammok side mount kit, you should not need any additional HW to make this work.
These are now on Etsy, for transparency, price has changed to cover store fees: https://www.etsy.com/listing/4458574486/side-mount-adapter-bracket-for-rivian-x
Feel free to message me here too.
ORIGINAL POST
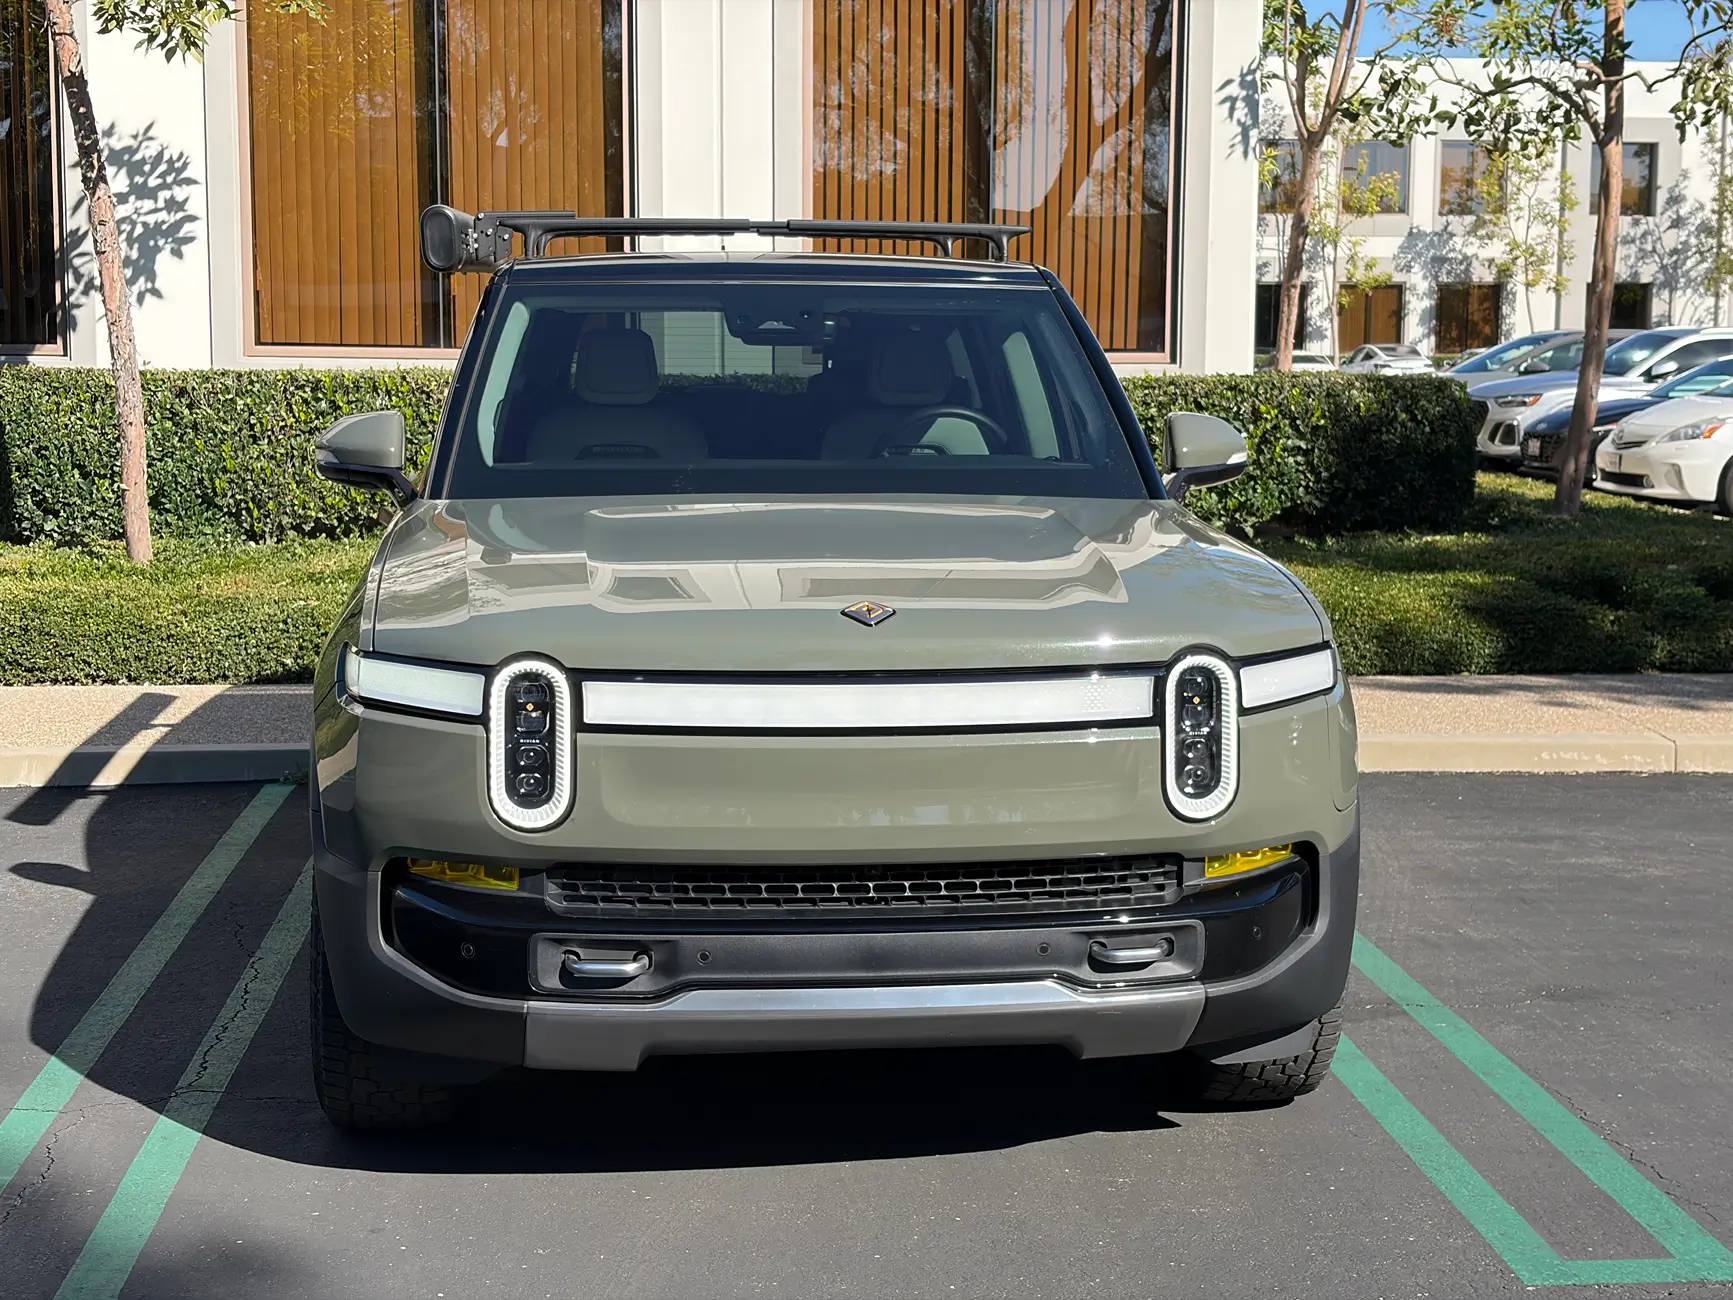
I've been working on a solution to get the Rivian x Kammok Awning side mounted so it can sit as flush as possible to the cross bars. The original setup with the Rivian x Kammok Mounting brackets sit on top of the cross bars and I've been told it adds about 11" above the crossbars.
This causes two problems for me. I don't like how it looks on top of the crossbars and I have clearance issues with my garage at that height. Out of the box they do not work with the Kammok Side mount kit as the T-Slots on the original Kammok awning and the Rivian x Kammok are different dimensions.
Design:
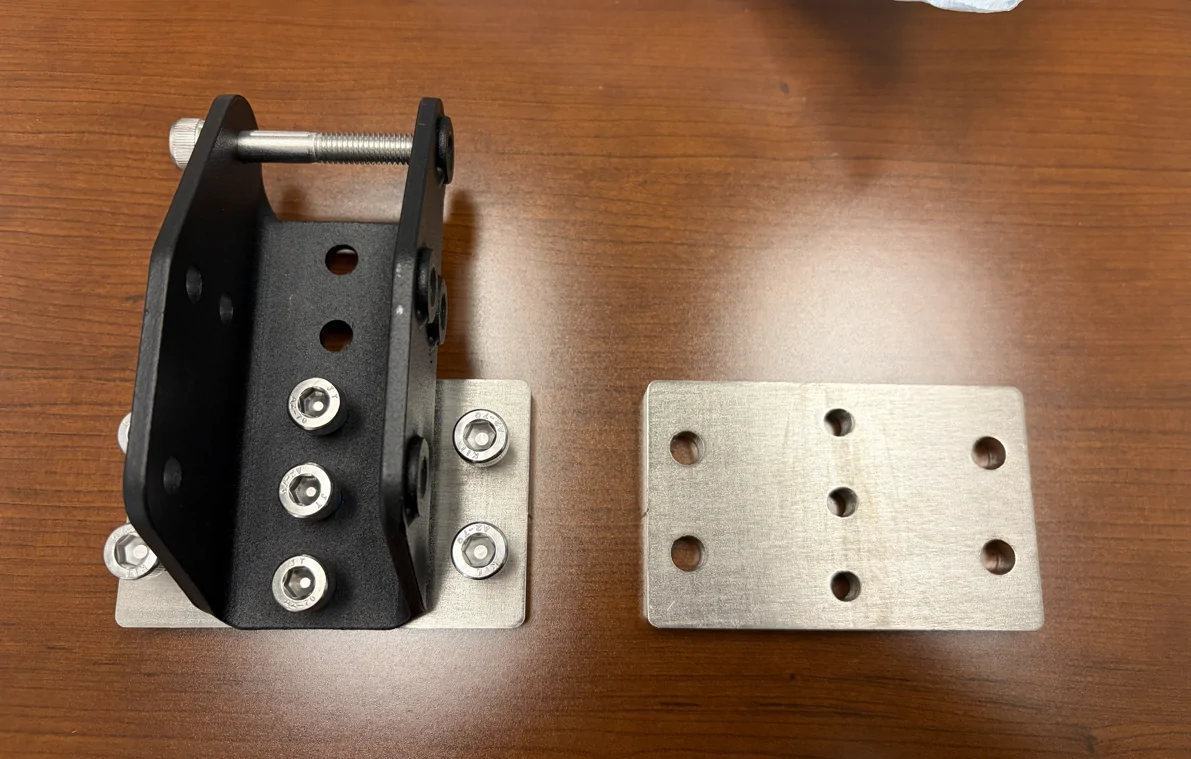
I came up with the idea of an adapter plate to make them work. I am not a mechanical or materials engineer so i did not do any load calcs. I decided on 304 stainless for corrosion resistance and strength. These are tapped (explained below) so powdercoated mild steal might cause some rusting in the threads once they are cleaned of the powdercoat.
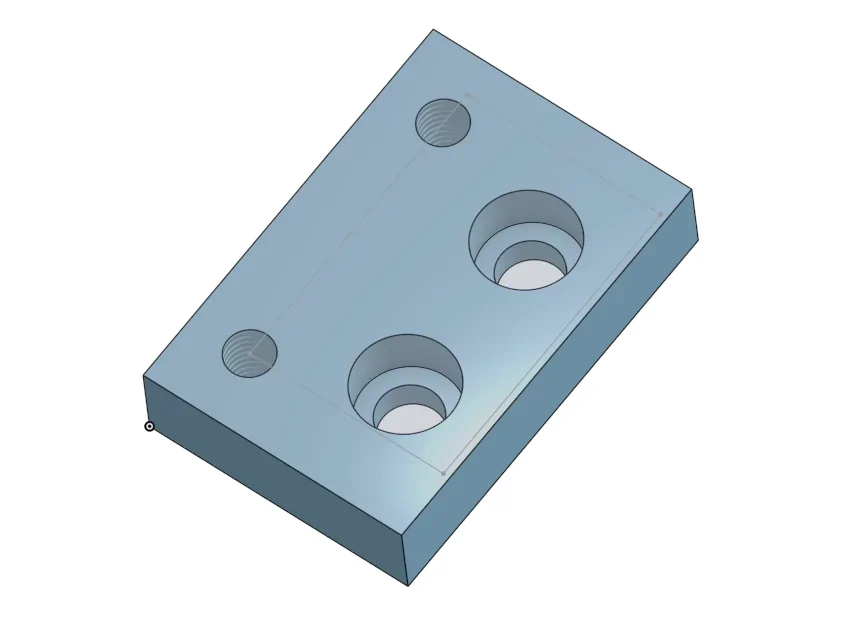
Initially I worked on a smaller plate that would need tapping and countersunk holes This would allow the plate to almost completely be sandwiched between the Awning and the side mounts. The countersink allowed the bolt heads to sit within the plate and between the awning and the side mounts. While this seemed simpler, the machining involved added too much effort. We made an initial prototype of this but gave up part way because the 304 stainless took too much time to machine with.


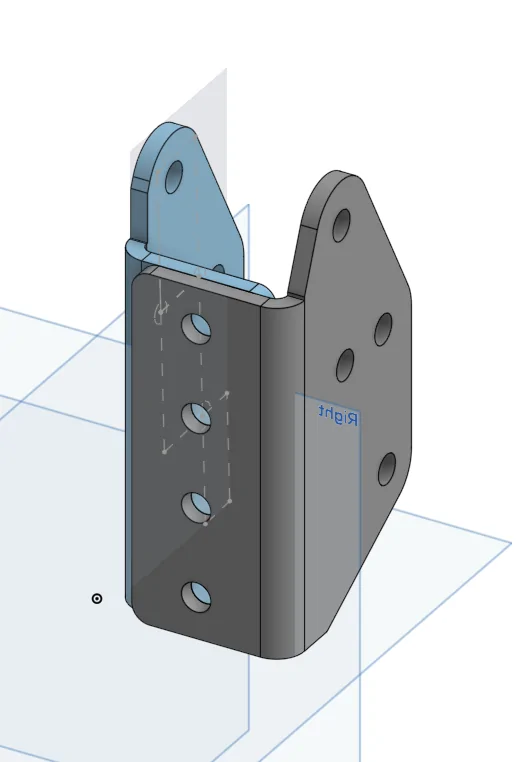
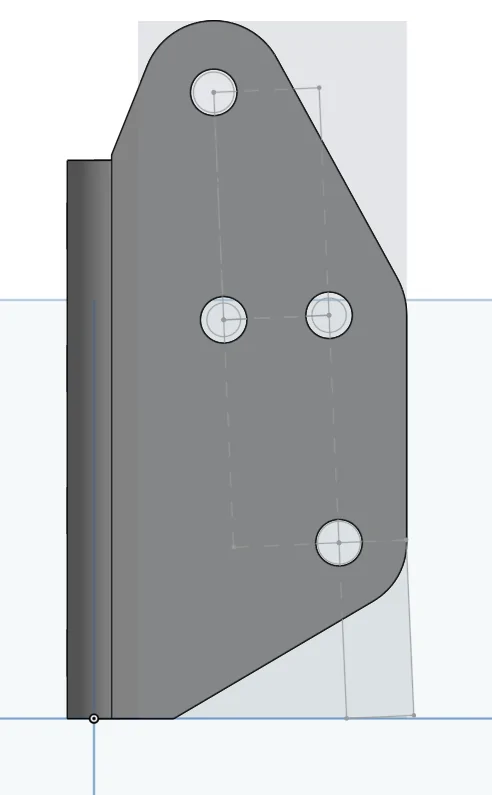
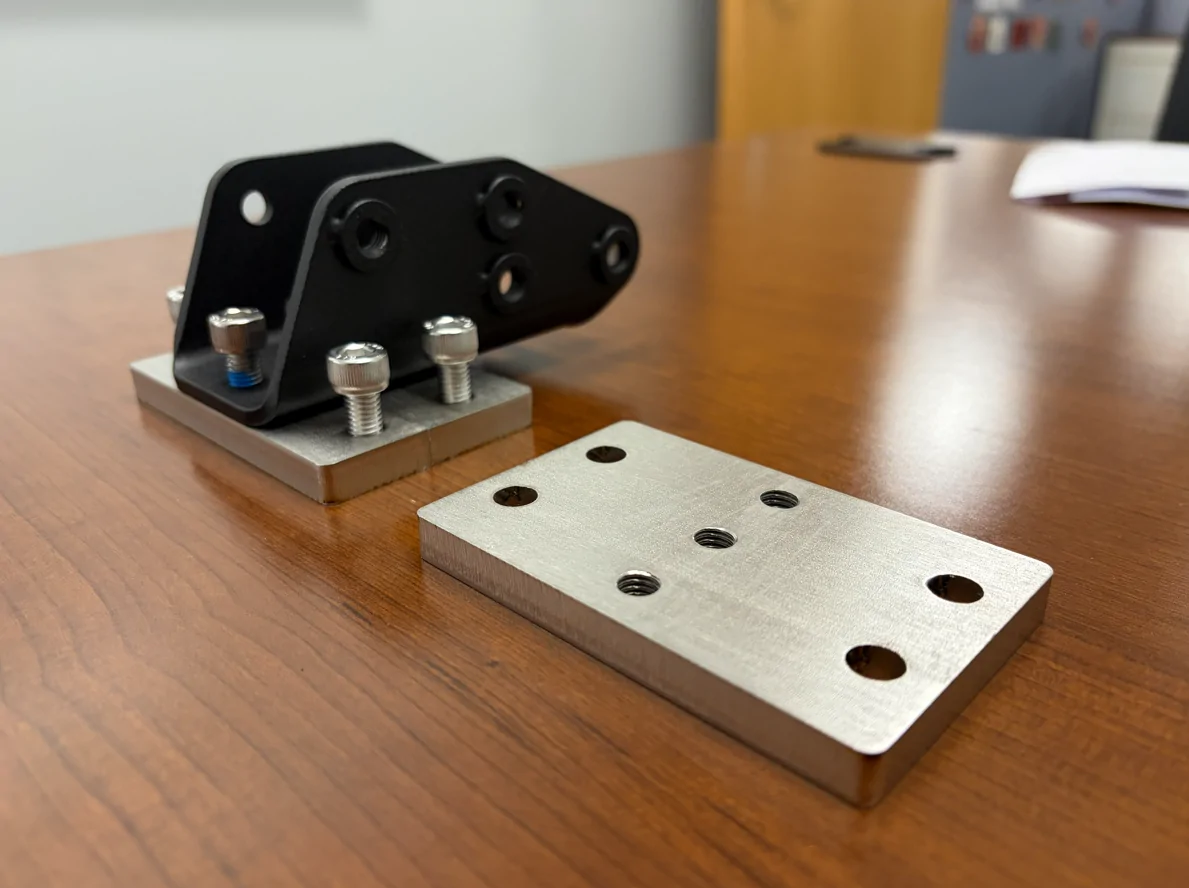
Going back to the drawing board I opted to go wider but at 9.5mm thickness vs 12.7mm. This allowed me to clear the side mounts and remove the need for countersink holes. Since I was making them wider, I decided to make the awning mounts doubled up, one on each side of the brackets instead. Since in my mind I was worried about twisting forces being that it was offset. The load is now divided and equalized.
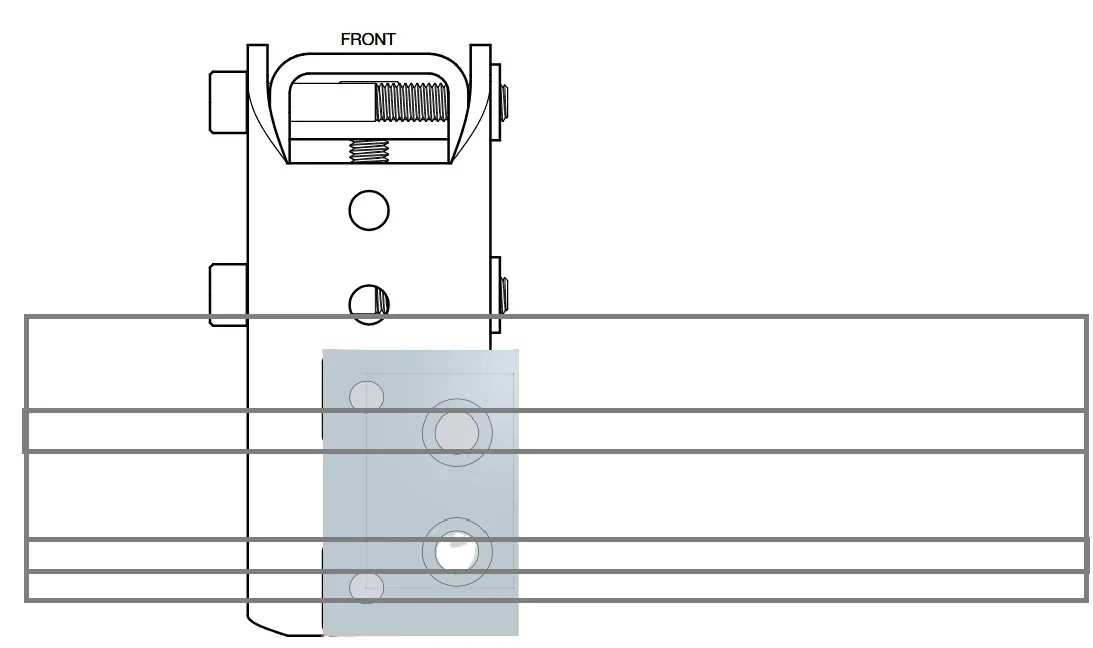
I also added another threaded hole on the side mount as to ensure no failure. The original setup is with 2 bolts on the side mount kit, it is now at 3 bolts (per bracket). Original has 2 bolts to the awning, it is now 4 (per bracket). Again since I'm not a mechanical engineer I just did it all by feel and decided on "overkill". Since the plate is ~5mm thicker than the brackets I had to order extended bolts for the awning side. All other bolts are original from the Kammok kits.
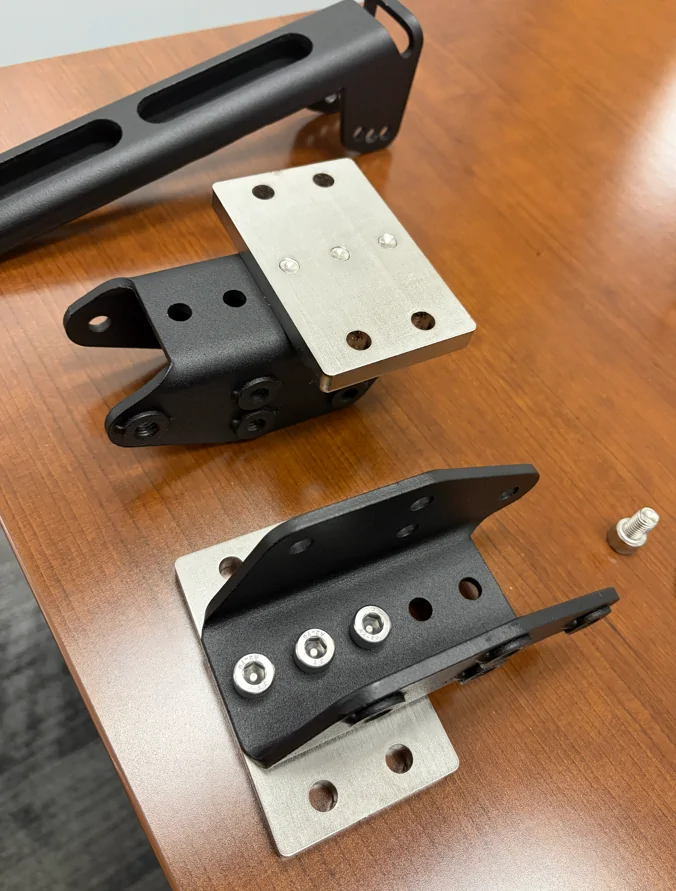
Installation:
The side mounts get bolted directly to the adapter plate using the 3 middle threaded holes. The assembly then gets bolted to the awning using extended bolts on the 4 corners of the plate. At that point, the Kammok side mount kits gets installed as usual.


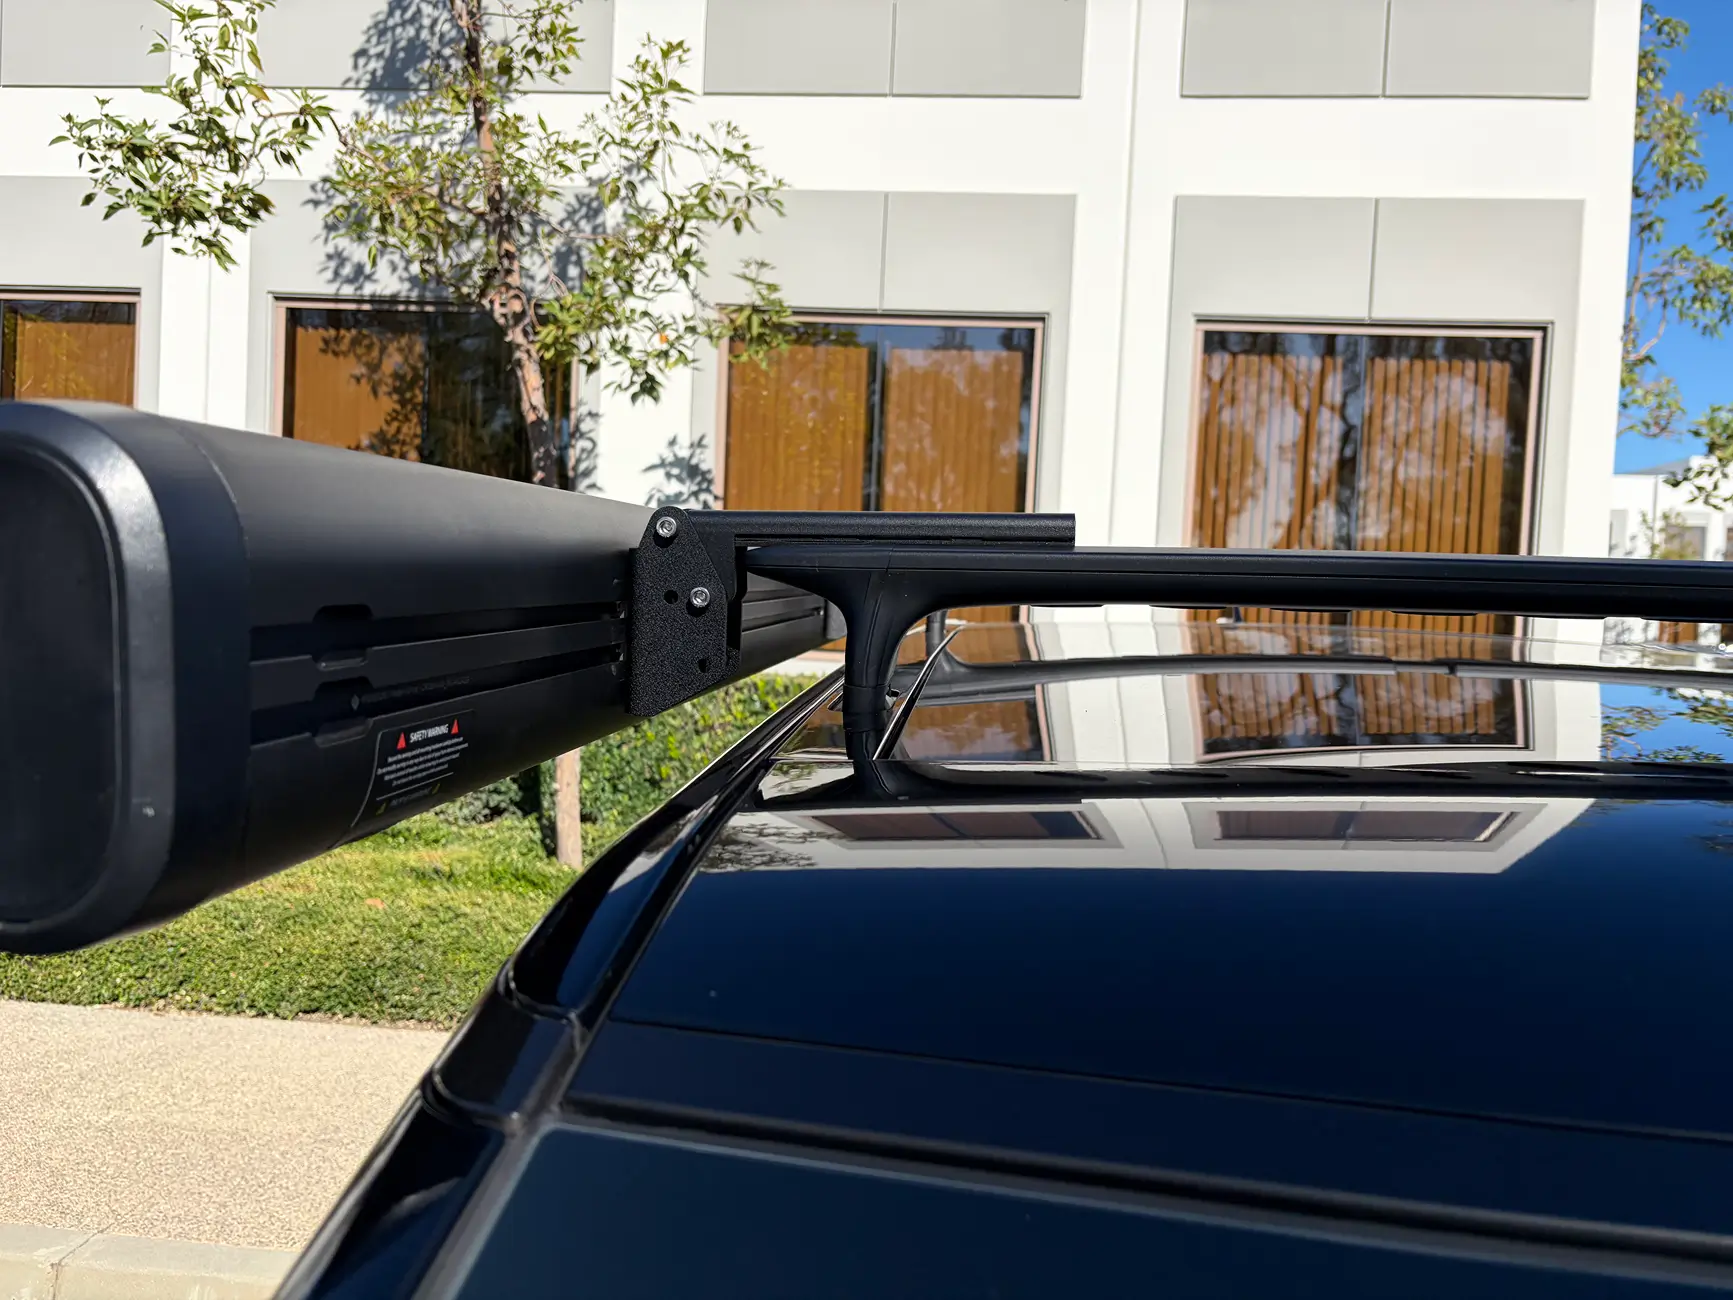
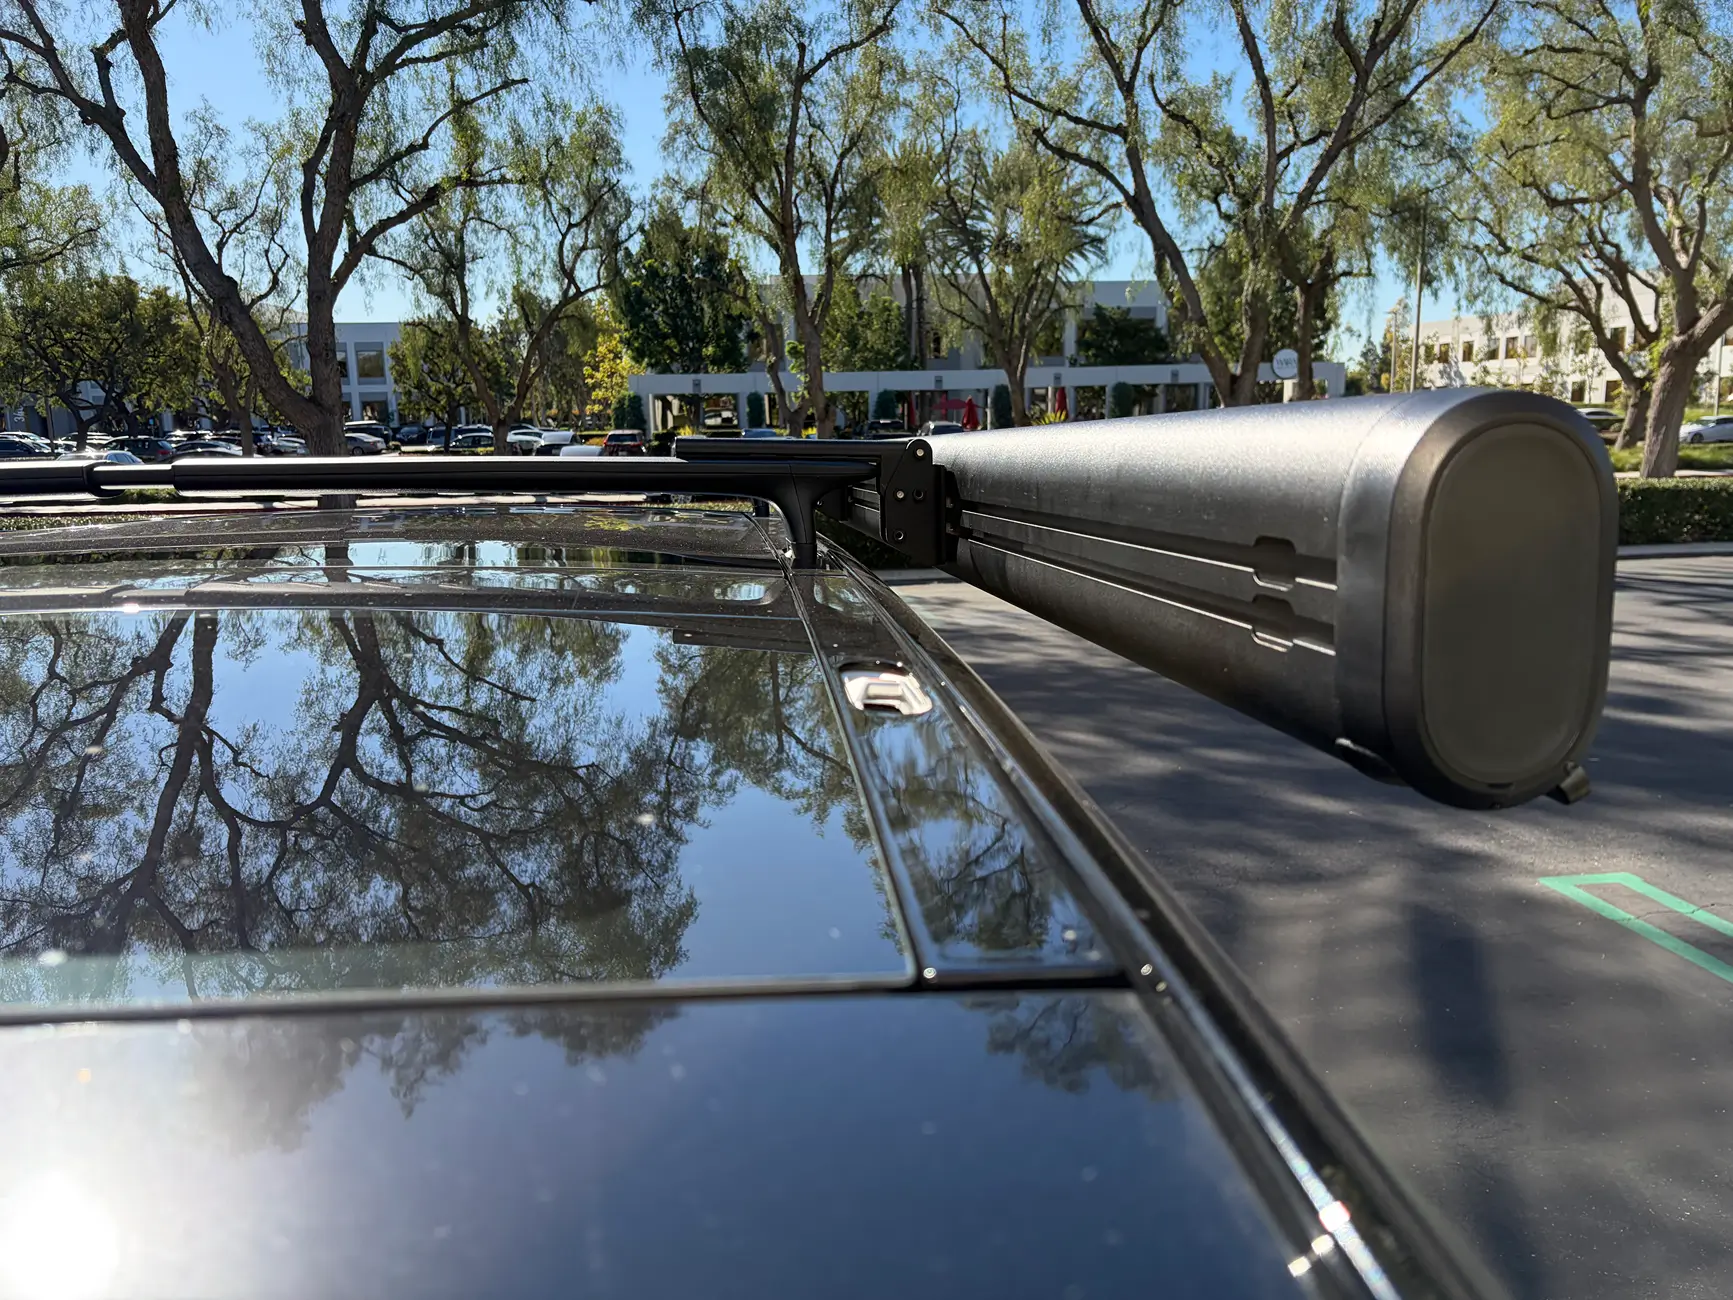
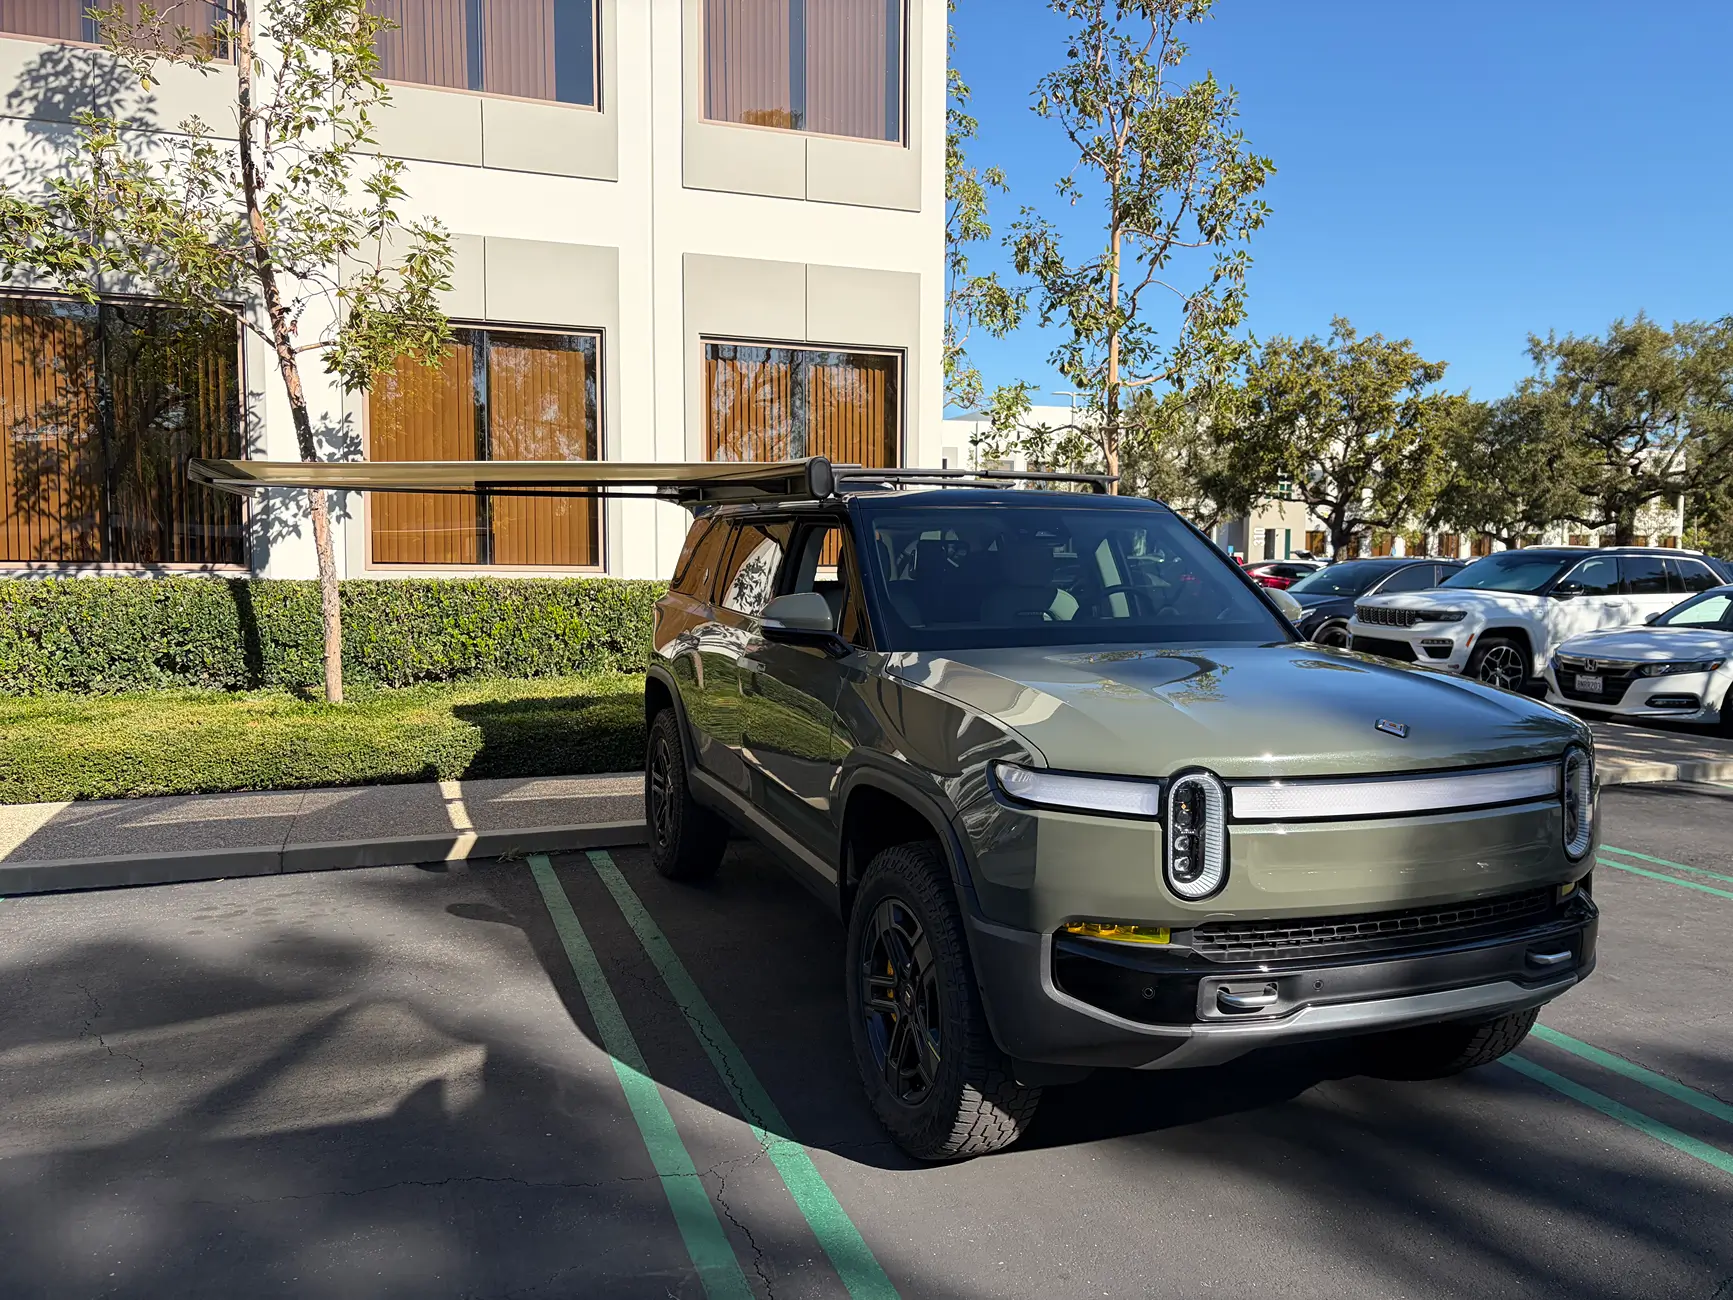
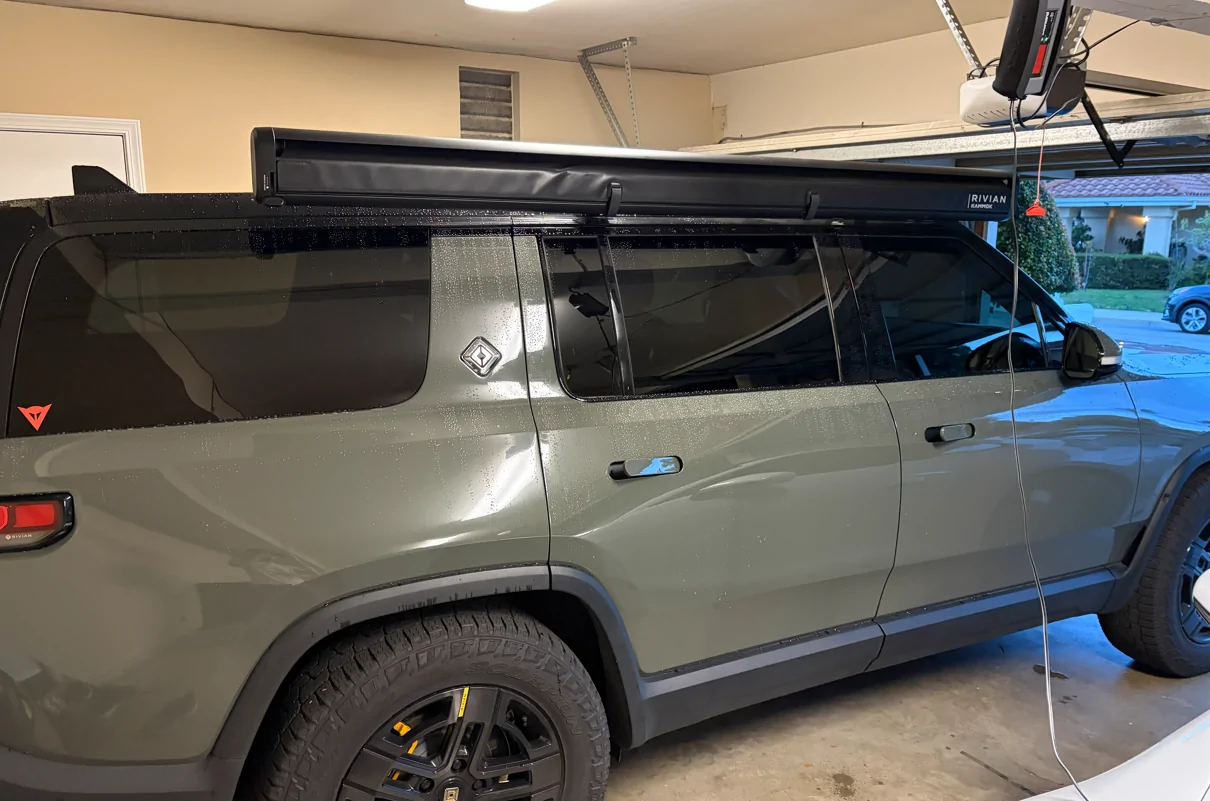
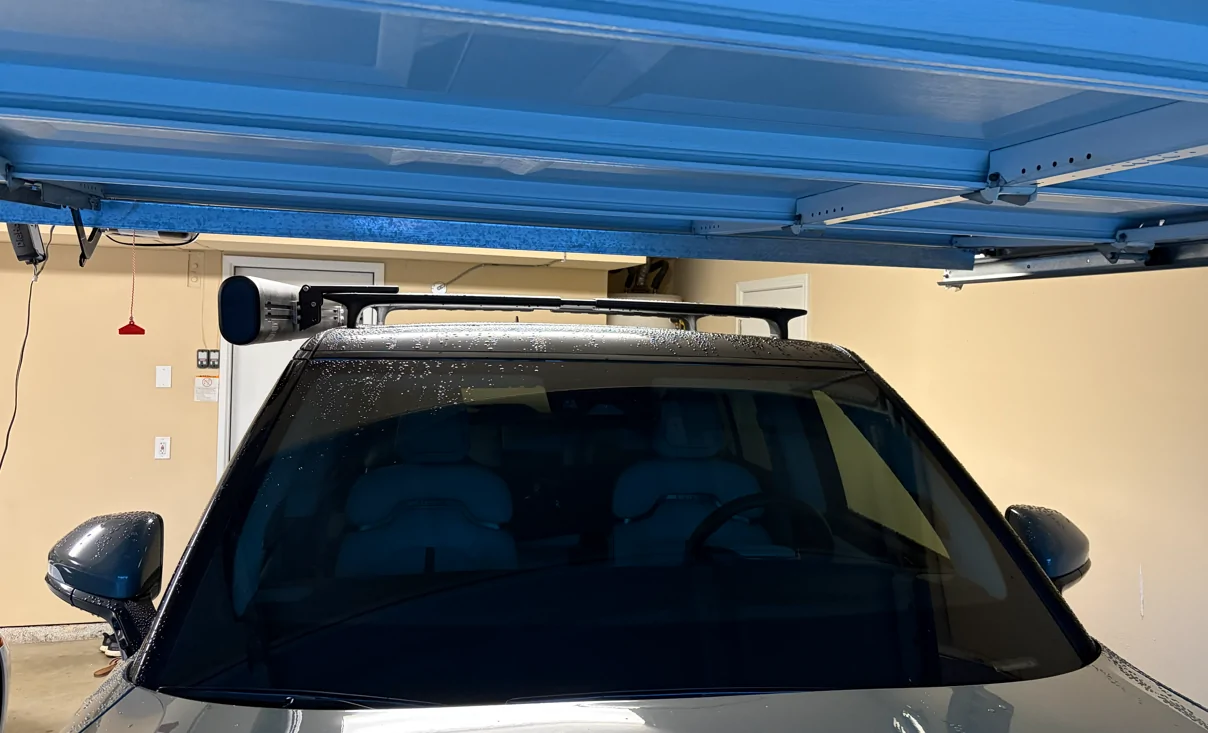
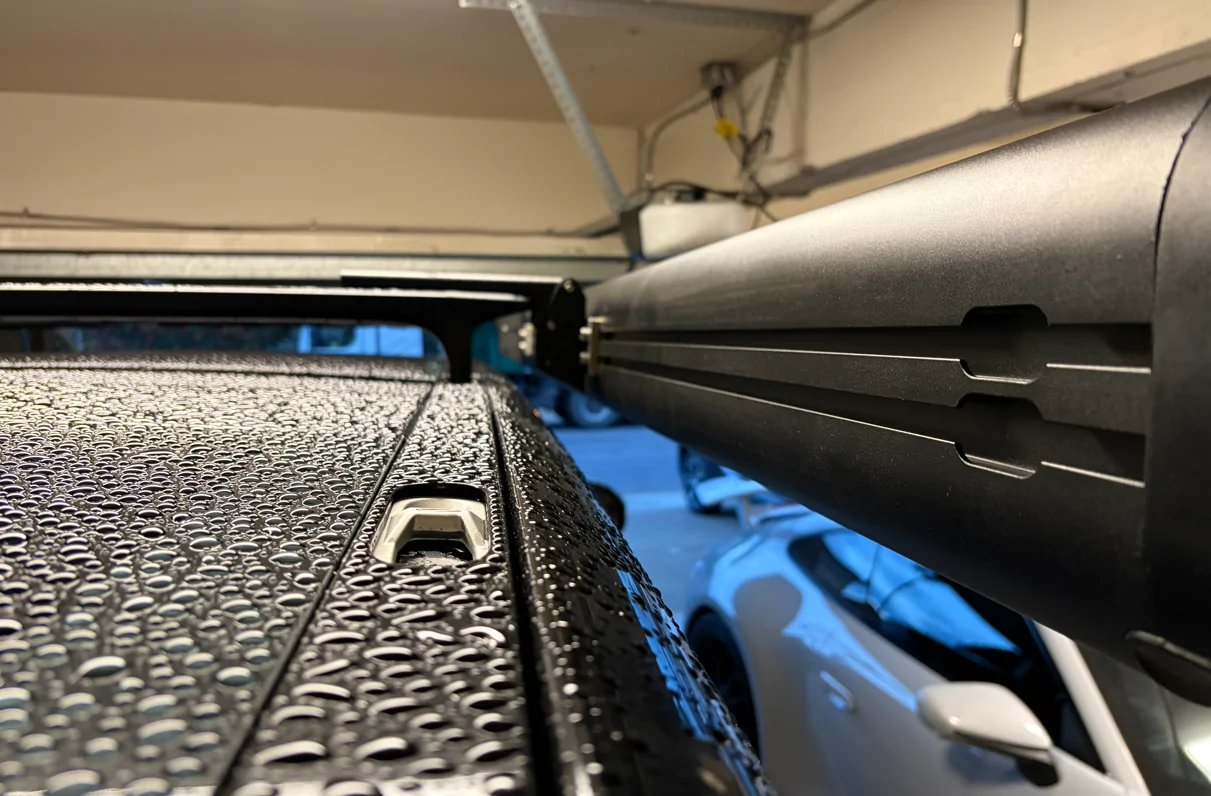
End result:
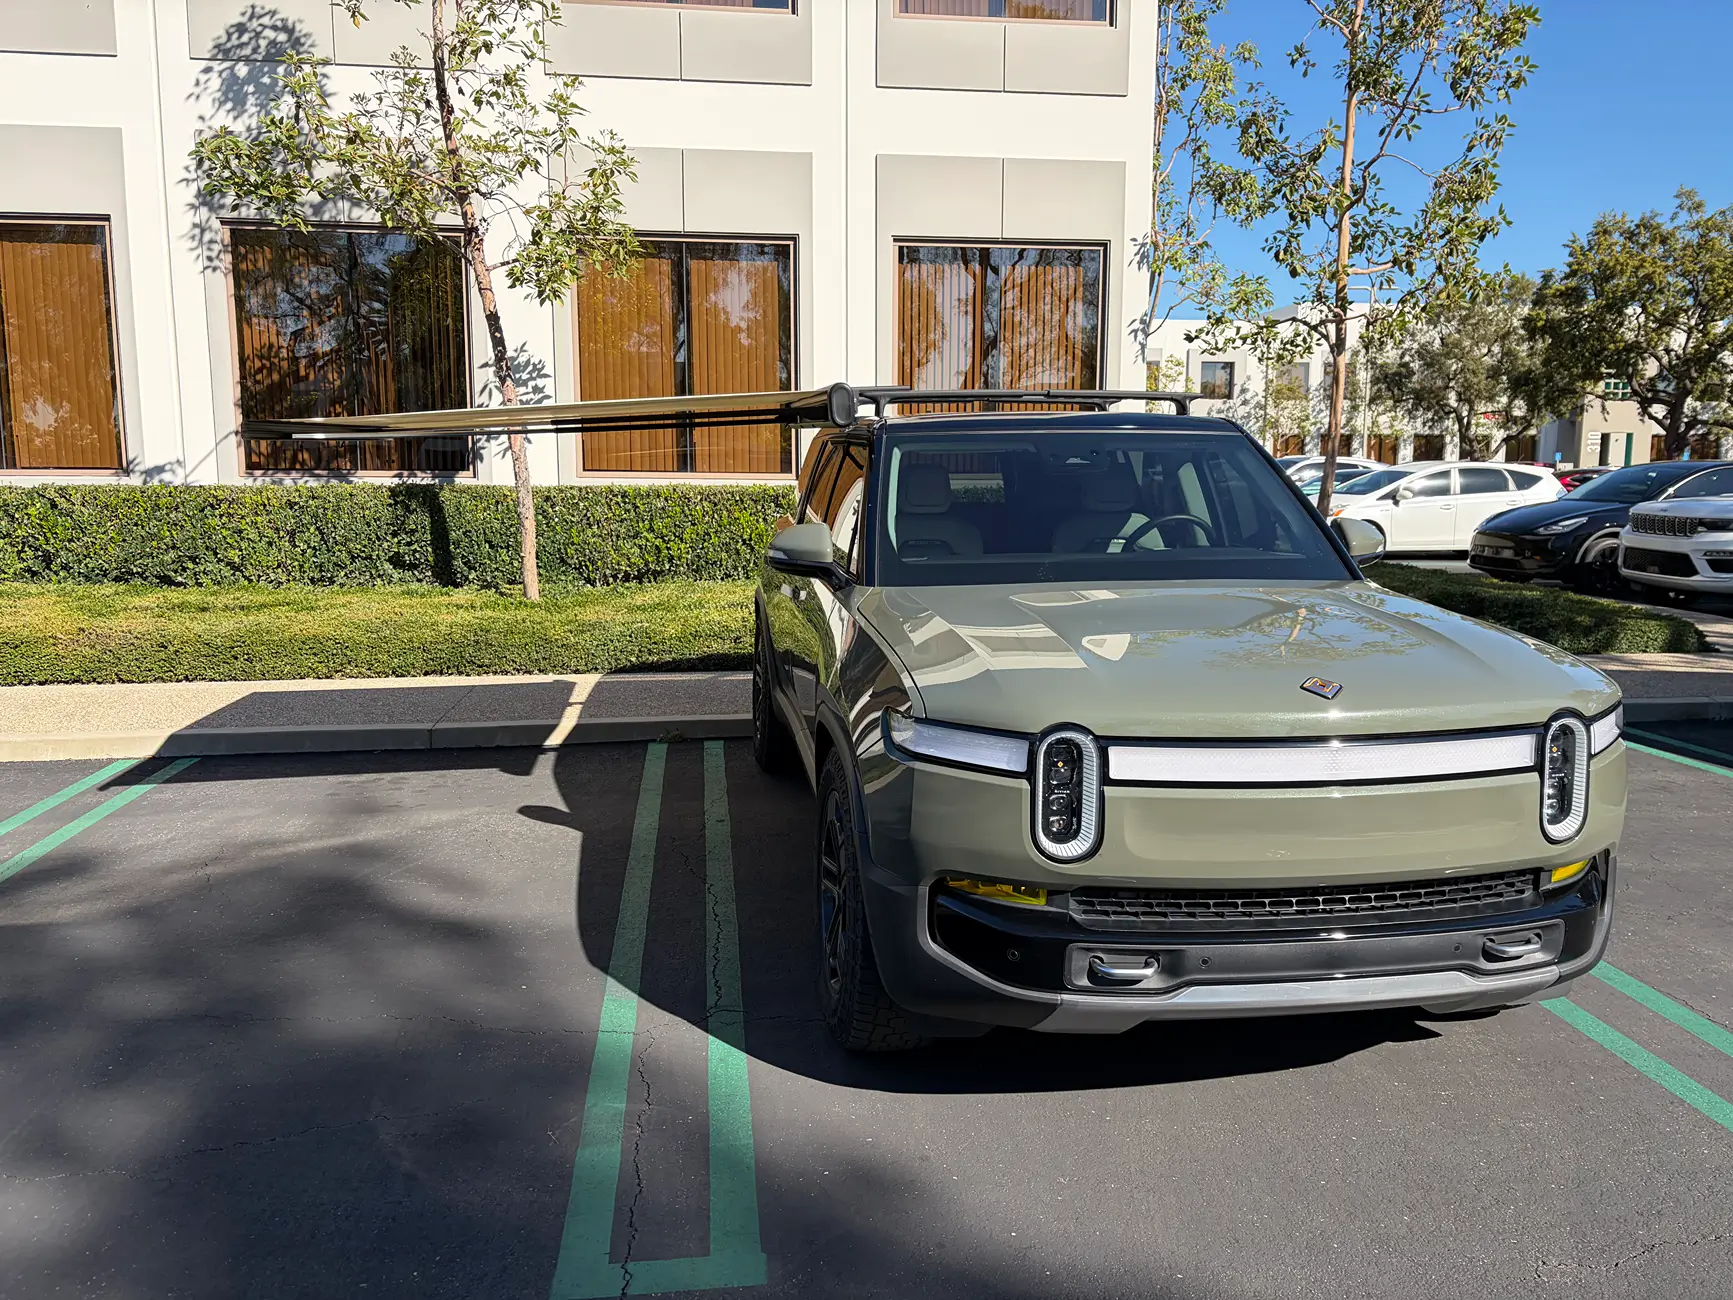
It works. The awning sits ~1" above the crossbars and clears the door by ~1.5" when opening. You do lose height so to fully stand underneath at 6'3" I'd have to raise the truck to high or highest. But I plan to sit underneath most of the time so this isn't an issue. I also think it looks more sleek this way.


I'll post outside or "action" pics whenever I get the chance. I've already come up with a V3 of this plate that is more for aesthetics. The gap above and below the plate between the side mount and the awning looks a little unfinished. The Rivian awning has big rounded edges top and bottom so the plate doesnt need to be taller (and probably wont touch anyways even if it was). The new design just fills it in a bit more but costs more in material as it adds 20mm top and bottom extra in 304 stainless.

So lots of things have been moving on this project/effort. I received and have been running the new "secret" solution for about a week now and I feel ready to share the latest.
As mentioned before, this has been a free time home project so new knowledge and resources have been gained with each implementation. The following was found:
- The Stainless steel plates were more noticeable (visually) than I expected when installed.
- I thought they would be more hidden when sandwiched behind the awning and the bracket
- I ended up seeing it and noticing it more than expected
- The cross bars are not flat.
- I knew this going in but didn't expect such an impact. The crossbars are not flat horizontally. it has a slight bow down the length, either due to style, the telescoping feature, or both. As such there is about a 2-2.5* slope from the center of the crossbar to the edge (where the latches are)
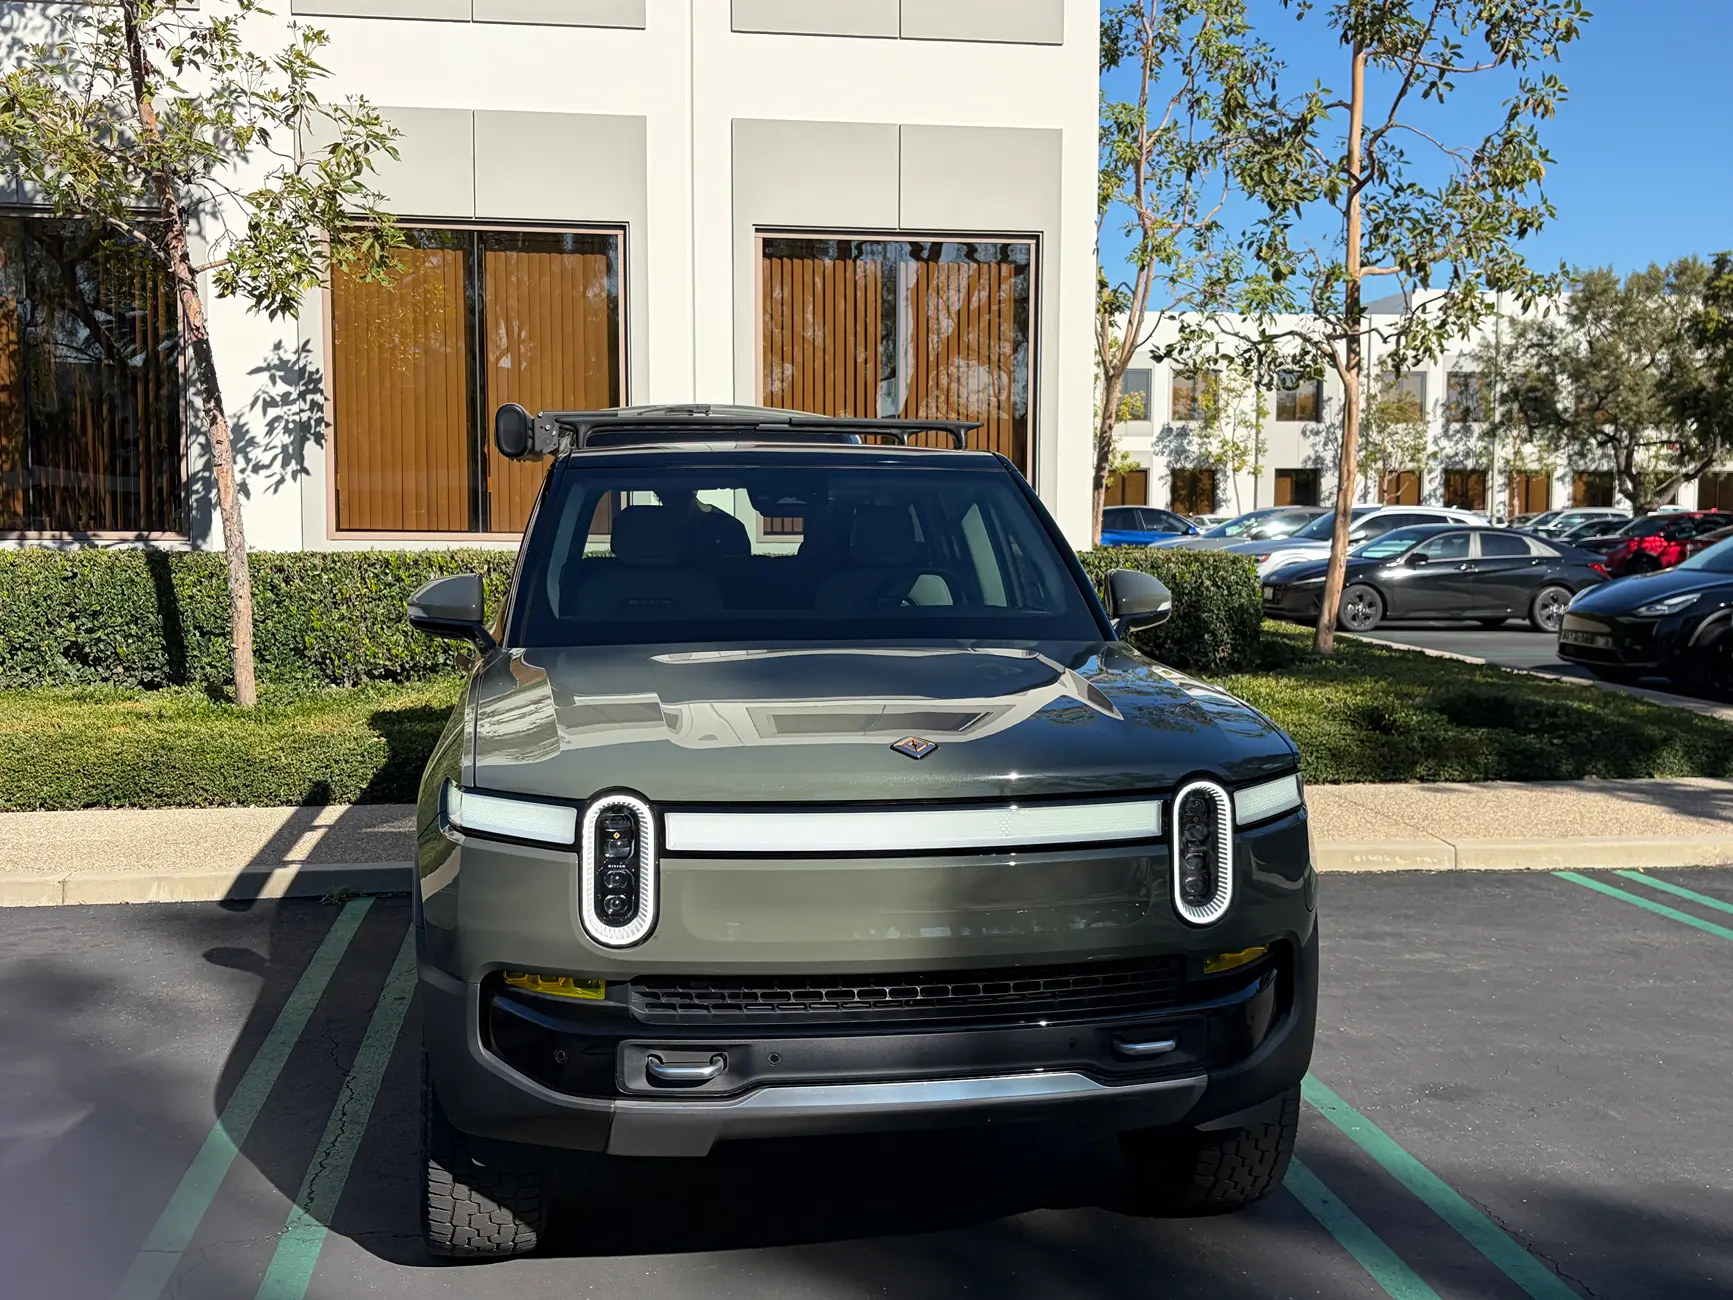
- The awning looks like its sagging, 2-2.5* is a lot visually especially when the awning has the same shape design as the headlights, when looking at it from the front, you end up comparing the awning "verticalness" to the headlights
- When extended, the awning droops with the same 2-2.5*. At full extension of 6.5ft that causes the end of the awning to droop down ~3.5"
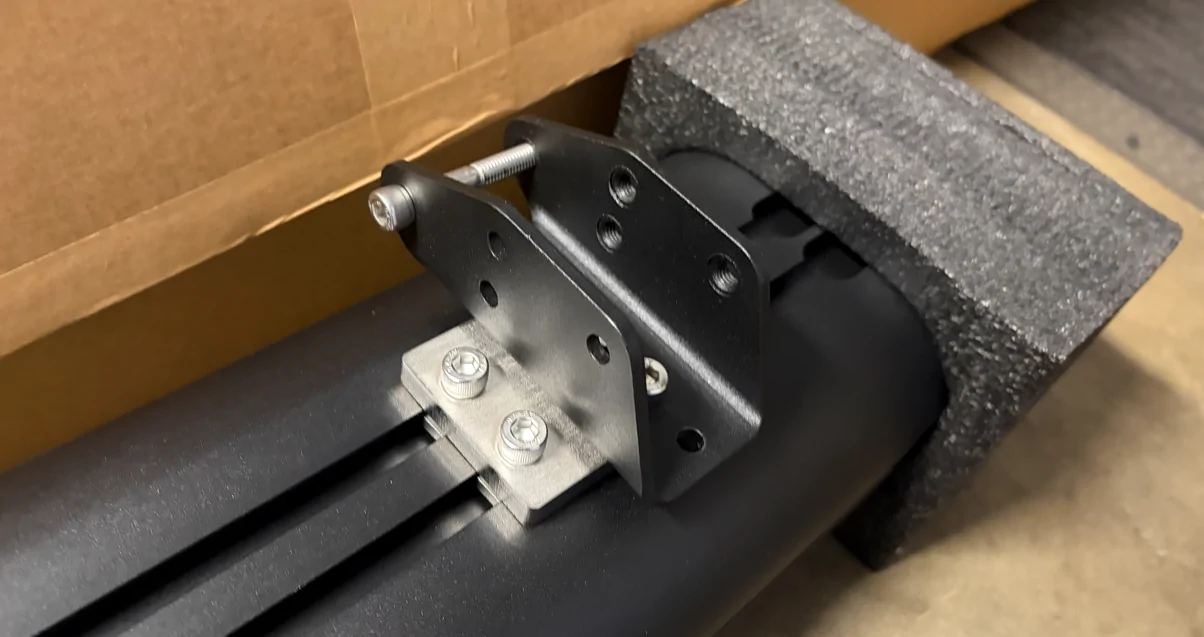
I learned that I can get sheet metal bent. This opened up the new solution. It is a direct replacement for the Awning side Kammok bracket.
- There was limitations on bending due to fabricator tools that did not allow me to one piece the assembly like the original Kammok, but the new bracket is slightly thicker in material and as a result of 2-piece, it is double walled at the awning connection side.
- The holes to mount to the Kammok Side mount crossbar side has been rotated 2.5* to level out the awning on the crossbars.
- Material changes
- It is powder coated a textured black to better match the original.
- The material has been changed from 304 stainless to A36/1008 mild steel. It has similar strength to 304SS but not as much corrosion resistance, but this is now powder coated and the material should be a match to the OEM Kammok stuff.
- The new brackets still require longer bolts
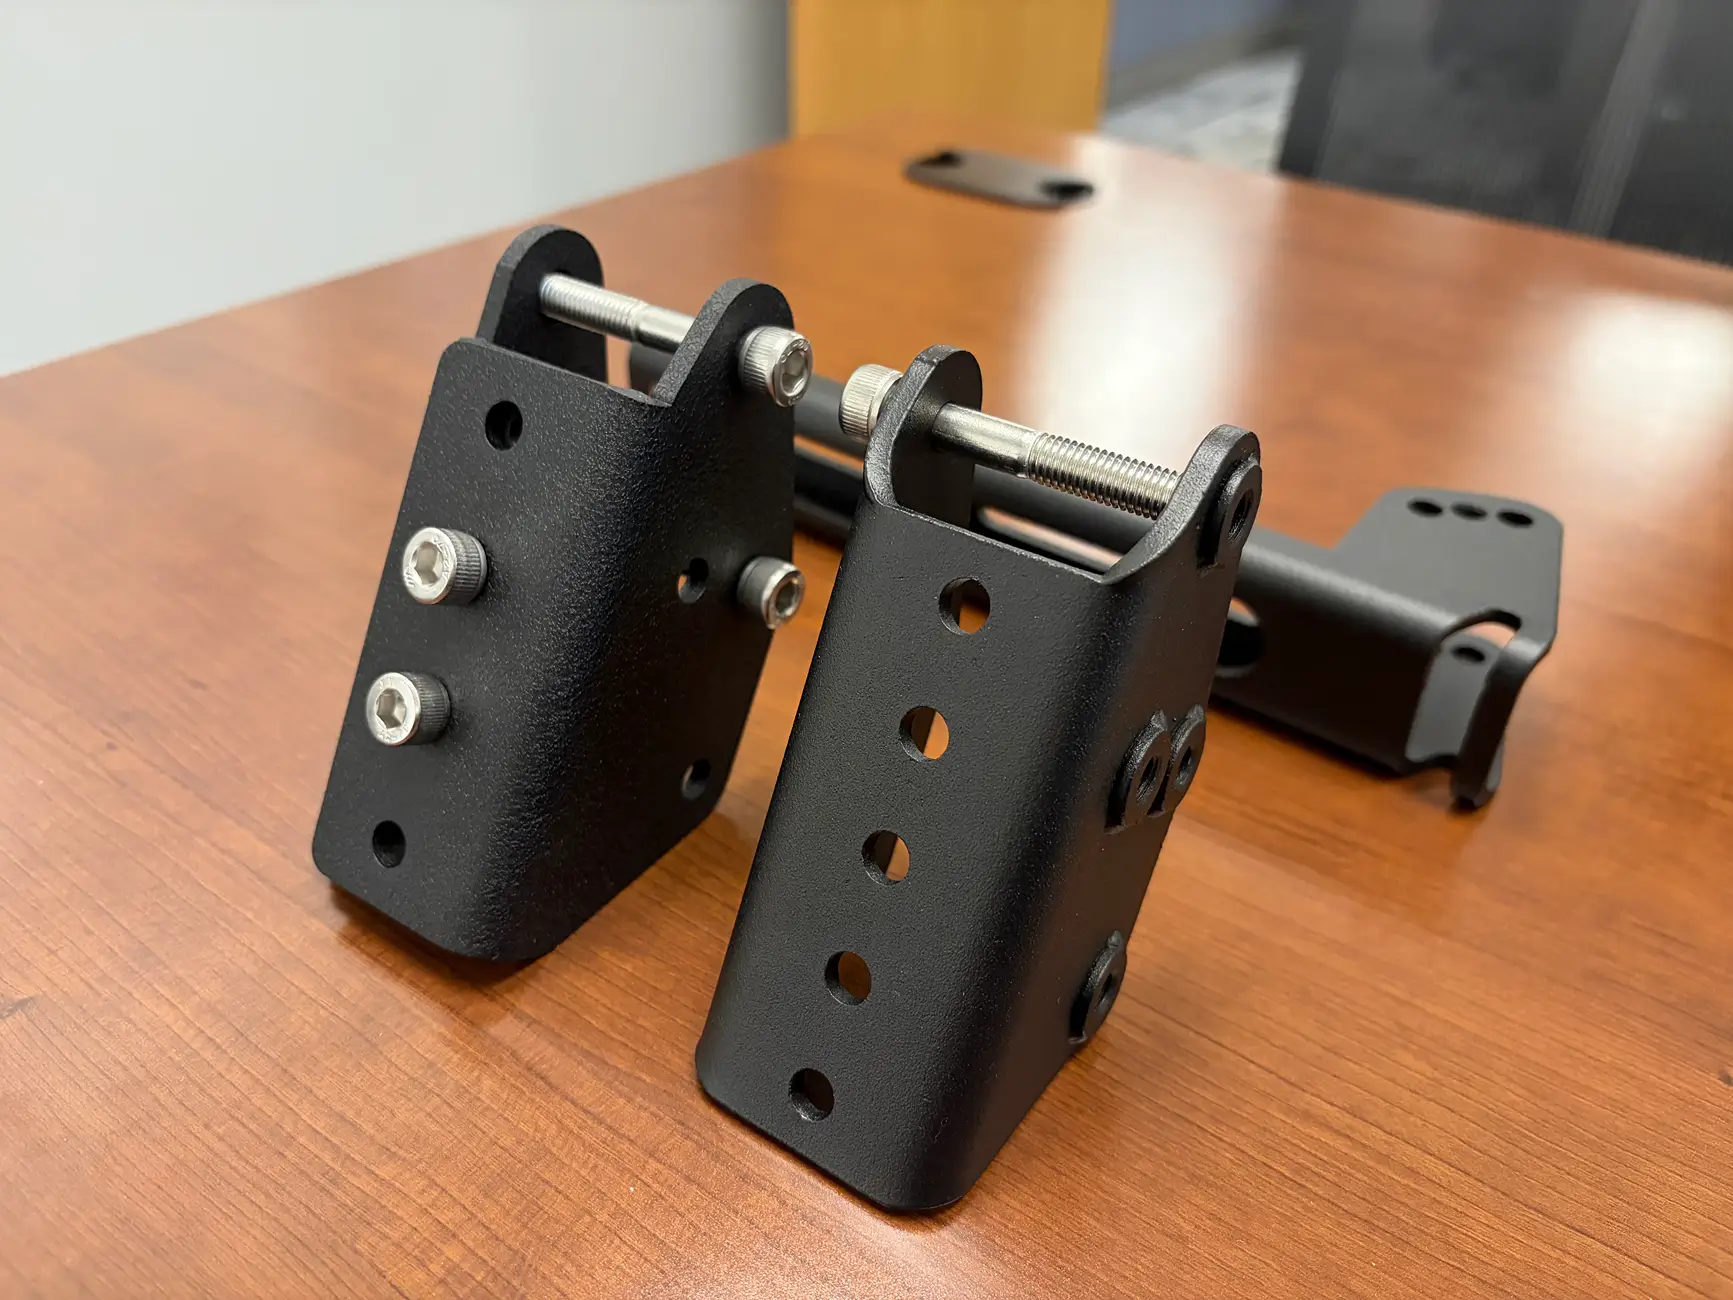
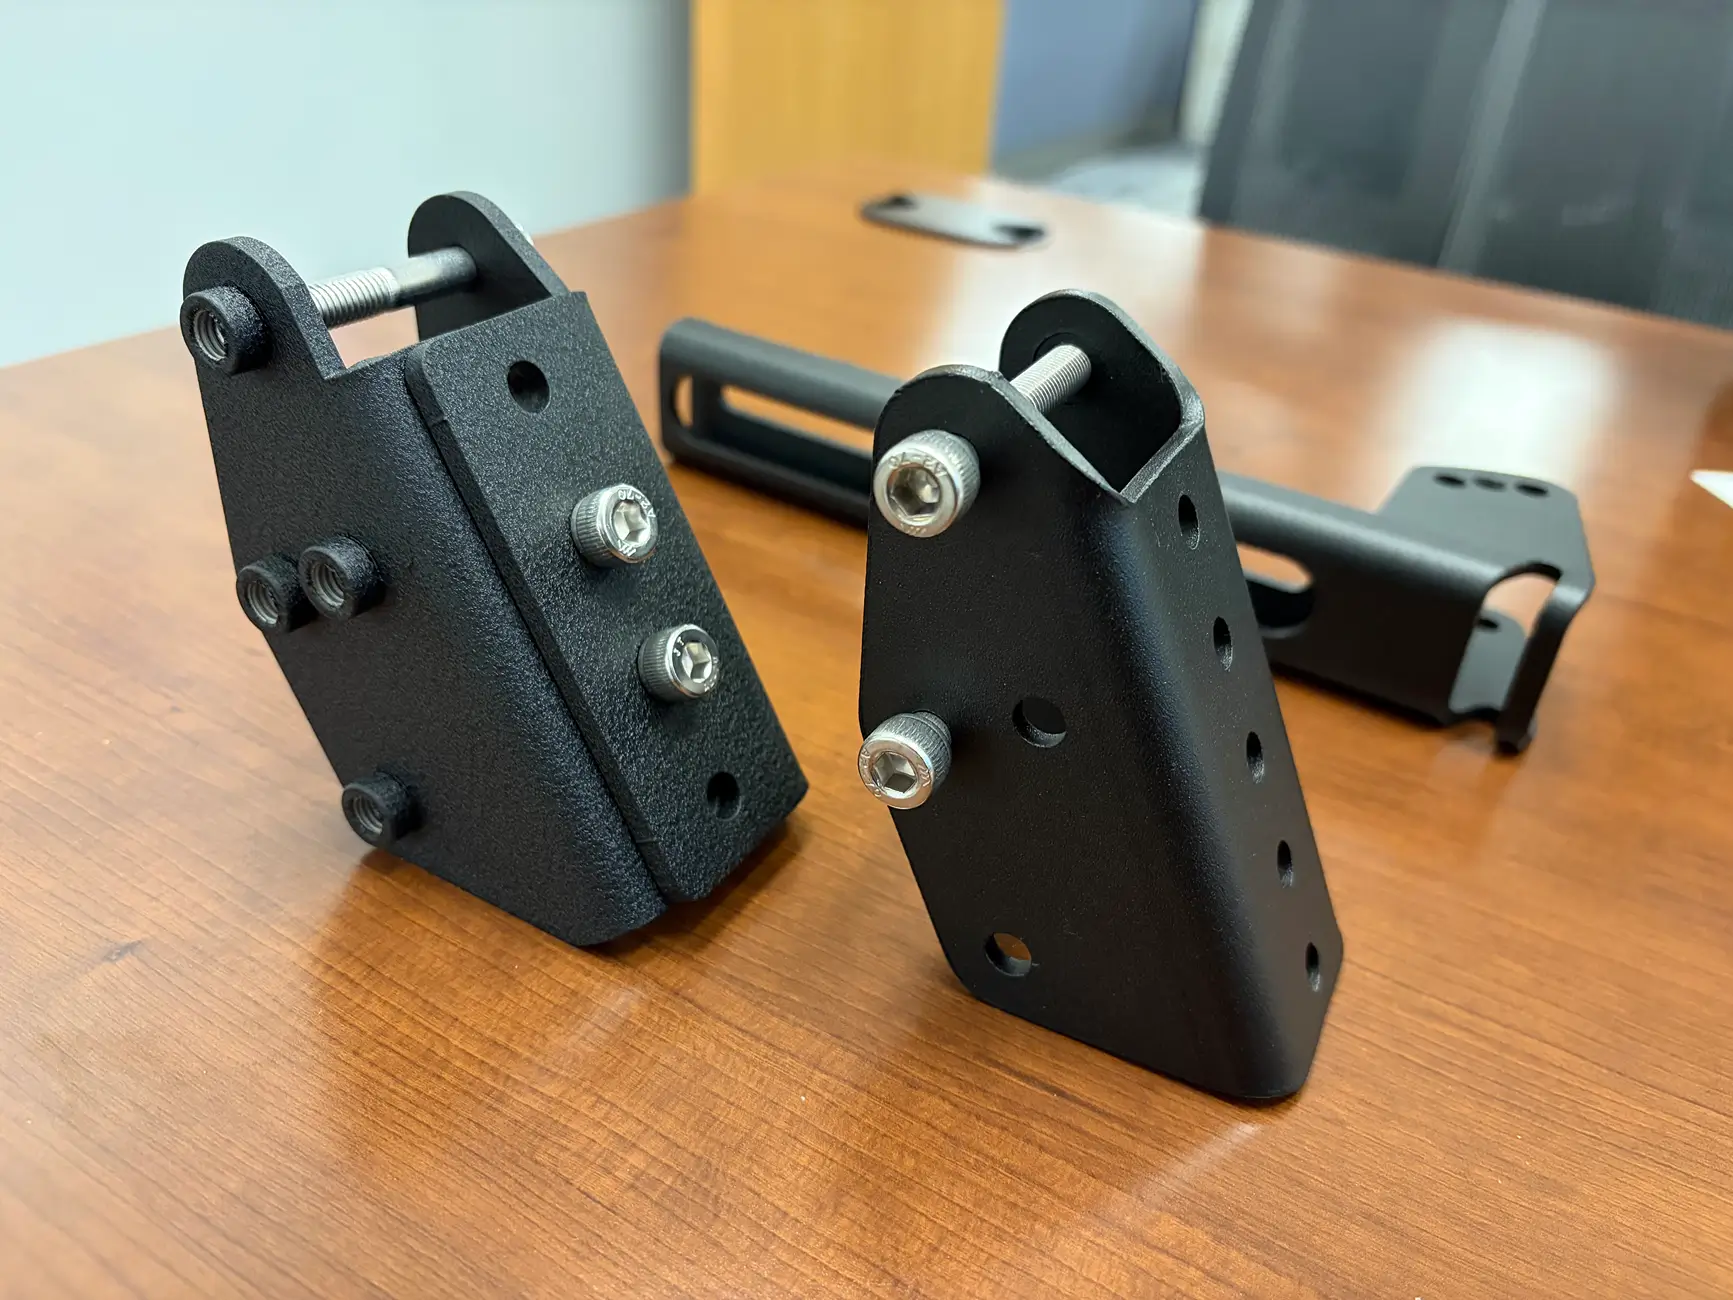
Note two things:
- The awning mating plate has a steeper angle than the original
- The press in nuts are opposite of the Kammok one. I actually had two sets of Kammok brackets and it seems there are variations between batches. the ones that were on my car has the nuts on the left matching my bracket, while this other one I used in the picture has them on the right.
Not all things are positive however, this solution is a more complicated solution and the costs are a bit more than the original plate only solution. Includes new extended bolts, essentially with the Rivian x Kammok awning and the Kammok side mount kit, you should not need any additional HW to make this work.
These are now on Etsy, for transparency, price has changed to cover store fees: https://www.etsy.com/listing/4458574486/side-mount-adapter-bracket-for-rivian-x
Feel free to message me here too.
ORIGINAL POST
I've been working on a solution to get the Rivian x Kammok Awning side mounted so it can sit as flush as possible to the cross bars. The original setup with the Rivian x Kammok Mounting brackets sit on top of the cross bars and I've been told it adds about 11" above the crossbars.
This causes two problems for me. I don't like how it looks on top of the crossbars and I have clearance issues with my garage at that height. Out of the box they do not work with the Kammok Side mount kit as the T-Slots on the original Kammok awning and the Rivian x Kammok are different dimensions.
Design:
I came up with the idea of an adapter plate to make them work. I am not a mechanical or materials engineer so i did not do any load calcs. I decided on 304 stainless for corrosion resistance and strength. These are tapped (explained below) so powdercoated mild steal might cause some rusting in the threads once they are cleaned of the powdercoat.
Initially I worked on a smaller plate that would need tapping and countersunk holes This would allow the plate to almost completely be sandwiched between the Awning and the side mounts. The countersink allowed the bolt heads to sit within the plate and between the awning and the side mounts. While this seemed simpler, the machining involved added too much effort. We made an initial prototype of this but gave up part way because the 304 stainless took too much time to machine with.
Going back to the drawing board I opted to go wider but at 9.5mm thickness vs 12.7mm. This allowed me to clear the side mounts and remove the need for countersink holes. Since I was making them wider, I decided to make the awning mounts doubled up, one on each side of the brackets instead. Since in my mind I was worried about twisting forces being that it was offset. The load is now divided and equalized.
I also added another threaded hole on the side mount as to ensure no failure. The original setup is with 2 bolts on the side mount kit, it is now at 3 bolts (per bracket). Original has 2 bolts to the awning, it is now 4 (per bracket). Again since I'm not a mechanical engineer I just did it all by feel and decided on "overkill". Since the plate is ~5mm thicker than the brackets I had to order extended bolts for the awning side. All other bolts are original from the Kammok kits.
Installation:
The side mounts get bolted directly to the adapter plate using the 3 middle threaded holes. The assembly then gets bolted to the awning using extended bolts on the 4 corners of the plate. At that point, the Kammok side mount kits gets installed as usual.
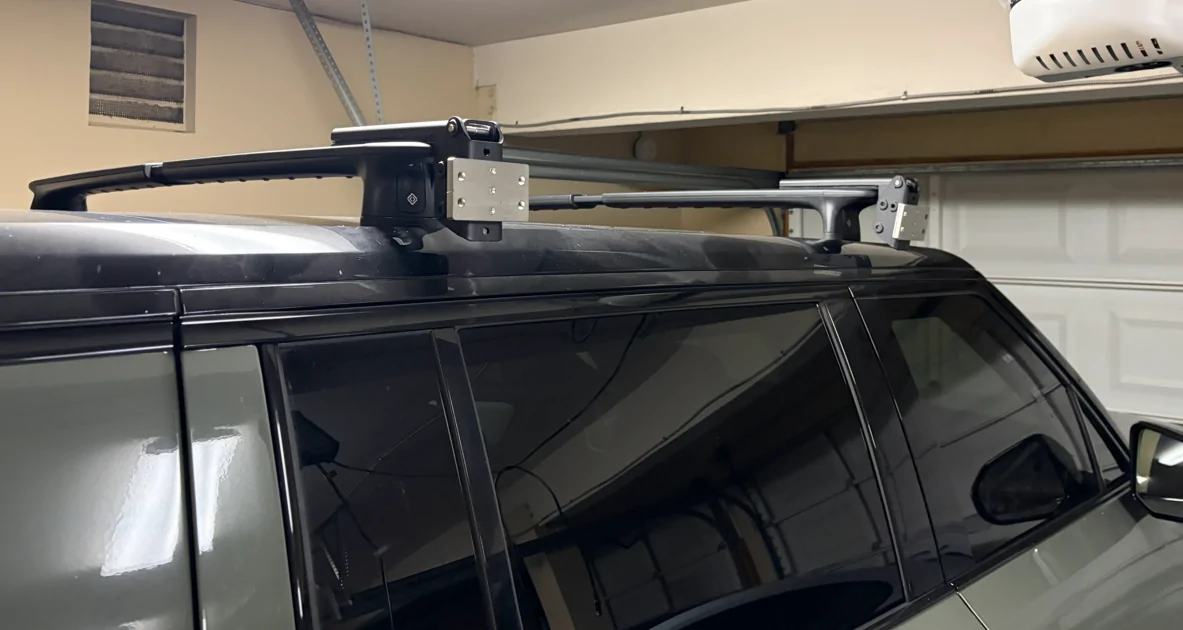
End result:
It works. The awning sits ~1" above the crossbars and clears the door by ~1.5" when opening. You do lose height so to fully stand underneath at 6'3" I'd have to raise the truck to high or highest. But I plan to sit underneath most of the time so this isn't an issue. I also think it looks more sleek this way.
I'll post outside or "action" pics whenever I get the chance. I've already come up with a V3 of this plate that is more for aesthetics. The gap above and below the plate between the side mount and the awning looks a little unfinished. The Rivian awning has big rounded edges top and bottom so the plate doesnt need to be taller (and probably wont touch anyways even if it was). The new design just fills it in a bit more but costs more in material as it adds 20mm top and bottom extra in 304 stainless.


Sponsored
Last edited:

