Nano
Well-Known Member
- Joined
- Sep 25, 2023
- Threads
- 16
- Messages
- 138
- Reaction score
- 256
- Location
- Vancouver,WA
- Vehicles
- 2023 FG R1S, 18 MDX, 71 240Z
- Occupation
- Business owner
- Thread starter
- #1
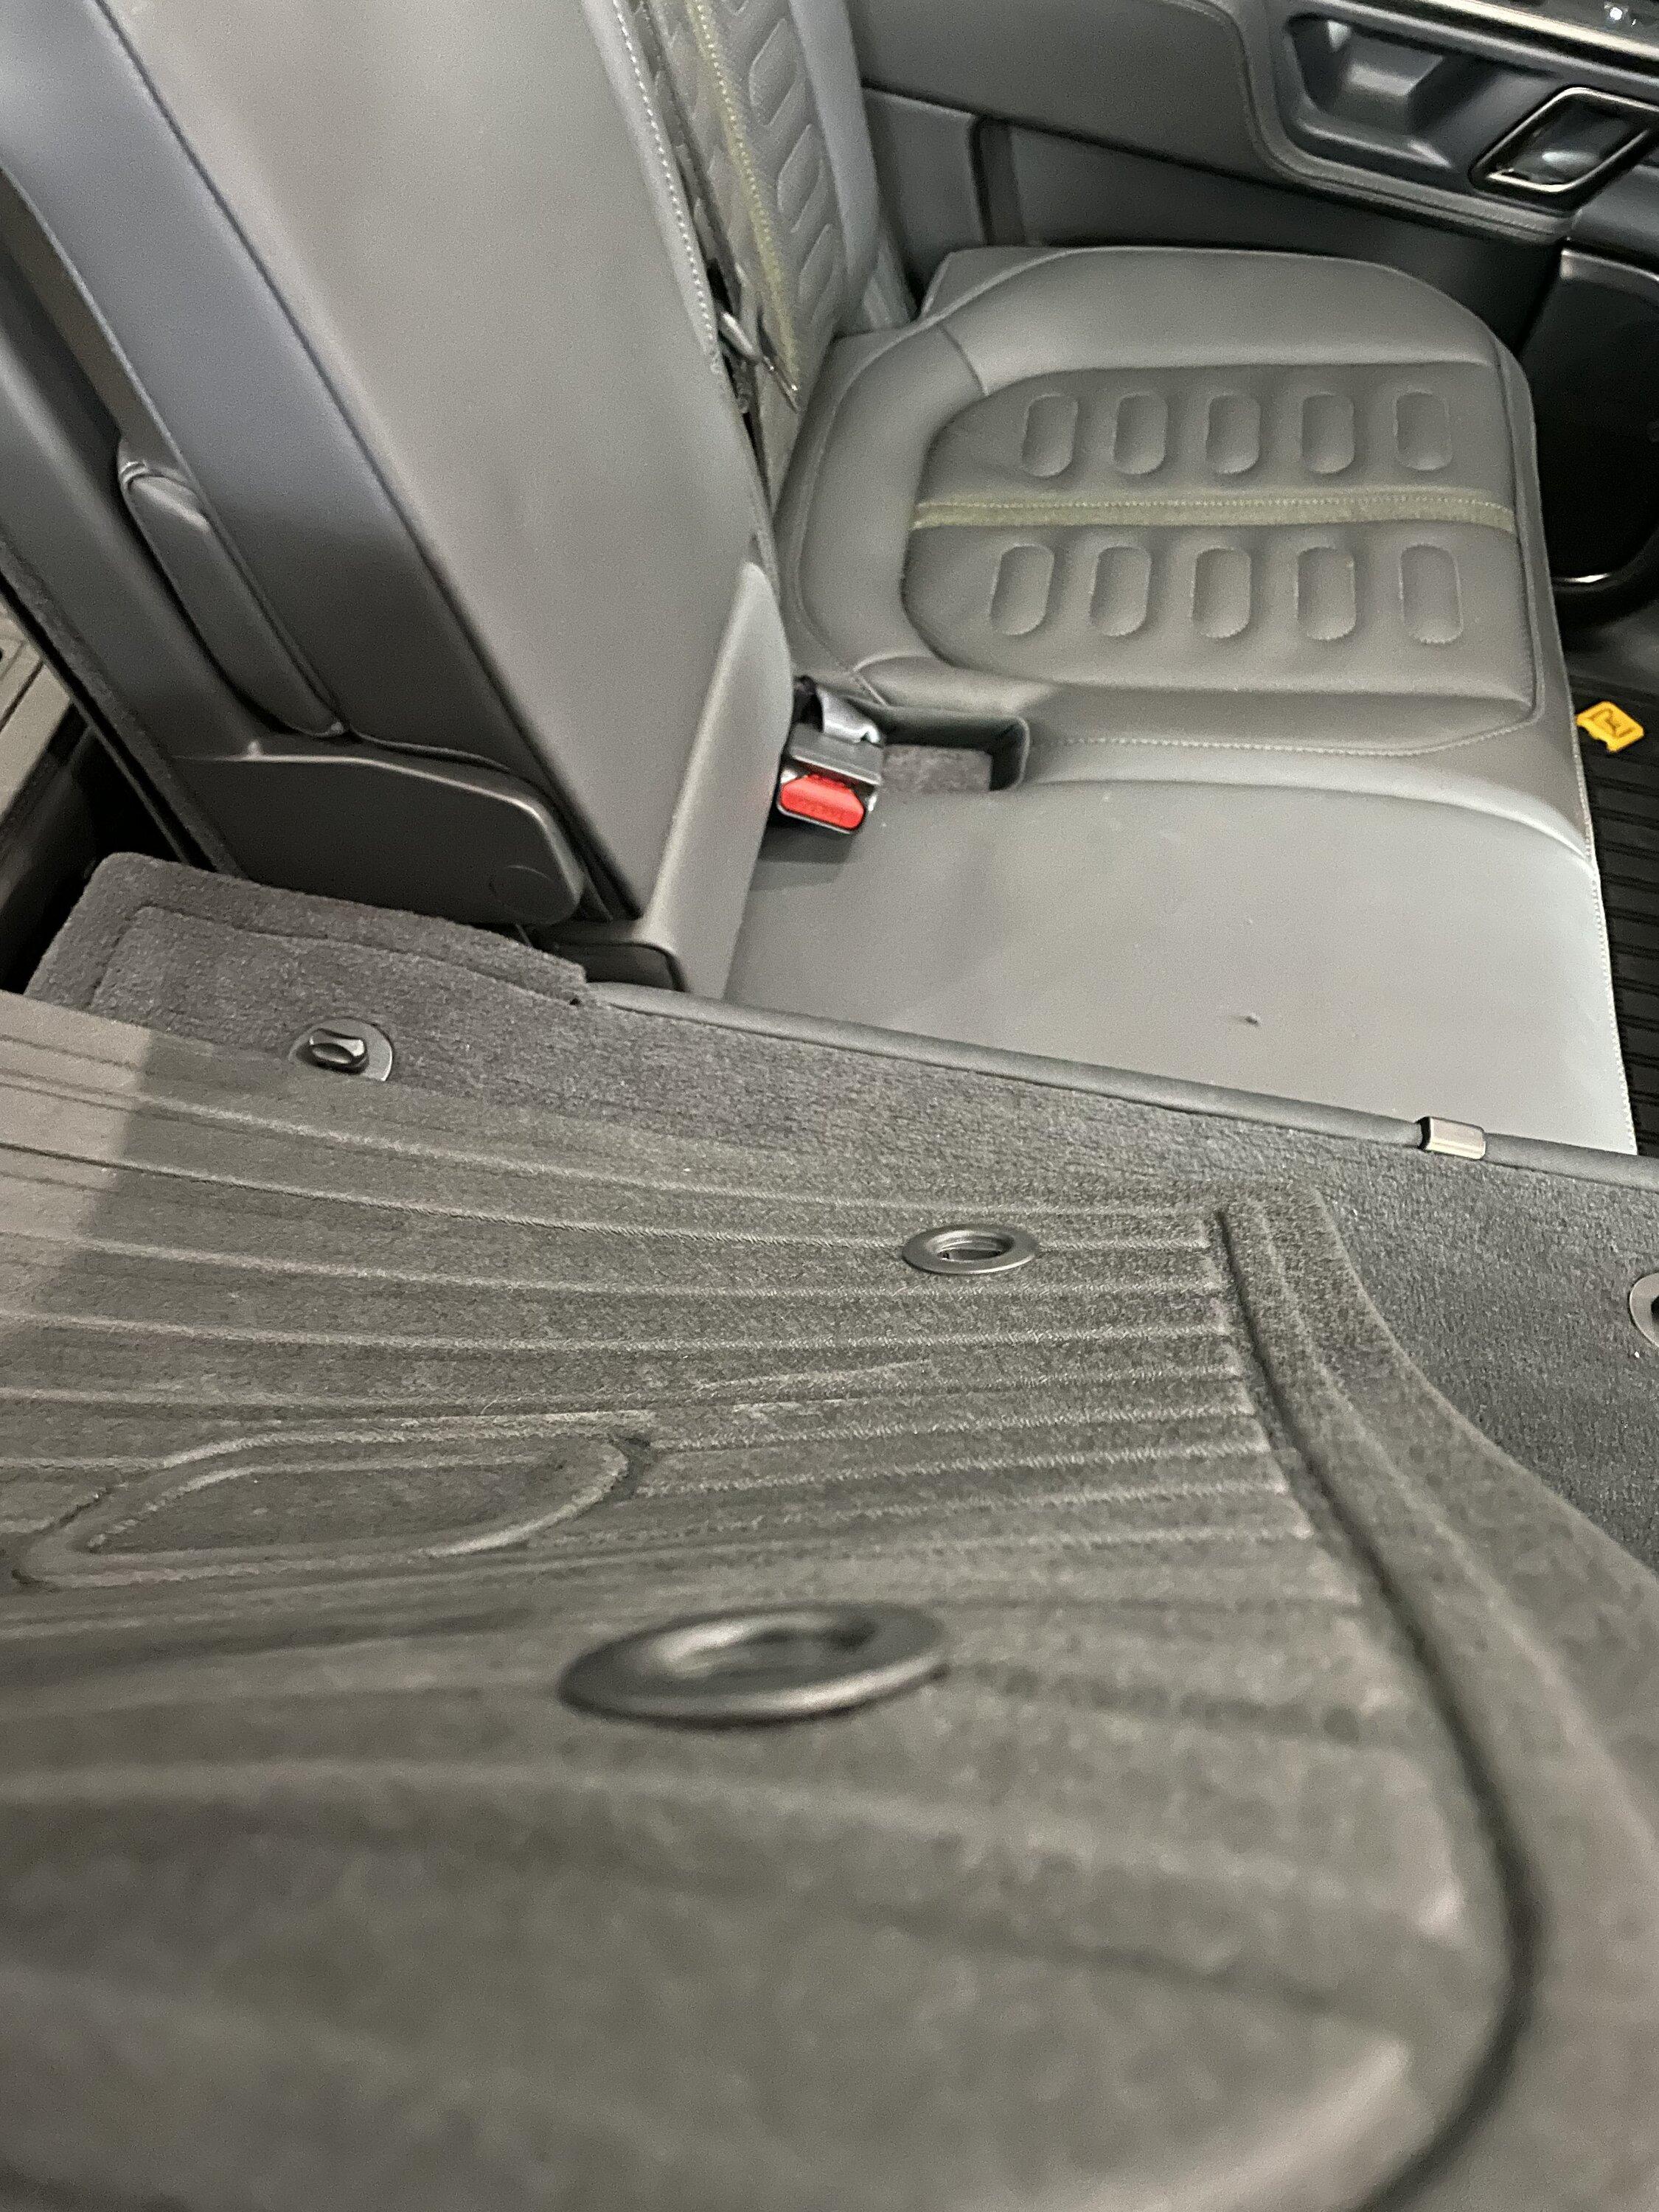
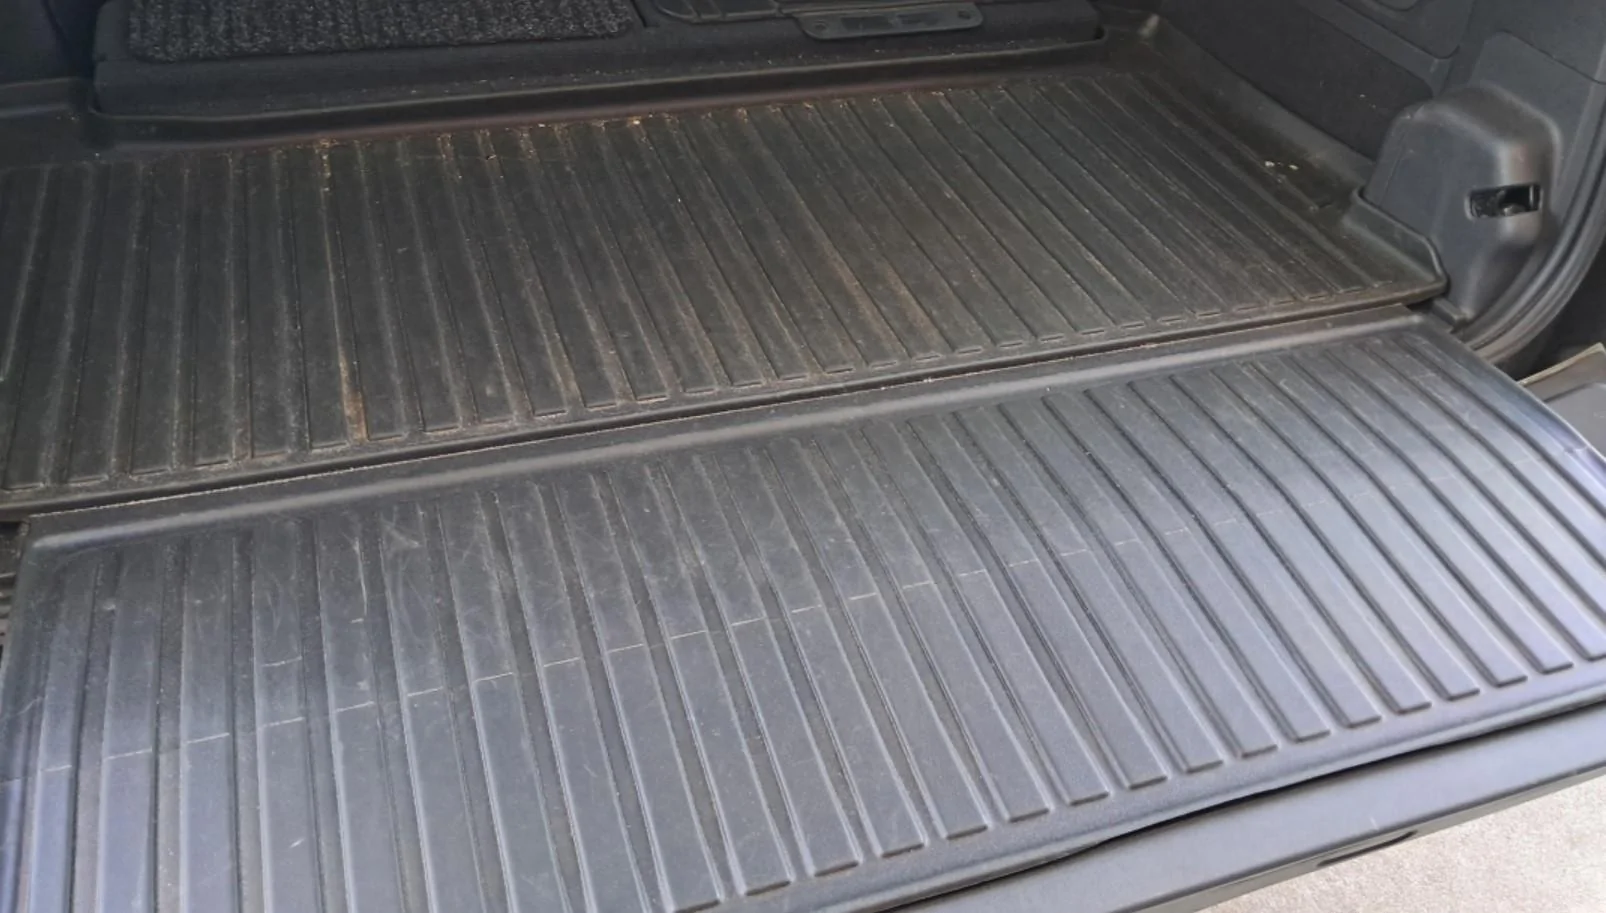
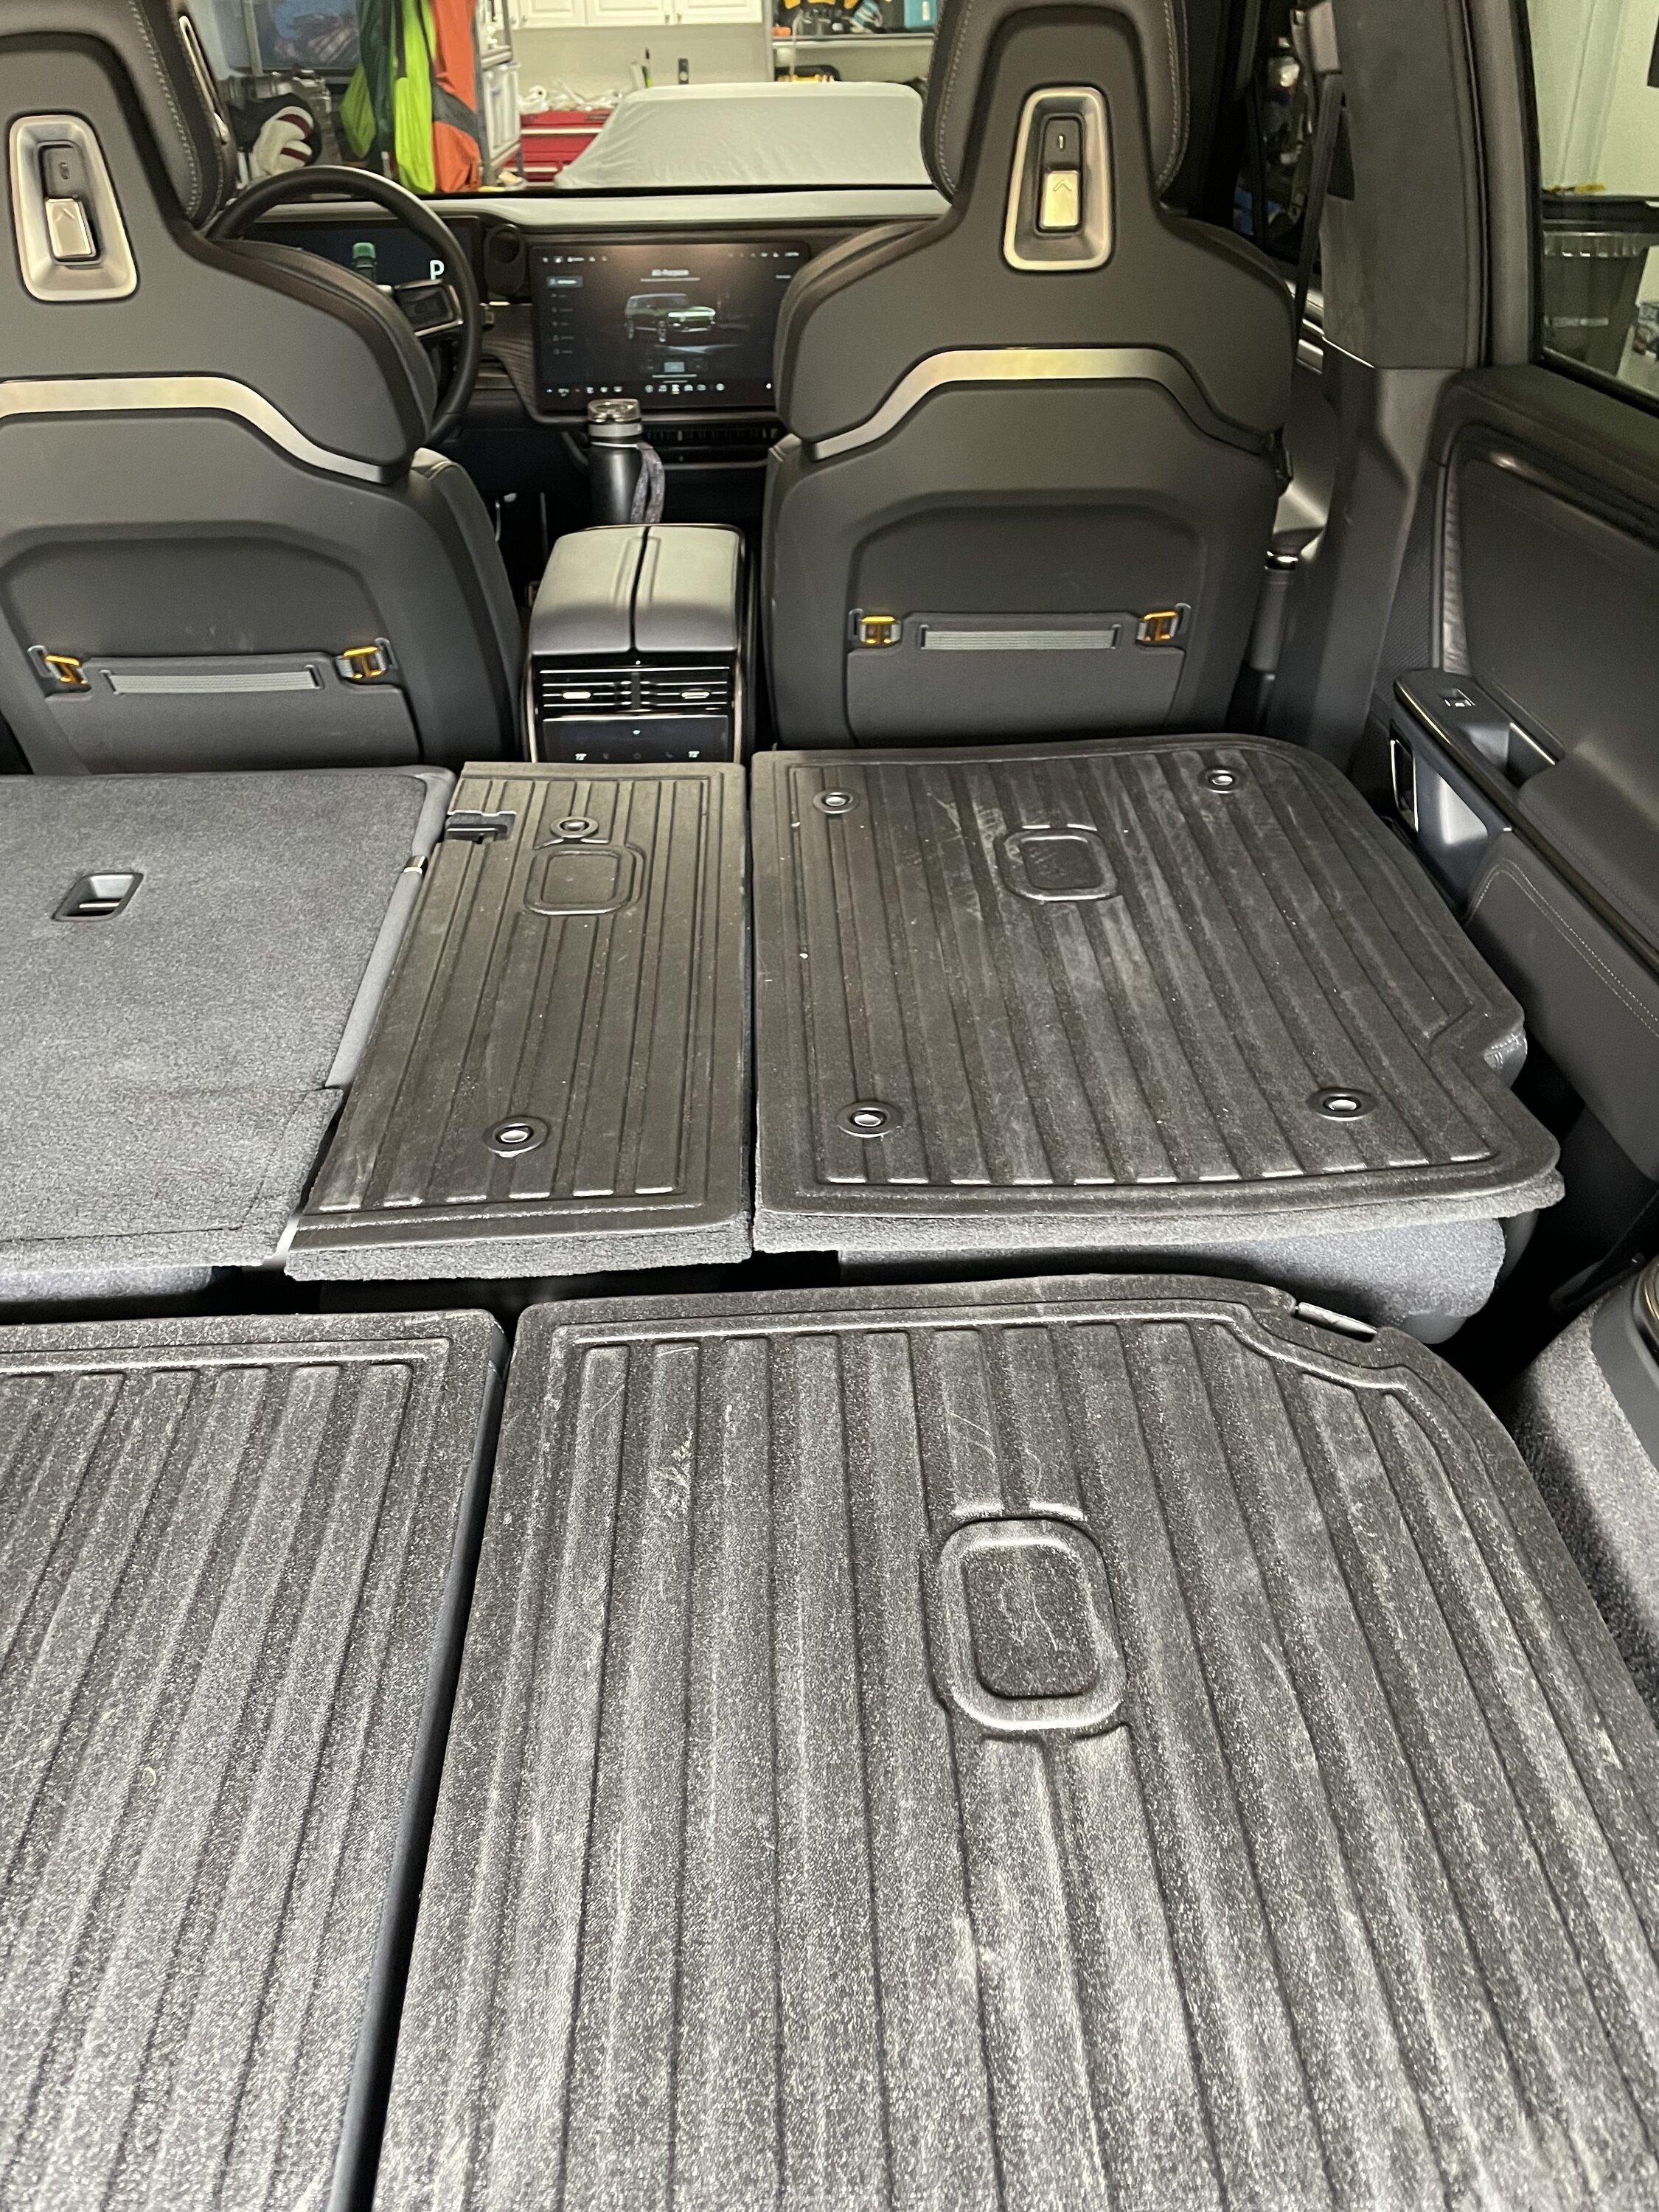
I am 3 weeks and 1600 miles into owning my R1S and like every car I own I have to modify it to make it "better". I ordered the entire cargo mat set from LinerX and am pretty pleased with it. The only issue I had is the 2nd row seat back covers came with velco to use so they would stick to the seat backs and it lasted maybe a week before they fell down.
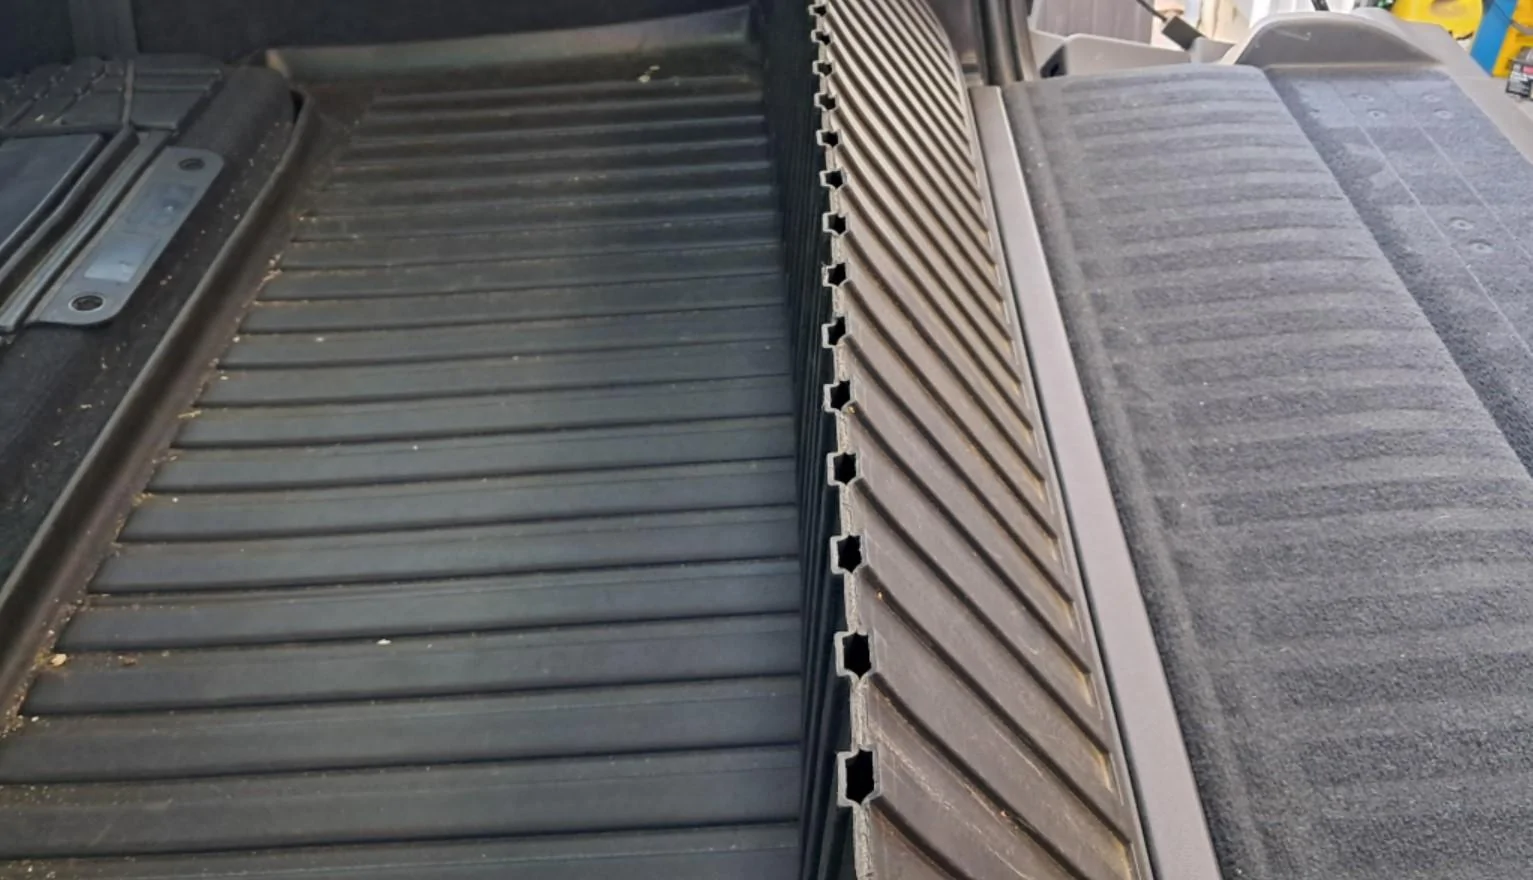
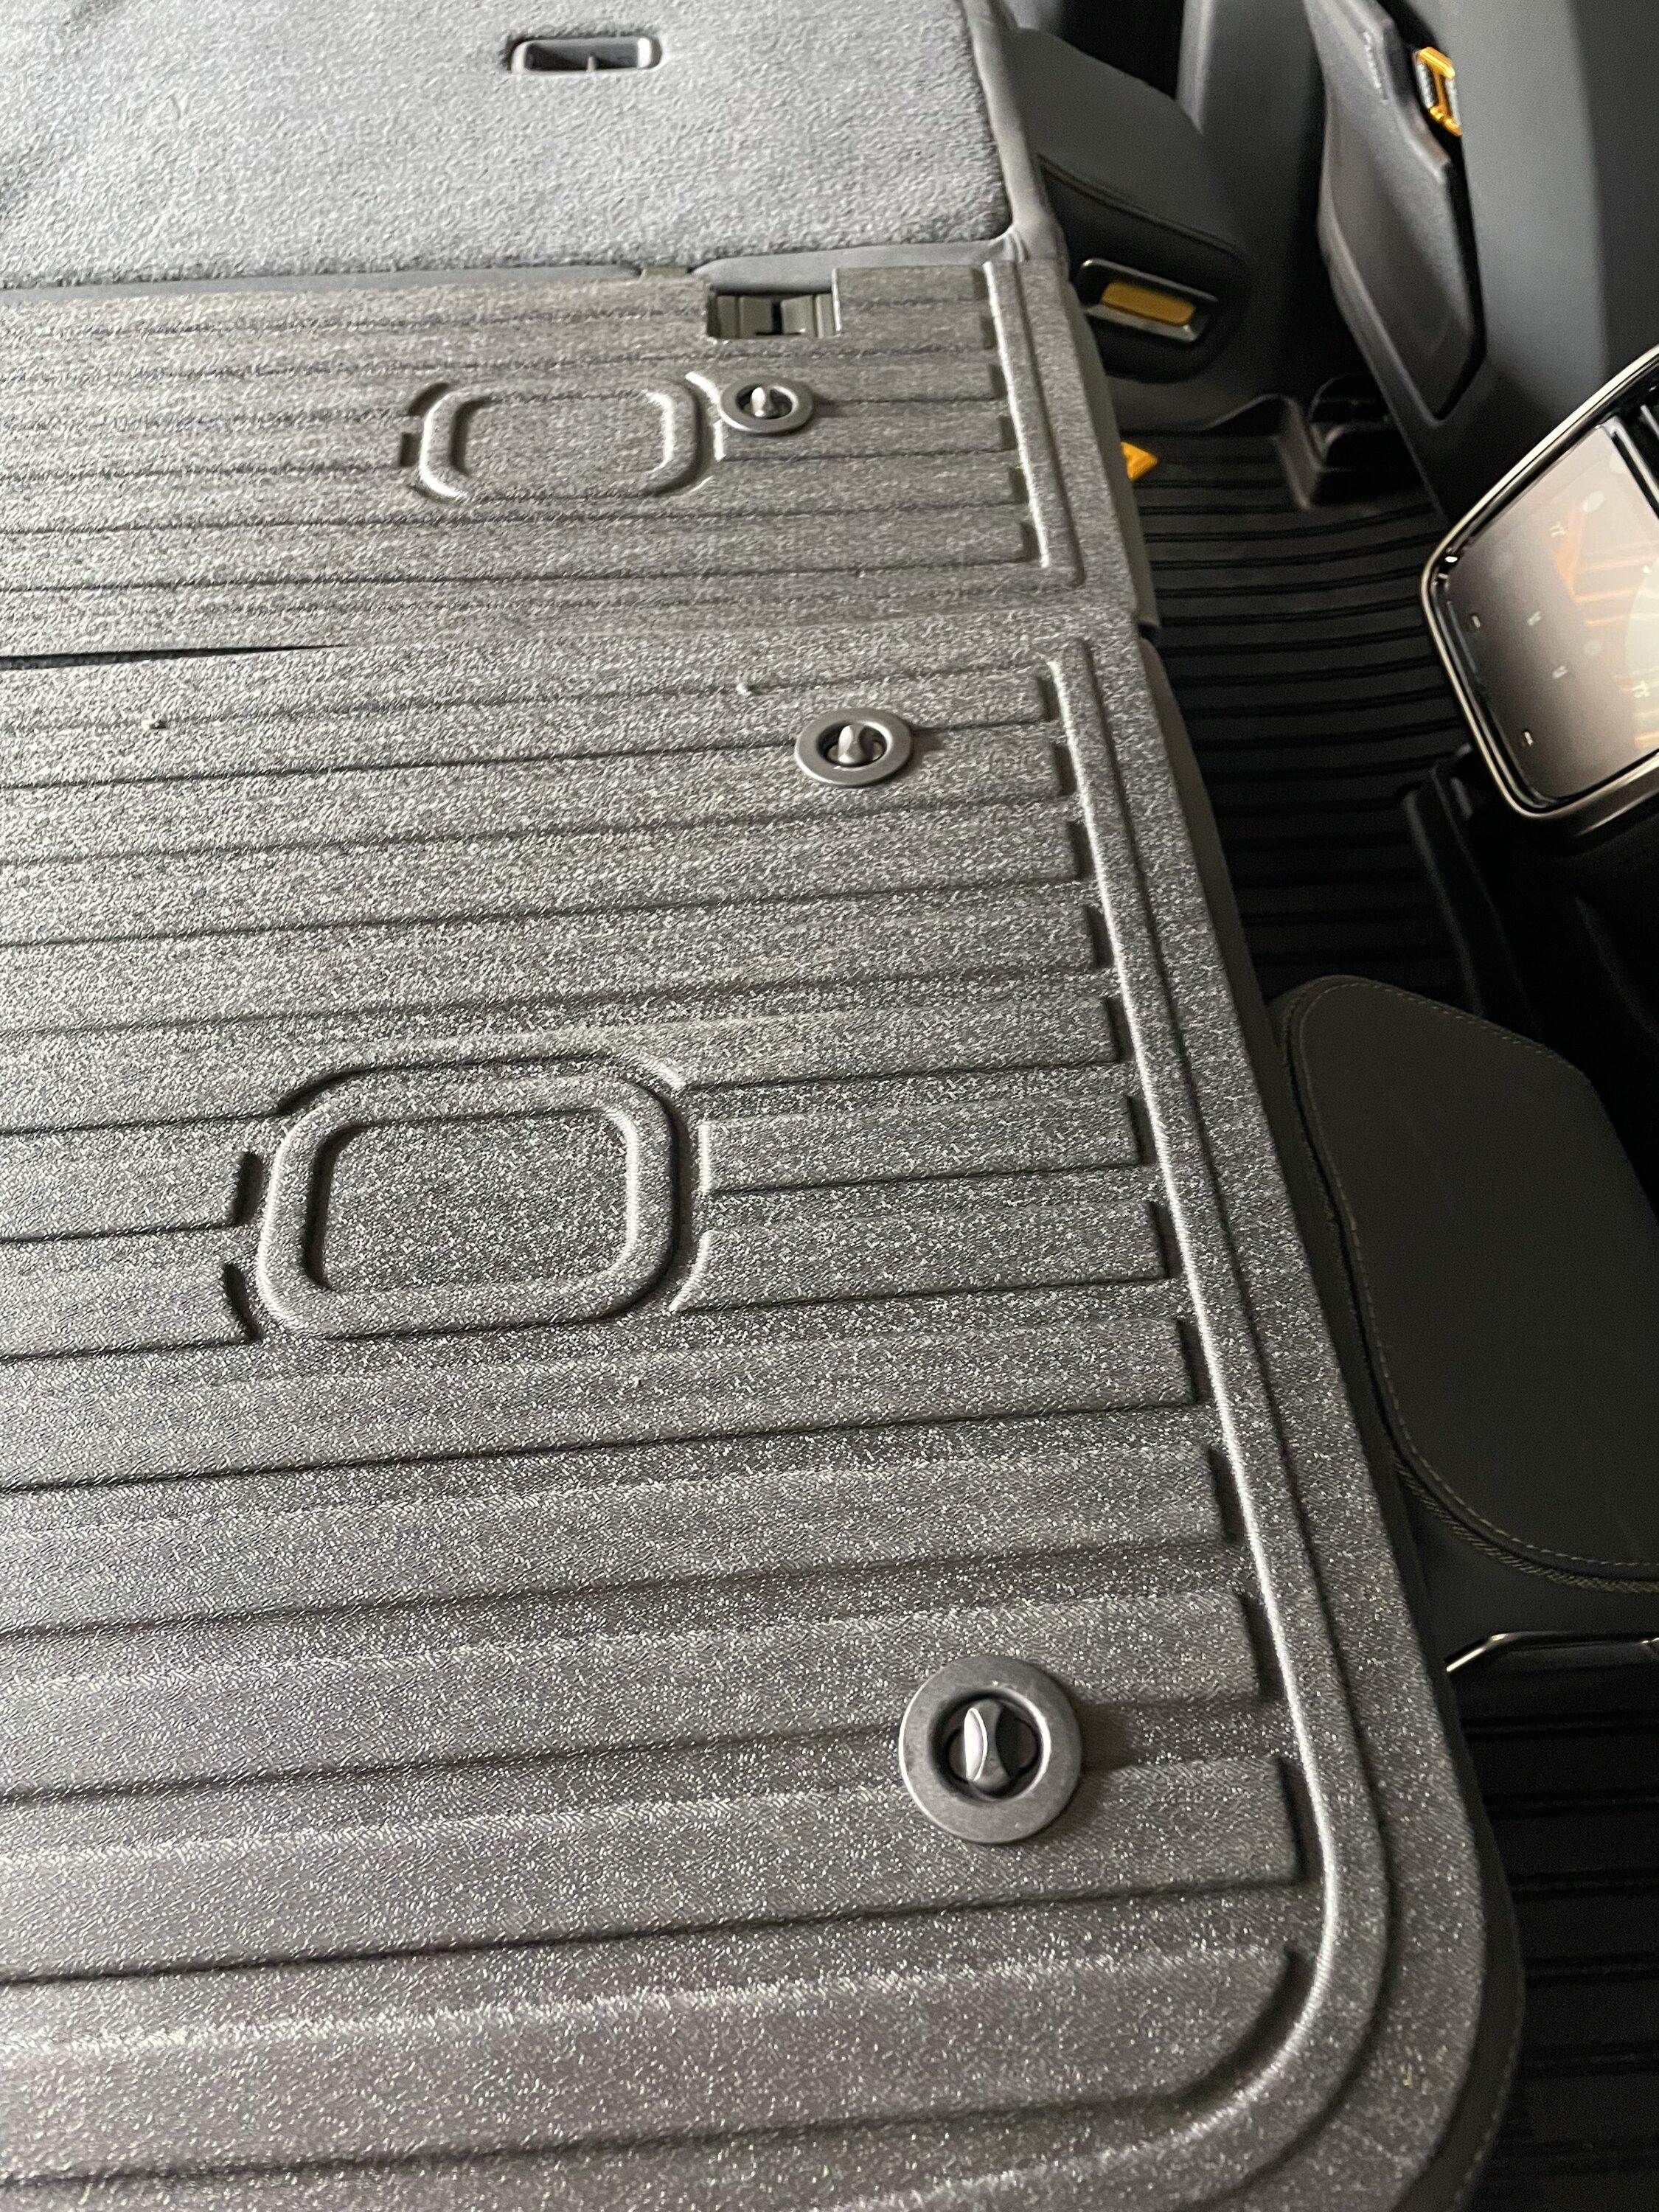
I decided to come up with a more sturdy and permanent solution that would look at OEM as possible. I bought these floor mat pins from Amazon https://www.amazon.com/dp/B09SF7Y344?ref=ppx_yo2ov_dt_b_product_details&th=1
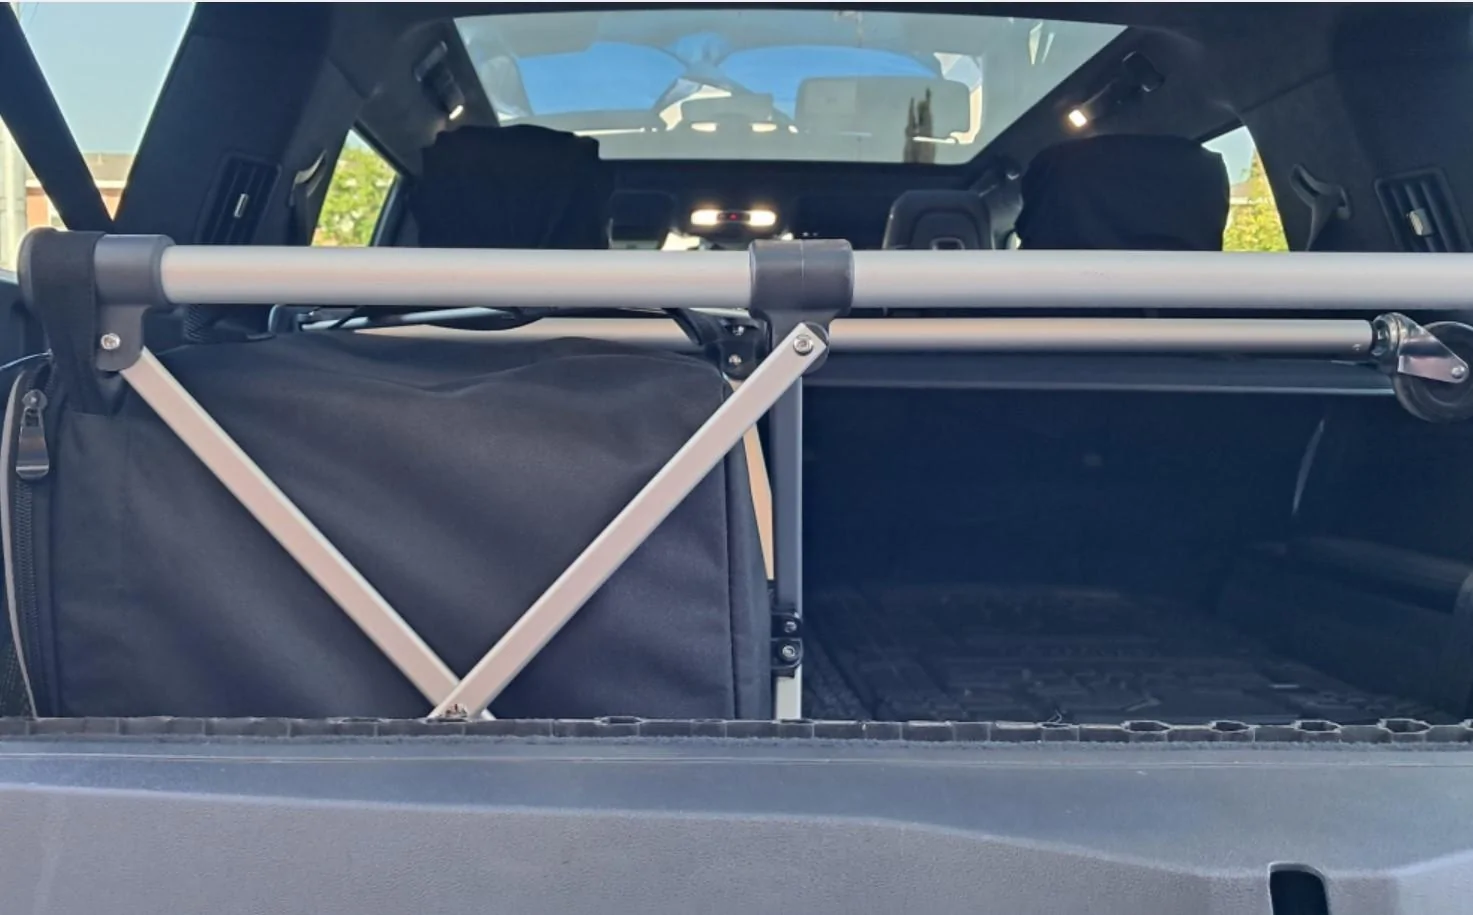
It takes a 1 inch drill bit and some sheet metal shears to cut the holes in the mat and trim to fit. The grommets snap into place with a rubber mallet and once they snap together are very strong. Next I took the mats that had all the holes cut in them with a drill bit to drill into the seats closest to the top very carefully. Nothing like taking a drill to a $90K car! But the seat backs are aluminum backed so there is some metal to get through. Once I was through I could screw in the anchors.
The anchors at the bottom of the carpet are just screwed through the carpet itself so no drilling needed.
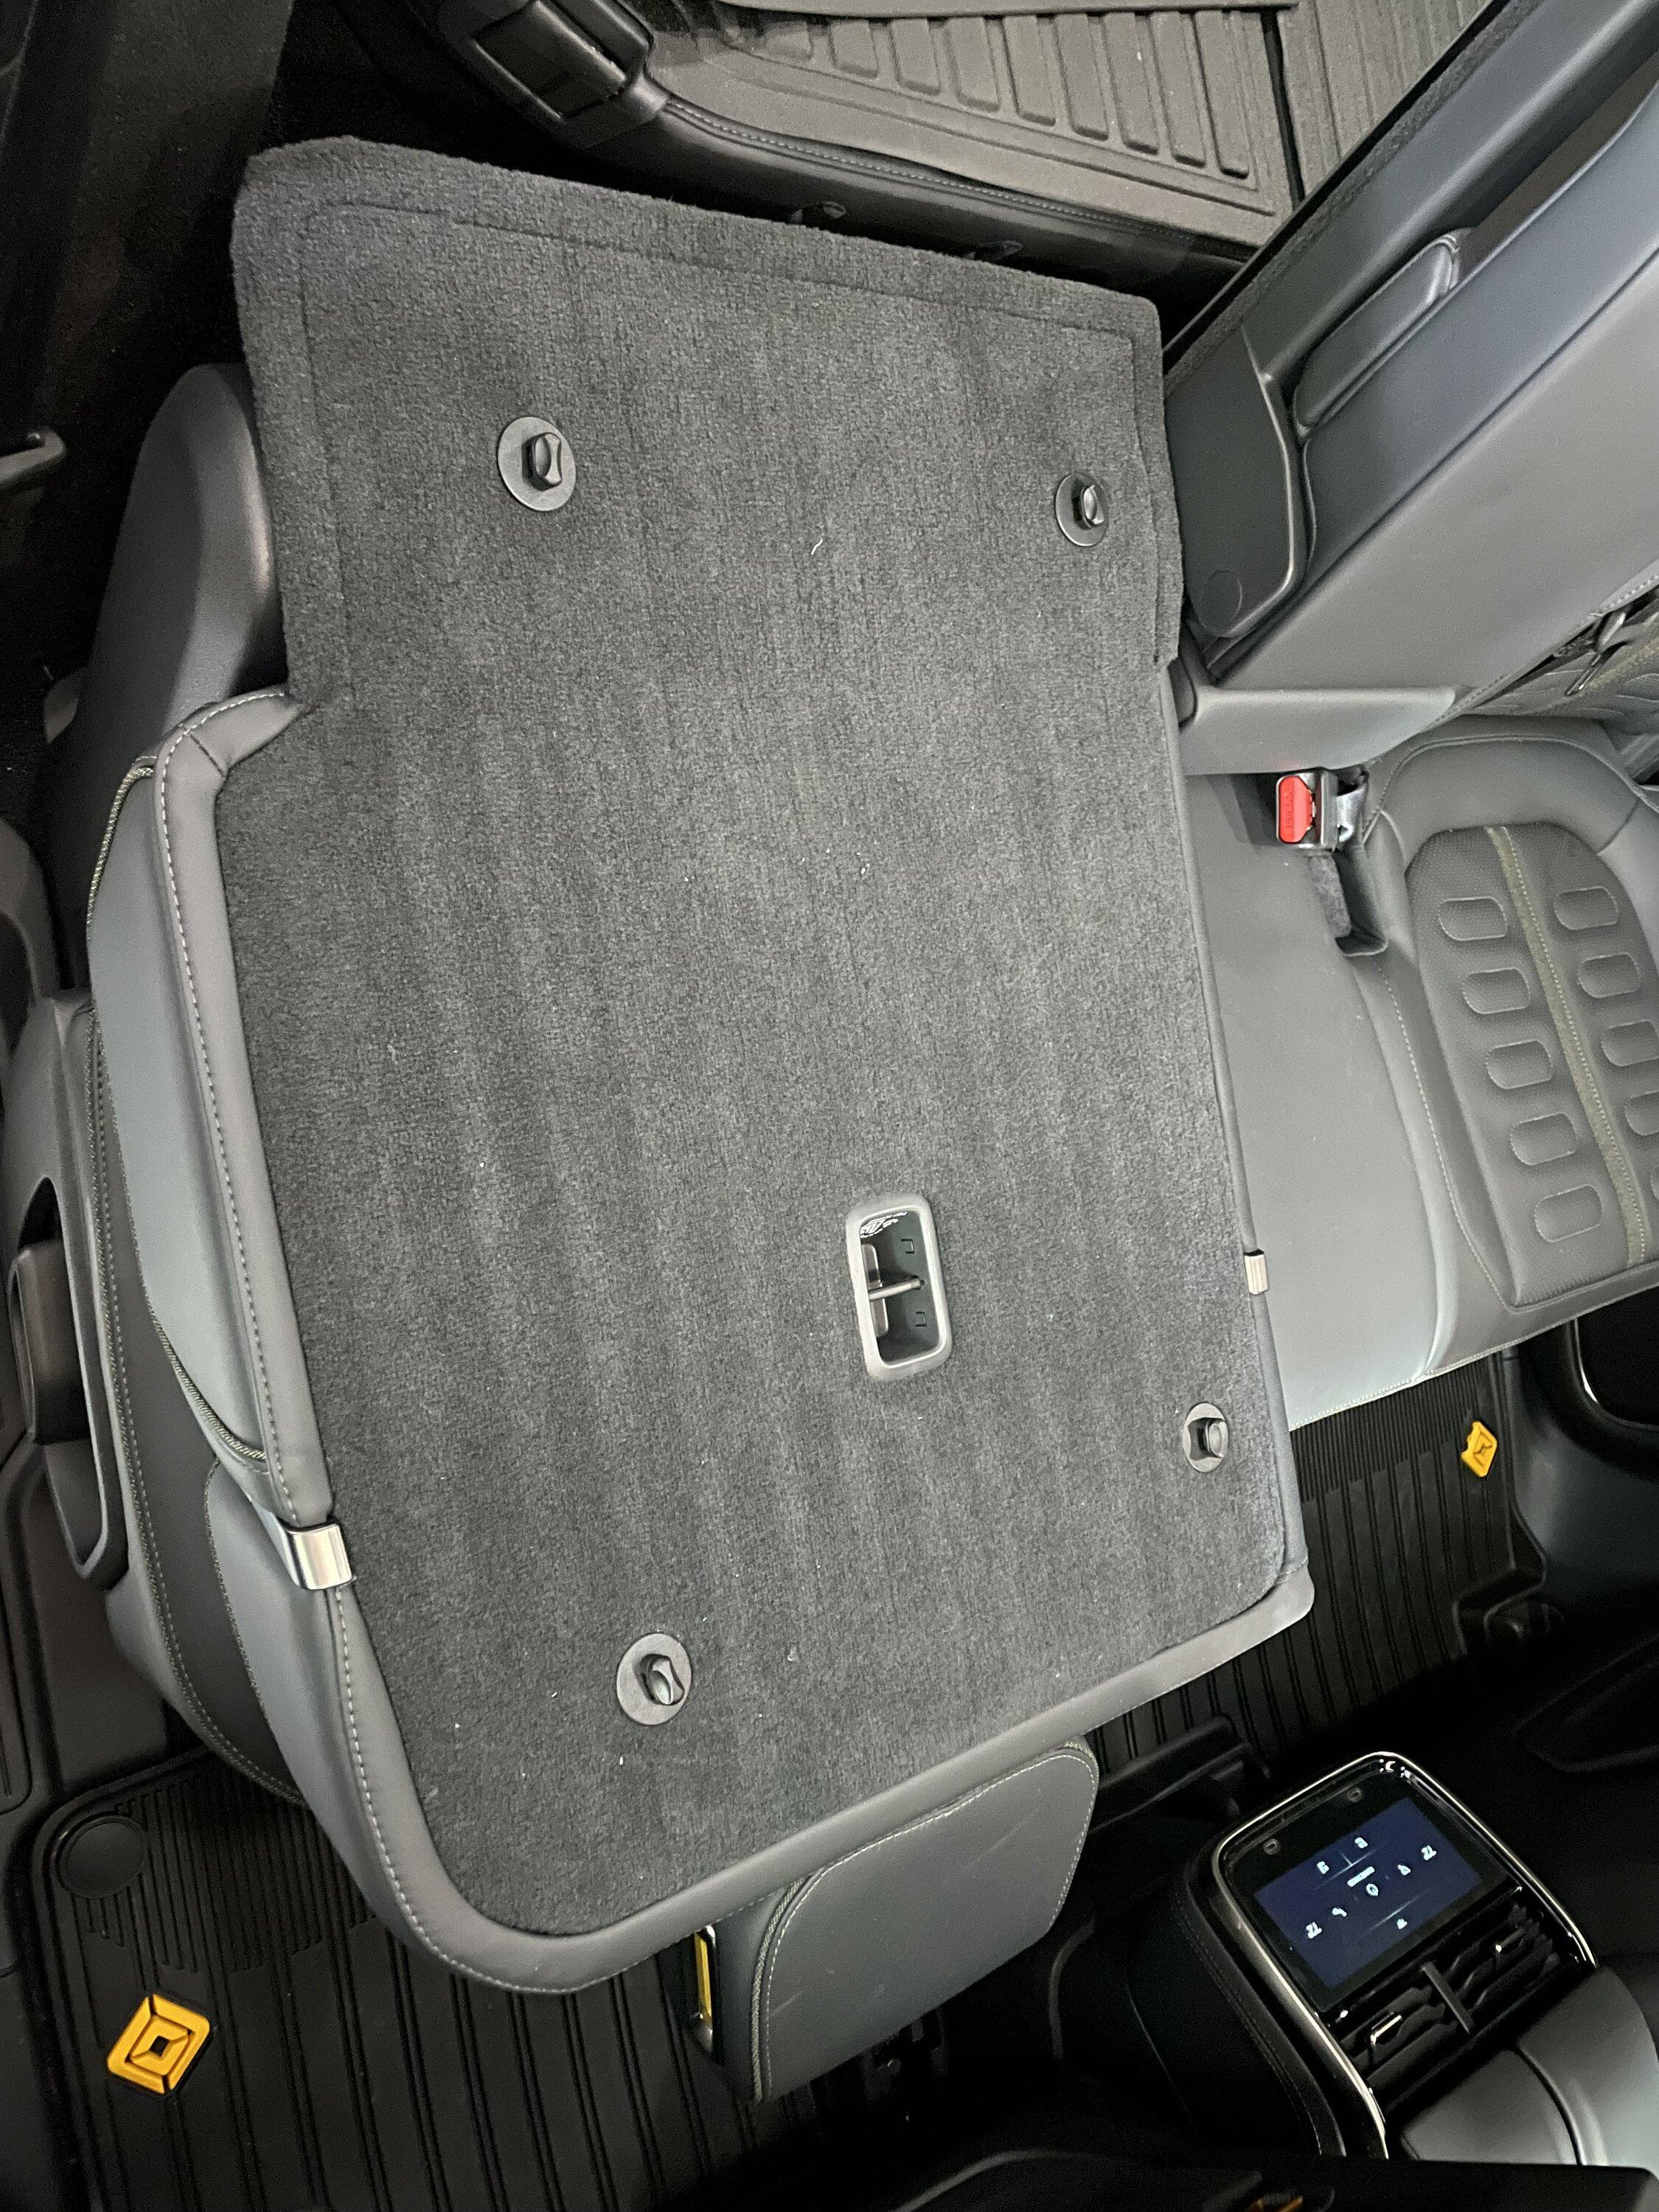
I did cut the liner so I could put the center section down and still have protection for skiing or hauling longer things
For me, I will do off grid camping and hauling things so I wanted the floor liners secure and will leave them on all the time and it will make loading and unloading much easier than the carpet.
I still have the driver side passenger to do since I toasted 2 of my anchors trying to get it right into the upper section of the seatback.
My to do list
- Ordered the Megawatt rock sliders, so I wait until the arrive whenever that will be
- I will put an overland rack on but I am waiting for some more options. I LOVE the JEH rack but that is a $2k premium over what I could get for my 4Runner and hopefully prices will come down
My already done list is cosmetic stuff.
- Lots of the Abstract Ocean and BrainExploder stickers for the door pilar logo, frunk logo, lower center console logo, black out logos, visor stickers
- Matte screen protectors from EV Sportline as well as their 4 jack pucks with case and carbon fiber mud flaps
- Twraps PPF for door sills, door handles, rocker panels, A,B,C Pillars and entire rear hatch
- Front full PPF from the factory
- Applied Aquapel to both sunroofs and front and rear windows (I live in PNW and I do that for all my cars it is good stuff!)
- Factory matching ceramic tint to the front windows
-Rivian factory rubber mats
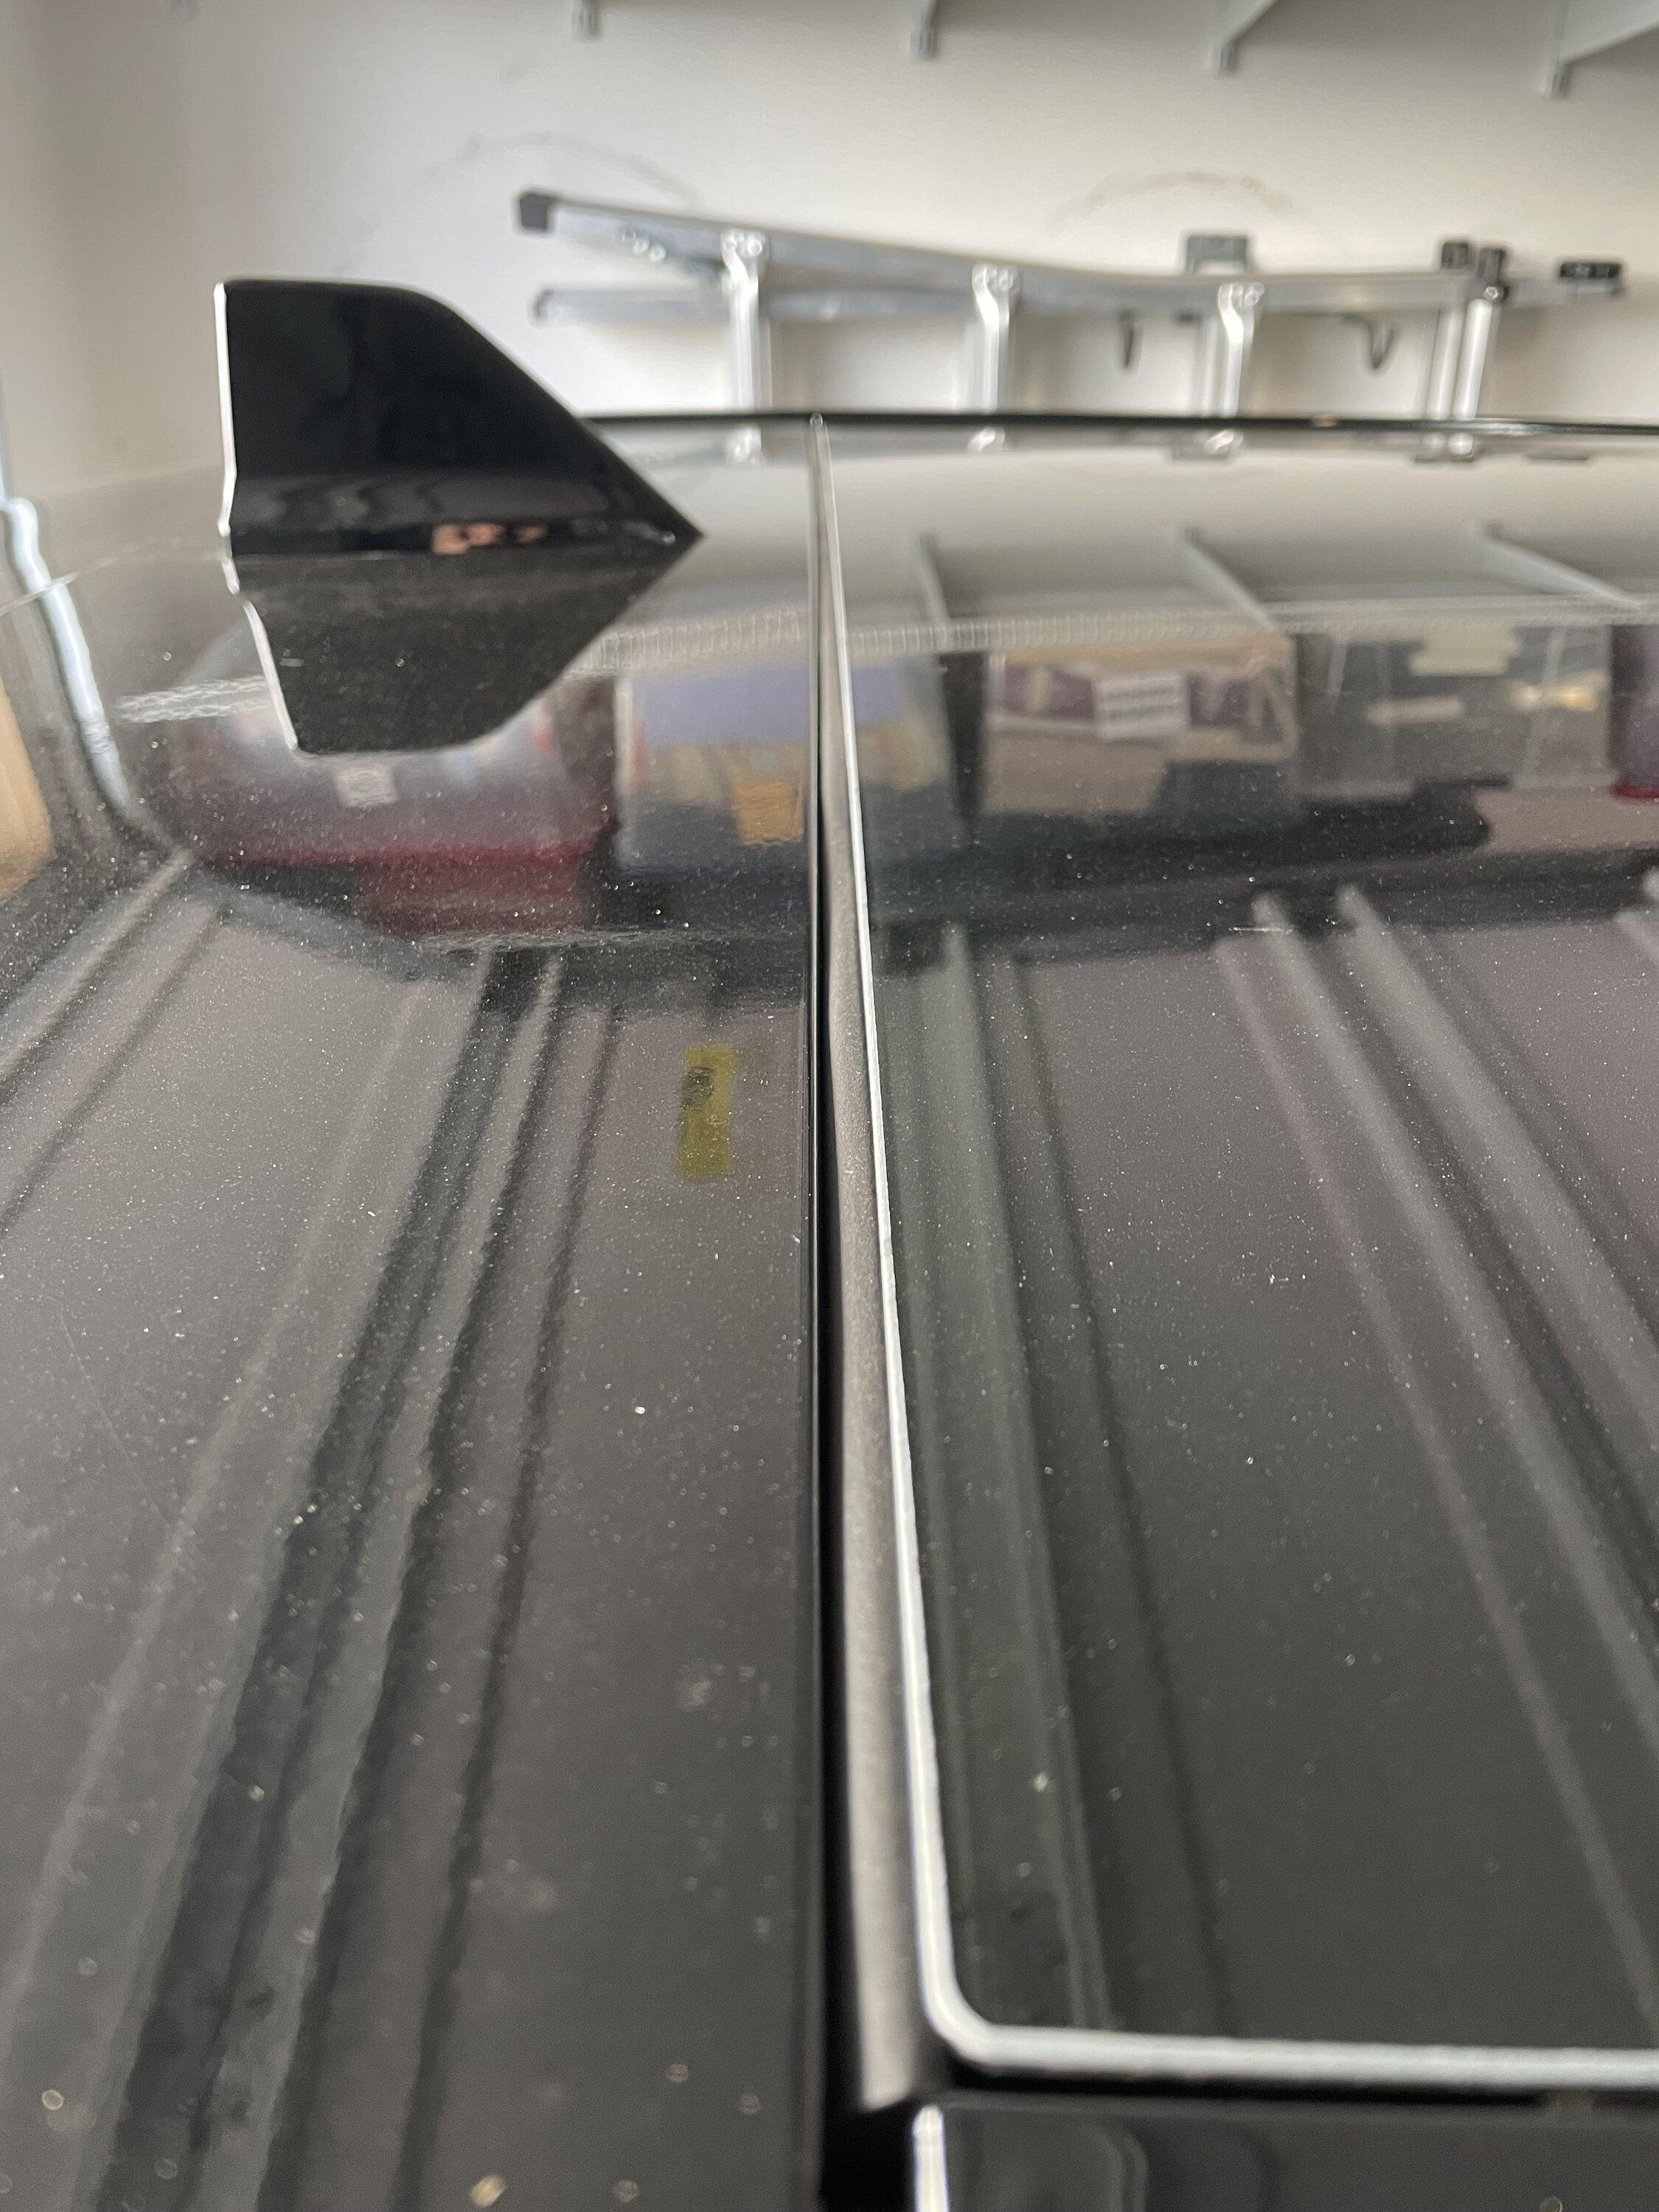
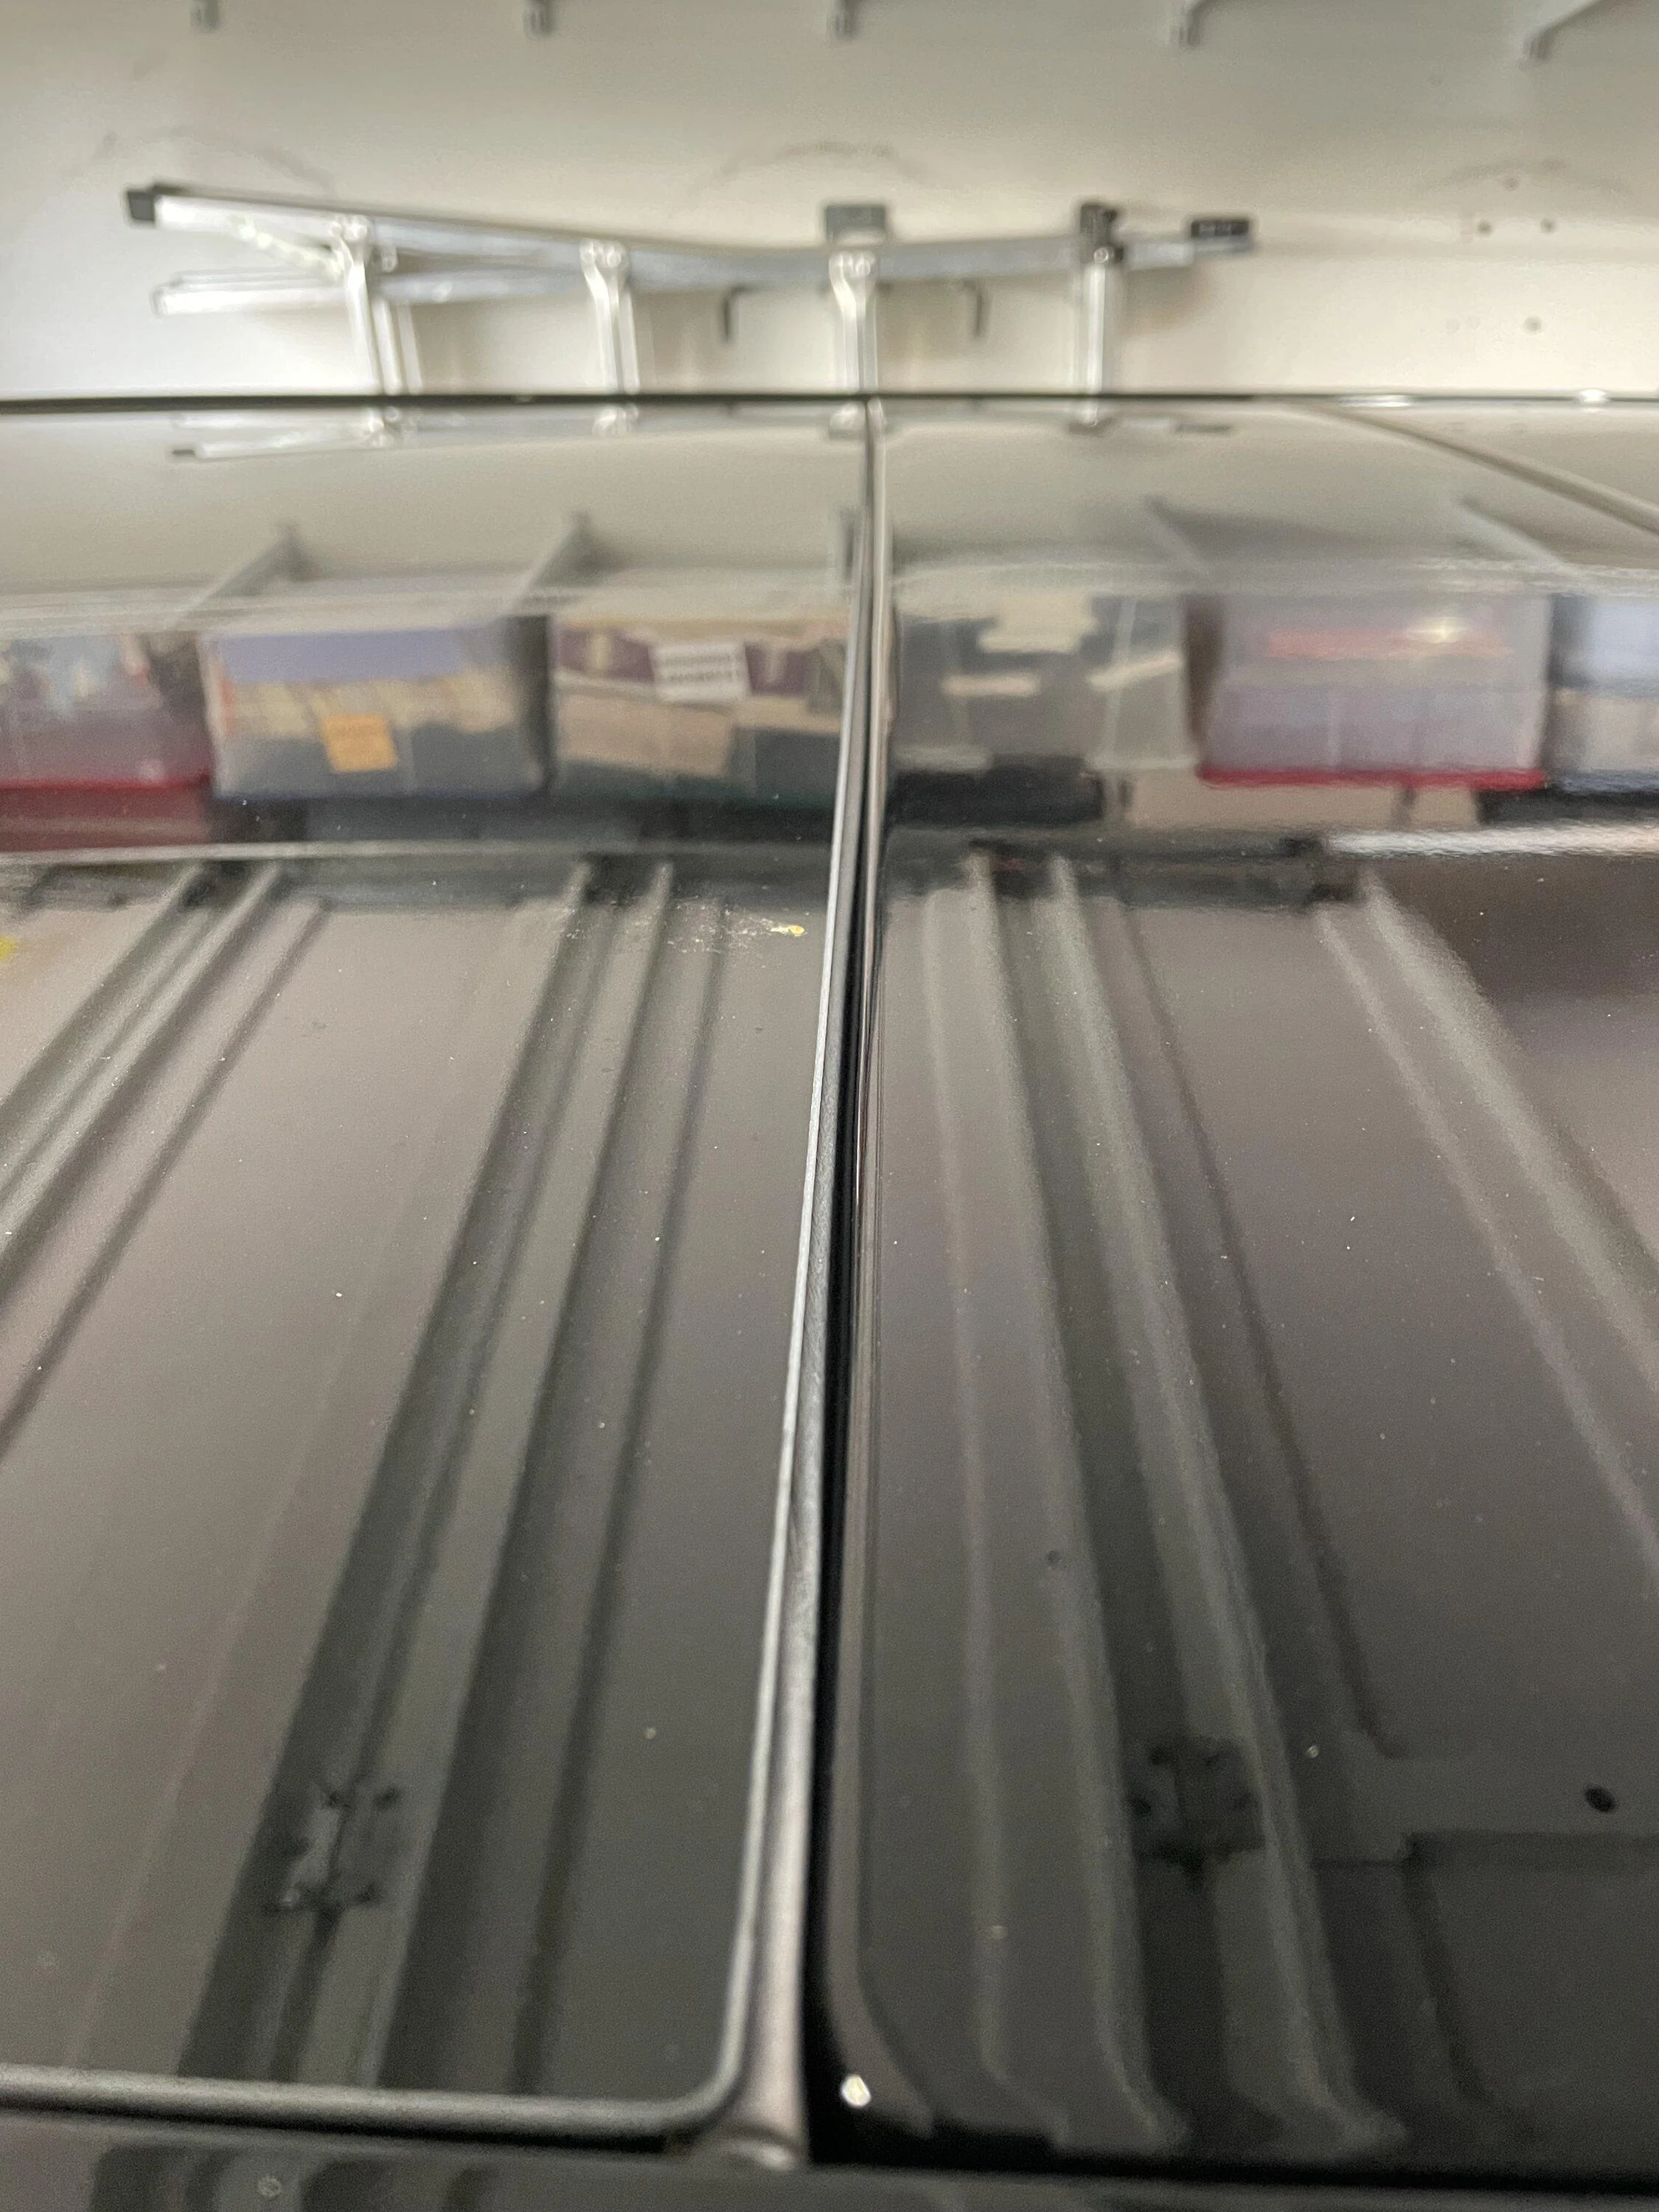
- Installed .25in automotive rubber trim around the rear window and 3 of the seems for the sunroof. I am particular about a clean car and these crevices' will easily get gunky and hard to clean. With this installed you will not know it is there unless you look for it and it looks OEM to me and keeps the gunk out.
I read the forum almost everyday and love the community!

I decided to come up with a more sturdy and permanent solution that would look at OEM as possible. I bought these floor mat pins from Amazon https://www.amazon.com/dp/B09SF7Y344?ref=ppx_yo2ov_dt_b_product_details&th=1
It takes a 1 inch drill bit and some sheet metal shears to cut the holes in the mat and trim to fit. The grommets snap into place with a rubber mallet and once they snap together are very strong. Next I took the mats that had all the holes cut in them with a drill bit to drill into the seats closest to the top very carefully. Nothing like taking a drill to a $90K car! But the seat backs are aluminum backed so there is some metal to get through. Once I was through I could screw in the anchors.
The anchors at the bottom of the carpet are just screwed through the carpet itself so no drilling needed.
I did cut the liner so I could put the center section down and still have protection for skiing or hauling longer things
For me, I will do off grid camping and hauling things so I wanted the floor liners secure and will leave them on all the time and it will make loading and unloading much easier than the carpet.
I still have the driver side passenger to do since I toasted 2 of my anchors trying to get it right into the upper section of the seatback.
My to do list
- Ordered the Megawatt rock sliders, so I wait until the arrive whenever that will be
- I will put an overland rack on but I am waiting for some more options. I LOVE the JEH rack but that is a $2k premium over what I could get for my 4Runner and hopefully prices will come down
My already done list is cosmetic stuff.
- Lots of the Abstract Ocean and BrainExploder stickers for the door pilar logo, frunk logo, lower center console logo, black out logos, visor stickers
- Matte screen protectors from EV Sportline as well as their 4 jack pucks with case and carbon fiber mud flaps
- Twraps PPF for door sills, door handles, rocker panels, A,B,C Pillars and entire rear hatch
- Front full PPF from the factory
- Applied Aquapel to both sunroofs and front and rear windows (I live in PNW and I do that for all my cars it is good stuff!)
- Factory matching ceramic tint to the front windows
-Rivian factory rubber mats
- Installed .25in automotive rubber trim around the rear window and 3 of the seems for the sunroof. I am particular about a clean car and these crevices' will easily get gunky and hard to clean. With this installed you will not know it is there unless you look for it and it looks OEM to me and keeps the gunk out.
I read the forum almost everyday and love the community!
Sponsored