kdcold
Well-Known Member
- Joined
- Aug 18, 2021
- Threads
- 1
- Messages
- 52
- Reaction score
- 53
- Location
- Little Rock
- Vehicles
- 2023 R1S, 2011 Toyota 4Runner, 2013 Infiniti JX35
- Occupation
- Banking IT Software Services
- Thread starter
- #1
I didn’t like how high my R1S low-beams were pointed from the factory, shining into the cabins of oncoming cars and compelling some to flick their brights at me.
So thanks to a tip on another forum I learned how to adjust them myself using just a 12mm wrench and about 10-15 minutes.
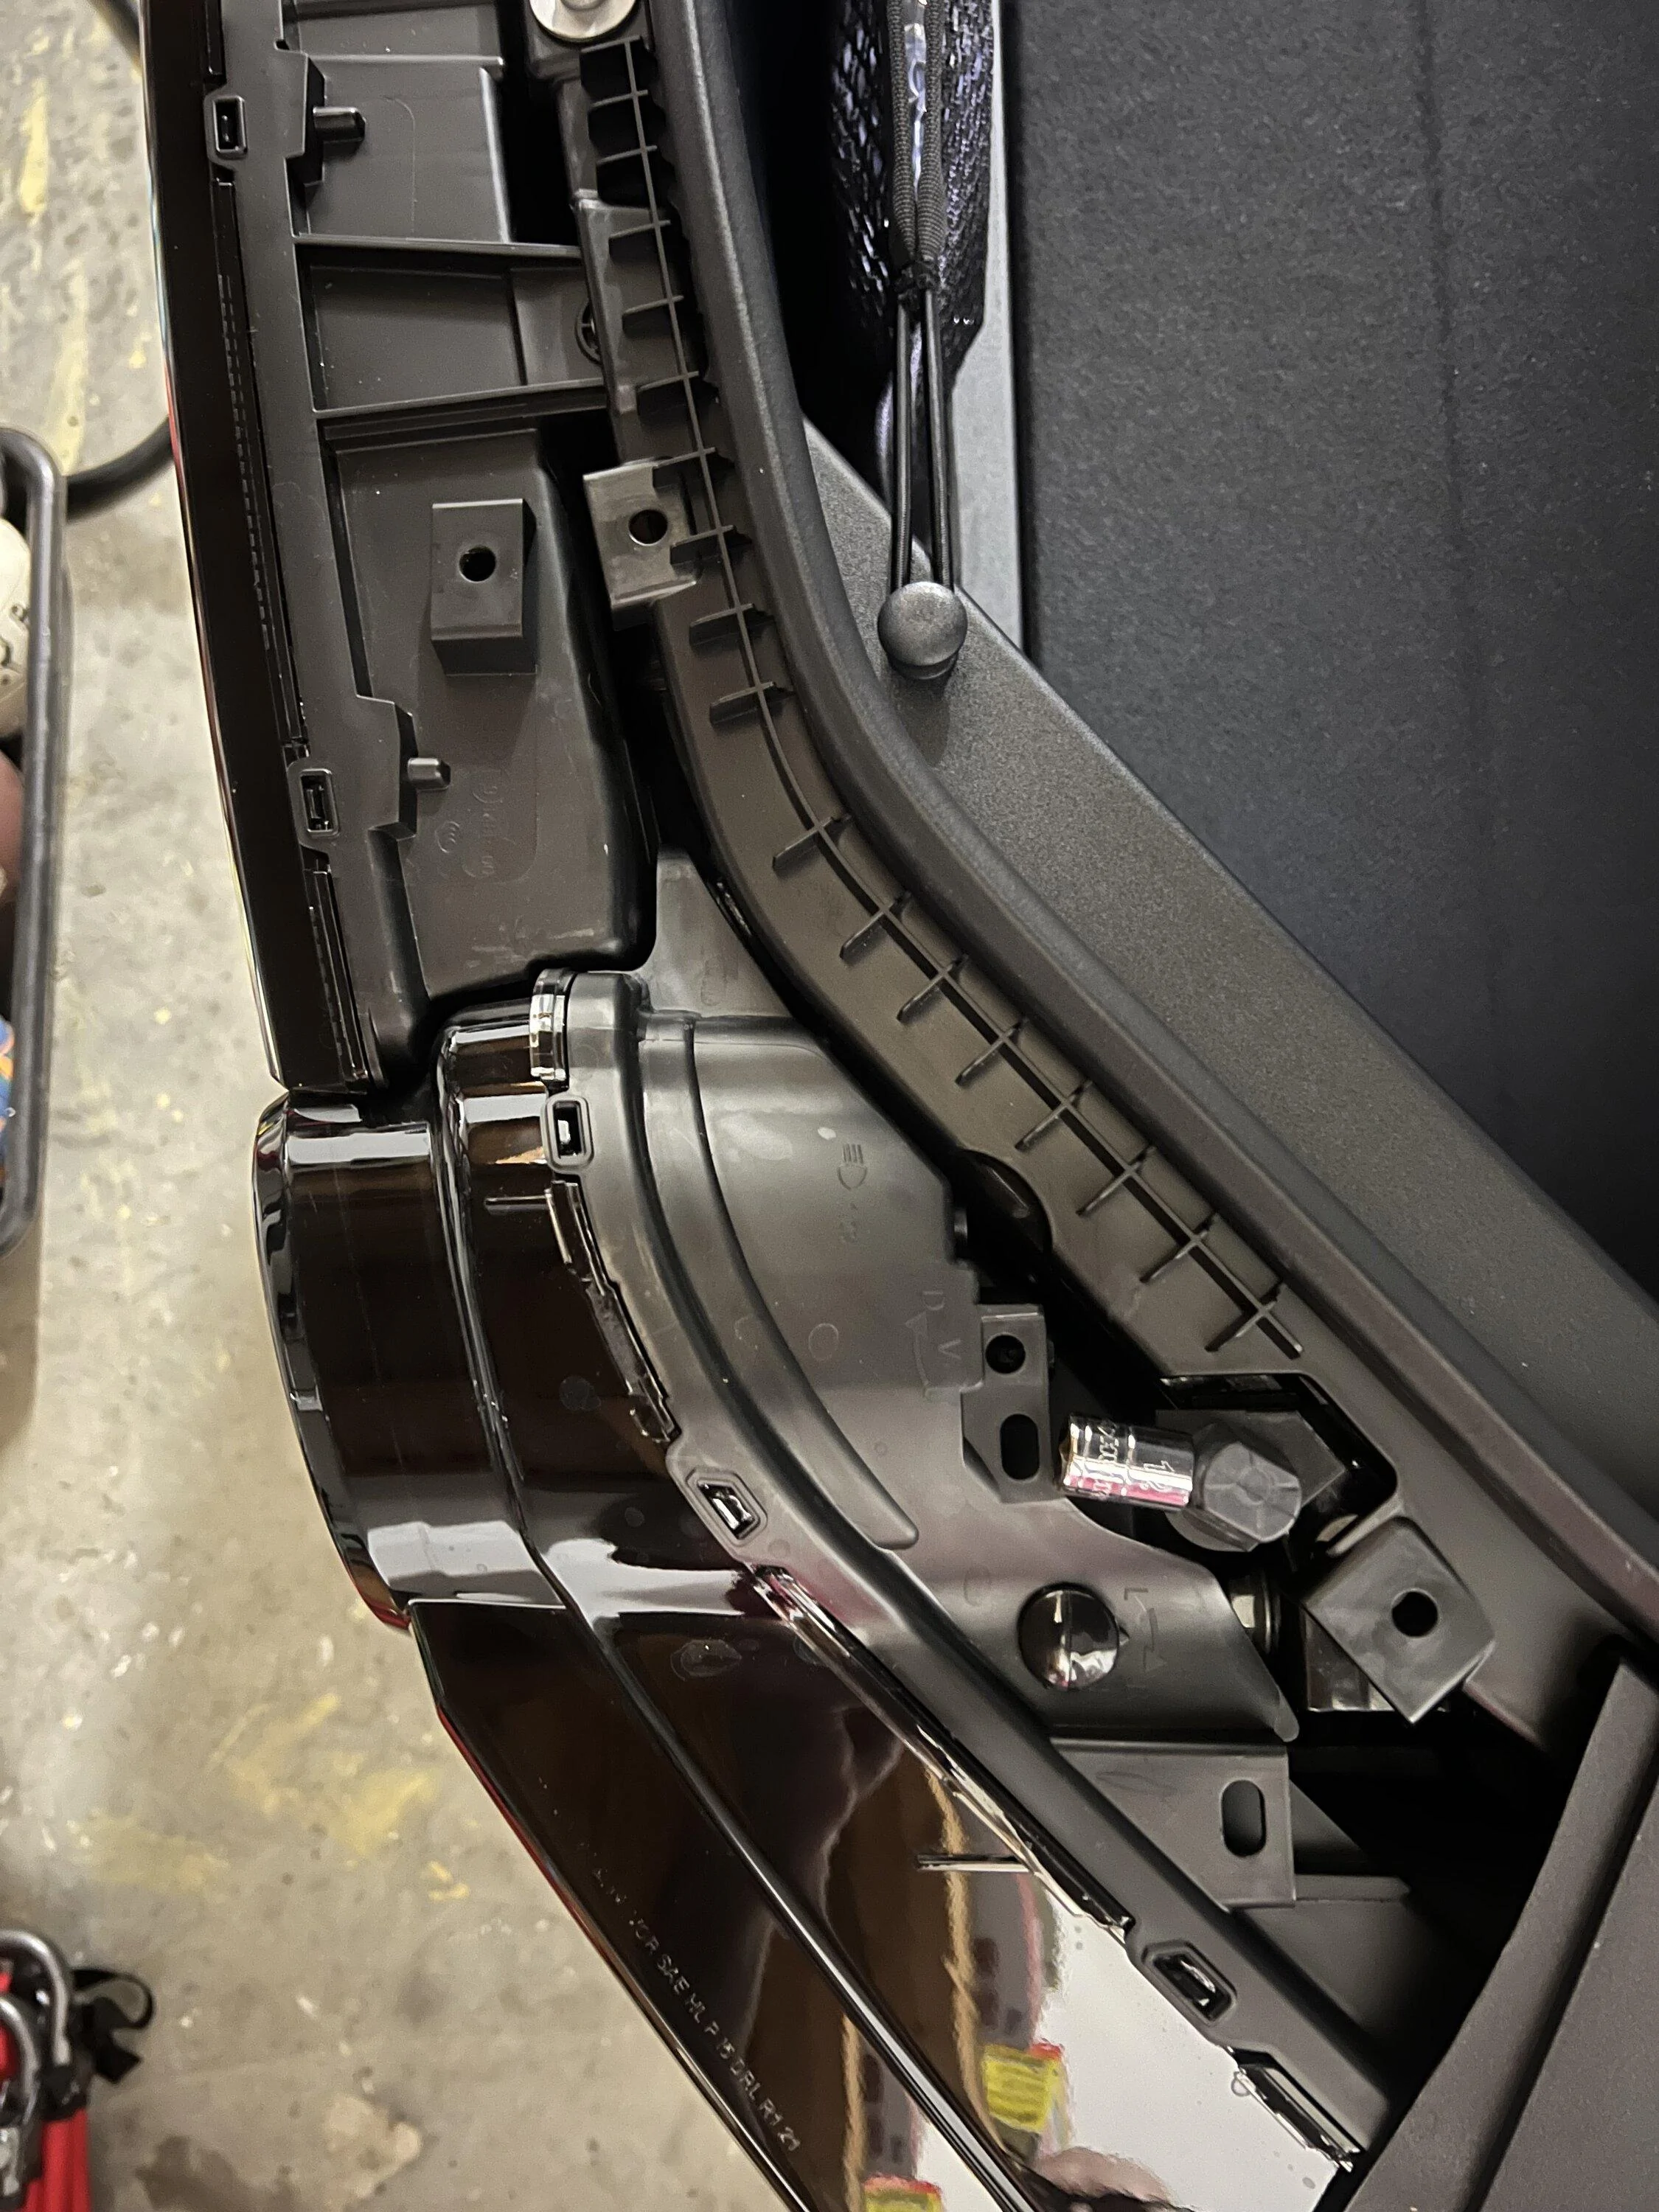
There are 12mm adjustment bolts under the plastic panel that runs along the frunk above the headlights.
Steps I took:
Removing the plastic frunk panel was just a matter of raising the hood and pulling up from one of the outer edges of that panel with my hands. Four pushpins hold it into place, 2 outer and 2 inner, roughly along the centerline of that boomerang-shaped panel. Some early Rivians actually have magnets rather than pushpins here.
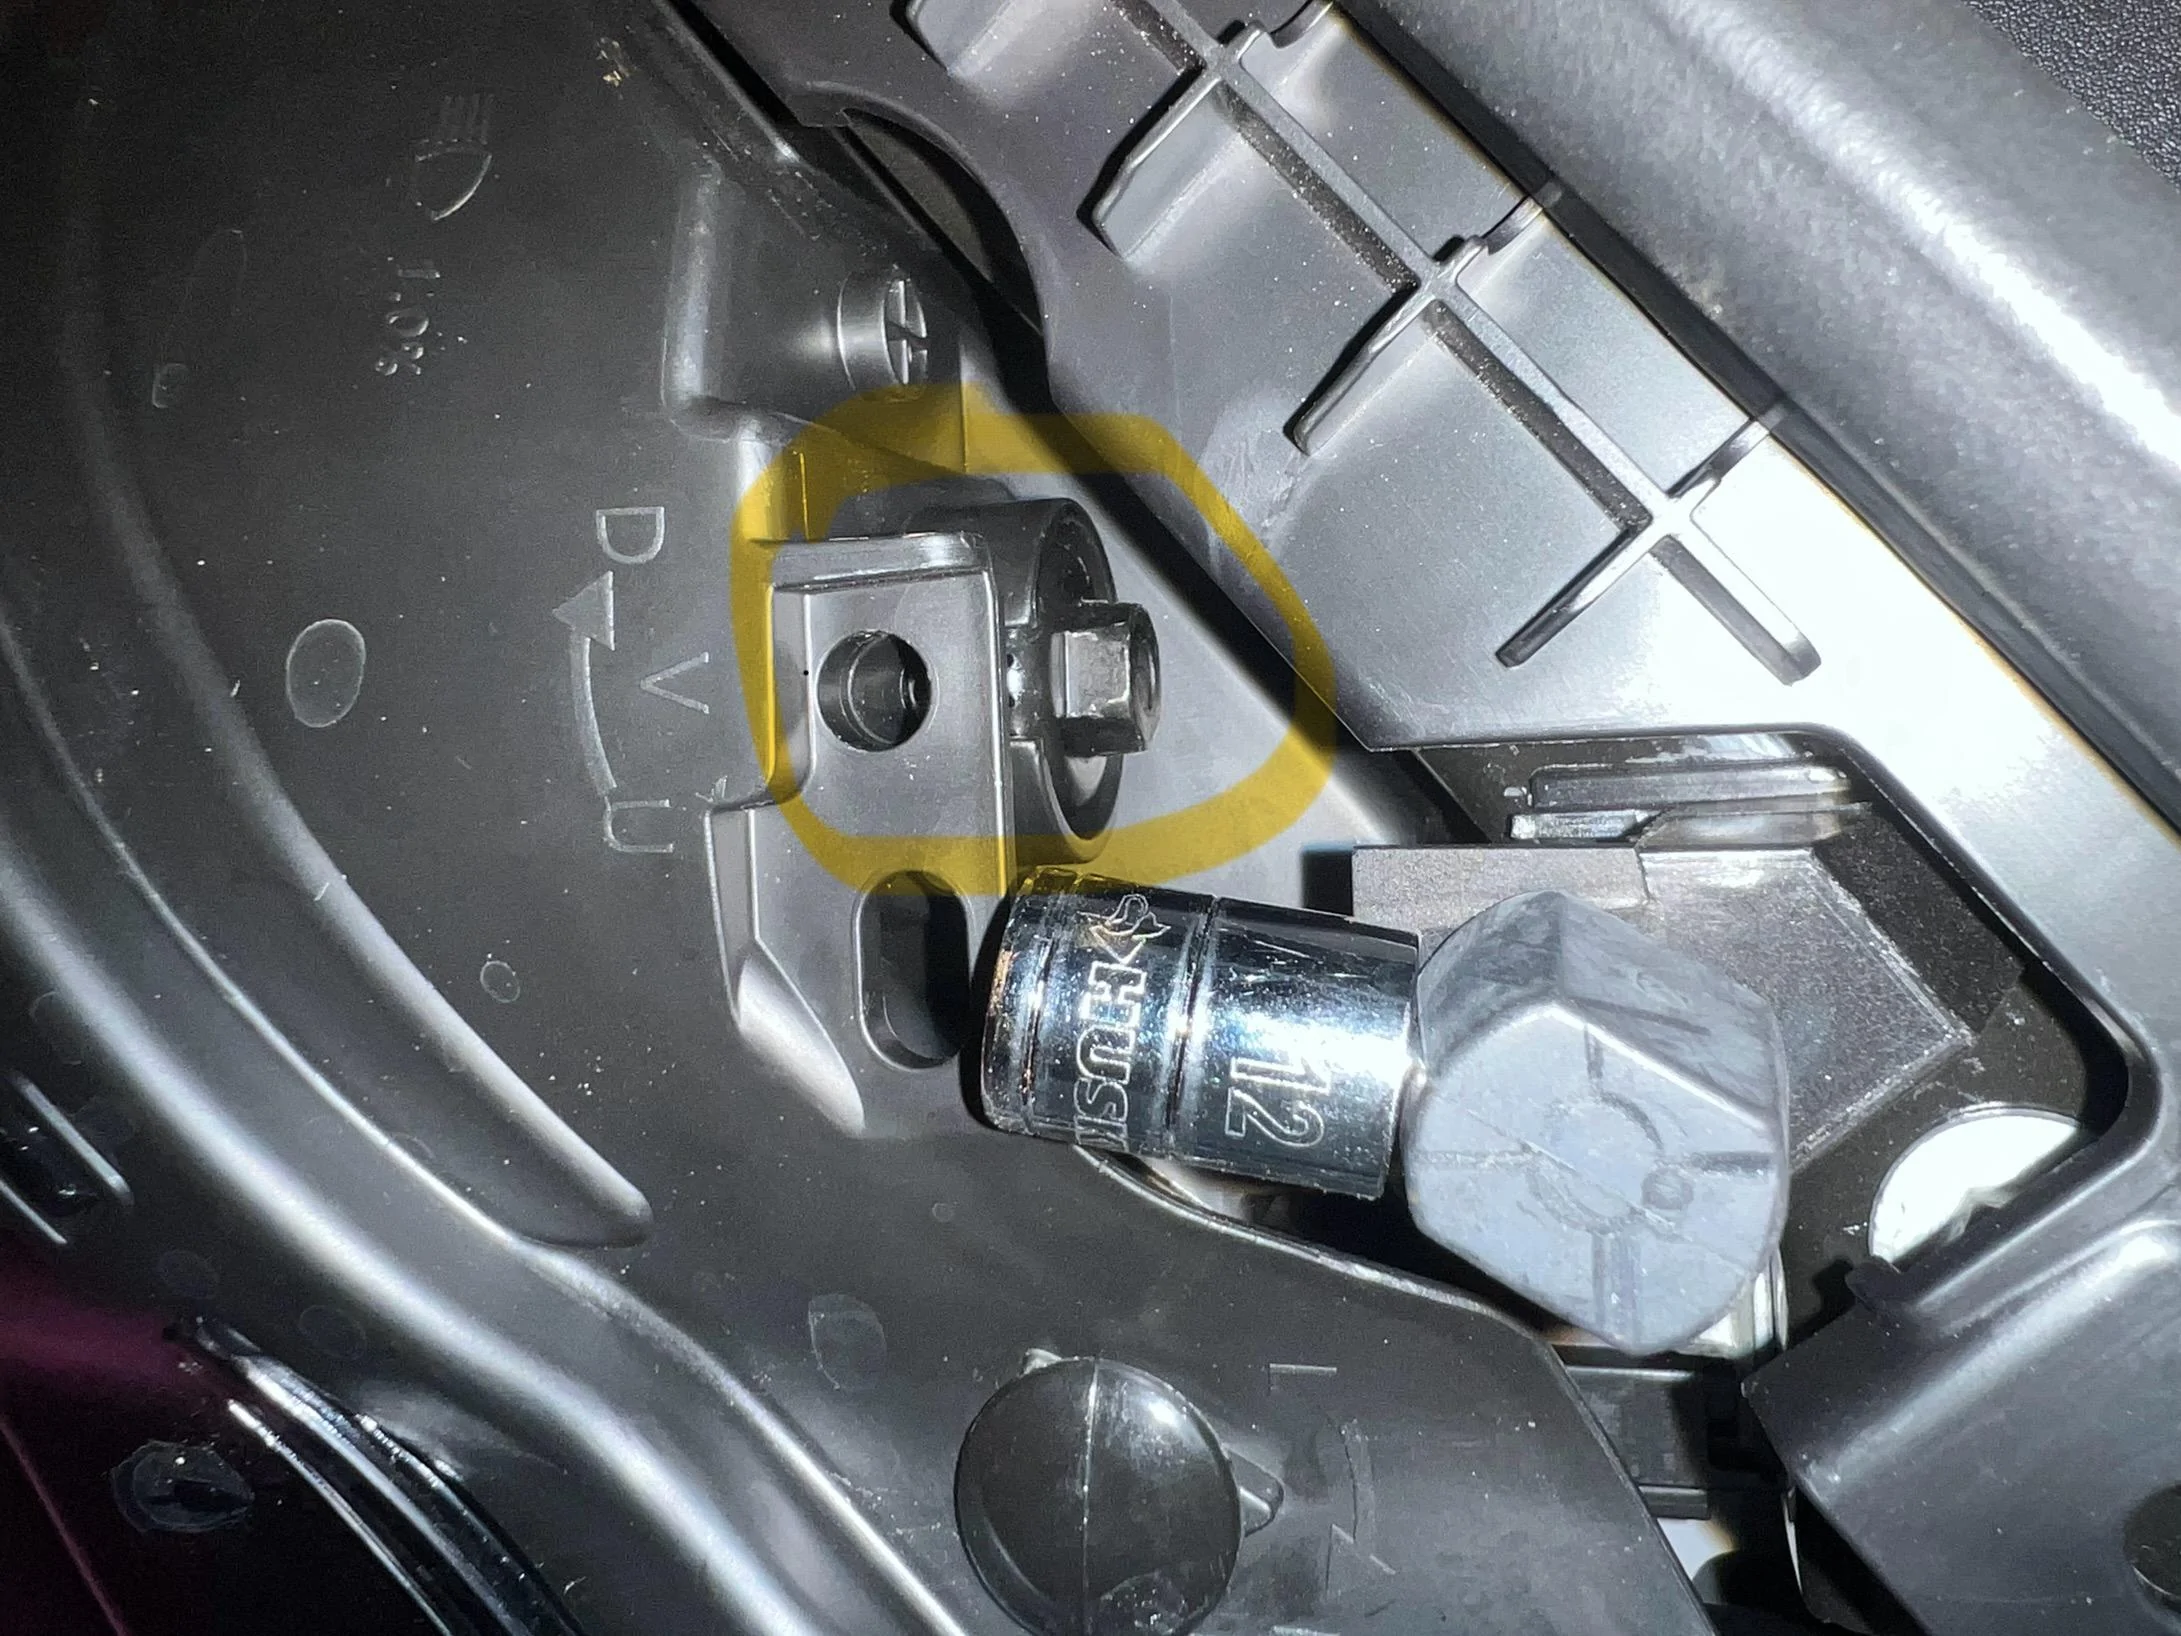
Then there they were. With labeling “D <—- U” above each headlight adjuster bolt, presumably for Down and Up. There’s even a little “viewfinder” hole where you can see “marks” which move with turns of the bolt and may represent 1 degree up or down for each mark.
I’d start with turning 5 or 10 marks on each side, which is maybe a 1/4-1/2 turn of the bolt behind each headlight. Then leave the panel off, close the hood, and go for a night test drive.
Or do the whole thing in an open space where you can mark how far out the upper edge of the low-beam light moves as you adjust each side.
Here are a few pics:


Ignore that socket, it won’t fit down in there. You’ll need a 12mm wrench.
EDIT: Putting the plastic frunk panel back on...
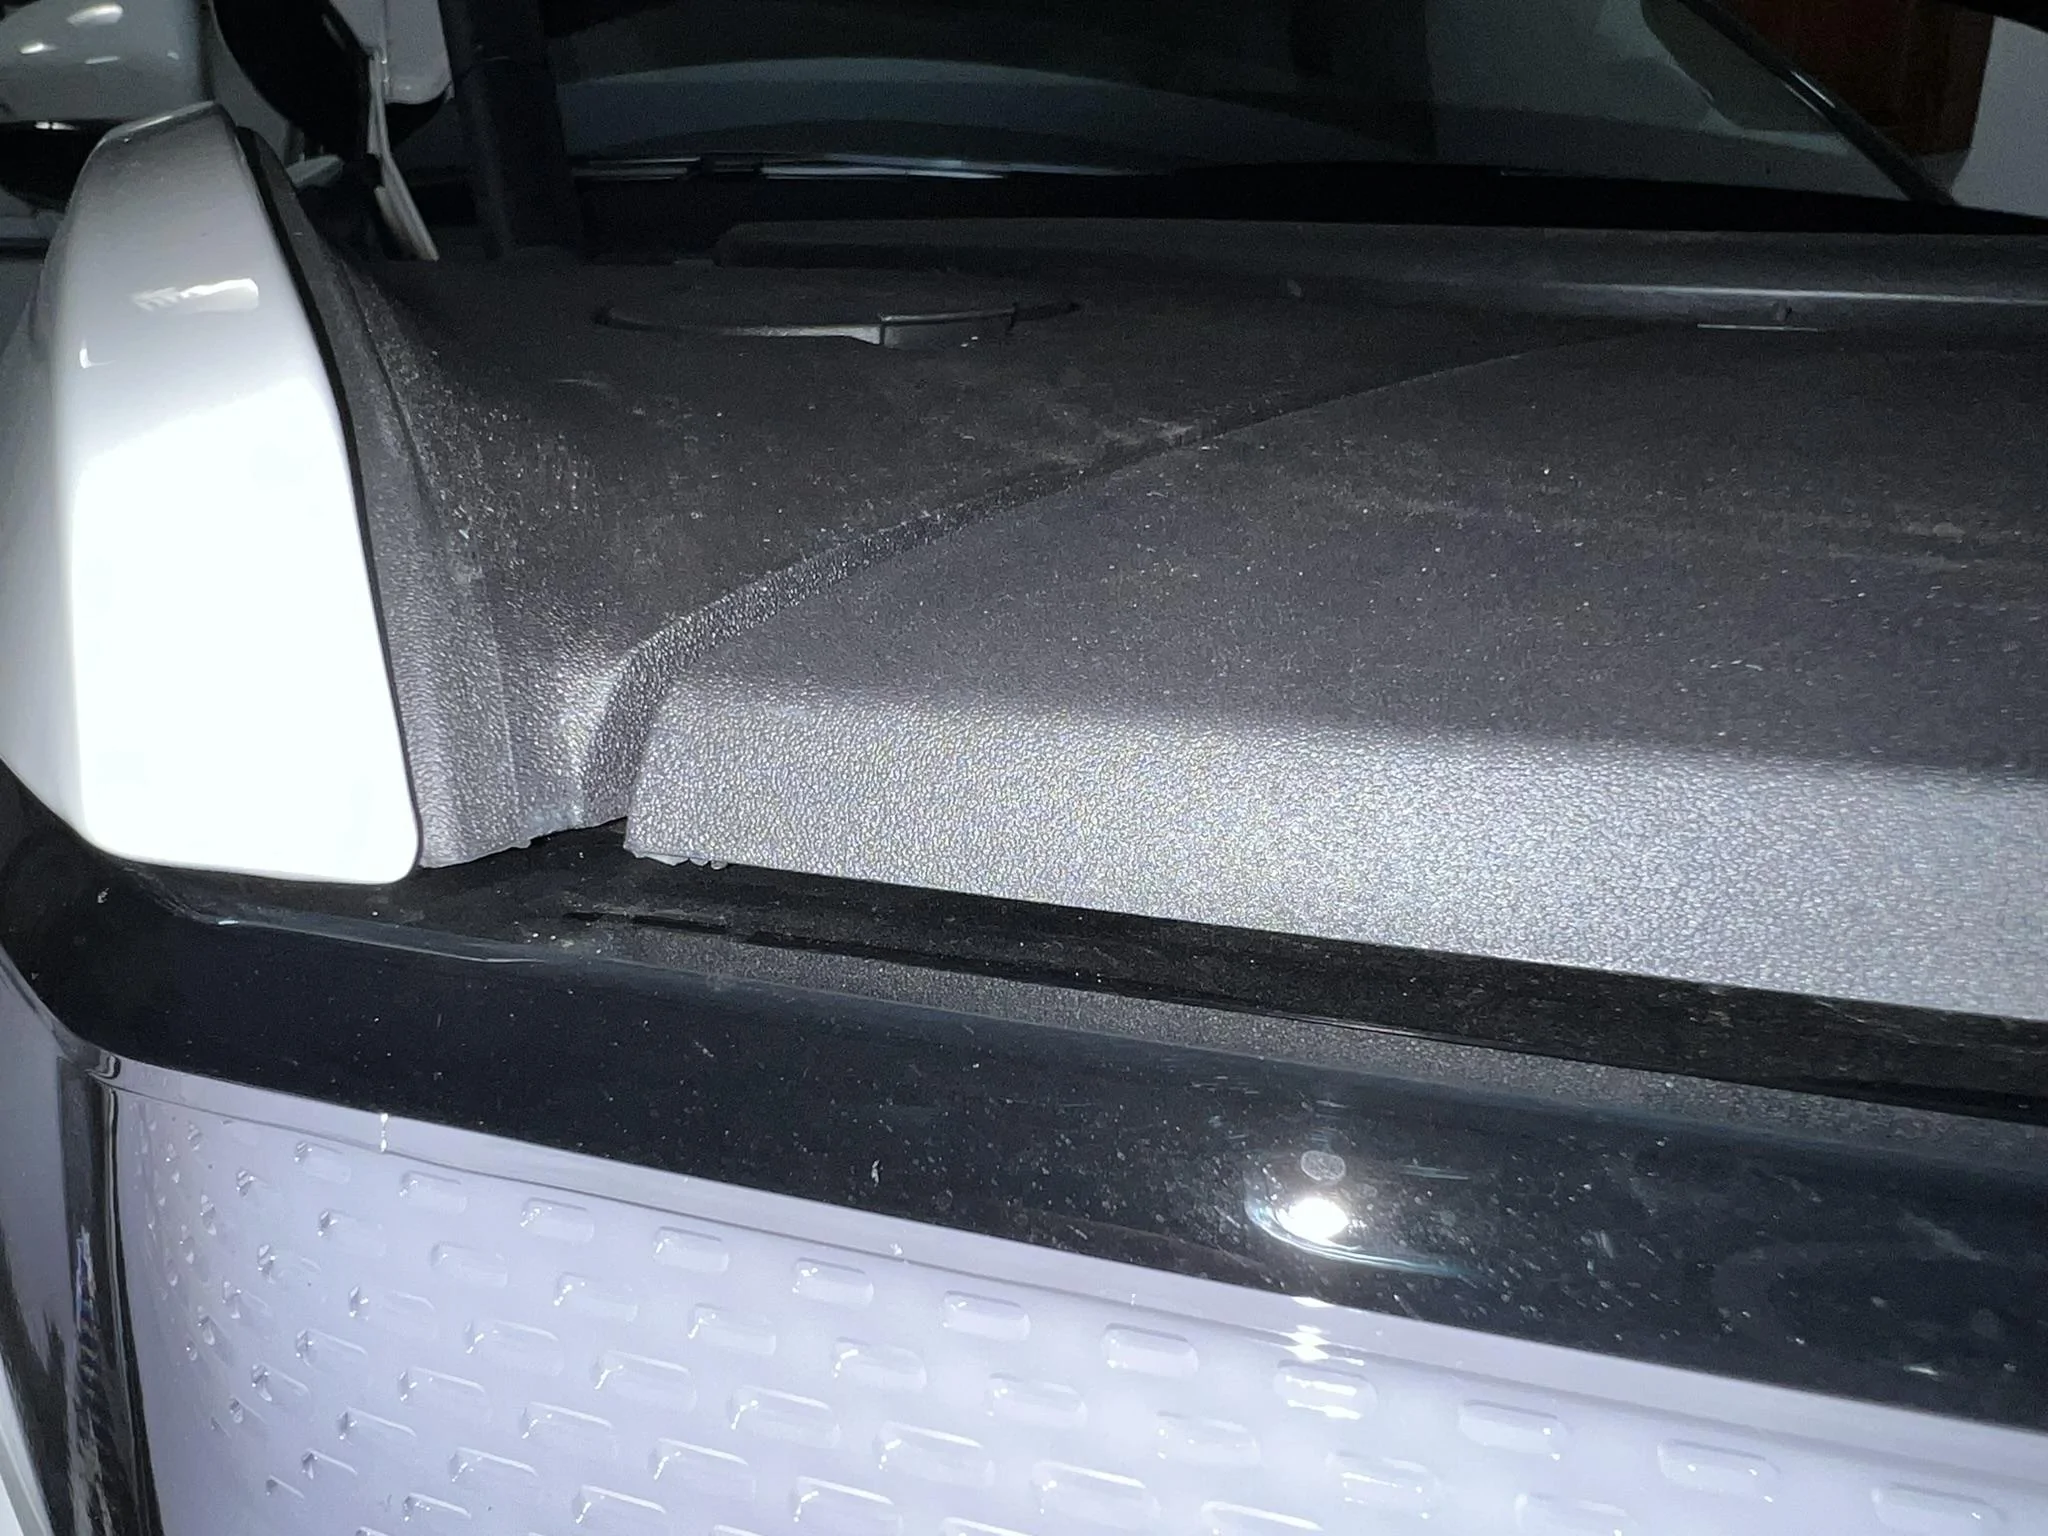
During a Rivian Service visit, the technician noticed my plastic top center panel was not re-installed correctly. My bad.
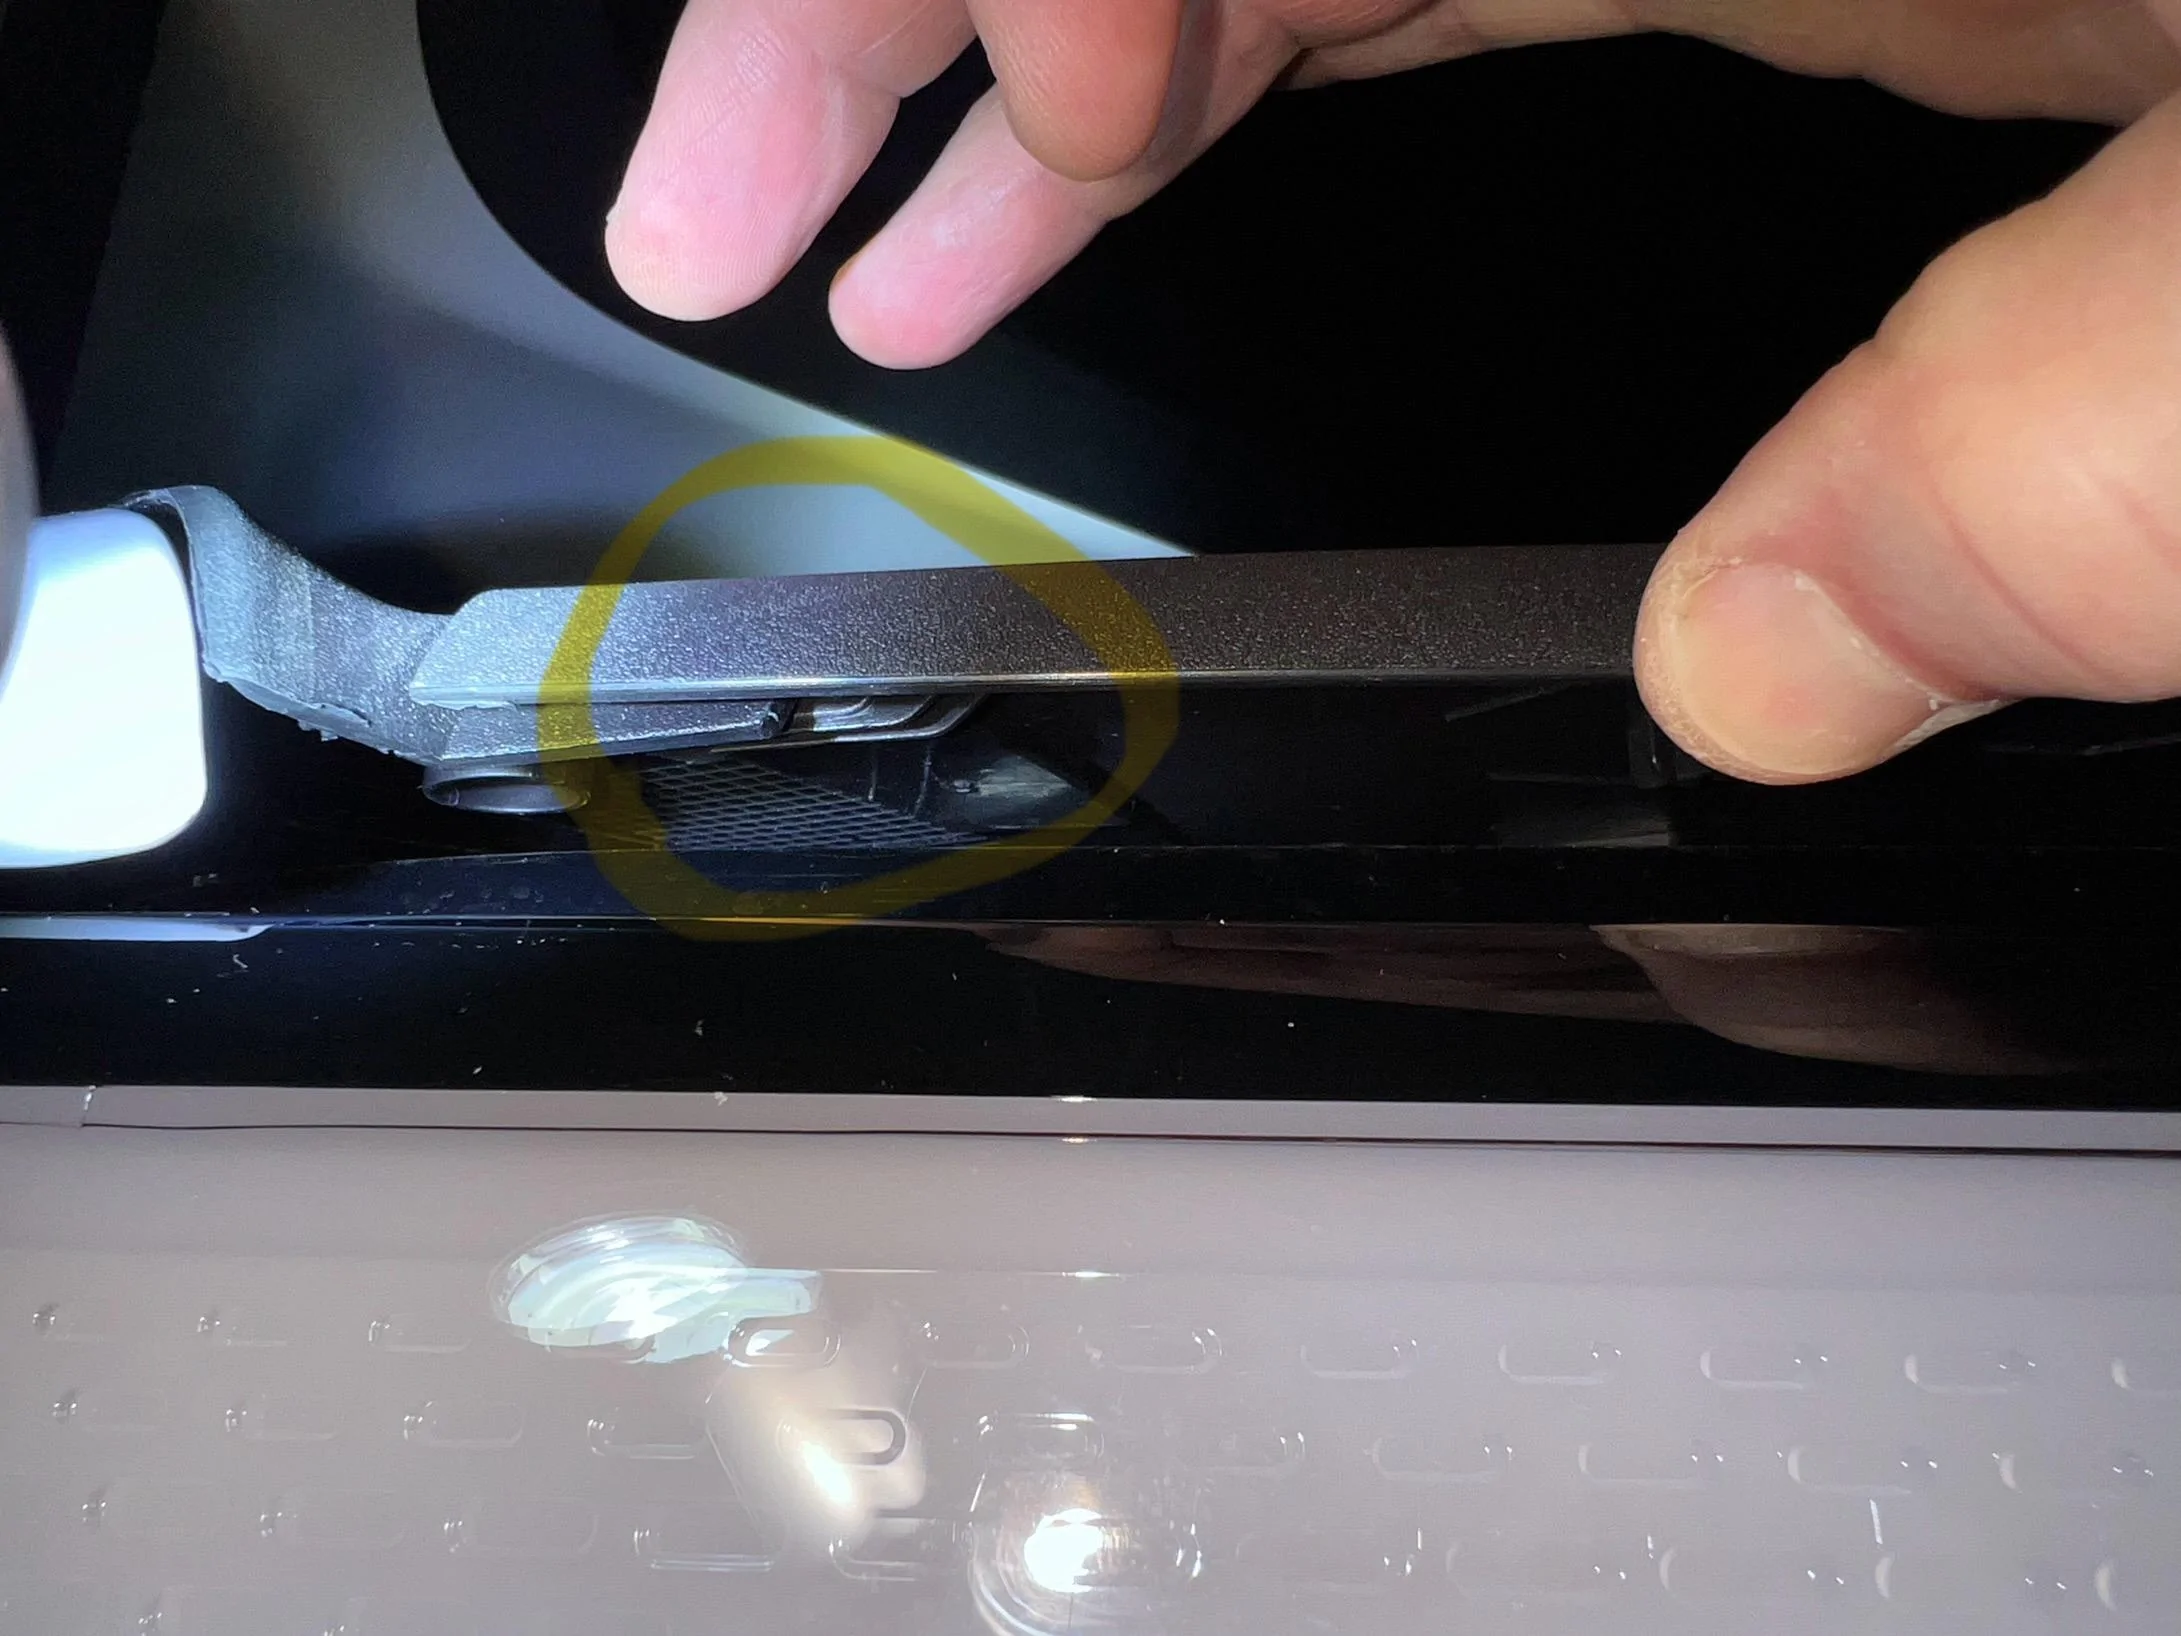
Under the front of each end of the plastic center panel, there is a tab dropping down a little and then pointing outward. Each of those 2 tabs should fit into a slot on the plastic panel that runs up that side of the frunk where the front and side panels come together.
I didn't take my panel back off, but here are a few pics to show the tab and how the center and side panels should line up if installed correctly.
Apparently this install mis-step I originally made has caused some to have trouble getting their hoods to close reliably.

So thanks to a tip on another forum I learned how to adjust them myself using just a 12mm wrench and about 10-15 minutes.
There are 12mm adjustment bolts under the plastic panel that runs along the frunk above the headlights.
Steps I took:
Removing the plastic frunk panel was just a matter of raising the hood and pulling up from one of the outer edges of that panel with my hands. Four pushpins hold it into place, 2 outer and 2 inner, roughly along the centerline of that boomerang-shaped panel. Some early Rivians actually have magnets rather than pushpins here.
Then there they were. With labeling “D <—- U” above each headlight adjuster bolt, presumably for Down and Up. There’s even a little “viewfinder” hole where you can see “marks” which move with turns of the bolt and may represent 1 degree up or down for each mark.
I’d start with turning 5 or 10 marks on each side, which is maybe a 1/4-1/2 turn of the bolt behind each headlight. Then leave the panel off, close the hood, and go for a night test drive.
Or do the whole thing in an open space where you can mark how far out the upper edge of the low-beam light moves as you adjust each side.
Here are a few pics:
Ignore that socket, it won’t fit down in there. You’ll need a 12mm wrench.
EDIT: Putting the plastic frunk panel back on...
During a Rivian Service visit, the technician noticed my plastic top center panel was not re-installed correctly. My bad.
Under the front of each end of the plastic center panel, there is a tab dropping down a little and then pointing outward. Each of those 2 tabs should fit into a slot on the plastic panel that runs up that side of the frunk where the front and side panels come together.
I didn't take my panel back off, but here are a few pics to show the tab and how the center and side panels should line up if installed correctly.
Apparently this install mis-step I originally made has caused some to have trouble getting their hoods to close reliably.
Sponsored
Last edited:
