Sponsored

PVguy

Well-Known Member
First Name
Tom
Joined
Jul 20, 2022
Threads
20
Messages
199
Reaction score
162
Location
Illinois
Vehicles
2012 Transit Connect, 2000 VW Golf TDI
Occupation
Retired
Personally I’d go with the taller one. Not sure there’s any reason not to, other than saving a few dollars. Just nice insurance in case you find yourself in a spot needing the extra lift.
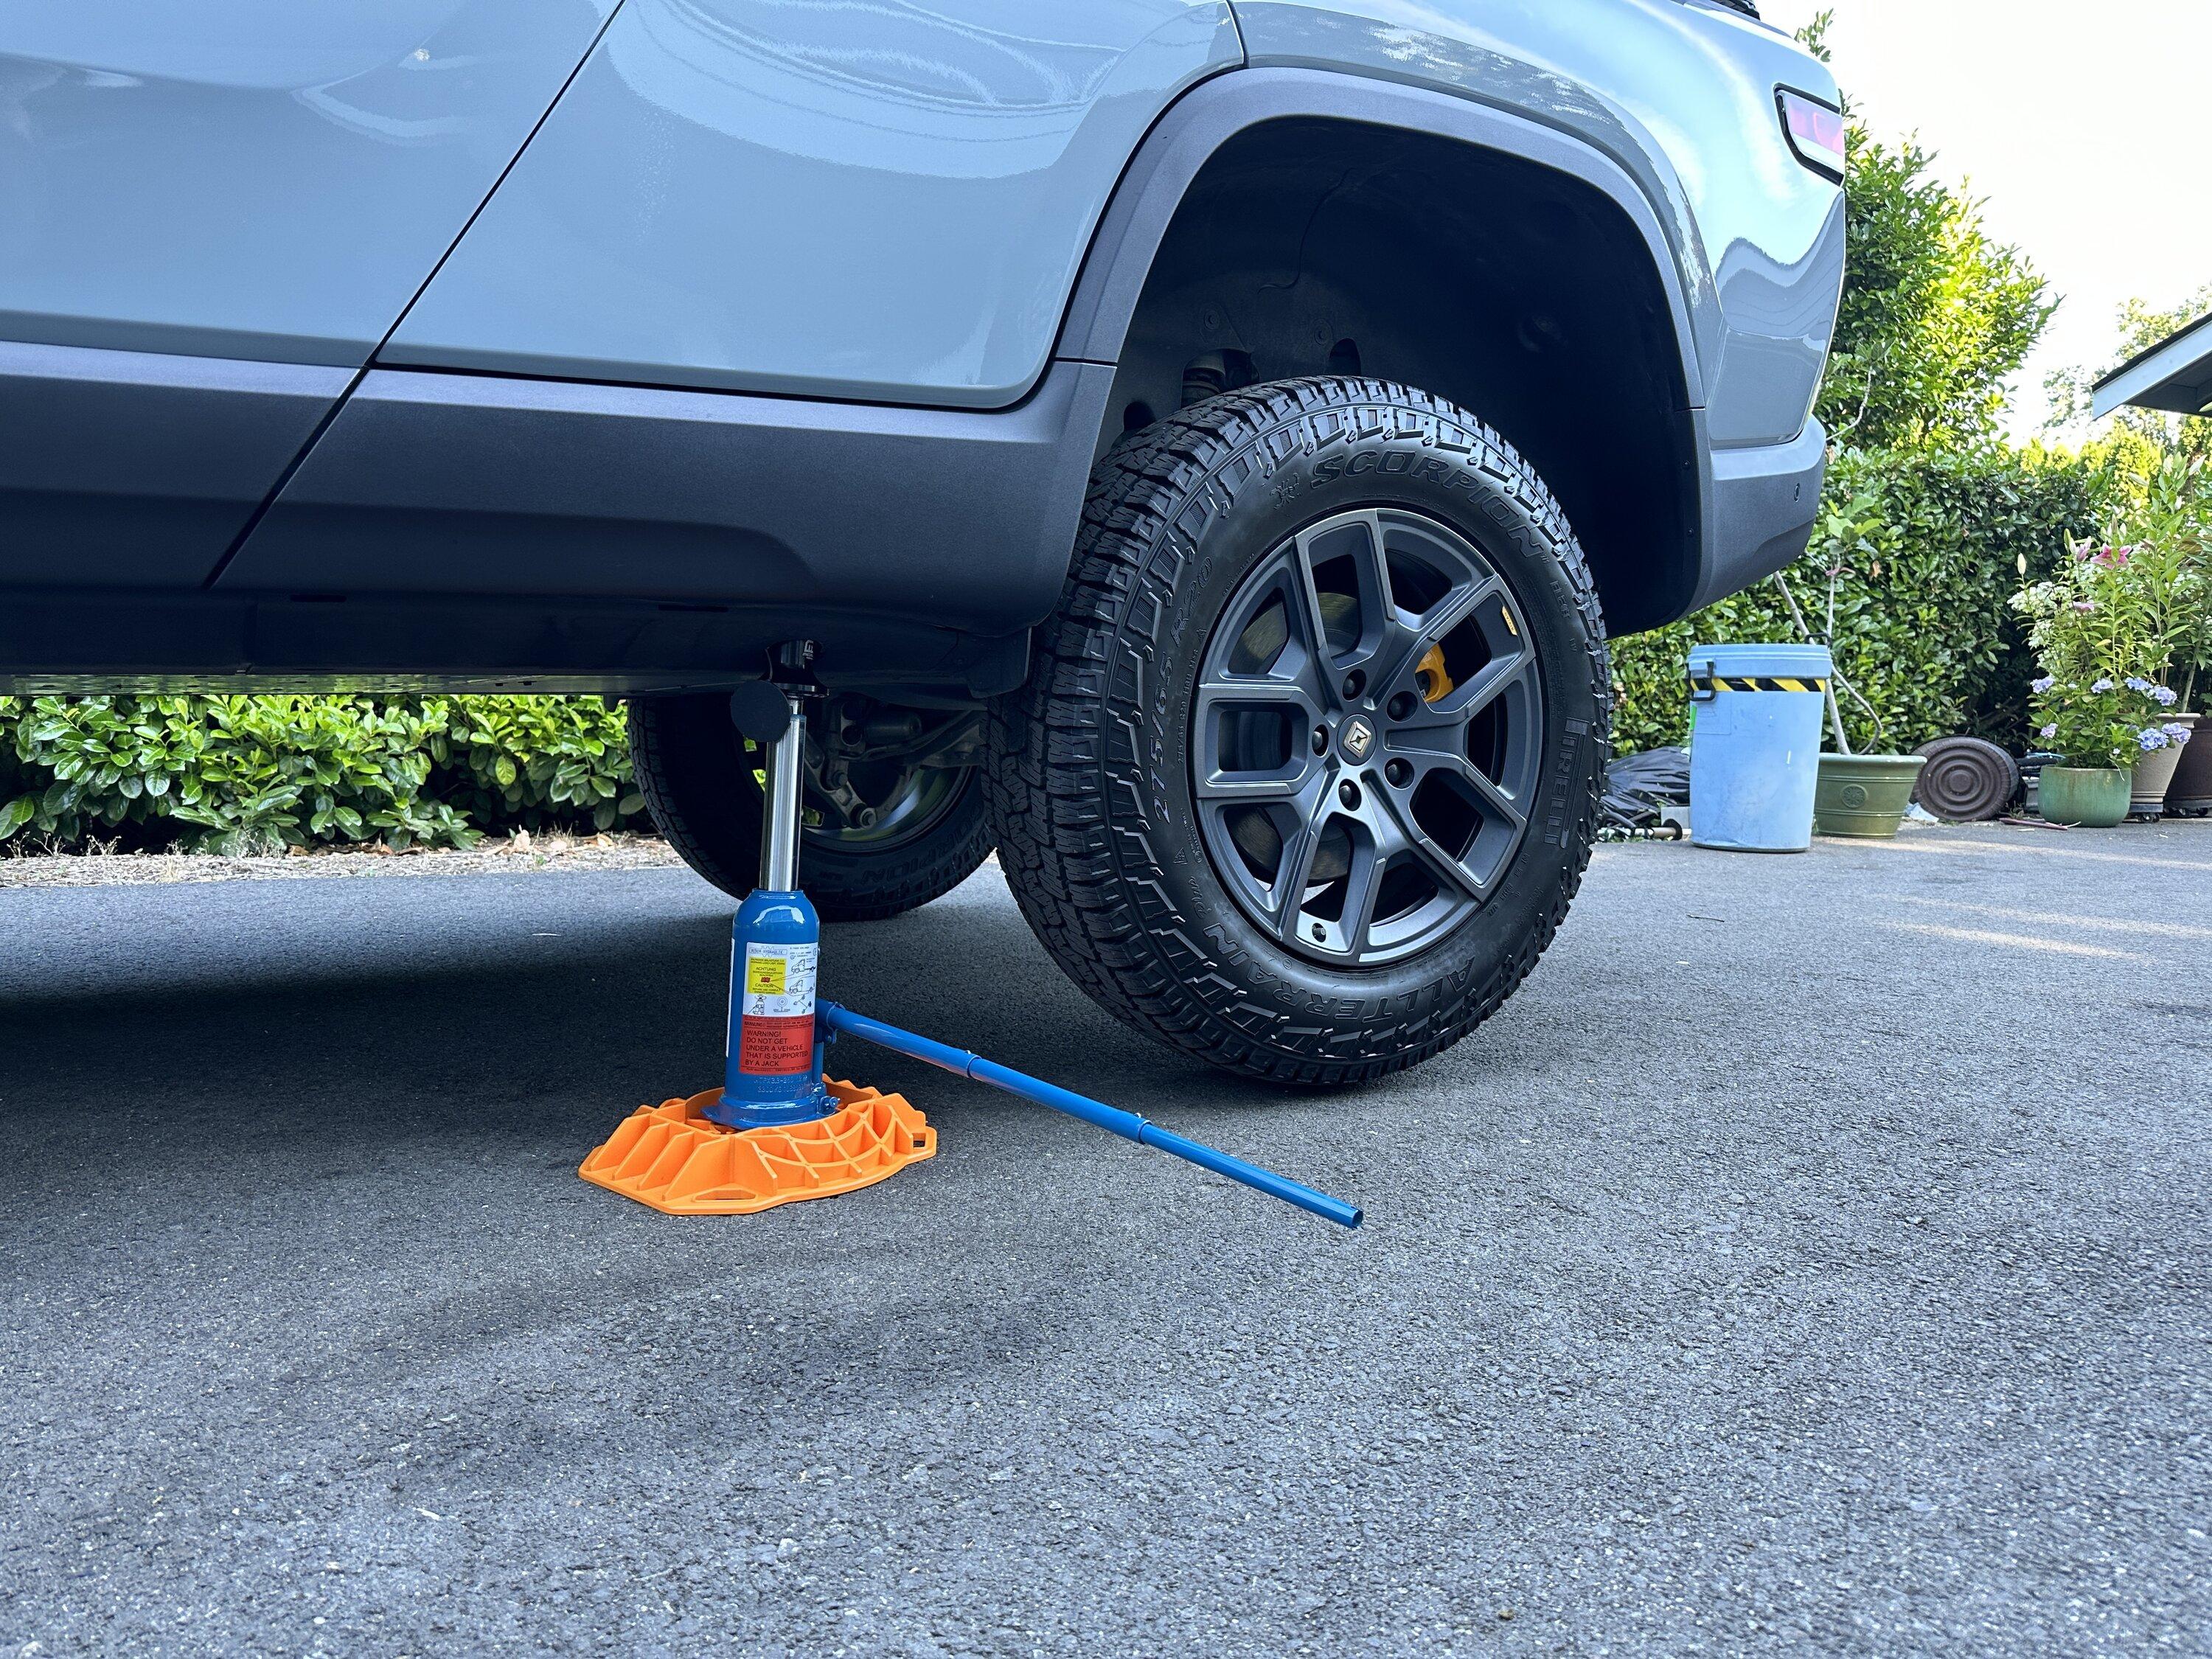
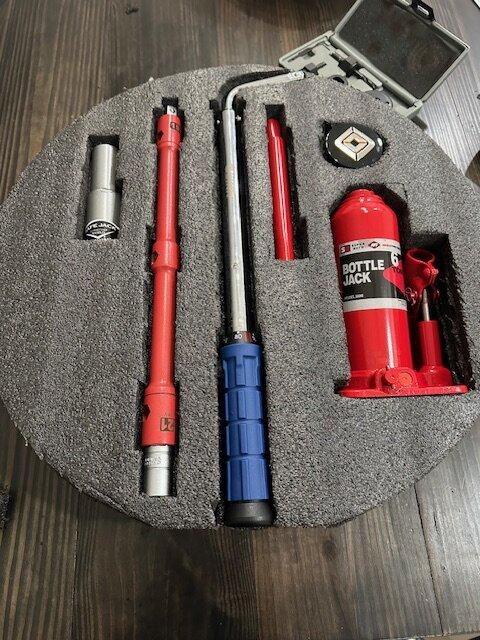
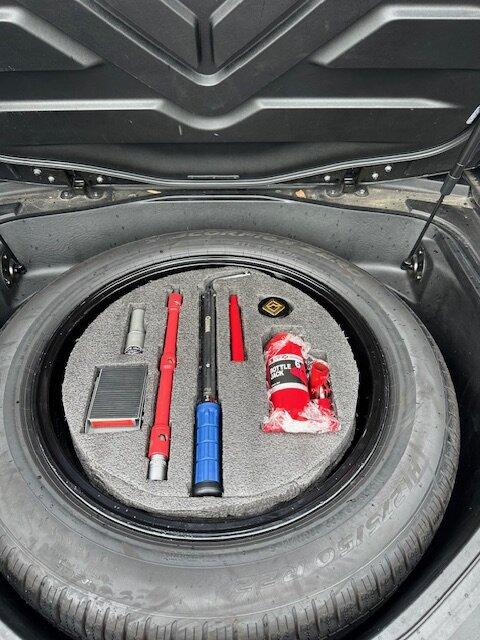
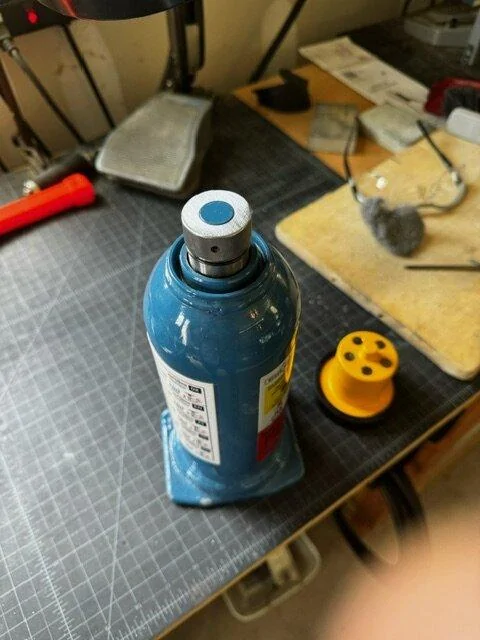
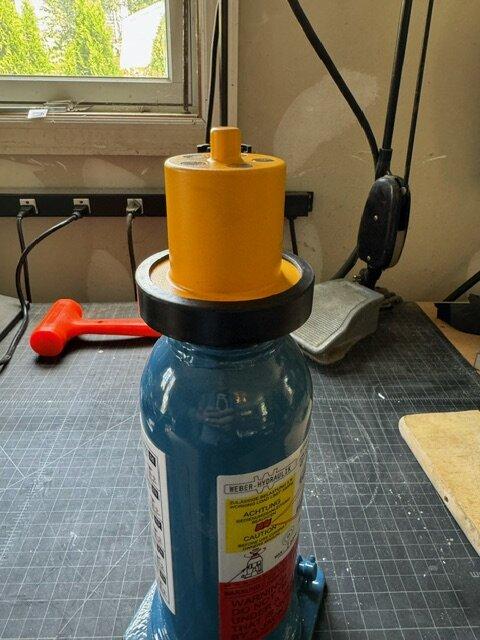
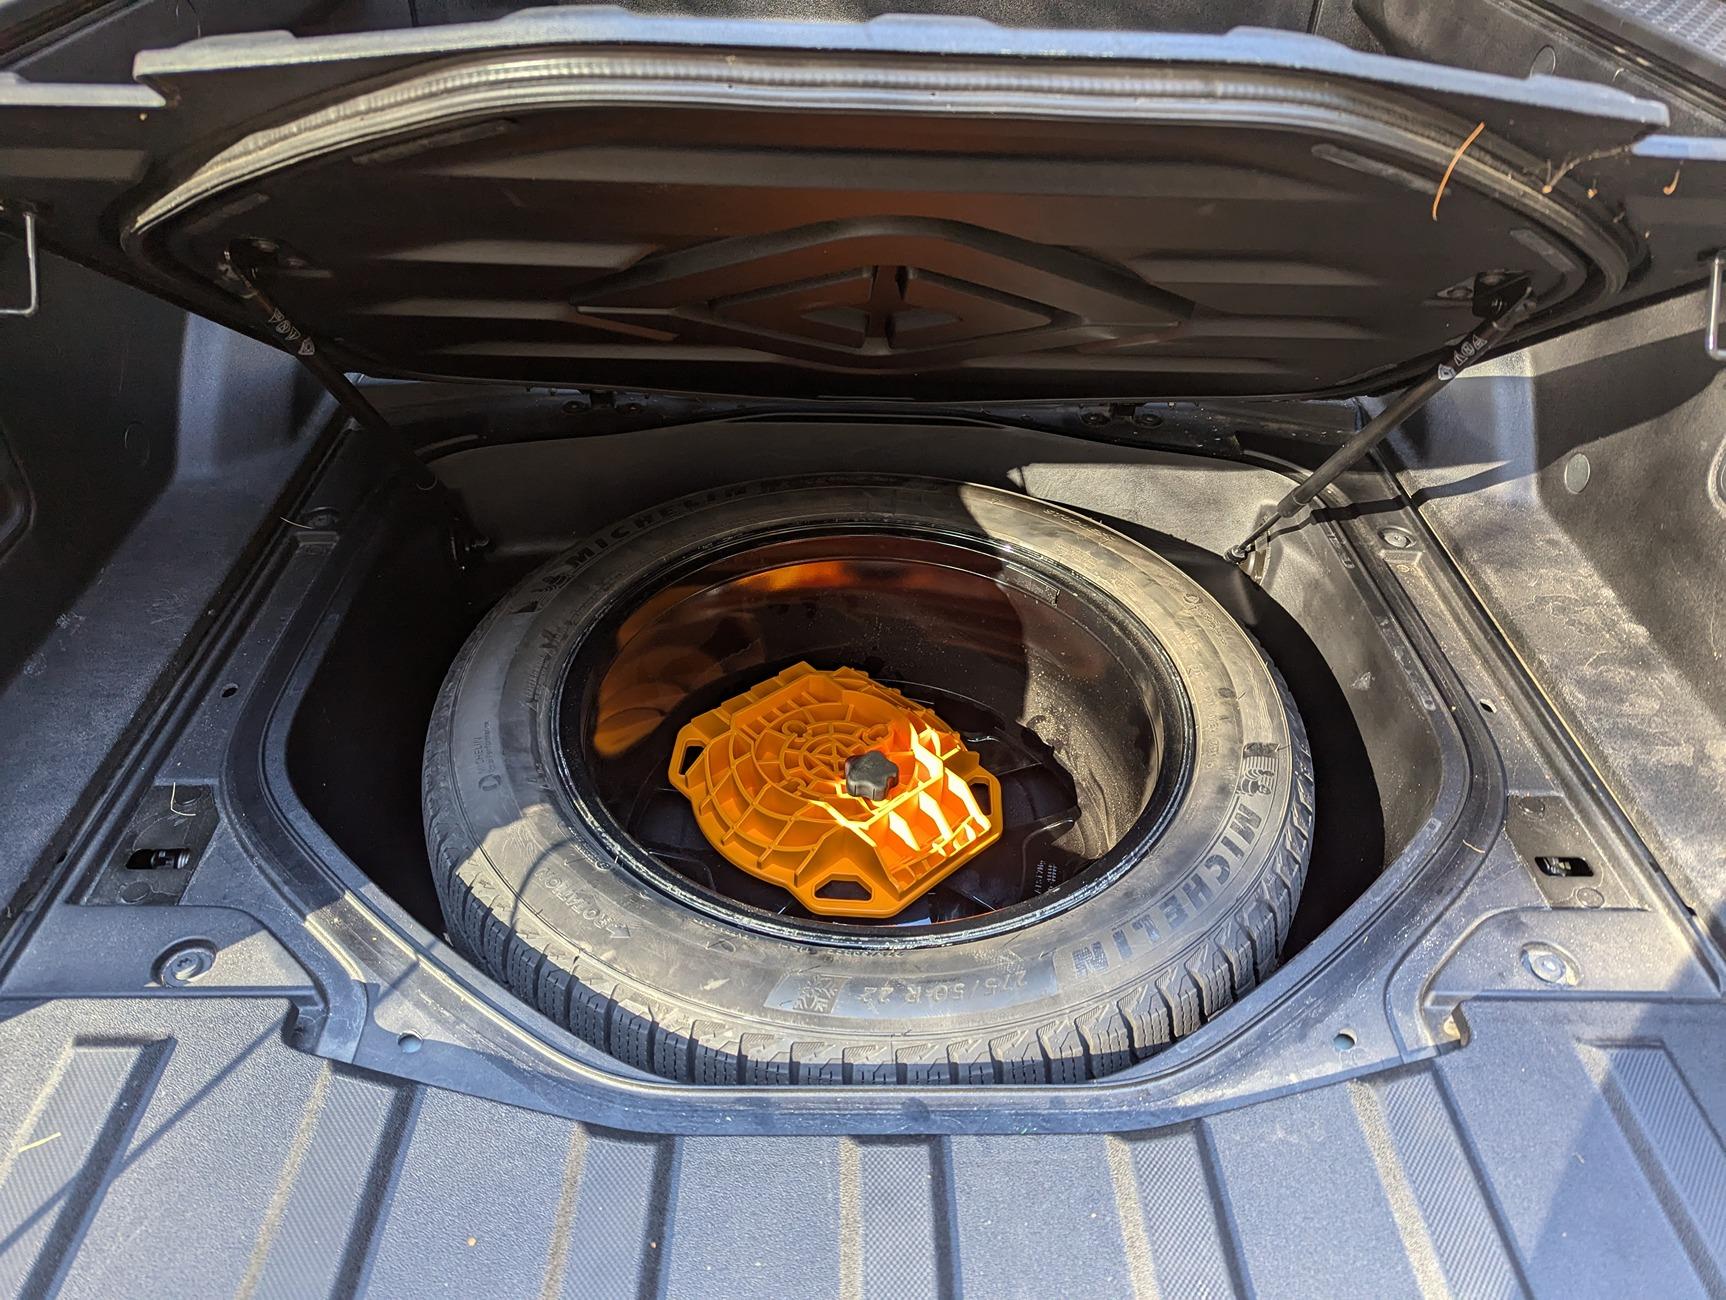
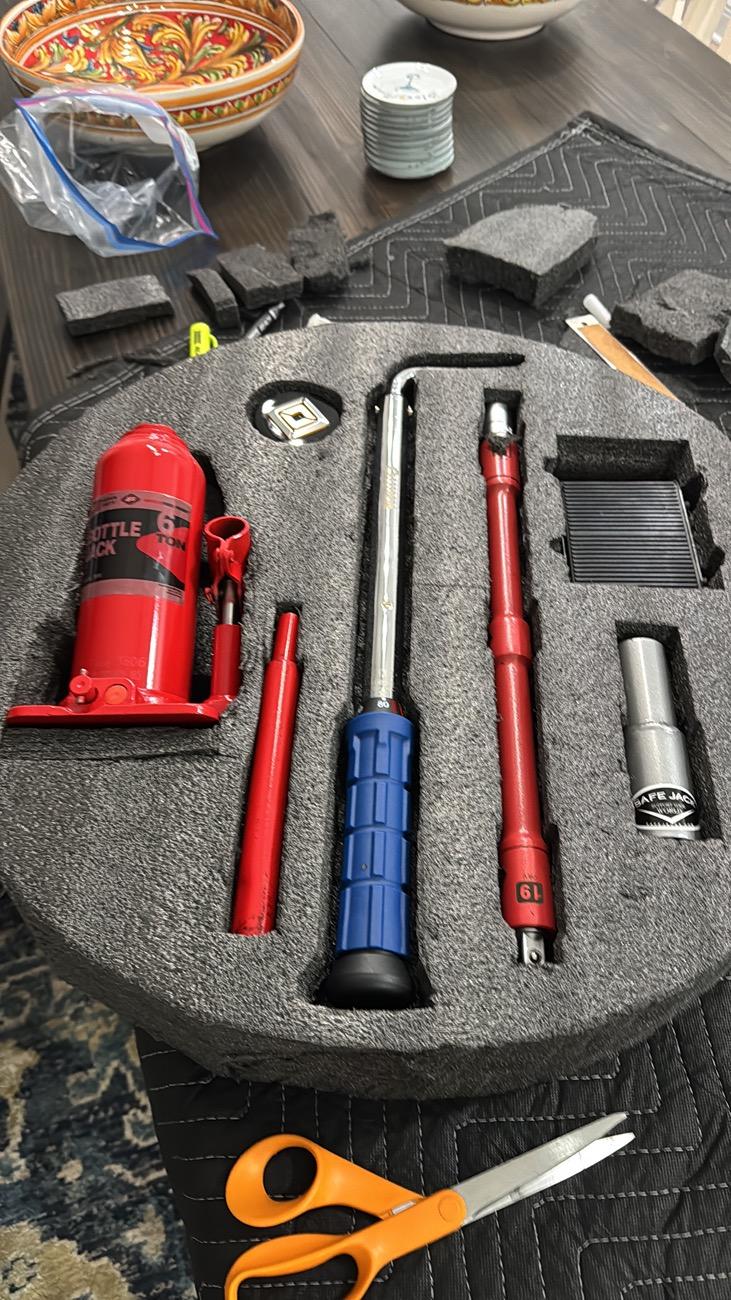
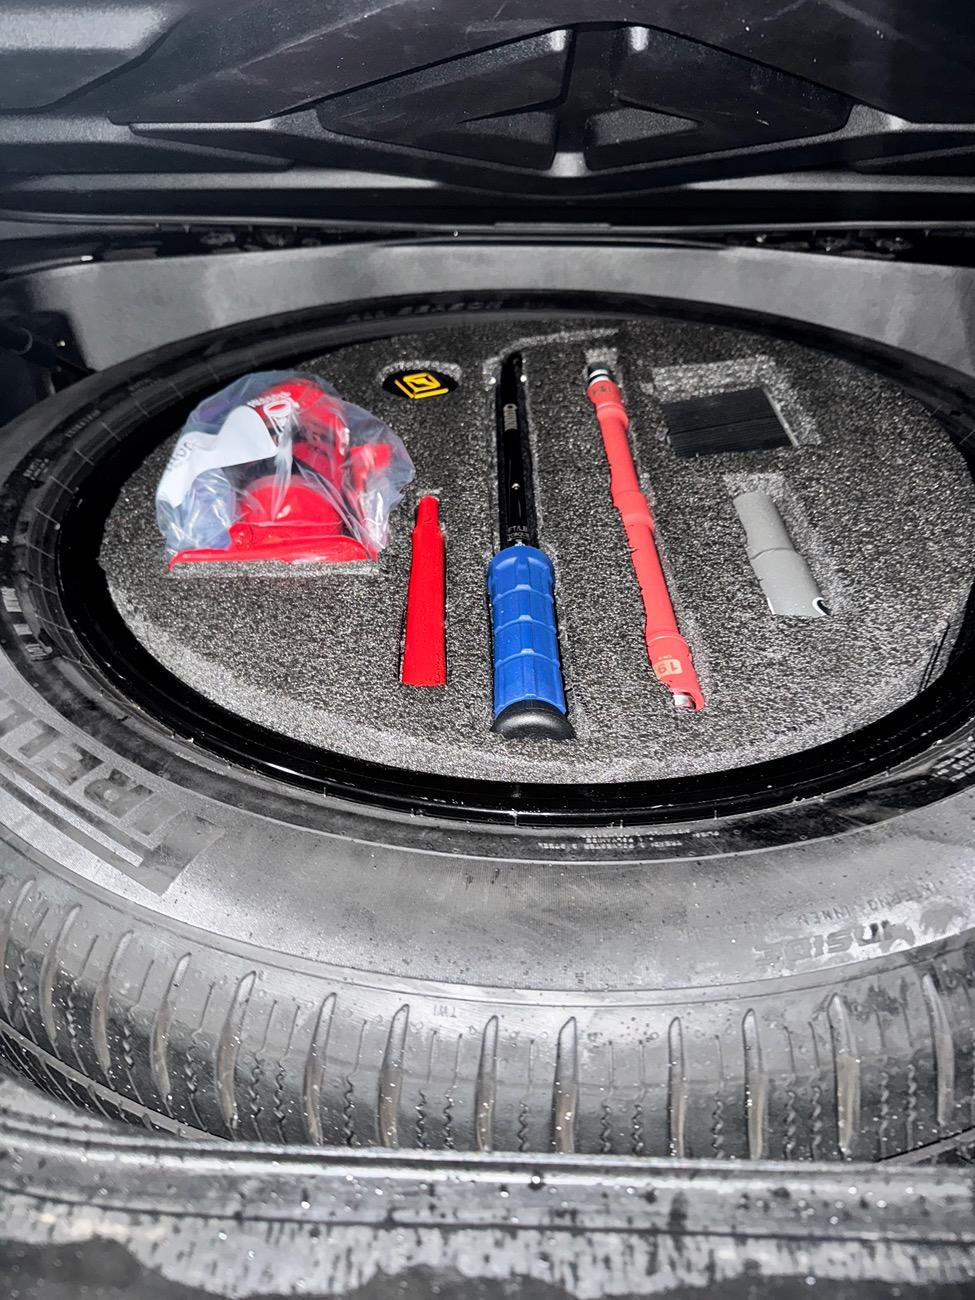
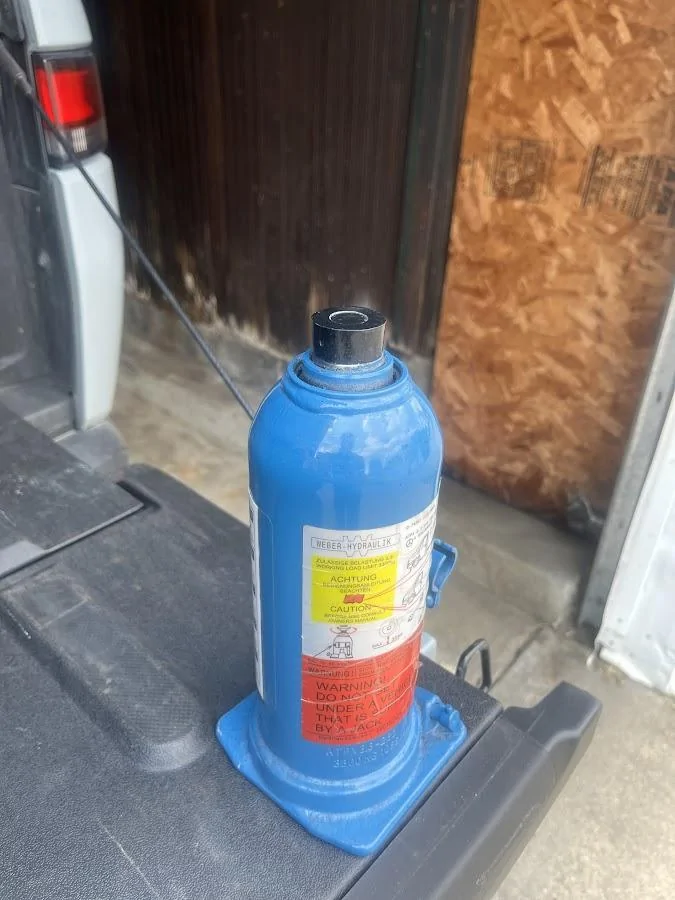
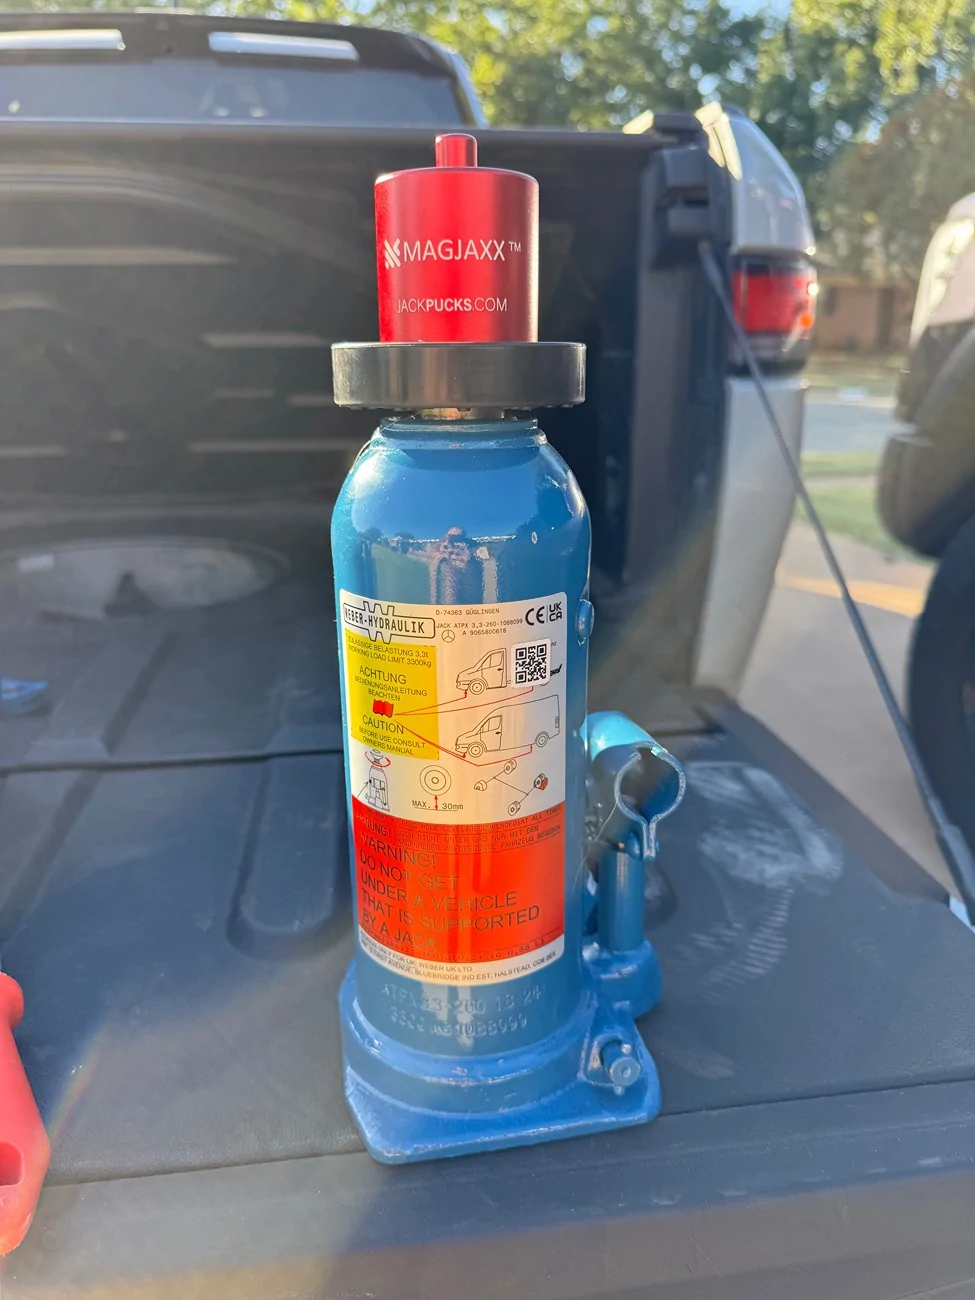
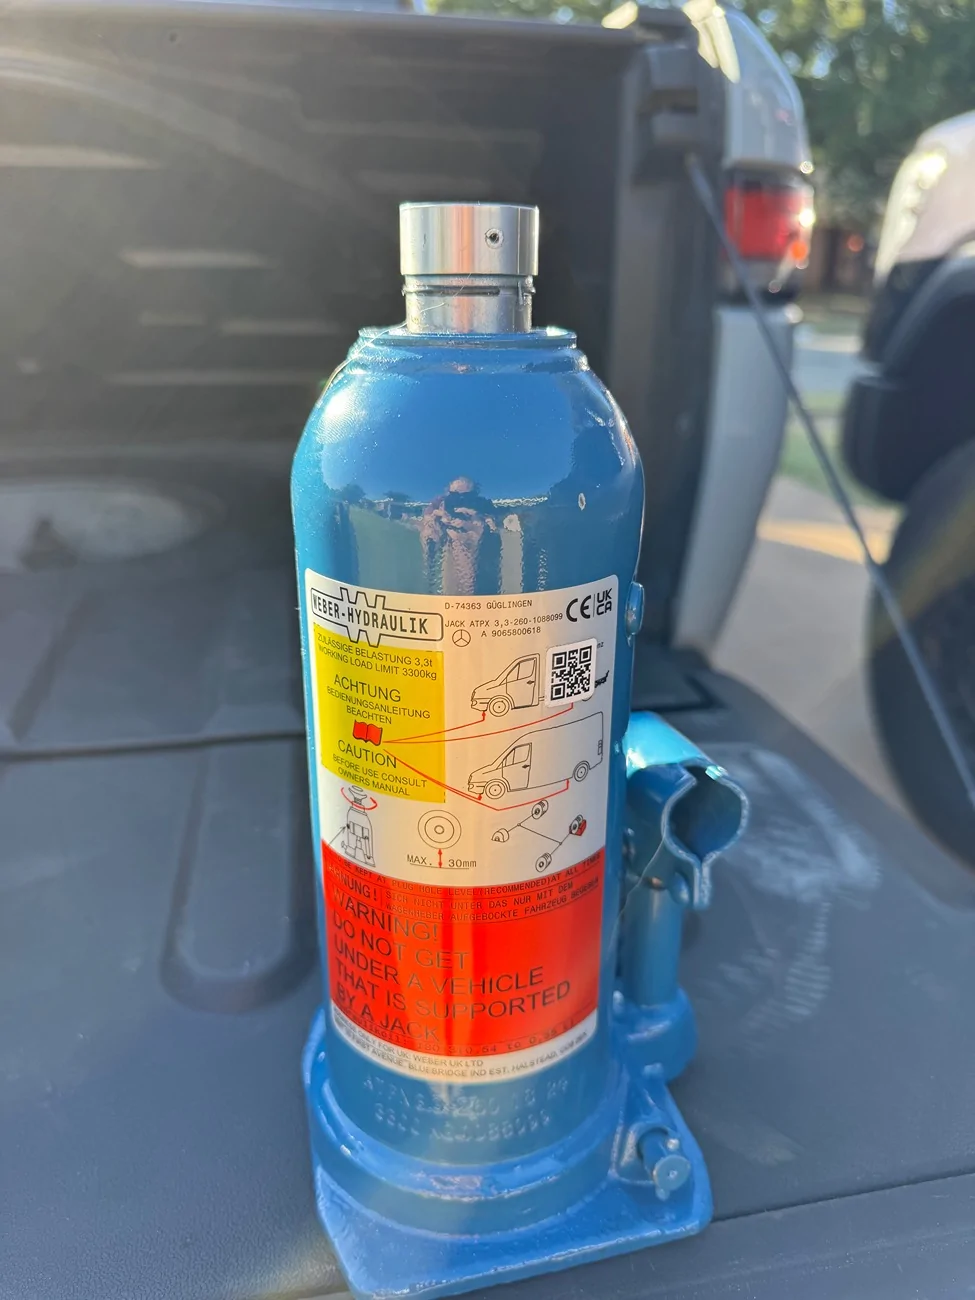
Thank you twizzstyle. I actually ordered and received the 618. I asked the vendor about total lift and I think that it was 28” vs. 25”. I should probably do a test lift.
Sponsored


PVguy

Well-Known Member
First Name
Tom
Joined
Jul 20, 2022
Threads
20
Messages
199
Reaction score
162
Location
Illinois
Vehicles
2012 Transit Connect, 2000 VW Golf TDI
Occupation
Retired
I have not completed my spare tire kit yet, but will be towing my small trailer soon And am always looking for a place to stash that spare. This looked like a good place. Maybe this will be a permanent location and I will keep the remainder of the kit in the lower portion of the frunk….

Rivian R1T R1S My DIY Spare Tire Kit IMG_7170
 
OP
OP
twizzstyle

twizzstyle

Well-Known Member
Joined
Jul 9, 2023
Threads
2
Messages
77
Reaction score
173
Location
Kenmore, Wa
Vehicles
2022 R1T, 2018 Model 3, 2017 Model X
That's amazing! That couldn't be a more perfect fit.
 

SoCal Rob

Well-Known Member
First Name
Rob
Joined
Apr 19, 2021
Threads
39
Messages
2,808
Reaction score
5,963
Location
Laguna Niguel / Palm Springs / Pioneertown
Vehicles
2025 Rivian R1S & 2021 VW ID.4 (2023 R1S sold)
Occupation
Information Technology
Clubs
 
@twizzstyle , thank you for taking the time to share this with everyone.

I purchased the taller Sprinter jack but I also have a question before I figure out where to store it in the vehicle. Have you had any issues with the oil leaking out while it’s stored horizontally rather than vertically?

I heard “conventional wisdom” that bottle jacks should always be stored upright to prevent leaking. Of course, it wasn’t kept upright during shipping so this made me wonder: is this not an issue with this jack at all, is it not an issue as long as the rams are forced down fully and the valve is tightened, is it not an issue until the jack is used and the factory paint breaks between the rams?

You’ve been storing your jack this way for a while so I thought you’d know the reality of using and maintaining it.

Thanks again!
 
OP
OP
twizzstyle

twizzstyle

Well-Known Member
Joined
Jul 9, 2023
Threads
2
Messages
77
Reaction score
173
Location
Kenmore, Wa
Vehicles
2022 R1T, 2018 Model 3, 2017 Model X
@twizzstyle , thank you for taking the time to share this with everyone.

I purchased the taller Sprinter jack but I also have a question before I figure out where to store it in the vehicle. Have you had any issues with the oil leaking out while it’s stored horizontally rather than vertically?

I heard “conventional wisdom” that bottle jacks should always be stored upright to prevent leaking. Of course, it wasn’t kept upright during shipping so this made me wonder: is this not an issue with this jack at all, is it not an issue as long as the rams are forced down fully and the valve is tightened, is it not an issue until the jack is used and the factory paint breaks between the rams?

You’ve been storing your jack this way for a while so I thought you’d know the reality of using and maintaining it.

Thanks again!
I had the same initial concern, but then saw that these jacks are stored horizontally in the Sprinter so I assumed it would be fine.

I just checked my jack, it has been in there untouched for about a month and a half. There was a trace amount of oil that had leaked. I suppose left long enough, it could make a mess, so I just put the jack in a plastic bag (which is how it is in the Sprinter) for extra insurance. My foam insert should catch any oil, but I don't really want that to turn into an oil-soaked sponge either.

Even with a very slight leak, I figure I'll be taking it out ~twice a year to rotate tires, which is a good time to check function and look for any major change in leakage.
 

Sponsored

TampaR1T

Well-Known Member
First Name
Paul
Joined
May 21, 2024
Threads
1
Messages
56
Reaction score
38
Location
Land O'Lakes, FL
Vehicles
2023 Rivian R1T Quad Motor
I got tired of waiting for Rivian to have spares available, so I put together my own setup.

Bought a wheel/tire off eBay from someone who got aftermarket wheels right after delivery.

I originally bought a jack kit from EV Sportline, only to find out it can’t actually lift the rear of the truck off the ground when following Rivian’s guidance to use the highest suspension setting for jacking. No-go for me. After a bit of searching, I found out the jack that comes with Mercedes Sprinters is a 3.5T jack that goes to about 25” without unscrewing the top at all. About 28” with the top screwed out. More than enough to jack the Rivian in any situation. These jacks can easily be found new on eBay for $75, sometimes less. I think it’s made in Germany, and seems much better built than the typical Chinese bottle jack. The only catch is these jacks have a saddle on top for the Sprinter. It is attached with a spring pin so it’s easy to remove. I put this saddle on my lathe and turned it down to a cylinder that just fits into the bottom of my jack pucks, and powder coated it black for good measure.

IMG_0101.jpeg

IMG_0102.webp

71115849434__3F8AABAE-0D18-4A09-AF20-E7AEC88F4D1B.webp


I bought an ARB jack base and a cheap extendable lug nut wrench to round out the kit. To secure the wheel to the truck I got a threaded rod and rubber knob from McMaster, which goes through a hole on the ARB base. Then to tie it all together, I made a foam insert that squeezes into the wheel and holds the jack, wrench, and even the center cap for the wheel. I cut the foam on my CNC router with a laser (although with my 7w laser it took a lot of slow passes and doesn’t look great)

IMG_0165.jpeg

IMG_0173.jpeg

IMG_0182.jpeg


Very happy with this setup, and much more comfortable taking the truck to more remote areas.
IMG_0108.jpeg
Thank you, twizzstyle, for your thread! It was a great help for me. Just wanted to post my version of your project. I didn't have the plastic disc you used, but did acquire one from here:
1) DISC: https://www.1800ceiling.com/collect...hru-12-6-piece-minimum?variant=39873154416684
7 inch disc, 0.220 gauge, 1/2 inch center hole

2) Safe jack 6 ton bottle jack with 3-inch extension, 6-ton screw collar:
https://safejacks.com/products/6-ton-omega-bottle-jack
https://safejacks.com/collections/bottle-jack-accessories/products/extensions-for-bottle-jacks
https://safejacks.com/collections/b...oducts/extension-screw-collar-for-6-ton-jacks

I angled the jack with the top up (not lying flat) to attempt to avoid leaks and then wrapped the jack bottom in plastic wrap to catch any leaks.

3) multi-position lug wrench
https://www.amazon.com/dp/B015DJ8A40?psc=1&ref=ppx_yo2ov_dt_b_product_details

4) Stud (M10 x 1.5 mm threads, 175mm length), ARB Base and securing knob:
https://www.amazon.com/dp/B07QX92KRP?psc=1&ref=ppx_yo2ov_dt_b_product_details
https://www.amazon.com/dp/B0D4YL83VK?psc=1&ref=ppx_yo2ov_dt_b_product_details
https://www.mcmaster.com/93275A047/

5) Harbor Freight preset torque wrench
https://www.harborfreight.com/12-in-drive-80-160-ft-lb-preset-lug-nut-torque-wrench-58628.html

6) Light duty wheel chocks
https://www.napaonline.com/en/p/BK_7761436?cid=paidsearch_shopping_dcoe_google

7) Same foam recommended by twizzstyle. 2x4 foot, 2.5 in thick. Cut in half.
https://www.rockler.com/rockler-foa...5HC6ze3_C8HUKAXQeJw_8YG8jFxUYSU4aAkVeEALw_wcB

8) Contact cement to adhere two pieces of foam together:
https://www.lowes.com/pd/DAP-Weldwo...proof-Quick-Dry-Multipurpose-Adhesive/3006177

9) Cutting the foam. Hmm. For help to others without a laser cutter, if I had to do it all over again, and make it perfect... I would have made the foam circle diameter the same as the inner dimension at the top of my inner / underside 22-in wheel. Also, would have marked the circle using something like the tool below:

https://www.amazon.com/dp/B0BY563GK...AJCBLRY8U&ref_=list_c_wl_lv_ov_lig_dp_it&th=1

Then, a small cut on the marked line, big enough for a sharp, serrated kitchen bread knife. I would plunge the knife into the small cut, then cut/saw vertically around the marked circle line. If you've got a sharp, serrated bread knife, it will cut cleanly. And, easy to control. Lastly, I'd use a marker, ruler and sharp X-acto-type knife to cut out the places for the items to sit. Again, I could make it look so much better the 2nd time around...

Hope that helps others...

Rivian R1T R1S My DIY Spare Tire Kit IMG_1697


Rivian R1T R1S My DIY Spare Tire Kit IMG_1705


Rivian R1T R1S My DIY Spare Tire Kit IMG_1750


Rivian R1T R1S My DIY Spare Tire Kit IMG_1751


Rivian R1T R1S My DIY Spare Tire Kit IMG_1752


Rivian R1T R1S My DIY Spare Tire Kit IMG_1753
 
Last edited:

Jumpjack

Active Member
First Name
Sean
Joined
Jul 14, 2023
Threads
3
Messages
41
Reaction score
24
Location
NJ USA
Vehicles
Subaru Forester and 2025 Rivian R1S Dual/Max
Clubs
 
I got tired of waiting for Rivian to have spares available, so I put together my own setup.

Bought a wheel/tire off eBay from someone who got aftermarket wheels right after delivery.

I originally bought a jack kit from EV Sportline, only to find out it can’t actually lift the rear of the truck off the ground when following Rivian’s guidance to use the highest suspension setting for jacking. No-go for me. After a bit of searching, I found out the jack that comes with Mercedes Sprinters is a 3.5T jack that goes to about 25” without unscrewing the top at all. About 28” with the top screwed out. More than enough to jack the Rivian in any situation. These jacks can easily be found new on eBay for $75, sometimes less. I think it’s made in Germany, and seems much better built than the typical Chinese bottle jack. The only catch is these jacks have a saddle on top for the Sprinter. It is attached with a spring pin so it’s easy to remove. I put this saddle on my lathe and turned it down to a cylinder that just fits into the bottom of my jack pucks, and powder coated it black for good measure.

IMG_0101.jpeg

IMG_0102.jpeg

71115849434__3F8AABAE-0D18-4A09-AF20-E7AEC88F4D1B.jpeg


I bought an ARB jack base and a cheap extendable lug nut wrench to round out the kit. To secure the wheel to the truck I got a threaded rod and rubber knob from McMaster, which goes through a hole on the ARB base. Then to tie it all together, I made a foam insert that squeezes into the wheel and holds the jack, wrench, and even the center cap for the wheel. I cut the foam on my CNC router with a laser (although with my 7w laser it took a lot of slow passes and doesn’t look great)

IMG_0165.jpeg

IMG_0173.jpeg

IMG_0182.jpeg


Very happy with this setup, and much more comfortable taking the truck to more remote areas.
IMG_0108.jpeg
For anyone wondering if they can convert this Mercedes Sprinter Jack head without a lathe, I did it with a HF handheld angle grinder, then a hand file and then a HF sanding wheel and belt. It took longer than I thought - I probably should have been braver with the angle grinder. Keeping things square, flat and circular was a challenge but this is where the sanding wheel and belt helped a lot.
So hopefully a 1 piece solution for the price of the XL puck.
Pics:

Rivian R1T R1S My DIY Spare Tire Kit image1


Rivian R1T R1S My DIY Spare Tire Kit image0
 

jbl911

Active Member
Joined
Mar 20, 2024
Threads
0
Messages
28
Reaction score
21
Location
Michigan
Vehicles
R1S Quad
Clubs
 
For the knob:
Comfort-Grip Plastic Five Arm Knob, with M10 x 1.5mm Thread 57mm Wide Head

https://www.mcmaster.com/61125K94

For the wheel alone (with some kind of super wide washer or plate to span the center cap hole) a stud like this would work:
Black-Oxide Steel Threaded on Both Ends Stud, M10 x 1.5mm Thread, 35mm and 16mm Thread Lengths, 140mm Long

https://www.mcmaster.com/93210A045

The ARB base adds about 1.4”, so I went with a 175mm stud. I also have a 1/4” thick UHMW plate between the wheel and ARB base, though it’s not really necessary with the ARB base there. That was just my first idea for holding the wheel and I left it. Here’s what that plate looks like before I got the hand knob.
Thank you sir

Rivian R1T R1S My DIY Spare Tire Kit PXL_20241019_151005366.MP
 

TampaR1T

Well-Known Member
First Name
Paul
Joined
May 21, 2024
Threads
1
Messages
56
Reaction score
38
Location
Land O'Lakes, FL
Vehicles
2023 Rivian R1T Quad Motor
I did end up redoing my insert as I commented in my post above. Probably need to shave off at touch, but it came out better using the super sharp bread knife to cut manually. Everything don't by hand. Also note I made the cutout for the jack at an angle to limit and avoid hydraulic oil seeping and placed it in a super large Ziploc from the grocery to catch any fluid if it does...

Rivian R1T R1S My DIY Spare Tire Kit B280EC74-4A8A-4928-87D1-A19ED3B906C7


Rivian R1T R1S My DIY Spare Tire Kit IMG_1068
 

R1TandMe

Well-Known Member
First Name
Mike
Joined
Aug 29, 2024
Threads
13
Messages
223
Reaction score
277
Location
Depends
Vehicles
R1T, Corvette, Audi A7, HD VRod
Occupation
Retired and loving it
I’m sure you are aware that bottle jacks will leak and should be stored upright. Saying from experience.
 

Sponsored

TampaR1T

Well-Known Member
First Name
Paul
Joined
May 21, 2024
Threads
1
Messages
56
Reaction score
38
Location
Land O'Lakes, FL
Vehicles
2023 Rivian R1T Quad Motor
I’m sure you are aware that bottle jacks will leak and should be stored upright. Saying from experience.
Yup. And while the Sprinter jack in the original post seems mostly okay, this one has been similar. Almost none at more of an angle...so far.
 

Whyz

Active Member
Joined
Apr 10, 2022
Threads
7
Messages
38
Reaction score
37
Location
Pittsburgh
Vehicles
R1T
Here's what I did so that the bottle jack can be stored upright.

Rivian R1T R1S My DIY Spare Tire Kit IMG_3412


Rivian R1T R1S My DIY Spare Tire Kit IMG_3458


I used an angled grinder to shape the Sprinter bottle jack. I then got a 2"/3" flexible PVC coupling, removed the hose clamps, and placed it over the jack.

The jack then fit upright through the wheel (20" All Terrain Dark) when the wheel was placed facing up. The flexible coupling perfectly secures it in there and also prevents the jack from scratching the wheel.

I also got a 300mm long M10 threaded rod and cut down to about 292mm. Using red (permanent) threadlocker, I then attached the thread rod to a plastic M10 knob. A few 2.5" OD plastic washers perfectly fit the wheel cap hole and allowed me to then attach the wheel to the bottom of the spare tire compartment.

The jack is secured well enough that it can't move at all, and I think this set-up should prevent the jack from leaking.
 

Klickster102

New Member
Joined
Dec 17, 2025
Threads
0
Messages
1
Reaction score
1
Location
Wichita Falls, TX
Vehicles
23 R1T Quad Large
I built my kit just like the OP and had a jack puck adapter for the Mercedes Jack and Magjaxx pucks made. They made me 2 and I only need one. $55 shipped from Wichita Falls TX.
Rivian R1T R1S My DIY Spare Tire Kit IMG_4448
Rivian R1T R1S My DIY Spare Tire Kit IMG_3319
Rivian R1T R1S My DIY Spare Tire Kit IMG_3318
Sponsored


Top