djsider2
Well-Known Member
- First Name
- E
- Joined
- Jul 27, 2023
- Threads
- 9
- Messages
- 445
- Reaction score
- 359
- Location
- Bay Area, CA
- Vehicles
- Rivian R1S
Is that a printed part? Is the model available anywhere?
Sponsored
if you go back to my last post, I reference another thread where I have posted the models on ThingiverseIs that a printed part? Is the model available anywhere?
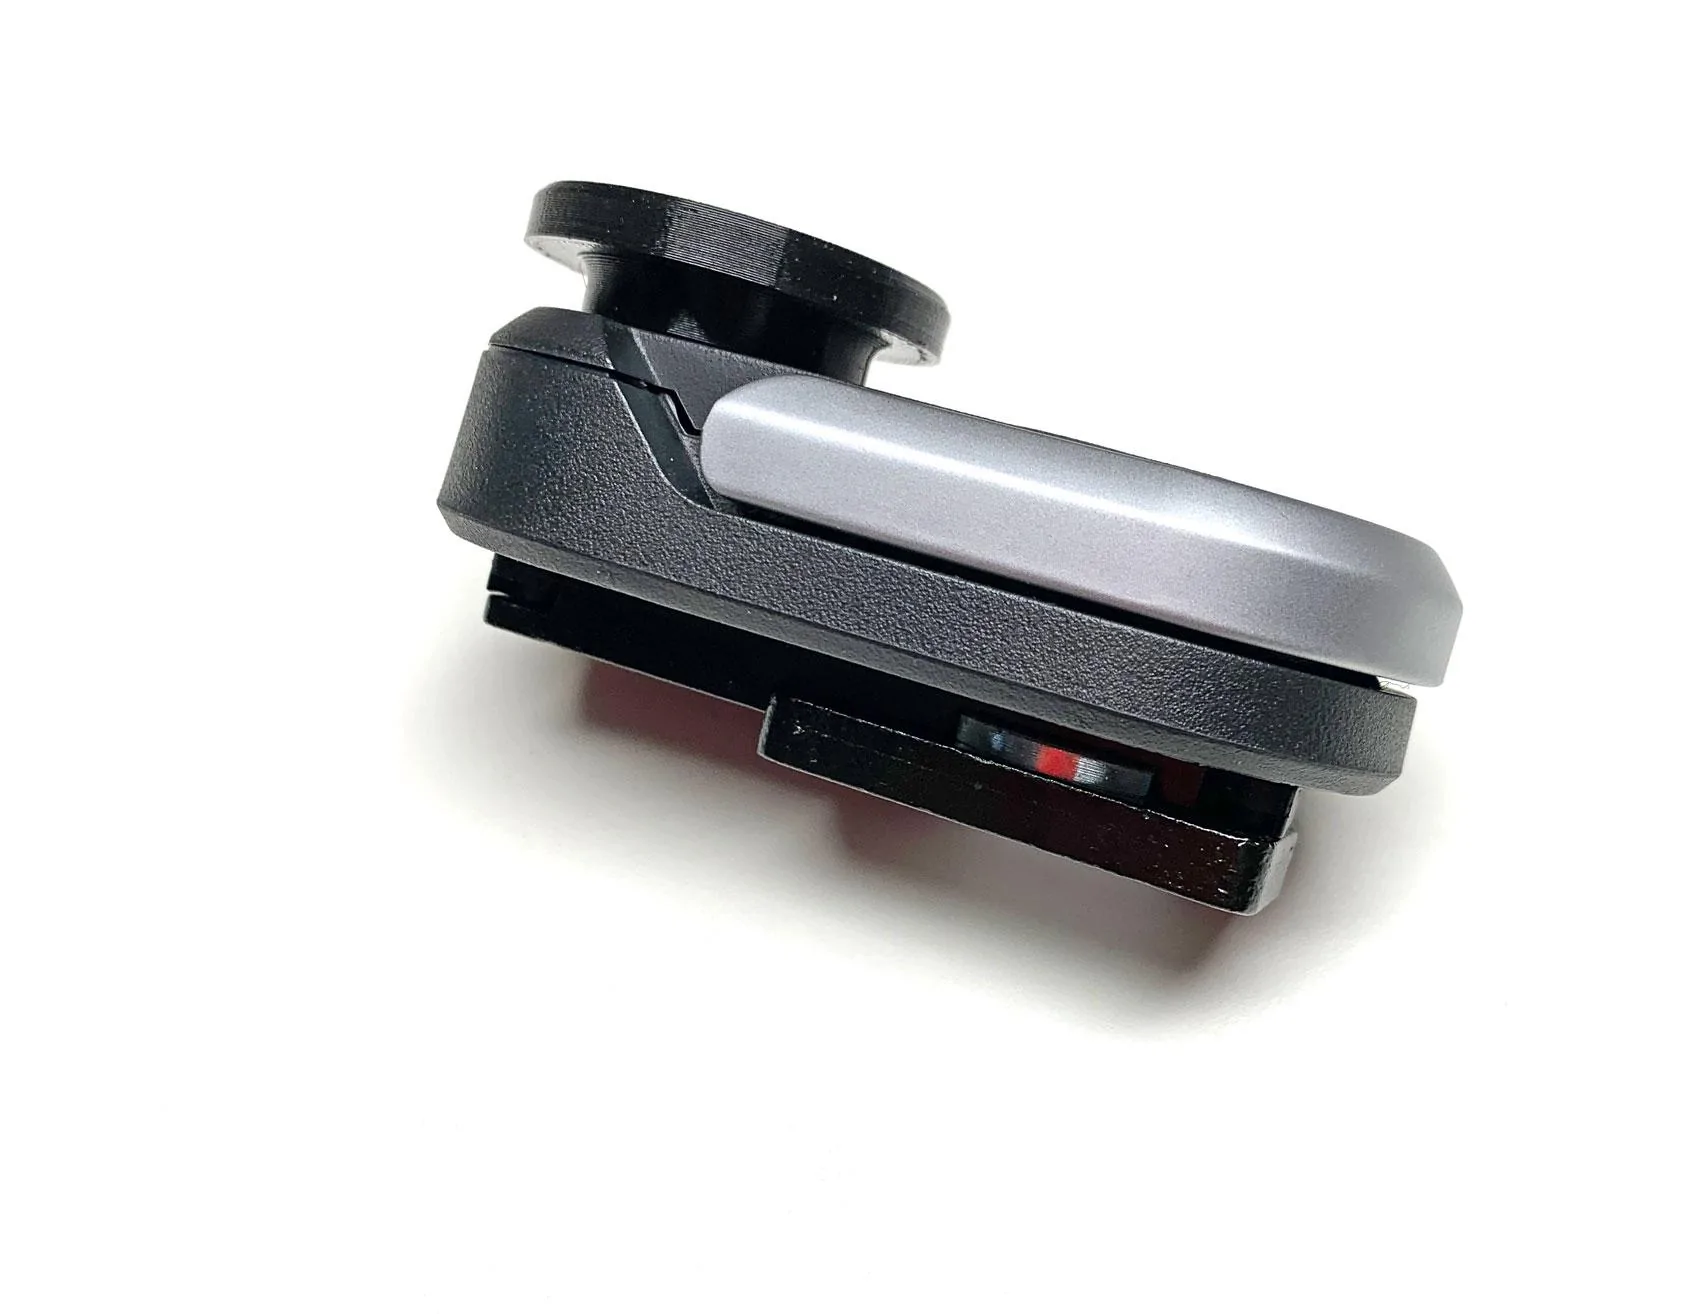
I played with the shape a little. I understand the concern about layer adhesion ( failure) and I was able to break one as you predicted (so I removed the Tie Down, flipped it over, pressed the button and the pin drops out, so not horrible). This latest design has a large surface in contact with the top of the Tie Down that carries a lot of the side load. The shape is for 6mm shock cord (bungee). I pulled on it as hard as I could and could not get it to fail. Another thing I like about it is that it's less likely to be sheared off if an object is slid into the cargo area and contacts it.Check this thread: https://www.rivianforums.com/forum/threads/3d-scanner-works-test-prints-working-great.22136/
I like the design, one of my concerns with printing these in a "no support" orientation is that it would put the layer lines in what I feel would be the "weakest" alignment with regards to pulling force - I could see the bottom of the peg simply pulling off at a layer line below the metal latch and now you have a chunk of plastic stuck down there. Printing these "on their side", while requiring some supports, allows for the "long grain" of the print - the continuous filament - to run along the dimension I feel should be strongest. So it's a trade-off, but one I made knowingly.
I'd love to see what you come up with though! Thank you for the interest and support. It would be cool to build up a nice little catalog of quick-release accessories people can easily print and replicate.

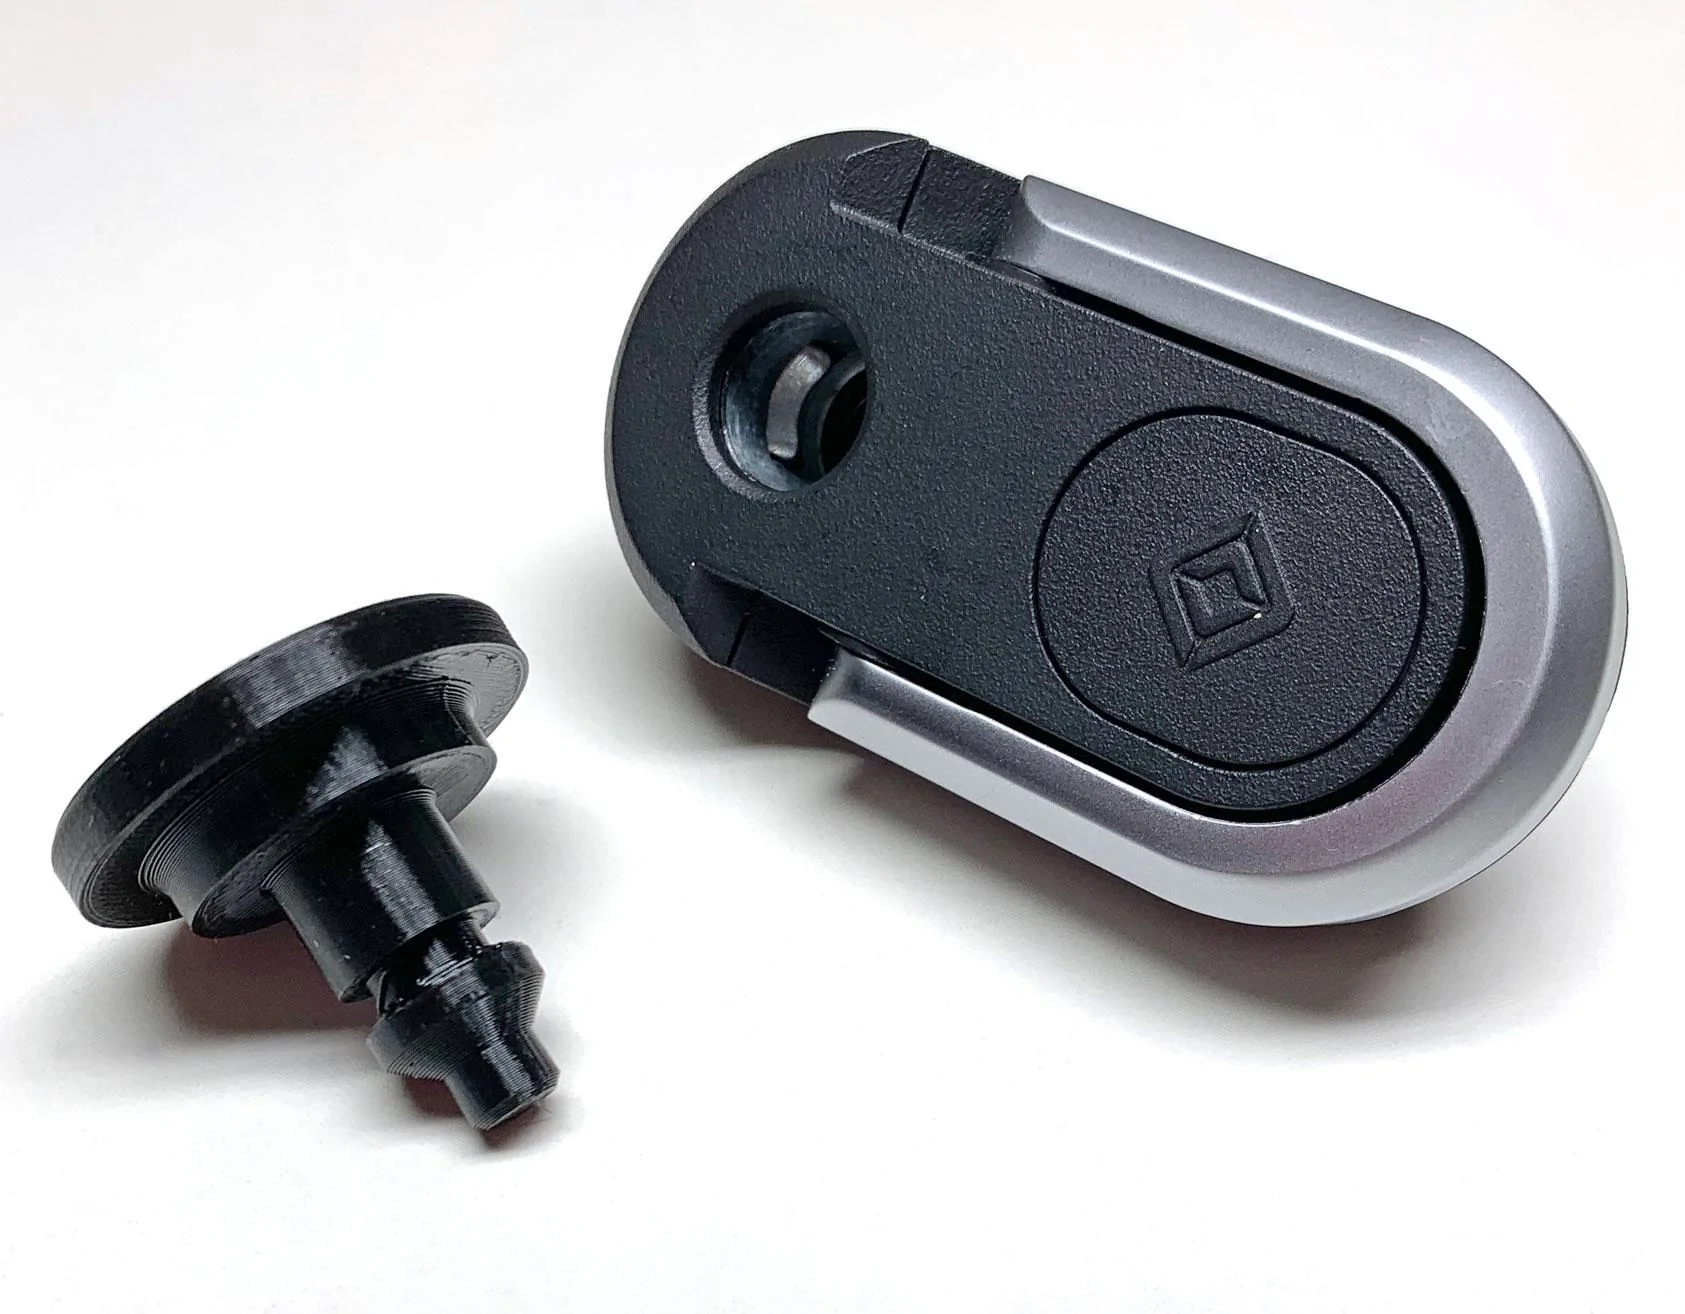
Excellent! Nice design.I played with the shape a little. I understand the concern about layer adhesion ( failure) and I was able to break one as you predicted (so I removed the Tie Down, flipped it over, pressed the button and the pin drops out, so not horrible). This latest design has a large surface in contact with the top of the Tie Down that carries a lot of the side load. The shape is for 6mm shock cord (bungee). I pulled on it as hard as I could and could not get it to fail. Another thing I like about it is that it's less likely to be sheared off if an object is slid into the cargo area and contacts it.

Just uploaded this to Thingiverse. https://www.thingiverse.com/thing:6823202This is exactly what I am looking for. @raylepper, Would you mind sharing the STL?
Hey there! Would it be possible to make a STL of this pin insert, but instead of a cap at the top end of the pin you make it another female insert? Basically I want a male to female pin insert that would increase the height of what is being inserted in the tie down. I have some of those levelers that make the trunk area lay flat, but now the OEM cargo dividers cannot reach the hole inserts. I am not super savvy in the 3-D printing world, but I do have access to one and could probably print one if you provided the STL.Just uploaded this to Thingiverse. https://www.thingiverse.com/thing:6823202
The stock cargo holddown has a spring loaded catch that engages with the pin. Without that function inserting another pin in the top of one my existing ones won't work. The cargo divider will just lift right out. I think a better answer is to fabricate a longer version of the pin on the cargo divider, in essence, an extended 'leg' that replaces the existing one. I've ordered one of the Rivian Cargo dividers. As soon as it arrives I'll see if my idea will work and come back to you. I'm thinking you're not alone in the need for something like this. Back s00n.Hey there! Would it be possible to make a STL of this pin insert, but instead of a cap at the top end of the pin you make it another female insert? Basically I want a male to female pin insert that would increase the height of what is being inserted in the tie down. I have some of those levelers that make the trunk area lay flat, but now the OEM cargo dividers cannot reach the hole inserts. I am not super savvy in the 3-D printing world, but I do have access to one and could probably print one if you provided the STL.
Thank you!
I got the cargo divider. The existing steel pin is not removable (despite removing the screws it seems to be held in place with an internal feature) But, I have a plan to make a 'lifting block.'How much higher do you want your cargo divider (in inches or mm, please)?Hey there! Would it be possible to make a STL of this pin insert, but instead of a cap at the top end of the pin you make it another female insert? Basically I want a male to female pin insert that would increase the height of what is being inserted in the tie down. I have some of those levelers that make the trunk area lay flat, but now the OEM cargo dividers cannot reach the hole inserts. I am not super savvy in the 3-D printing world, but I do have access to one and could probably print one if you provided the STL.
Thank you!
Hey! I just went out to measure. Seems like 1.5 inches minimum would be good, maybe up to 2 inches for good measure? I feel like anywhere between 1.5-2 inches should be good. Appreciate all this help and effort.I got the cargo divider. The existing steel pin is not removable (despite removing the screws it seems to be held in place with an internal feature) But, I have a plan to make a 'lifting block.'How much higher do you want your cargo divider (in inches or mm, please)?
OK. I'll go with 2" lift. I'll be back with some pics.Hey! I just went out to measure. Seems like 1.5 inches minimum would be good, maybe up to 2 inches for good measure? I feel like anywhere between 1.5-2 inches should be good. Appreciate all this help and effort.
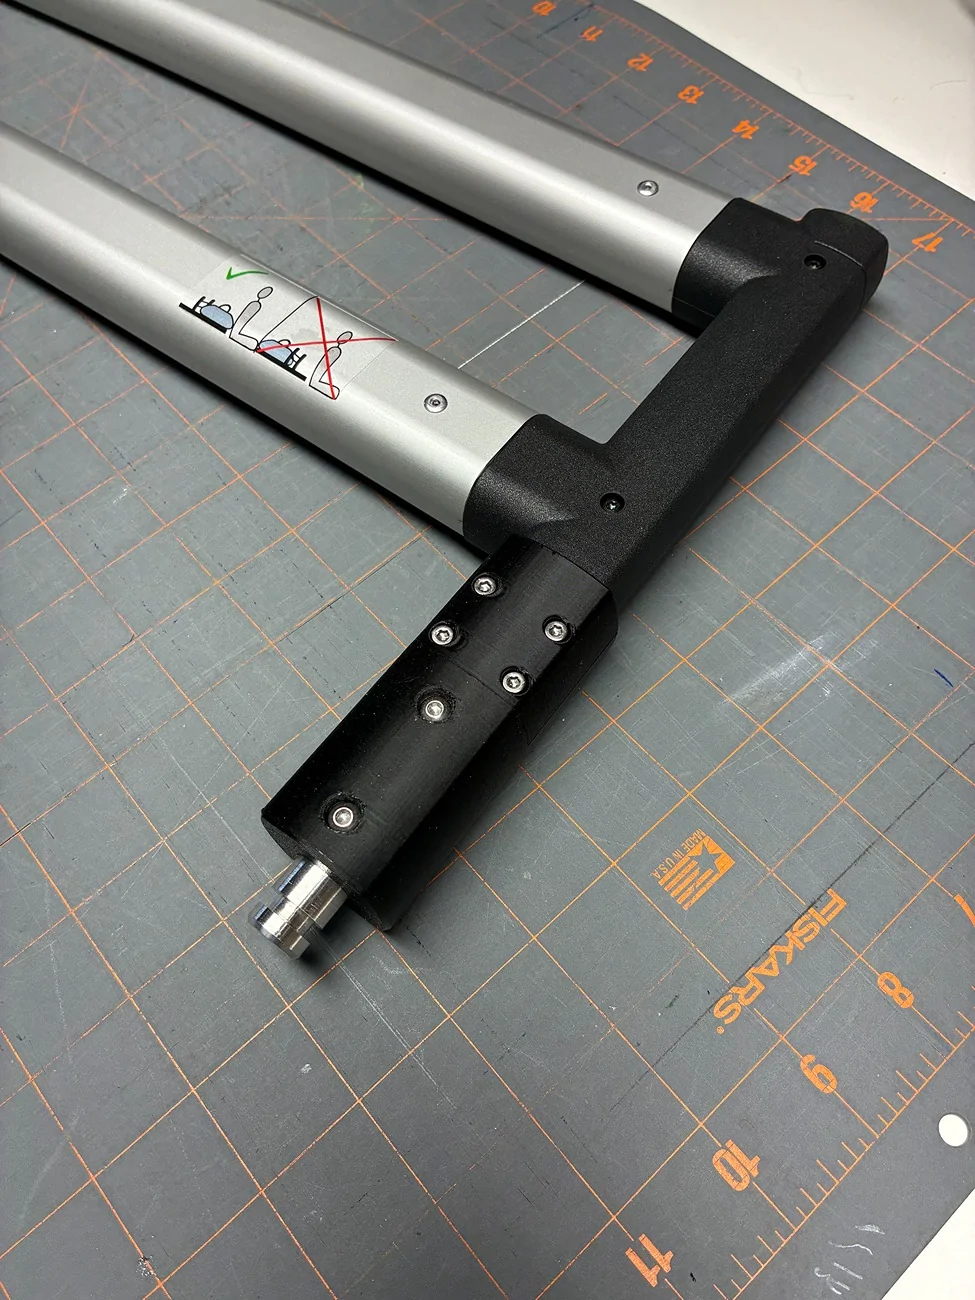
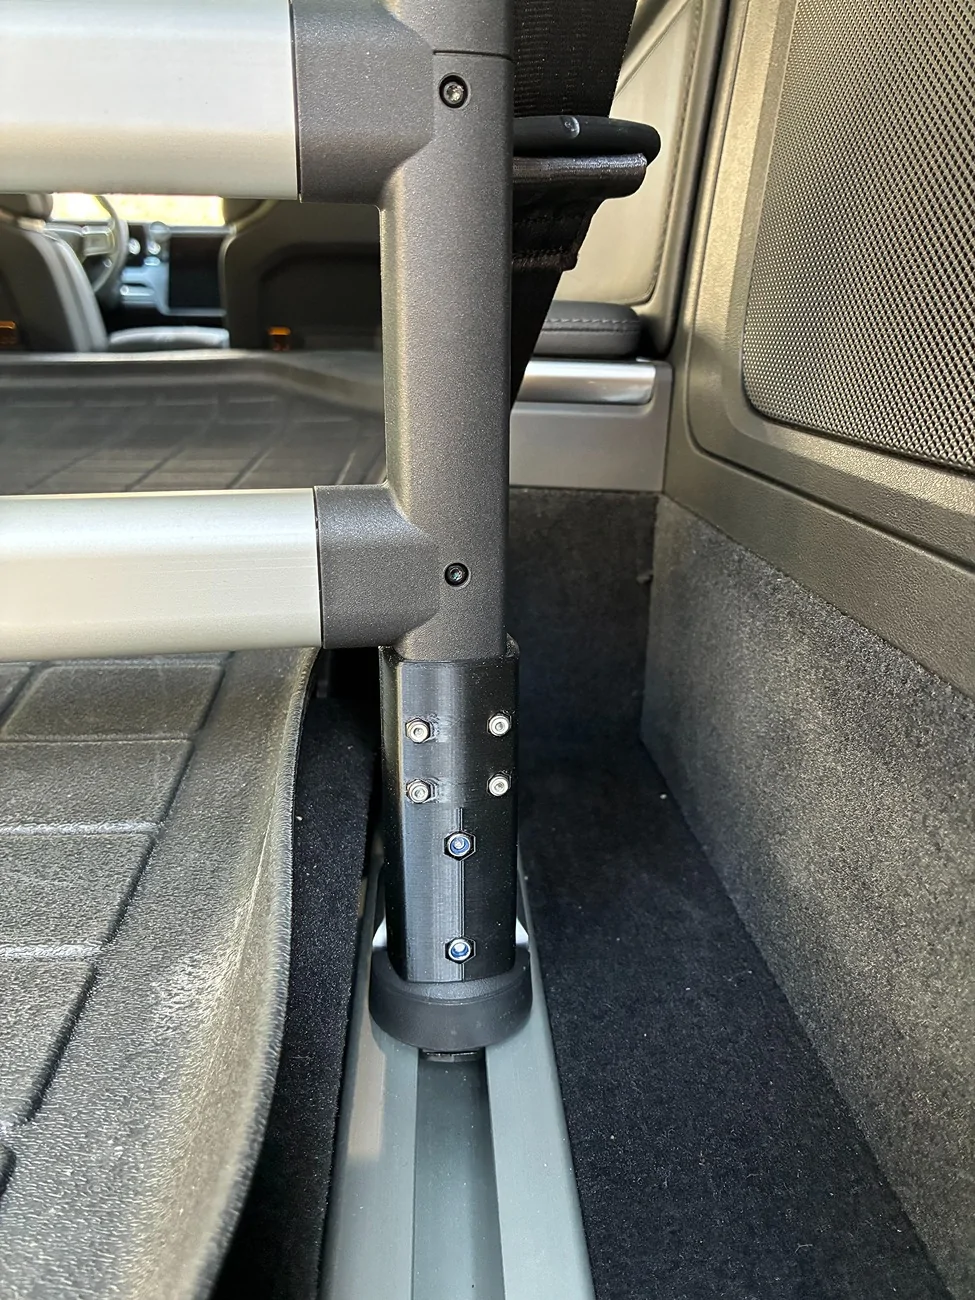
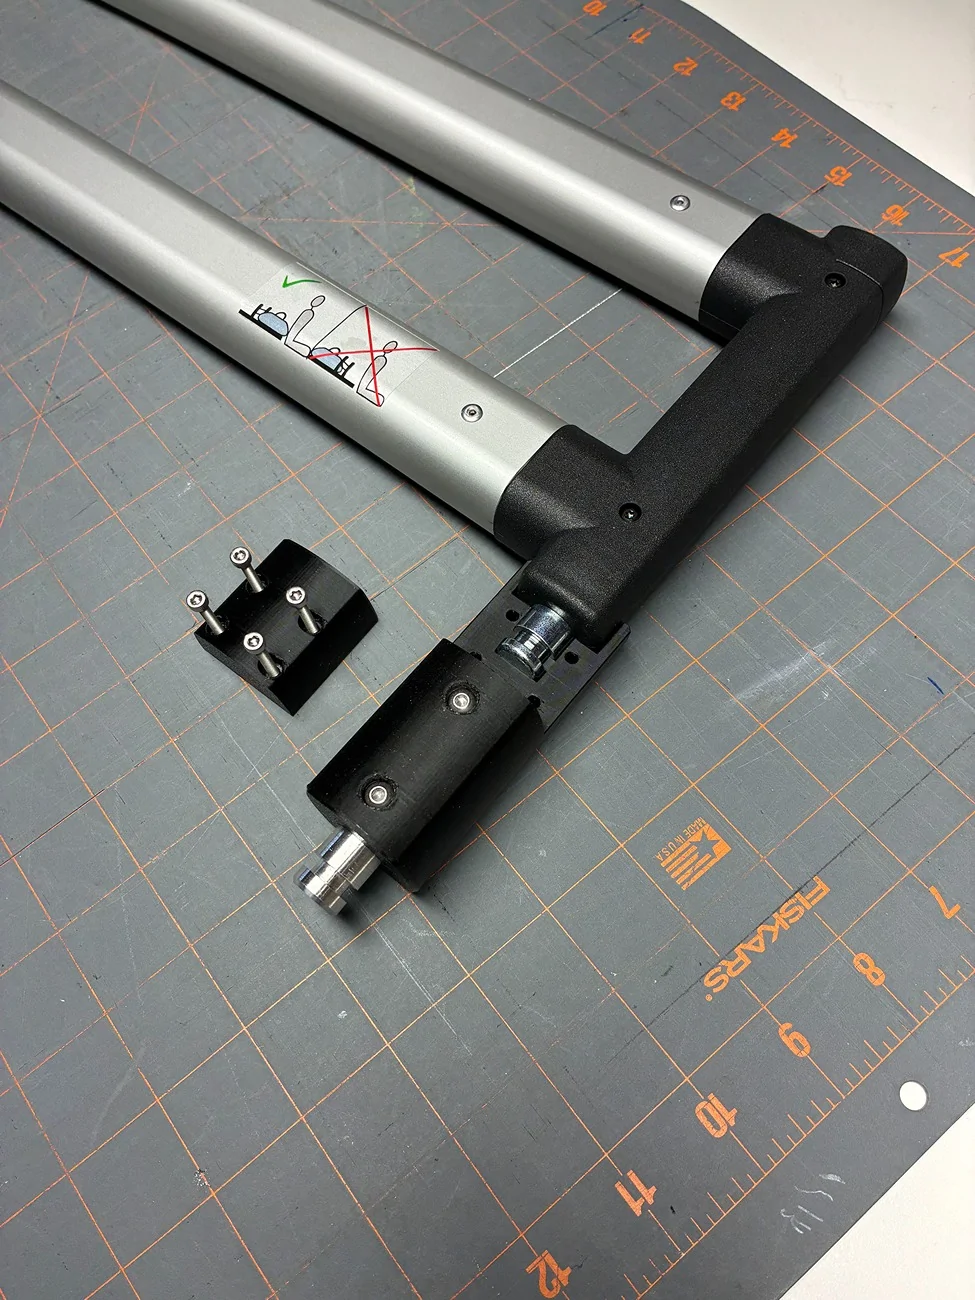
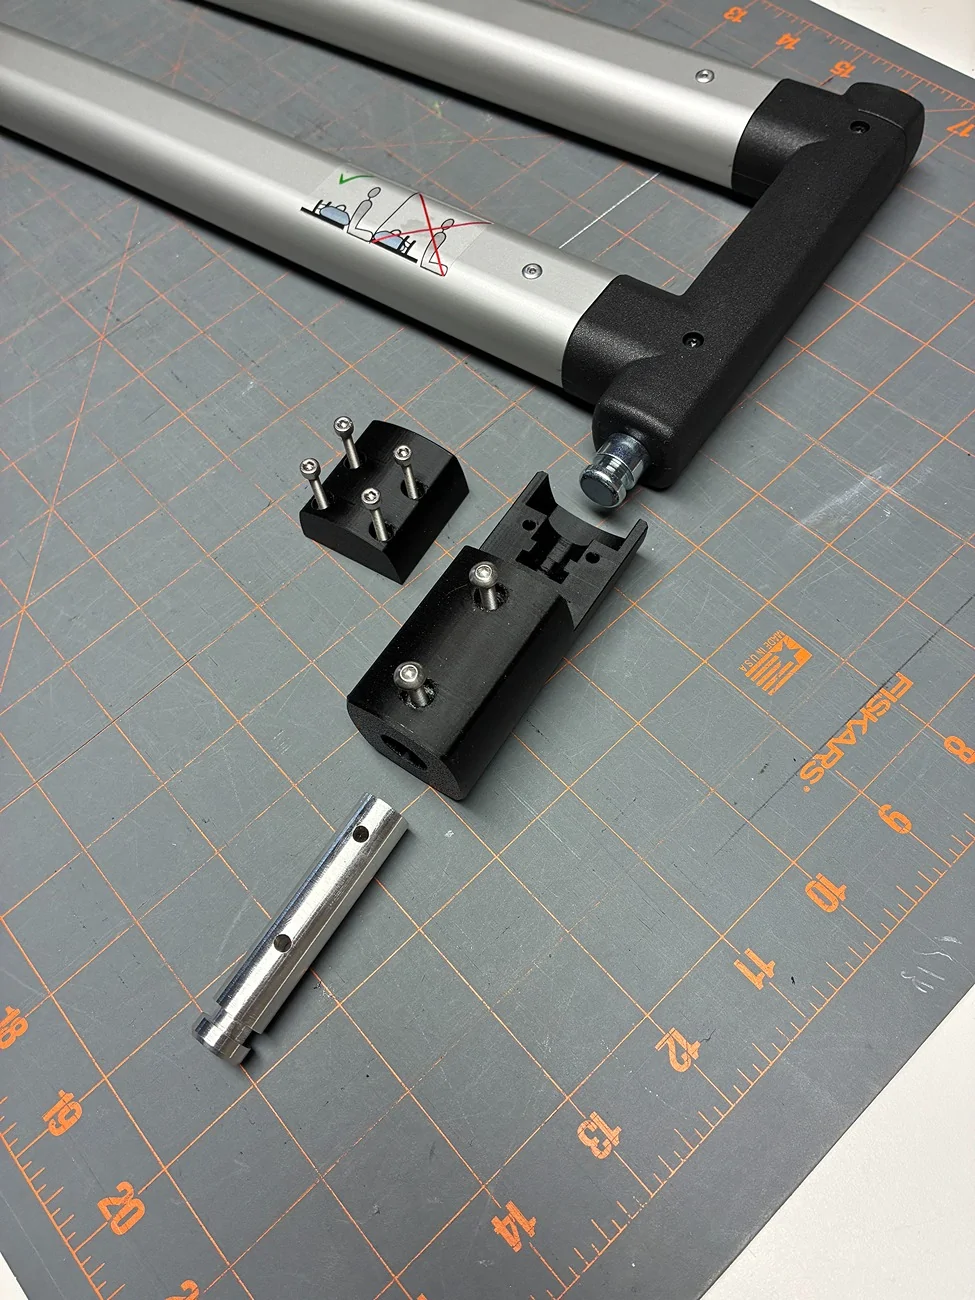
Whoa! That is a bit more involved than just a 3d printed part. How did you create the metal pieces? This might be a bit out of my skills to recreate :/So it was a bit more involved but I think this is a nice solution. It requires a new metal pin to engage the cargo tie down. It probably ought to be steel but I did this quick one in aluminum. It'll work fine—it'll just wear over time. The 'extension' is 2" but it could be longer. I'd probably stop at 4-5". When installed the stock divider is a little wobbly and so it is with the extension. It's possible to tighten up the connection between the pin and the hold down but that will make it fussier to get in and out.

I'd be willing to buy a pair if you're offering, no pressure either way though.I turned the pin on my little lathe. I think a plastic pin would break easily. The pin is 14mm dia and that size rod (in aluminum) is available from Amazon, McMaster and others. These parts were printed in PETG but I would print the final version in something like NylonX.
