citizen
Well-Known Member
- First Name
- Darren
- Joined
- Sep 1, 2021
- Threads
- 16
- Messages
- 395
- Reaction score
- 439
- Location
- Orange County, CA
- Vehicles
- R1S, 911, RX350h
- Occupation
- Designer
- Thread starter
- #1
Due to insurance scammers, terrible drivers (captured via my FIL's car the week after they took delivery), and criminals driving recklessly leaving a crime scene (was hit while waiting at a light in San Francisco), I've always been a stickler about having dashcams installed when driving.
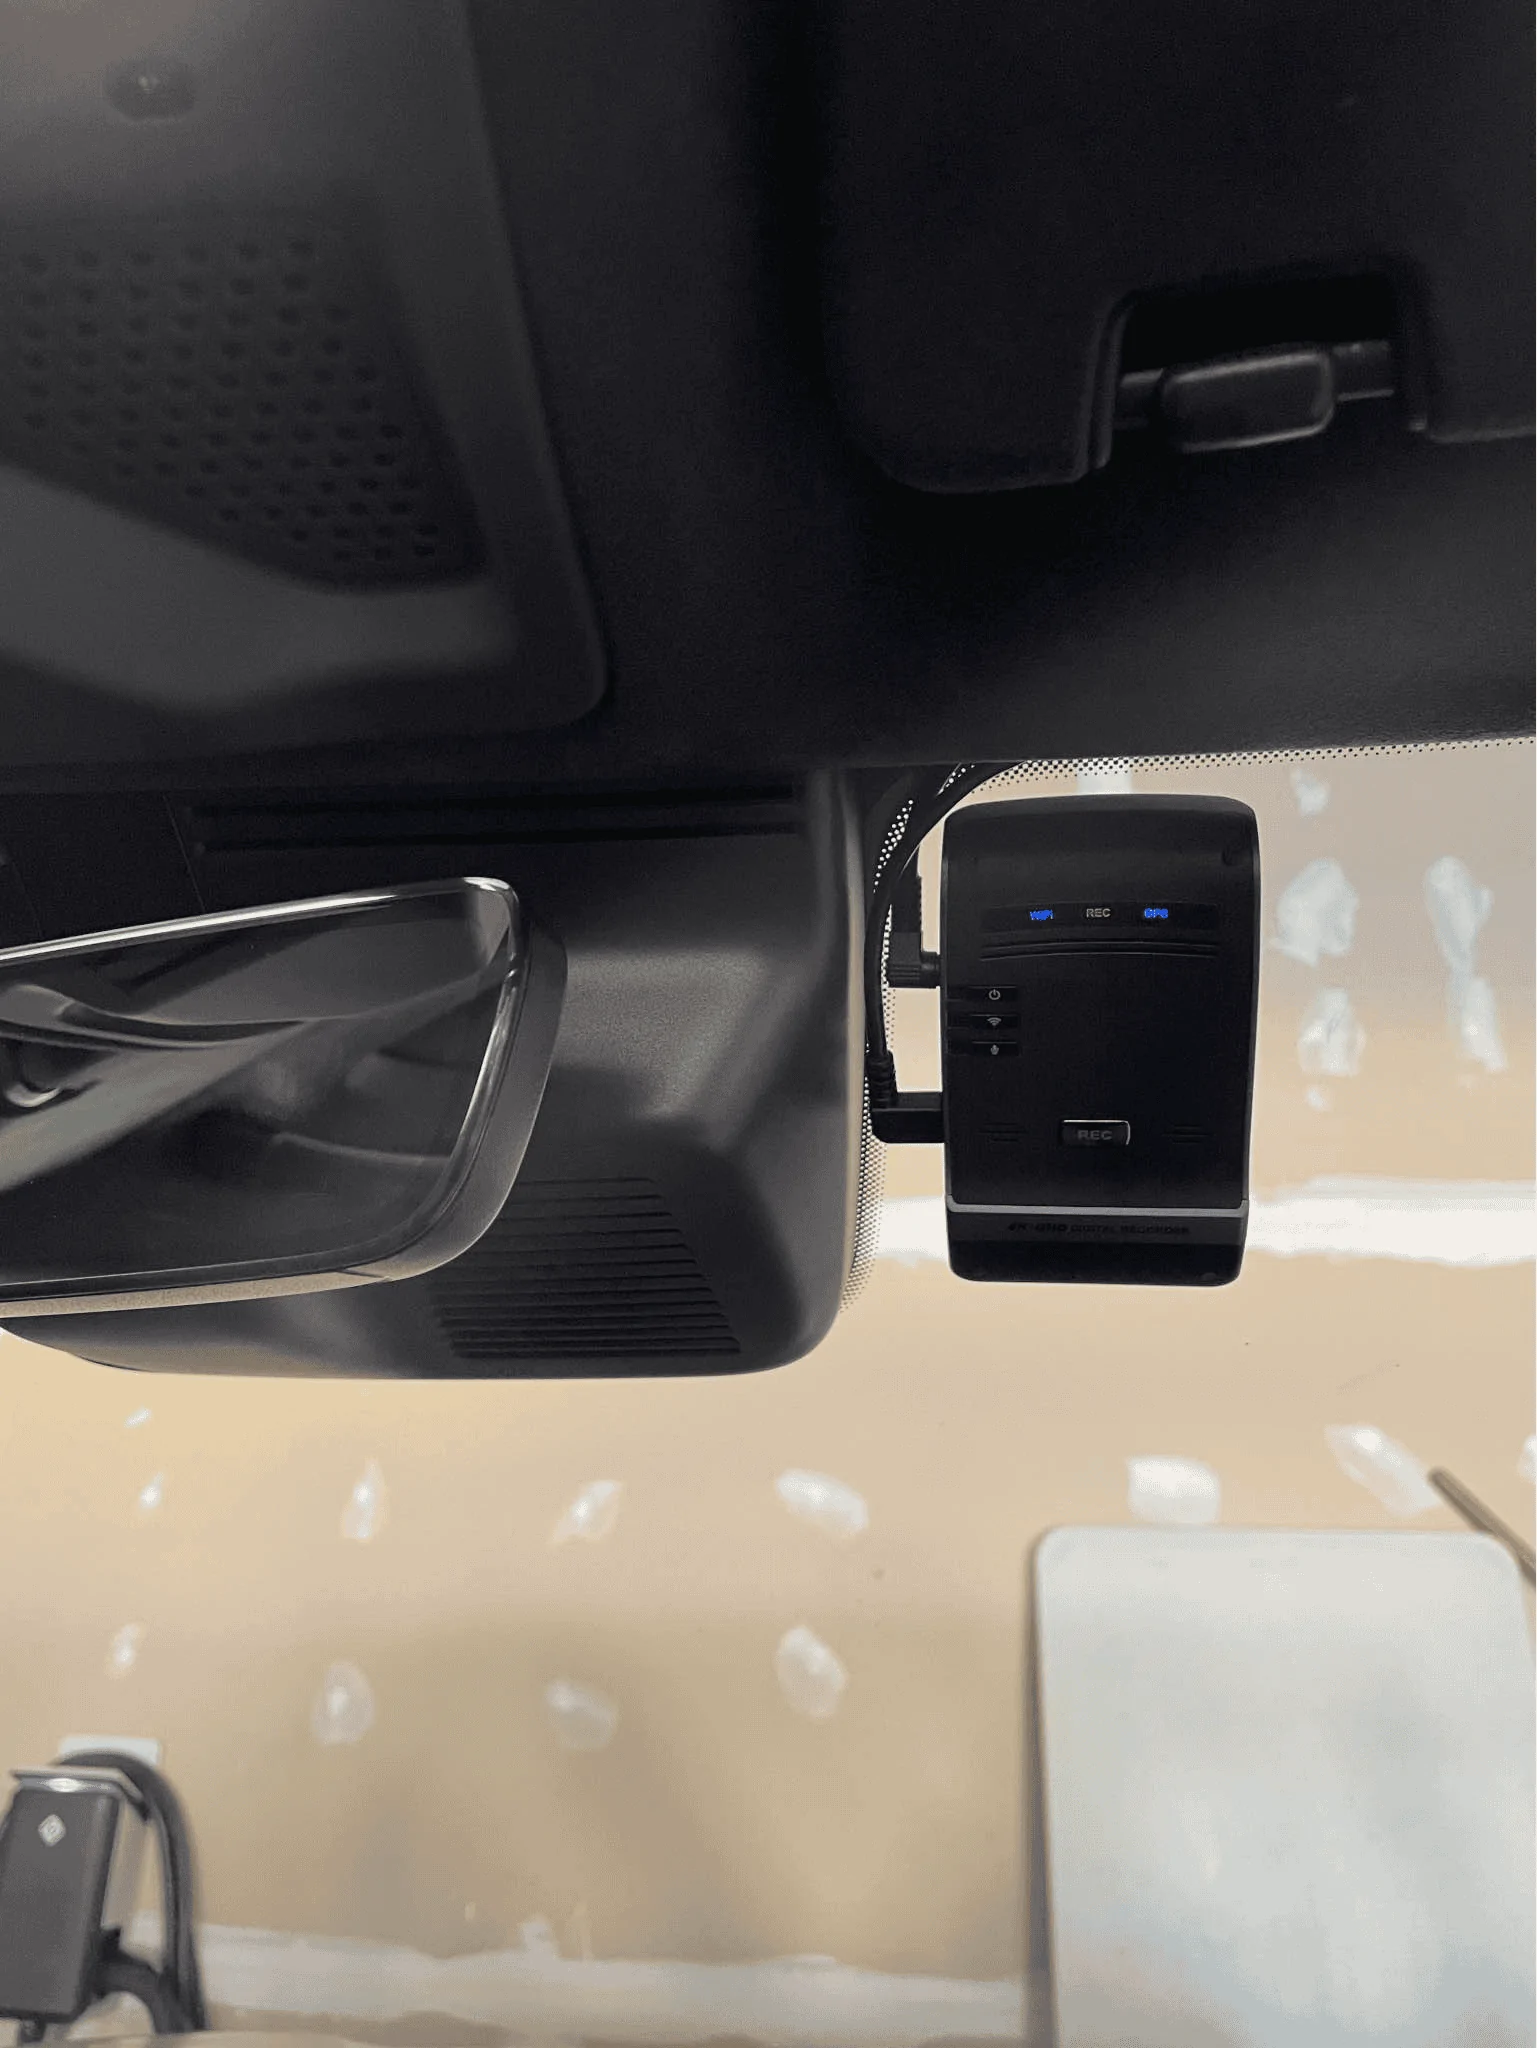
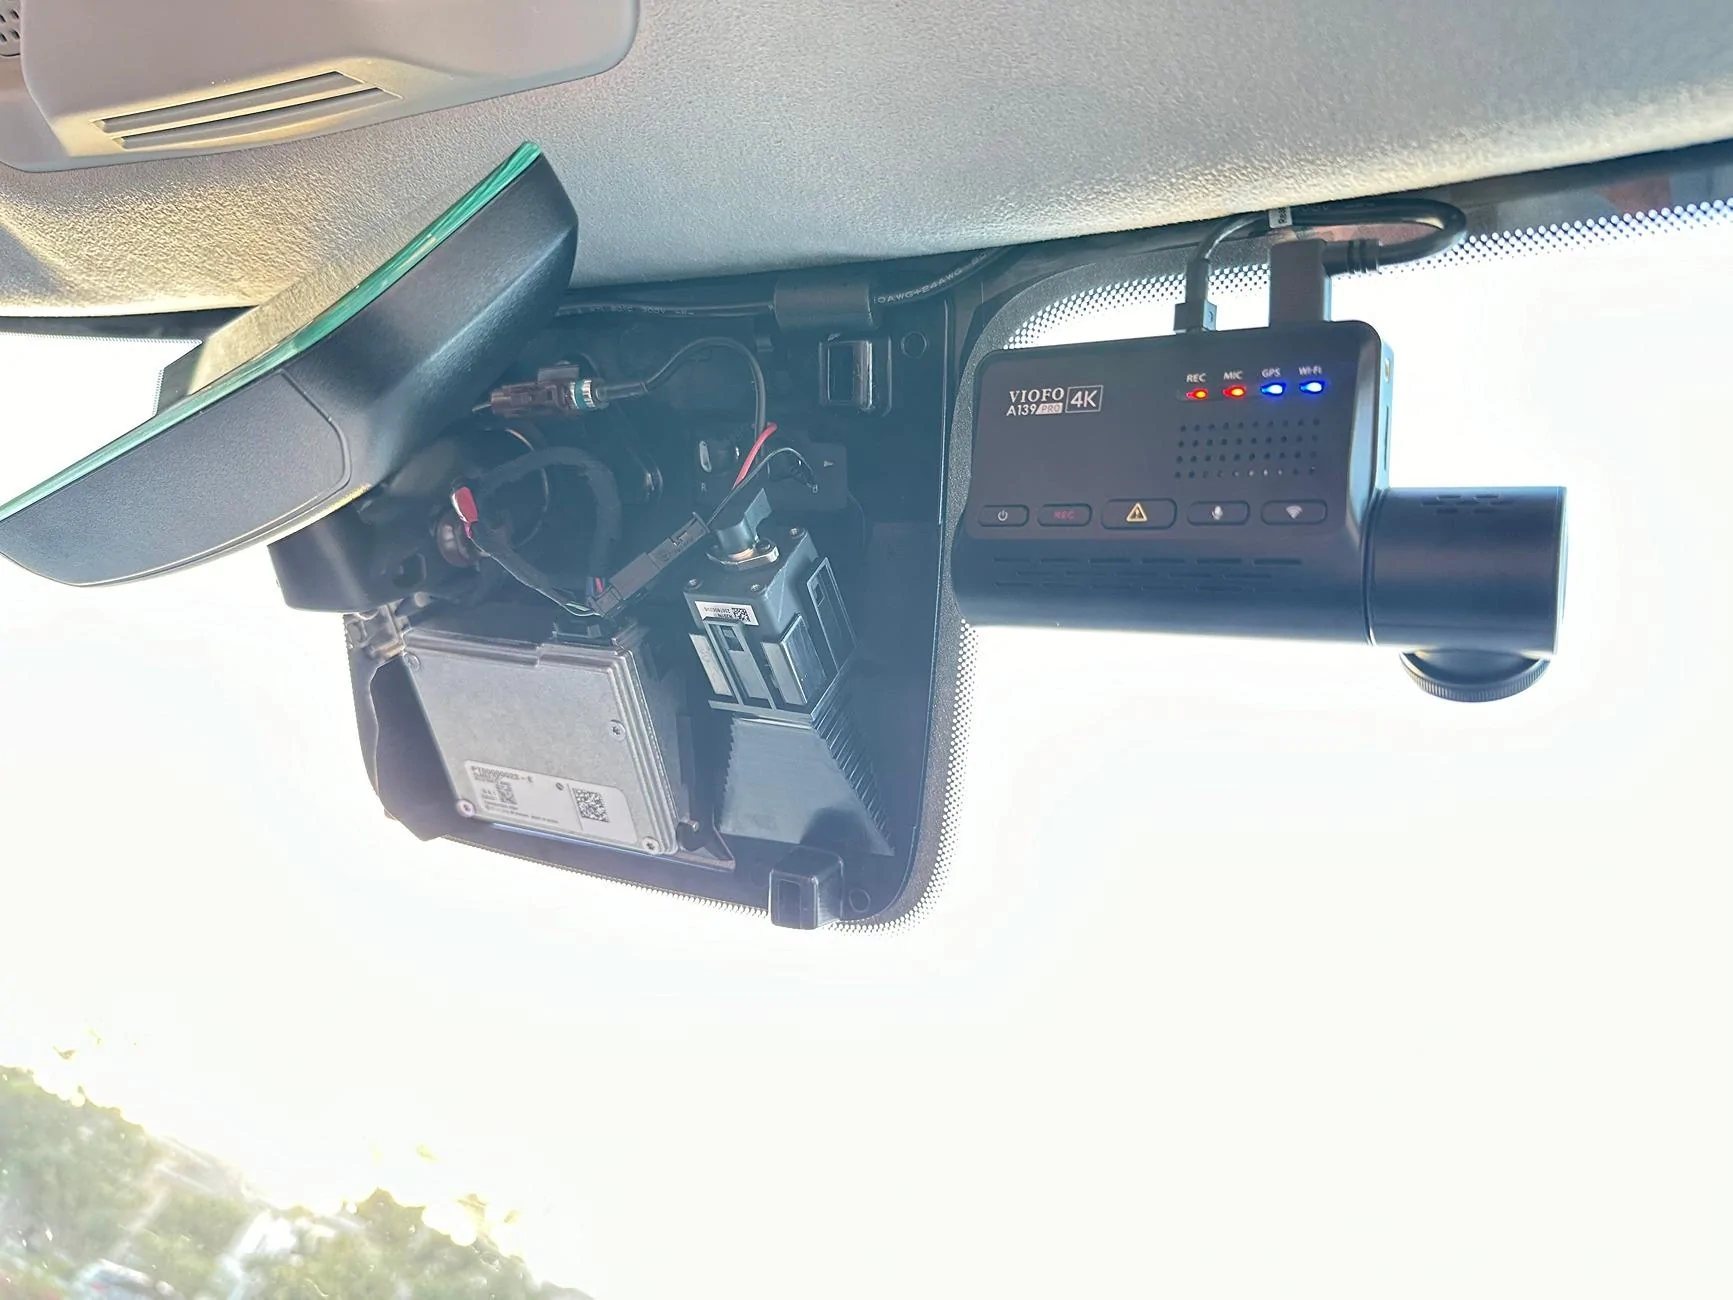
Brought a dashcam with me when picking up my FIL's car earlier in the year and had it mounted even before we left the dealership. For our R1S, one of the first two items I ordered was the 90-degree angle adapter and a Samsung memory stick. Made sure it was installed and Drive Cam was running before I left the service center.
But due to the low resolution of the Rivian cameras as detailed by @opnwide in this extremely helpful thread, I always knew I would be adding an aftermarket camera to augment Rivian’s system.
Thanks to this helpful thread and @opnwide's video, I was able to jerry-rig a mirror-tap for the Viofo A139 Pro front + rear dashcam and run the rear camera wire cleanly to the liftgate. Below is a write-up of what I did, hopefully, you'll find it helpful.
Disclaimer: I'm not responsible for anything that happens to you or your property. Be careful when working with the trim pieces near airbags. And as always, watch out for live / hot wires.
Mirrortap:
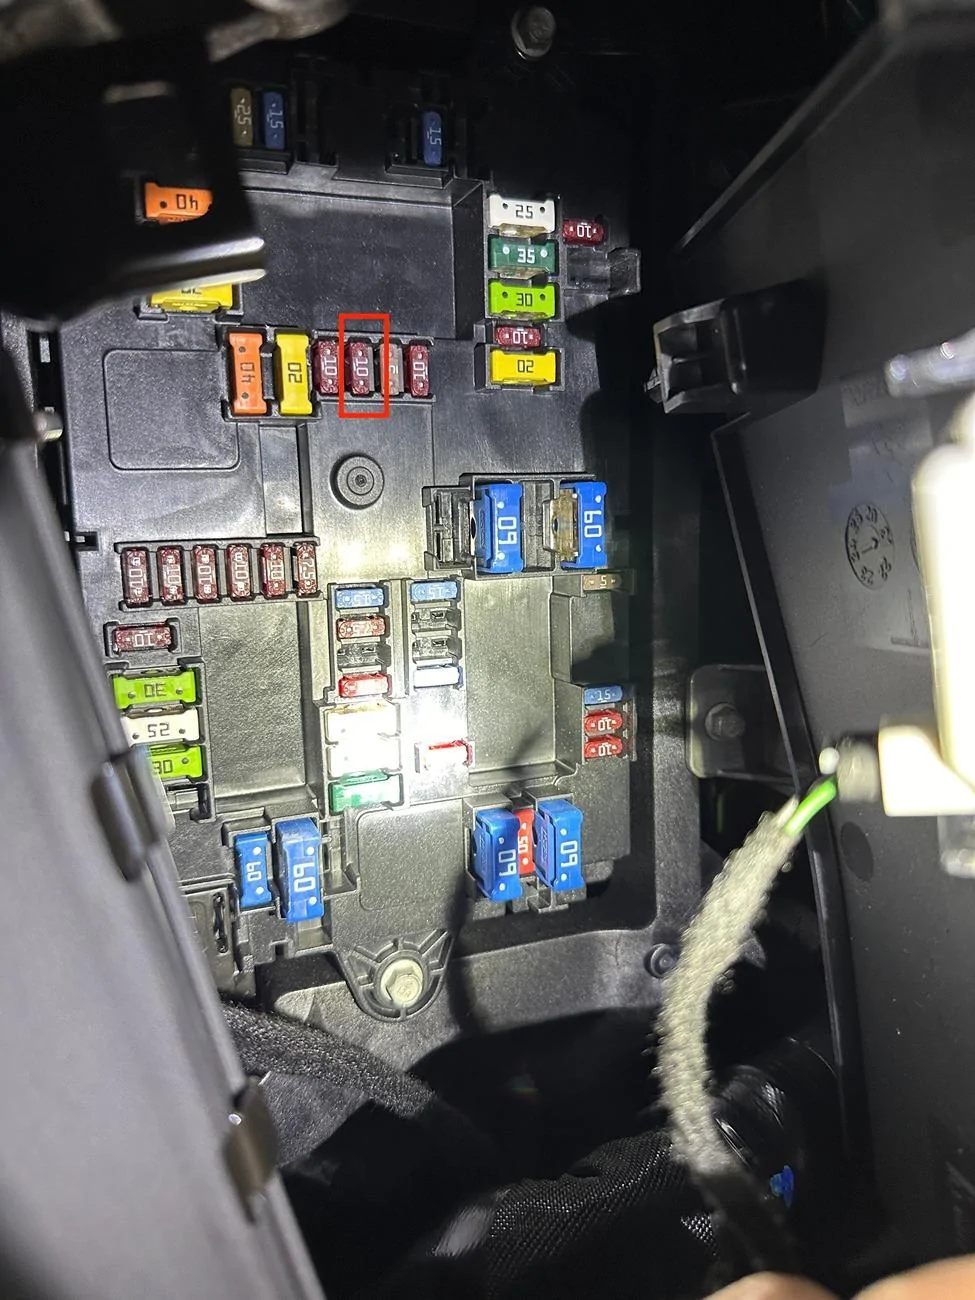
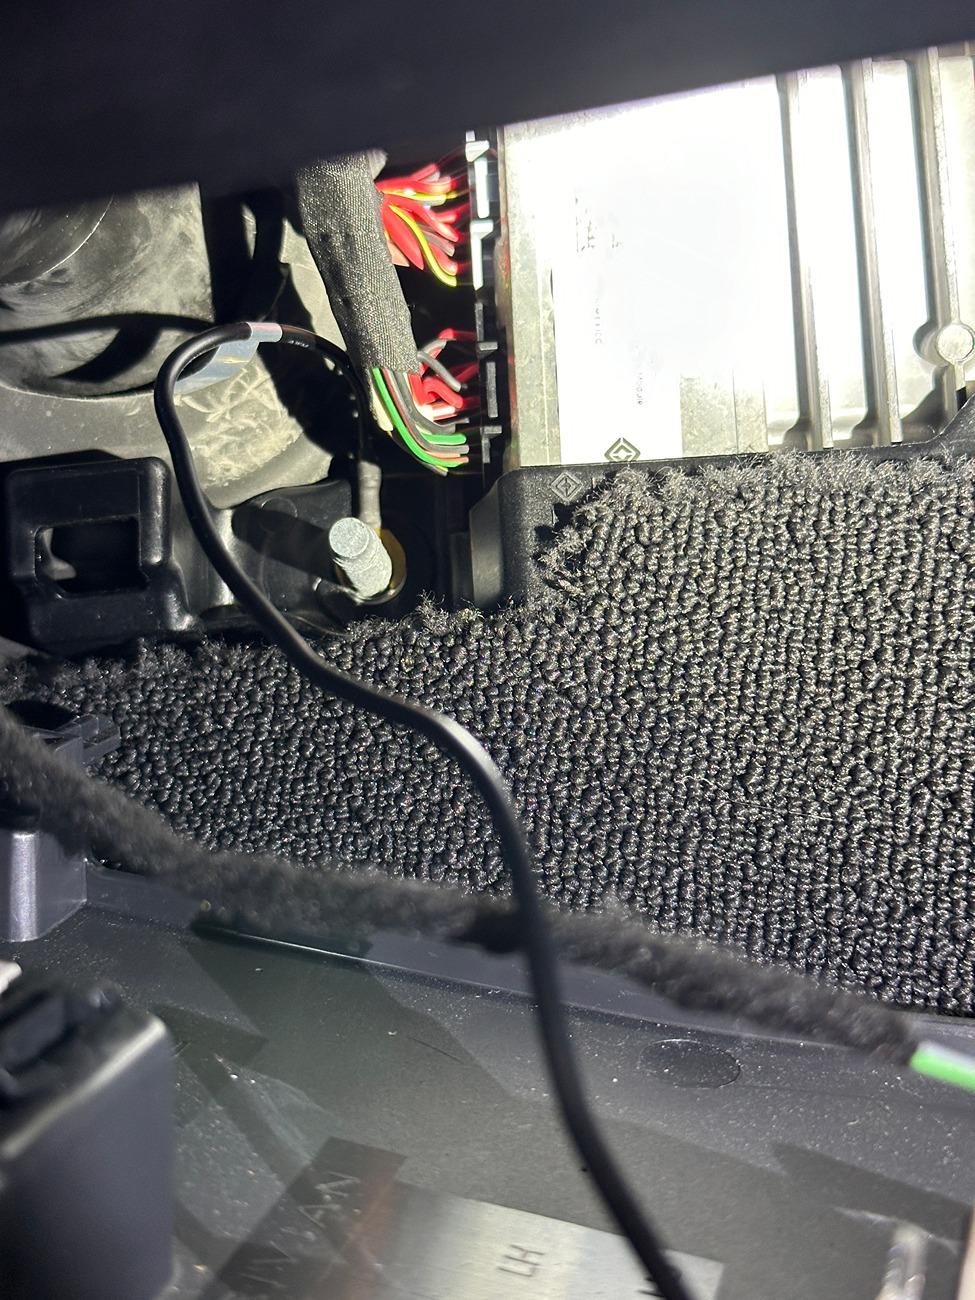
Whereas radar detectors seem to have a number of mirrortap options, there doesn't seem to be an equivalent if you just want a USB-C connection. For other vehicles, I've mirrortapped with a Dongar adapter (not available for the Rivian, though I did wonder if another brand's 10-pin Type H would work) or tapped the fusebox. Due to reports of Rivian not using standard size fuses I zeroed in on the mirrortap option early on.
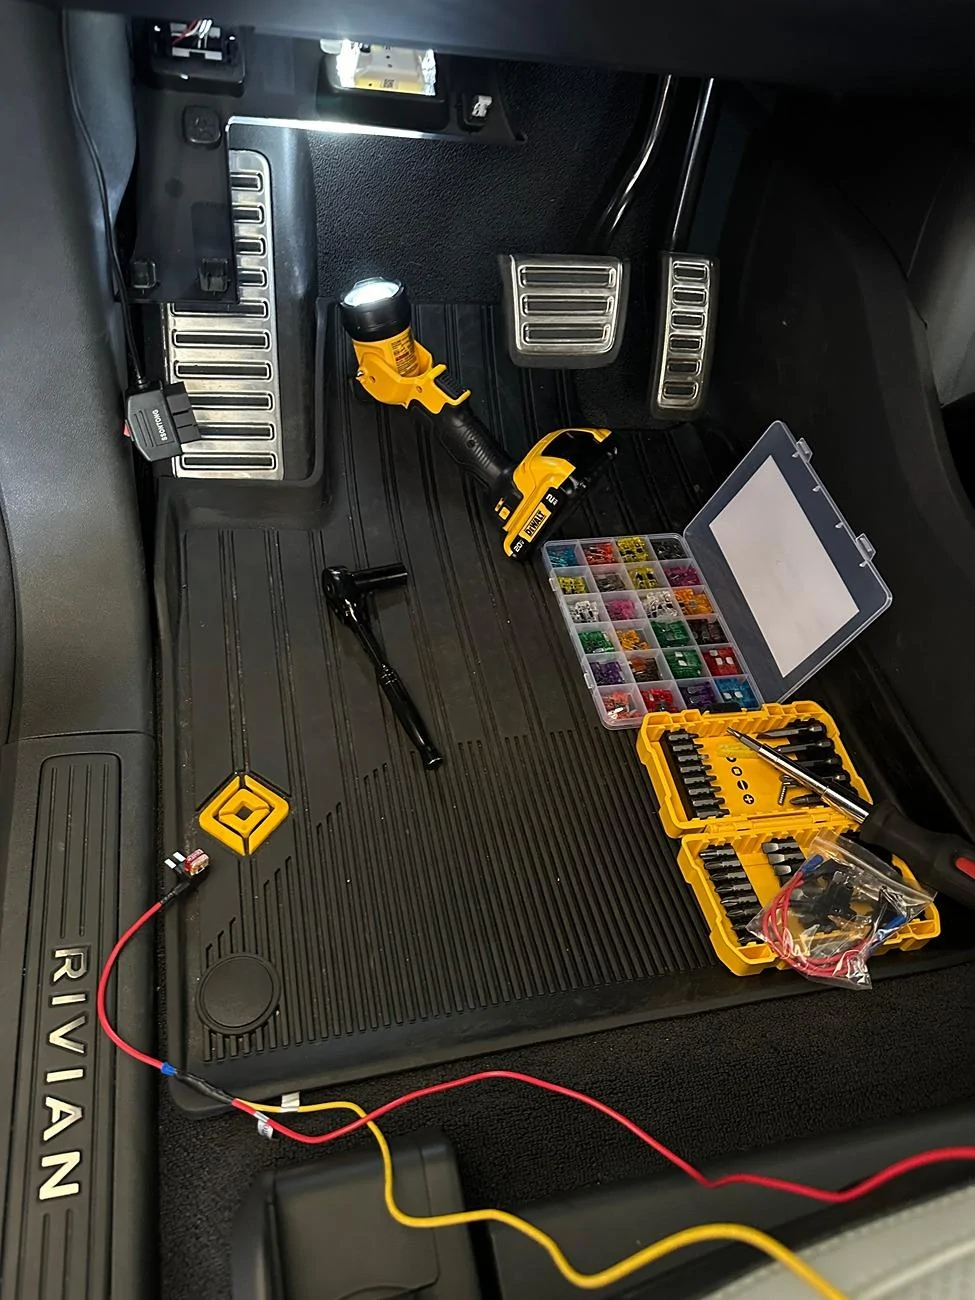
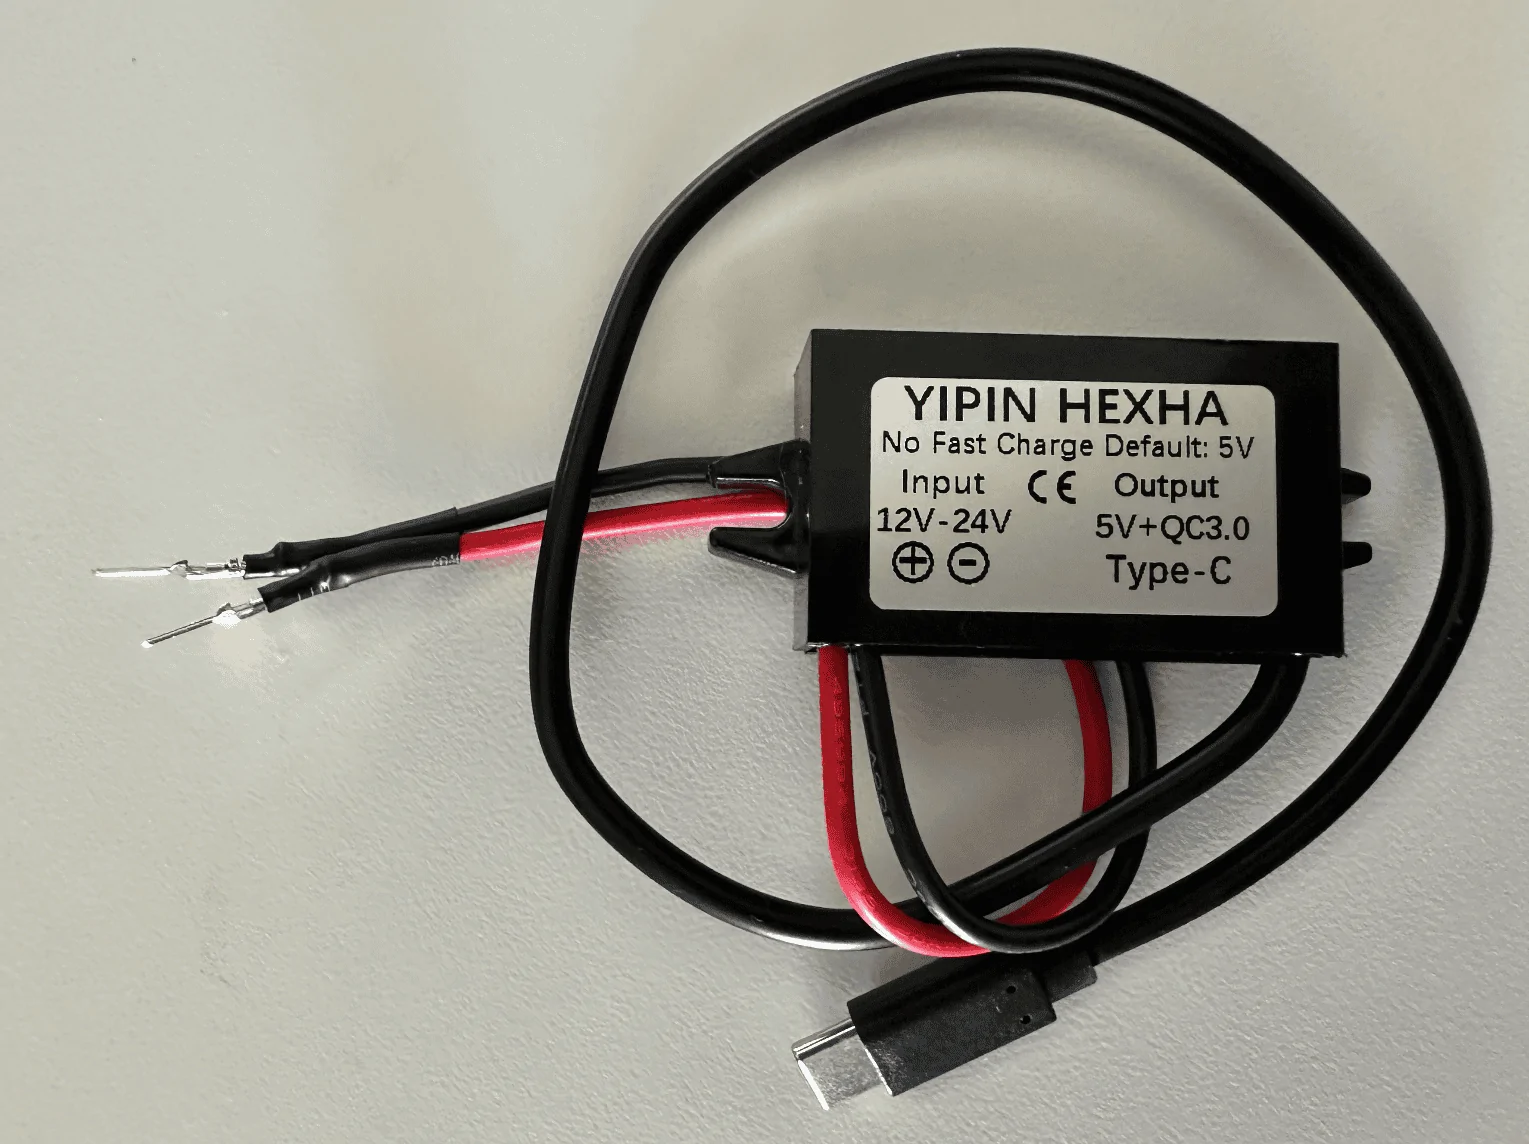
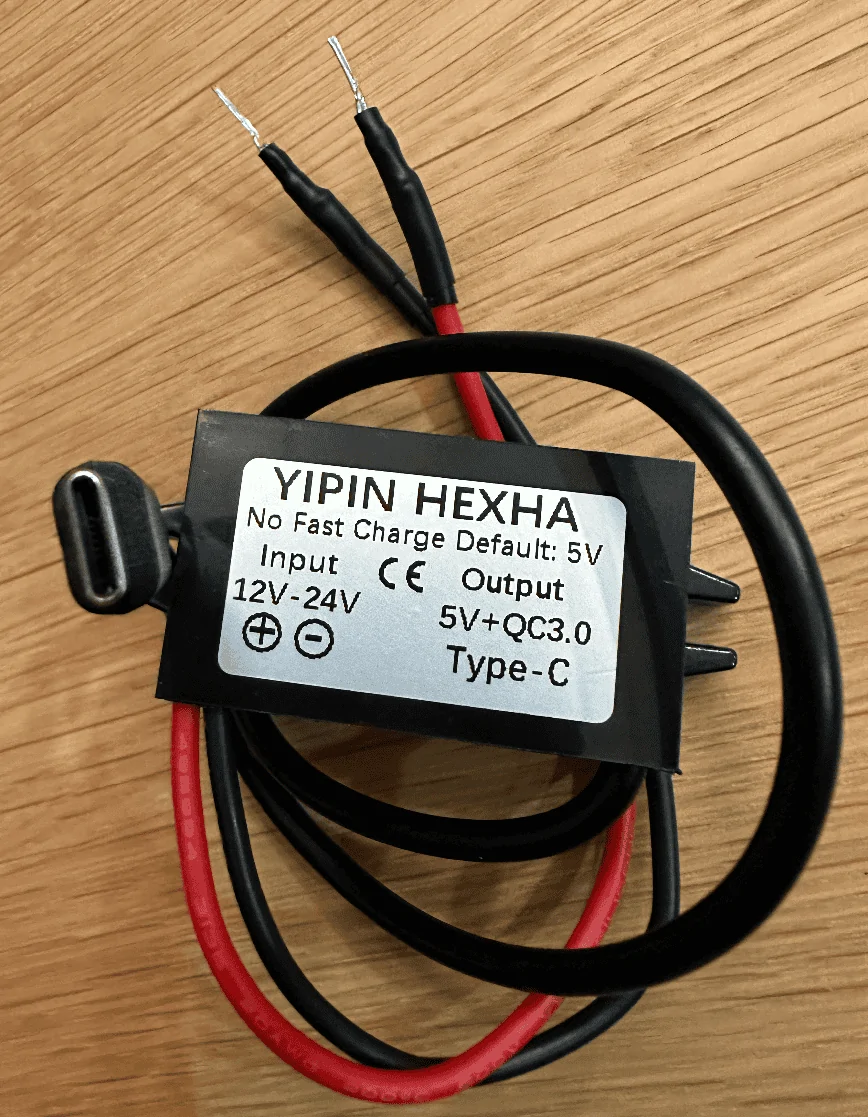
Used the following two items and some heat shrink tubing for my mirrortap:

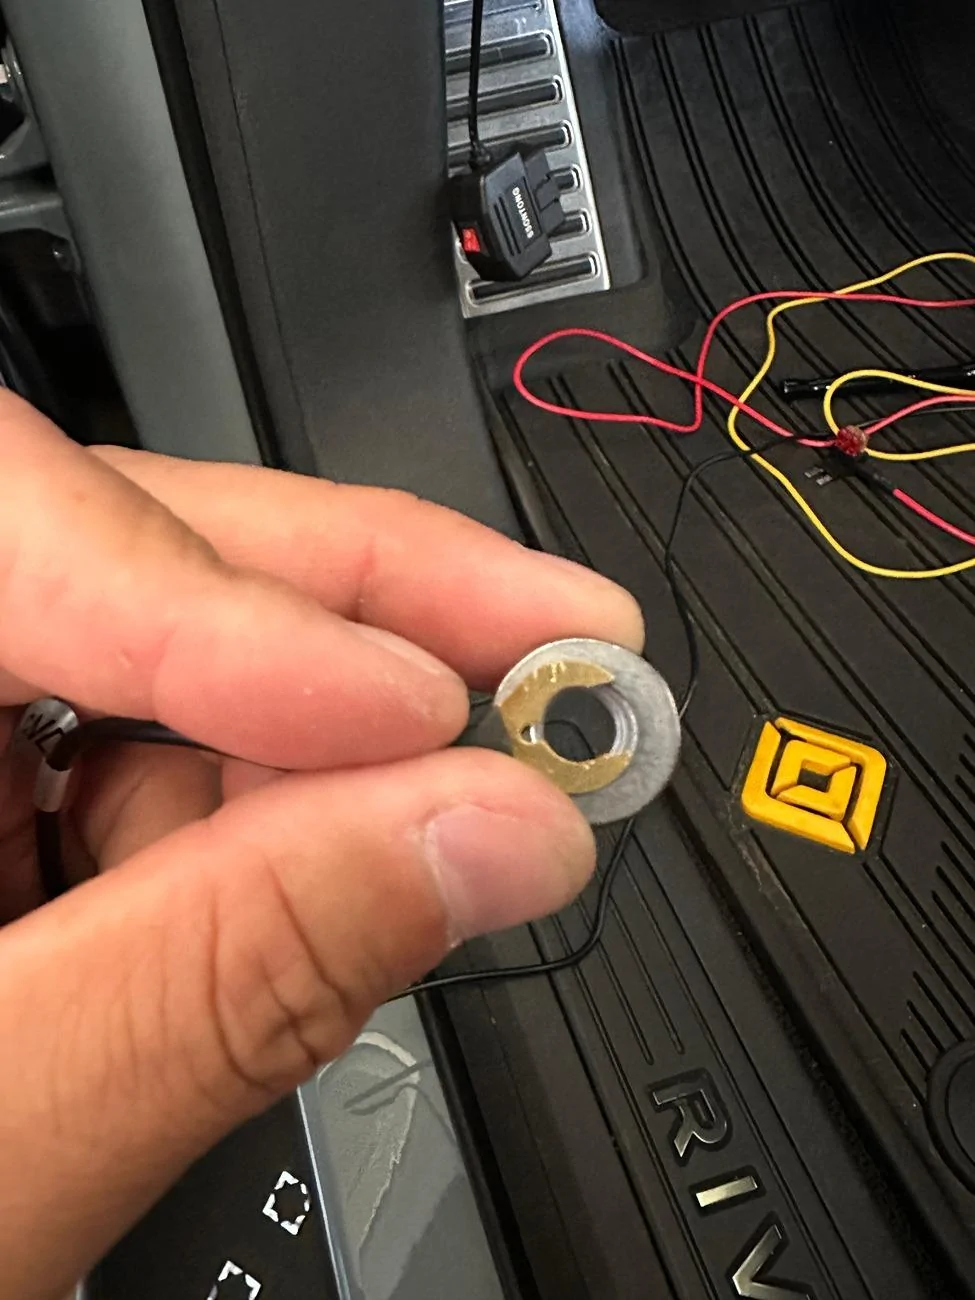
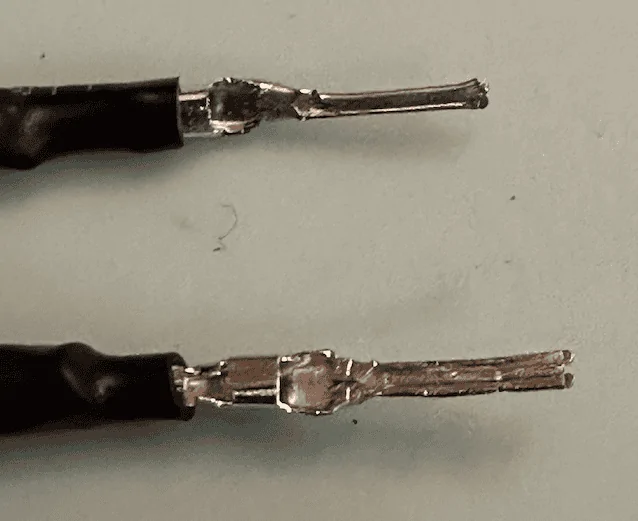
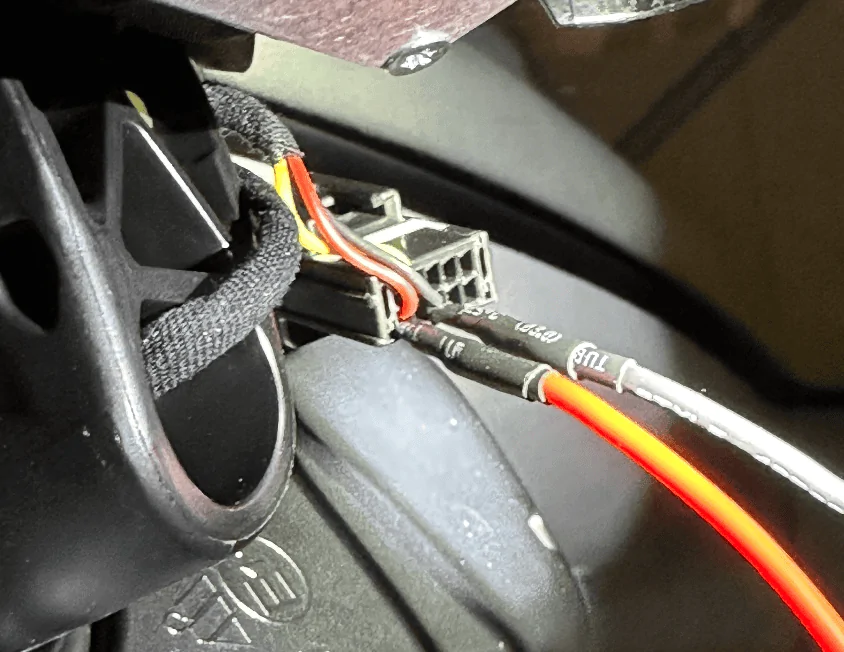
After some unsuccessful attempts at tapping the rear of the molex connector, I ended up flattening the pins:


Tapping the mirror assembly:
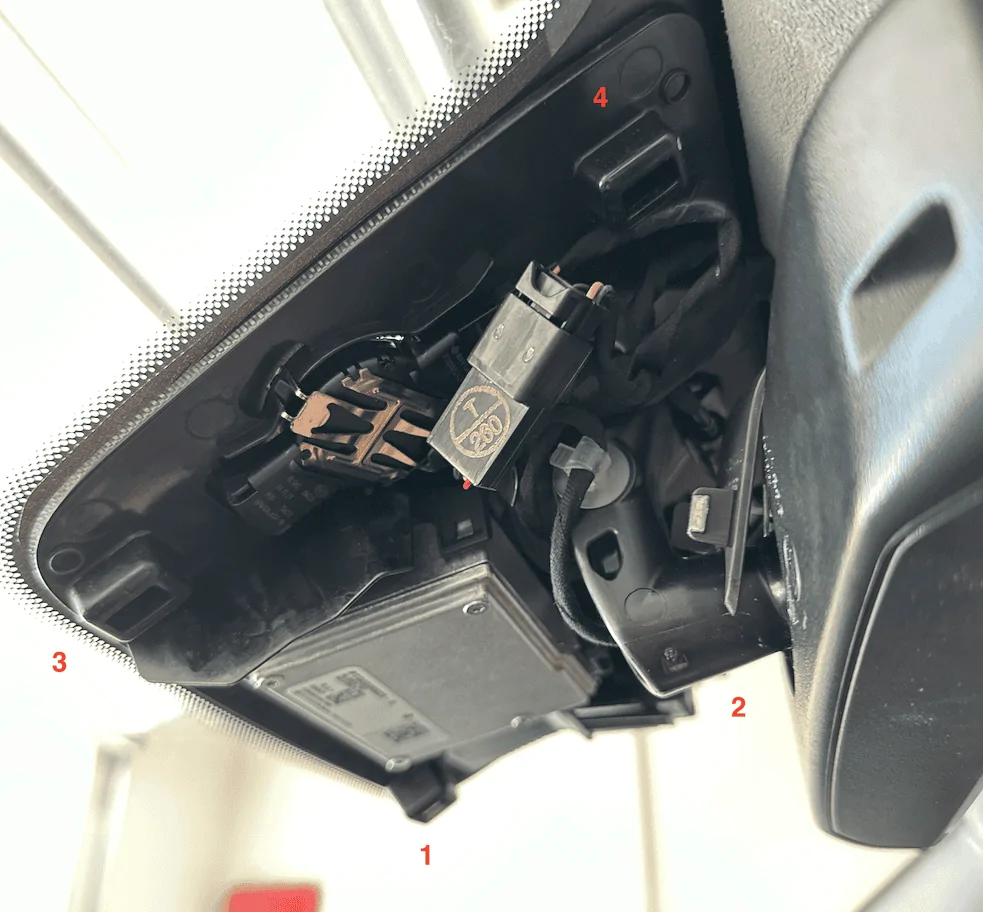
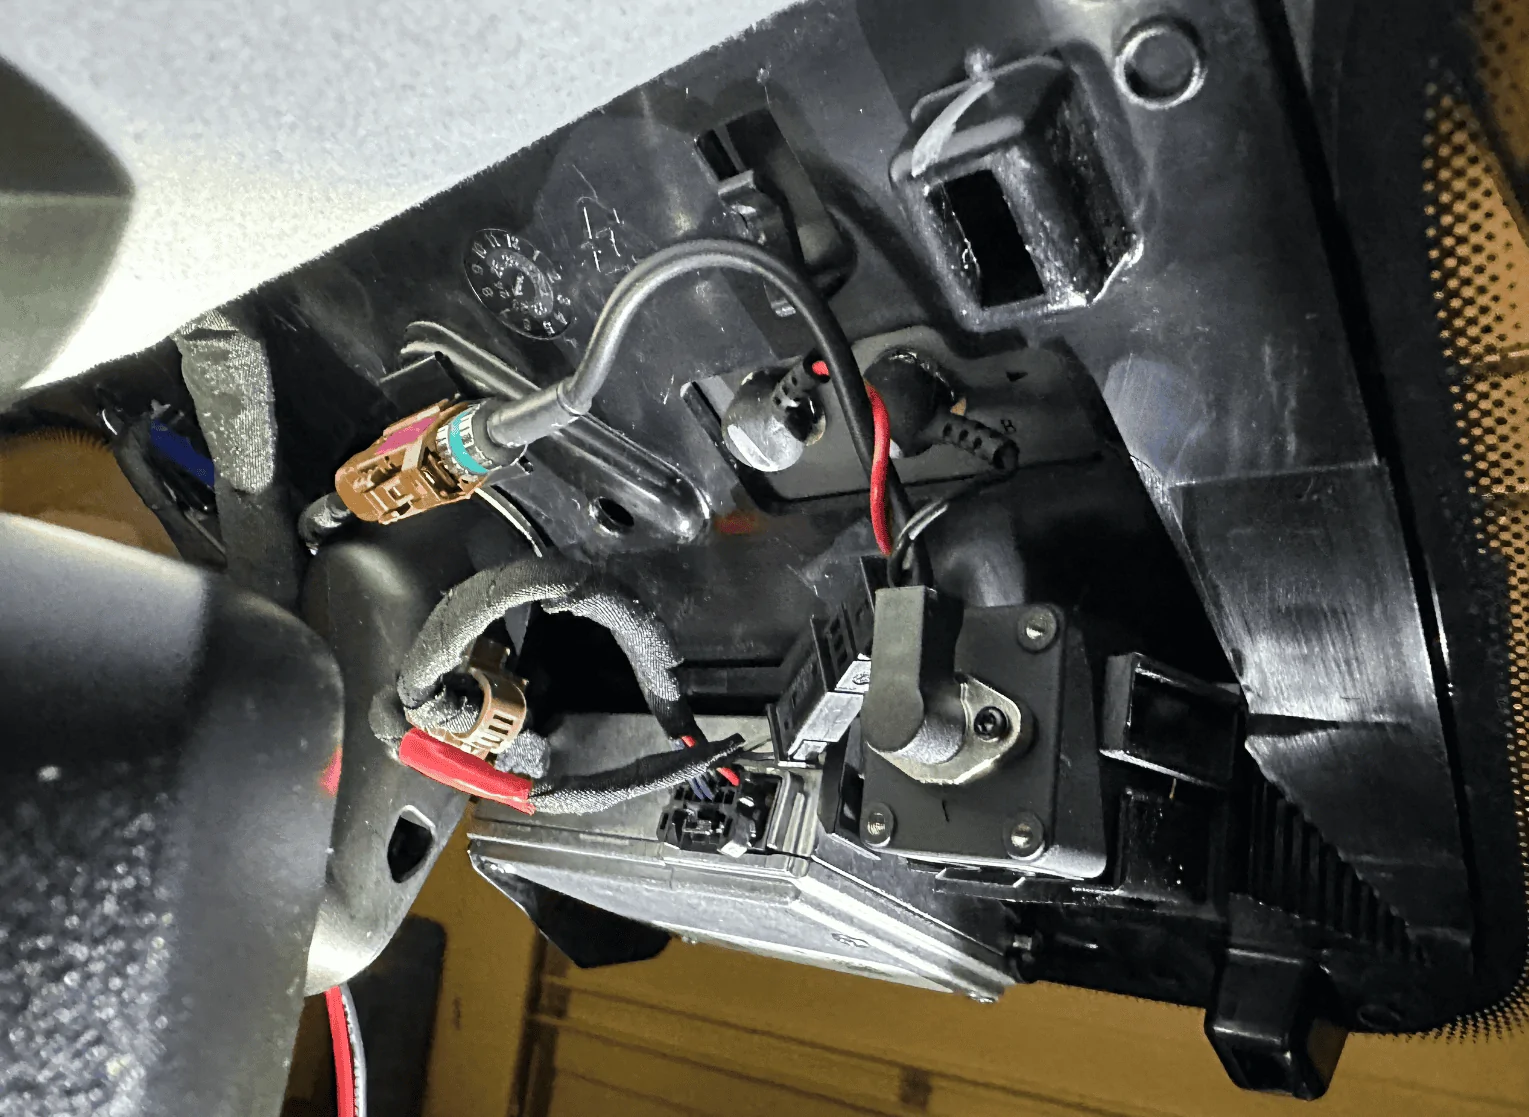
Using a pry tool, I would suggest removing the housing cover in the order as labeled in the photo. The passenger side has more room to work with. Note that the front of the enclosure has a cut out which might make it more prone to damage, so I would suggest focusing on prying from the side. In this view, you can clearly see the molex connector you'll be tapping (labeled T / 260). Note that there have been numerous reports of the mirror falling off so just be careful when working in this area.

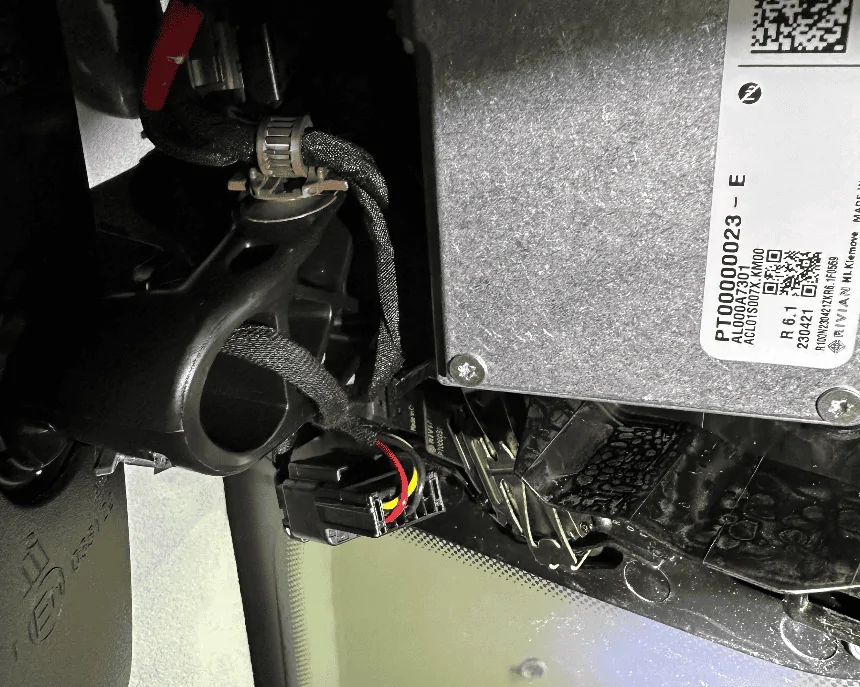
Better shot of the back of the connector we'll be tapping, if the yellow wire is overlapping, disconnect the connector and reorient it so you get as clean of a setup as possible:

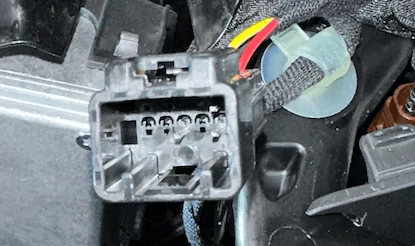
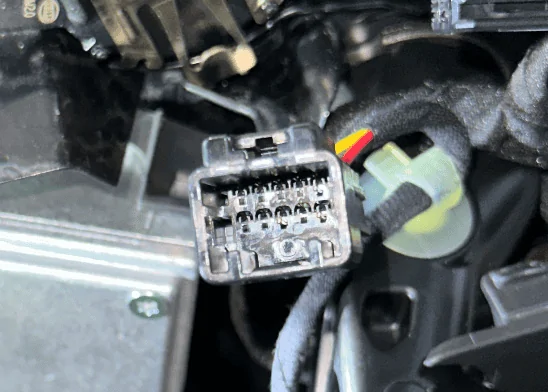
If Dongar or anyone else wants to offer a productized connector, here's what the connector looks like, there are a few 10-pin connectors used by the other car manufacturers, wasn't sure which mapped closest to the one Rivian uses:


Tap red to red and black to black, you might need to attempt it a few times to get it seated correctly and drawing power:

Test your connection to make sure everything is working as expected:

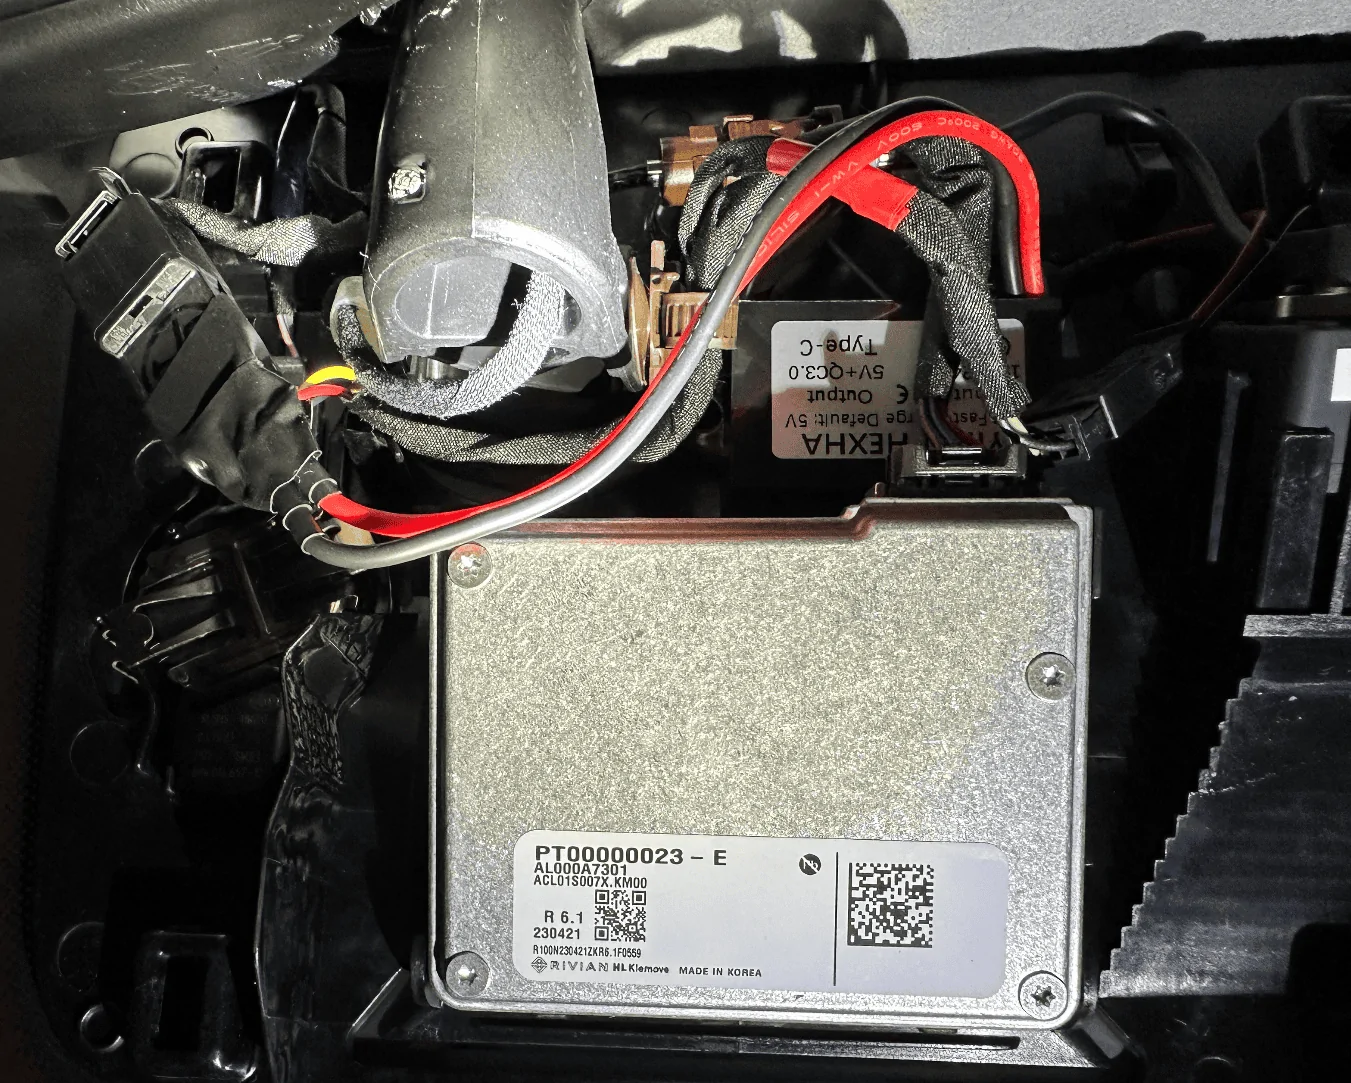
This is what the mirror housing looks like, there's a nice little void in the middle but don't touch the silver box, it's hot!

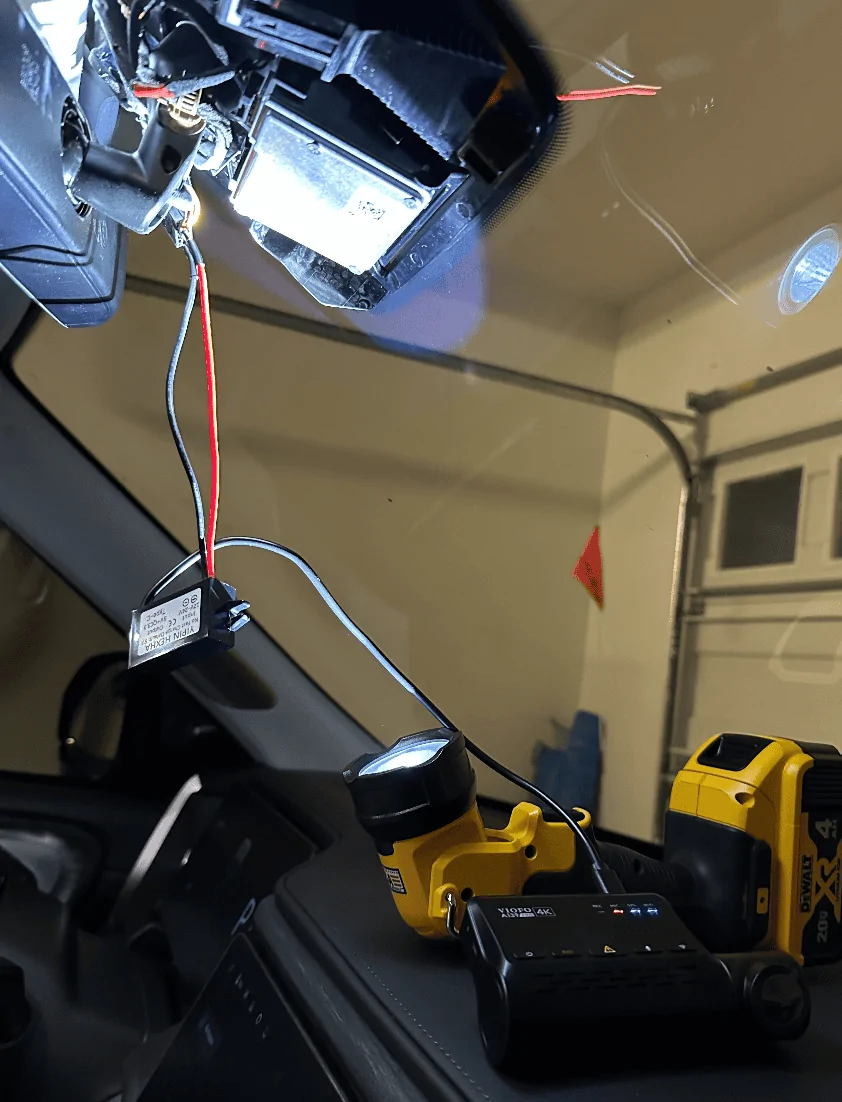
Buck module all tucked in, also used some extra electrical tape around the molex tap to make sure it doesn't get unseated accidentally:

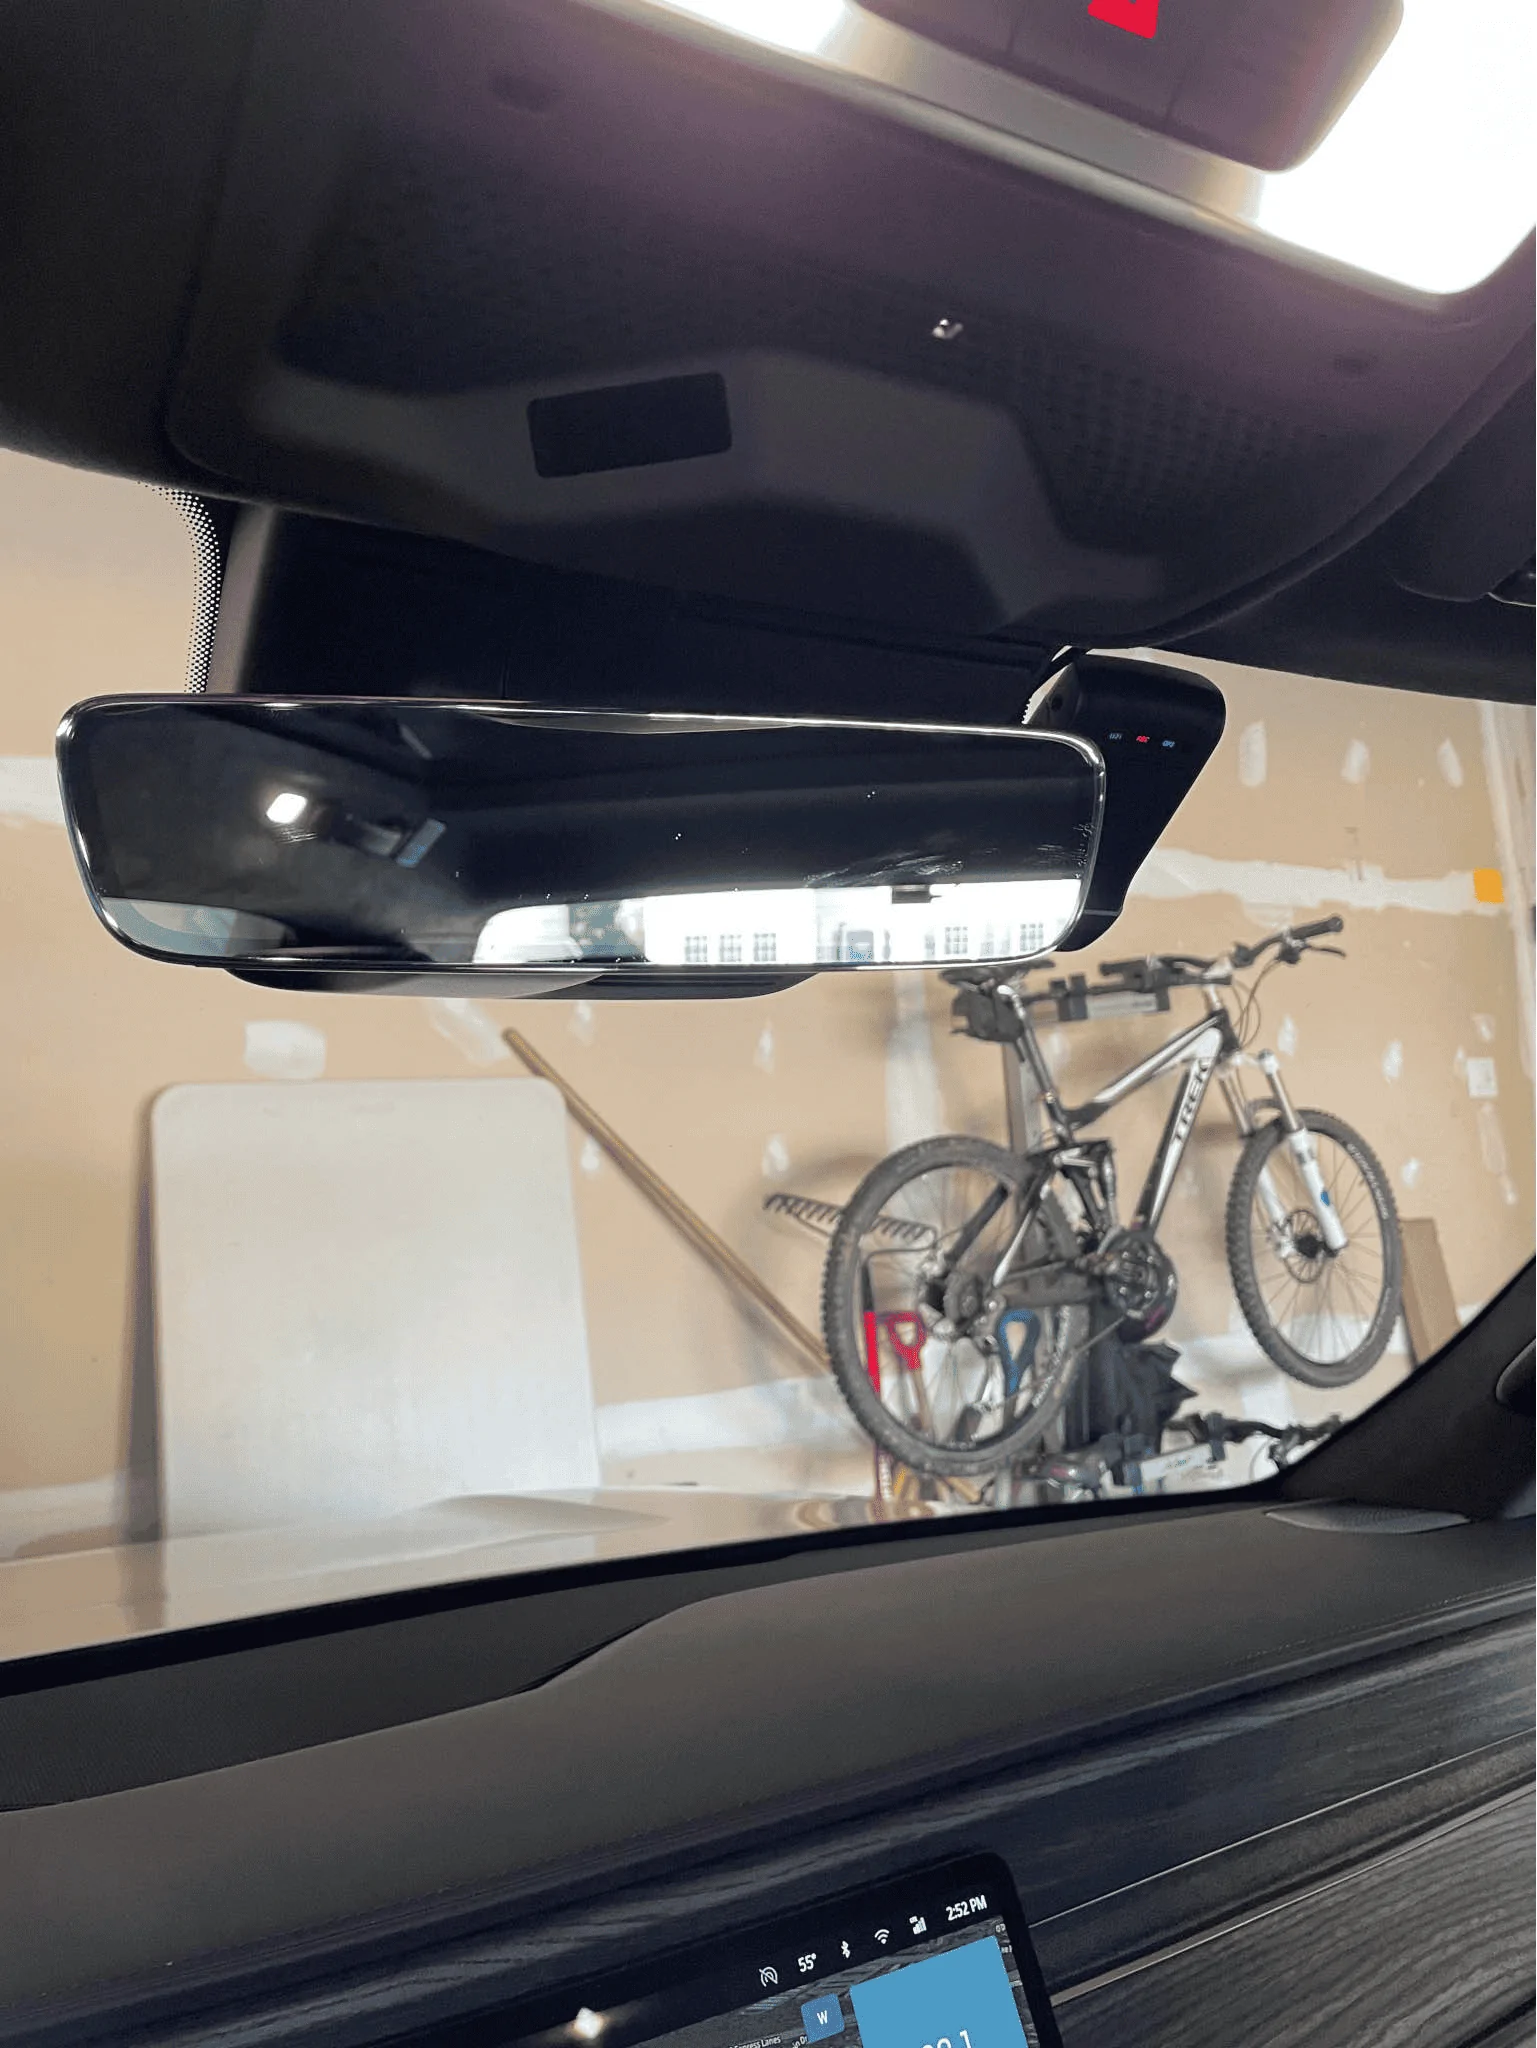
Now just route the USB-C wire up towards the roof and reattach the housing cover when you feel like everything is working as expected. Onto the next step.
Wiring up the rear camera:
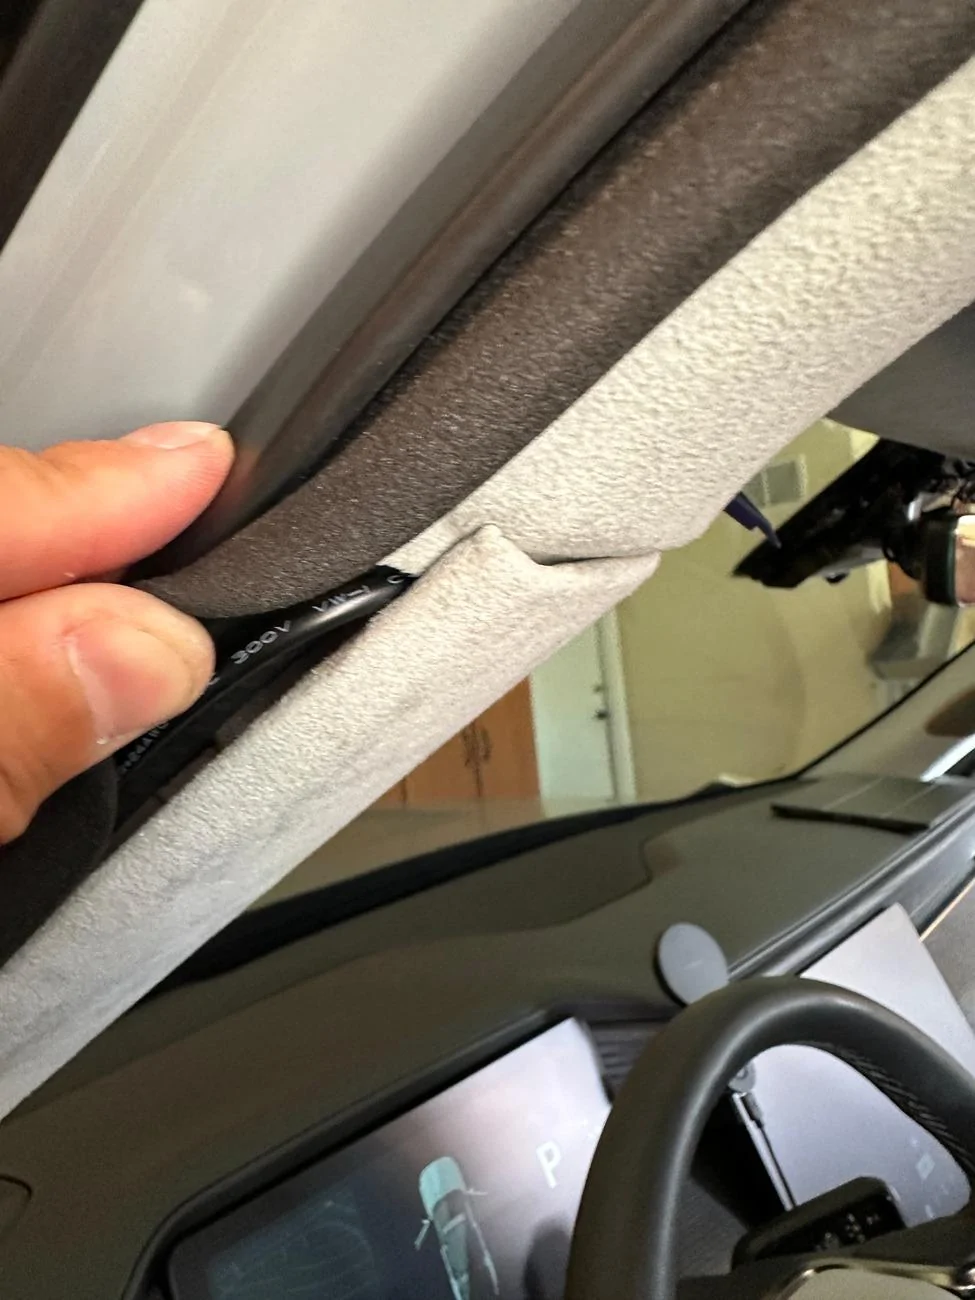
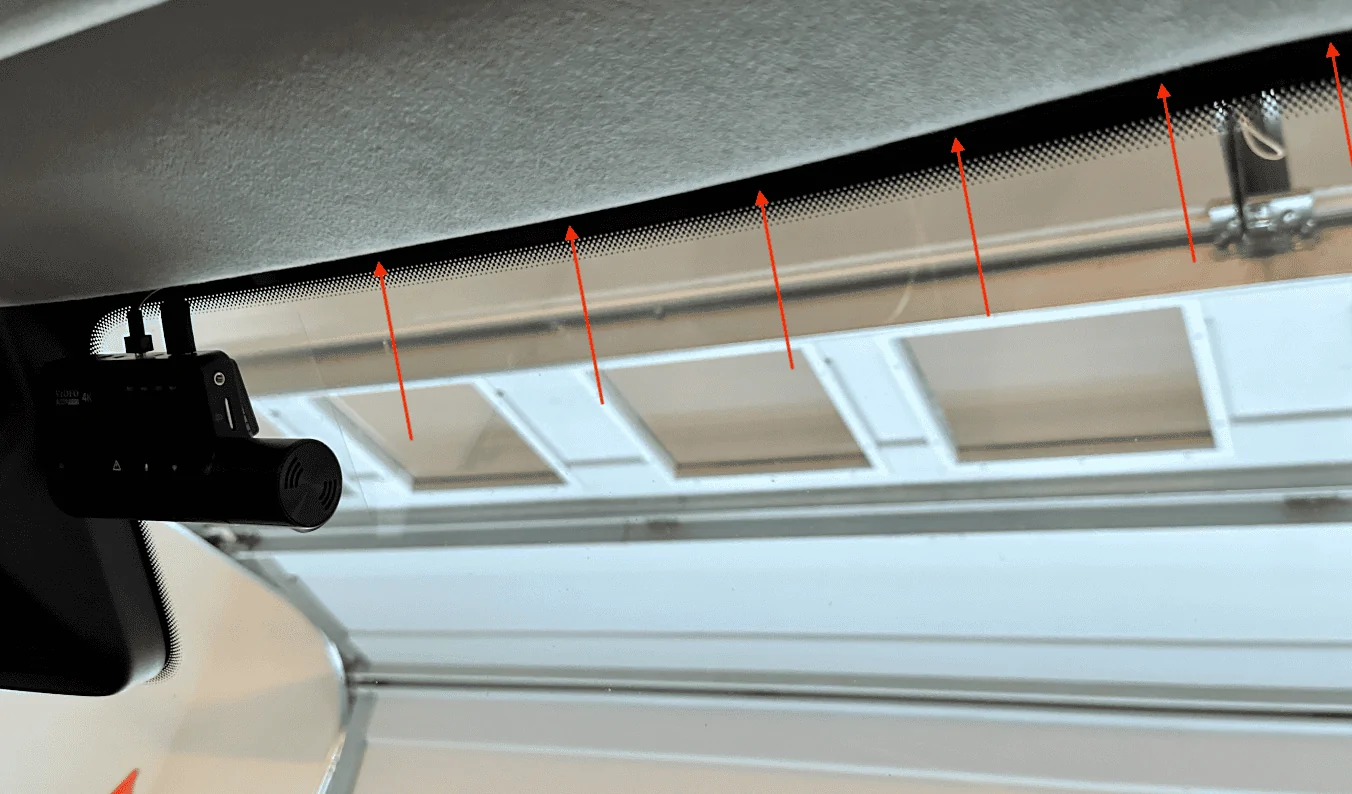
The process is super easy in the front and gets tougher as you work your way towards the rear. There's plenty of room at the top of the windshield so just run the cable until you hit the A-pillar:

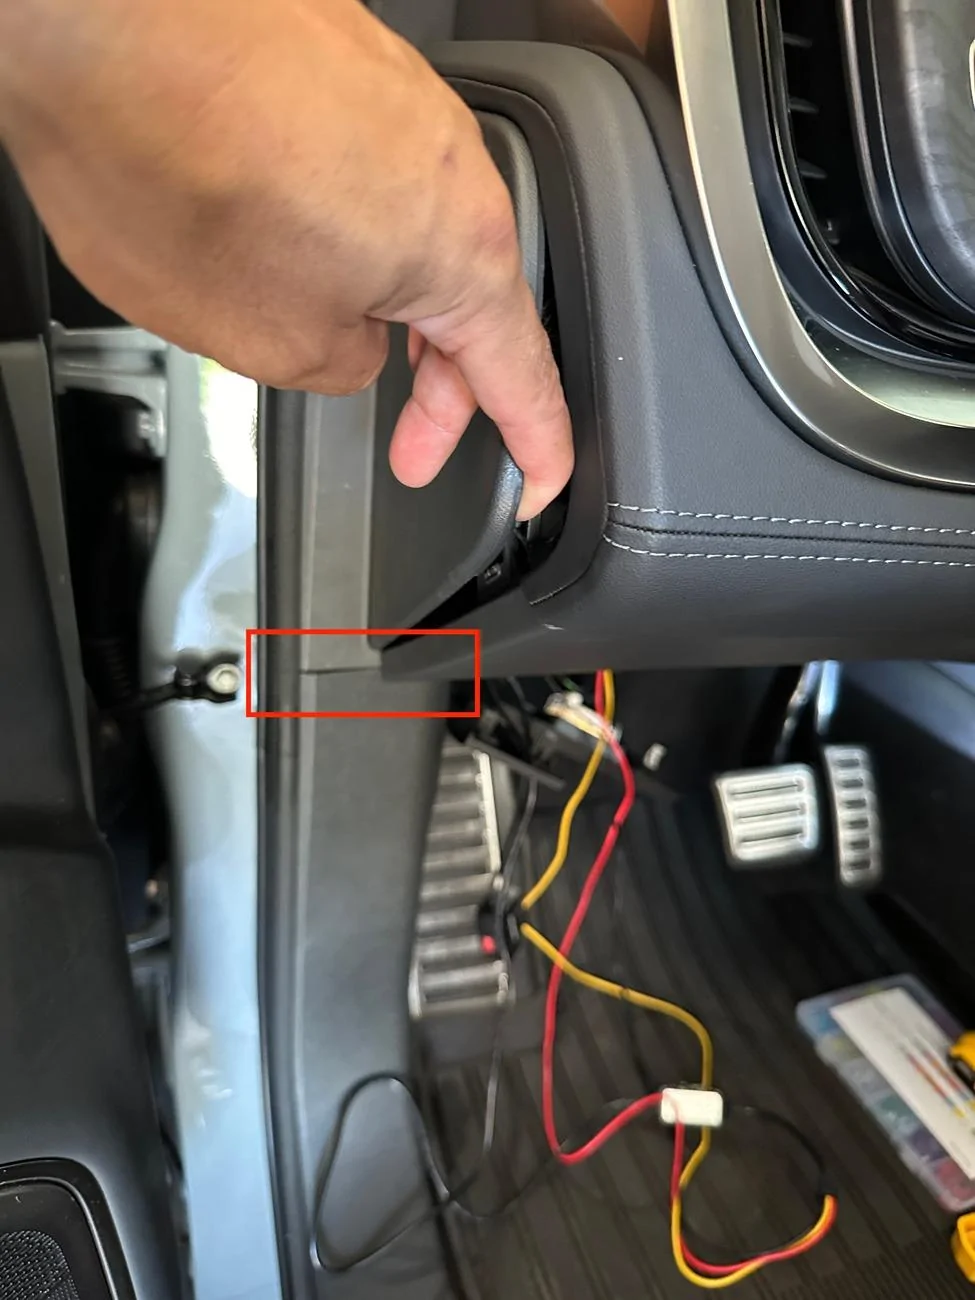
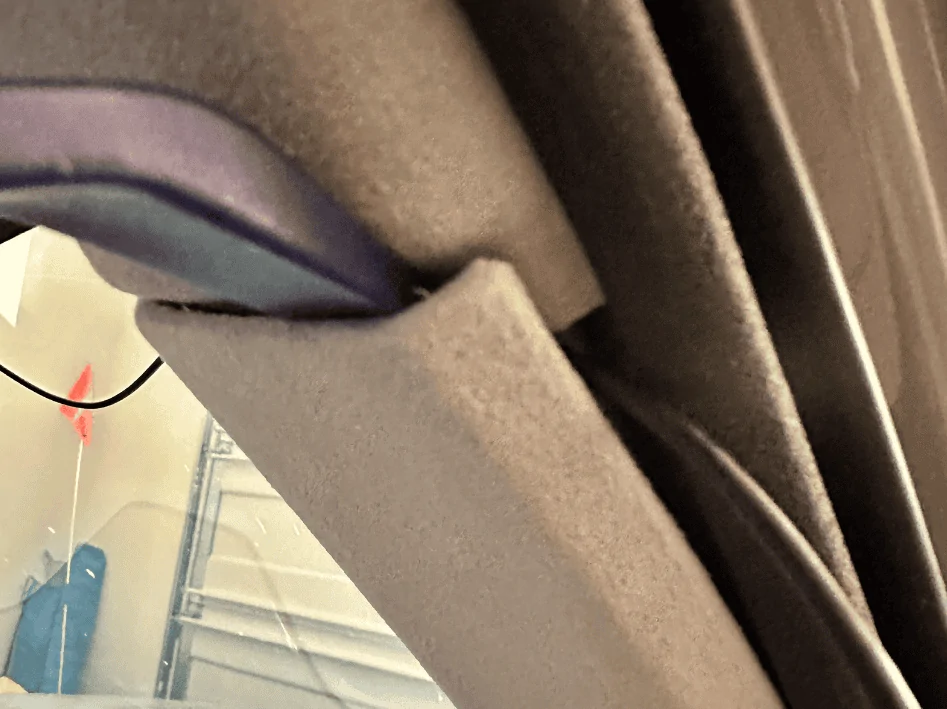
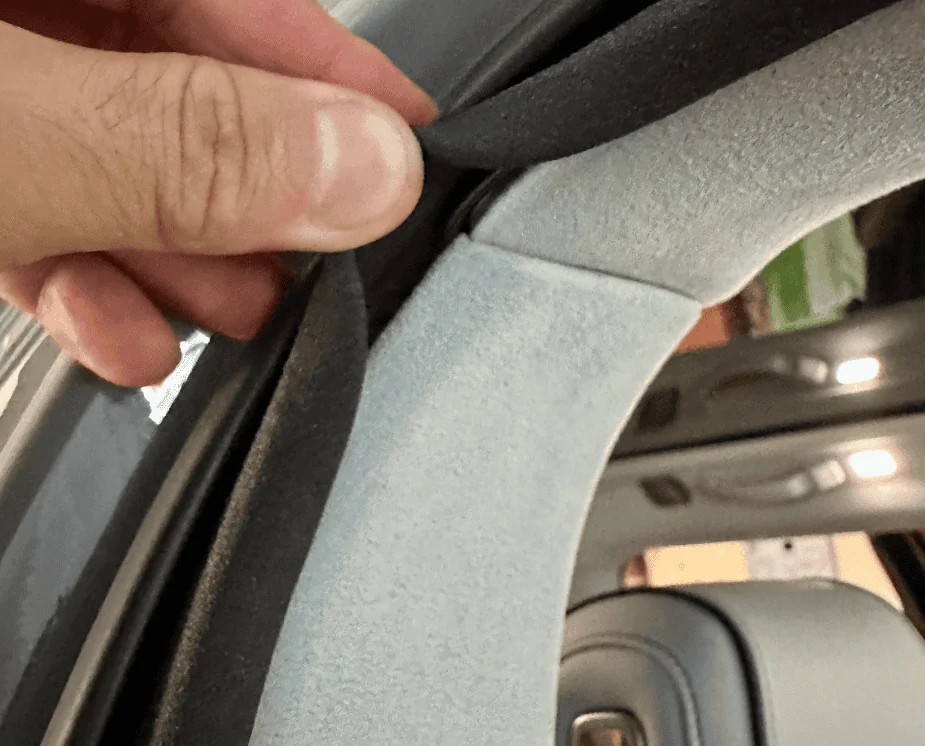
For all trim pieces, prying from under the weather seal makes life a little easier. At the A-pillar, lift up the seal and pry from there, you'll get plenty of leverage and will be able to open a large cavity to run the wire through.


Once the cable is deep behind the trim piece, run it up along the door seal to the B-pillar:

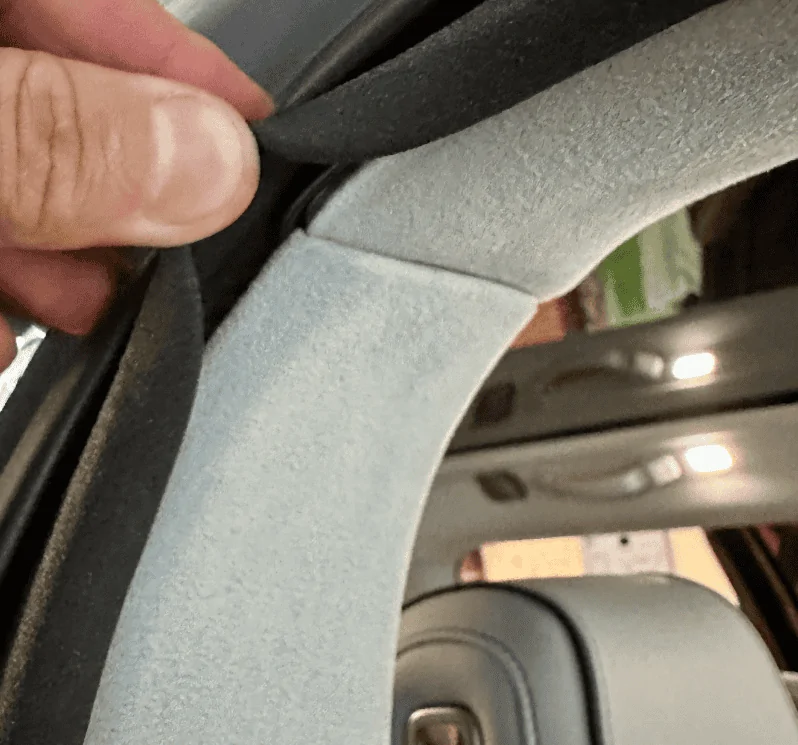
At the B-pillar, again work from the portion underneath the weather seal, I found that the bottom piece was easier to pull out than the top piece. You won't be able to pry the trim out as far as the A-pillar but it'll be enough to get the wire behind it. Once you've gotten the wire deep behind the B-pillar trim piece, run it up along the door seal to the C-pillar.


The C-pillar was similar if not a little tougher than the B-pillar, follow the same steps. Focus on the bottom trim piece and pulling from under the seal:


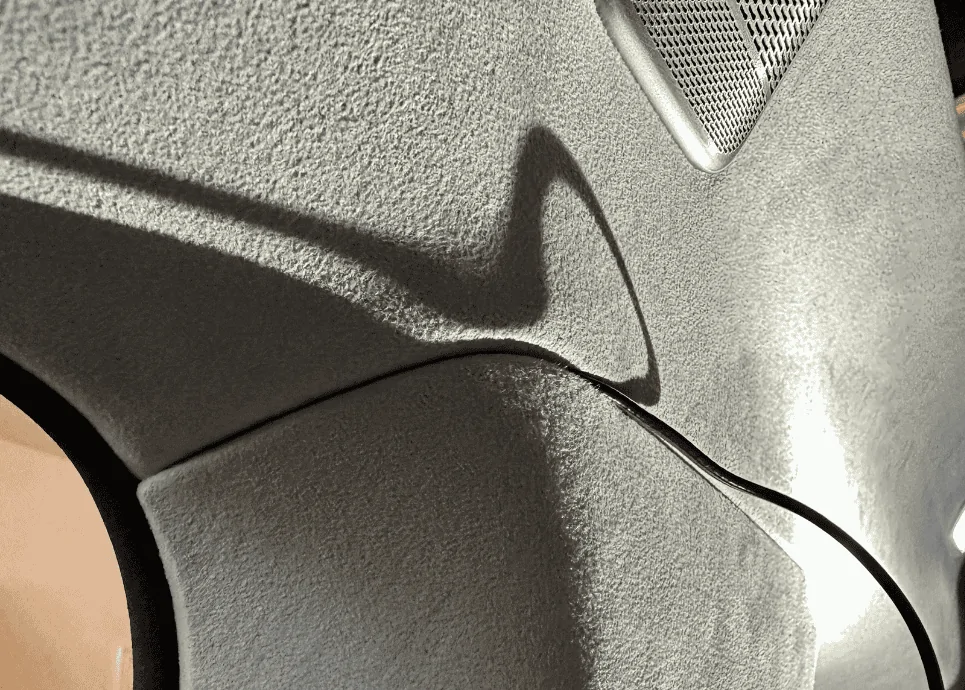
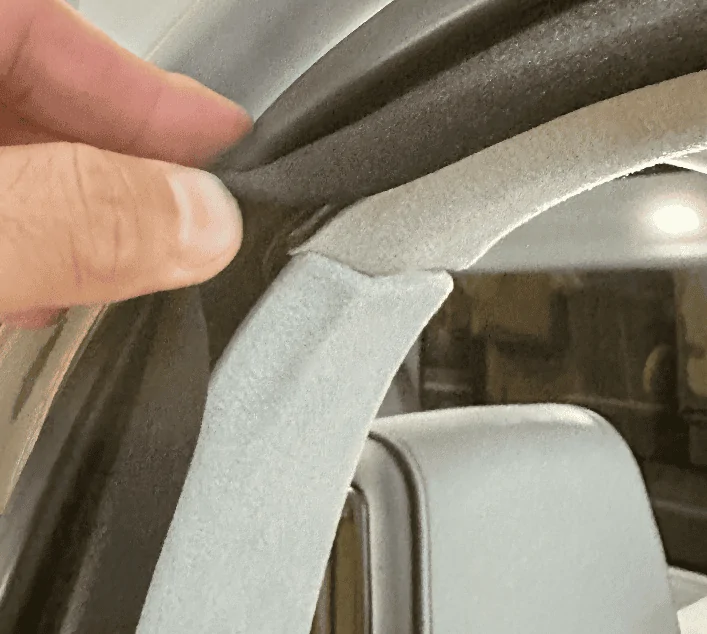
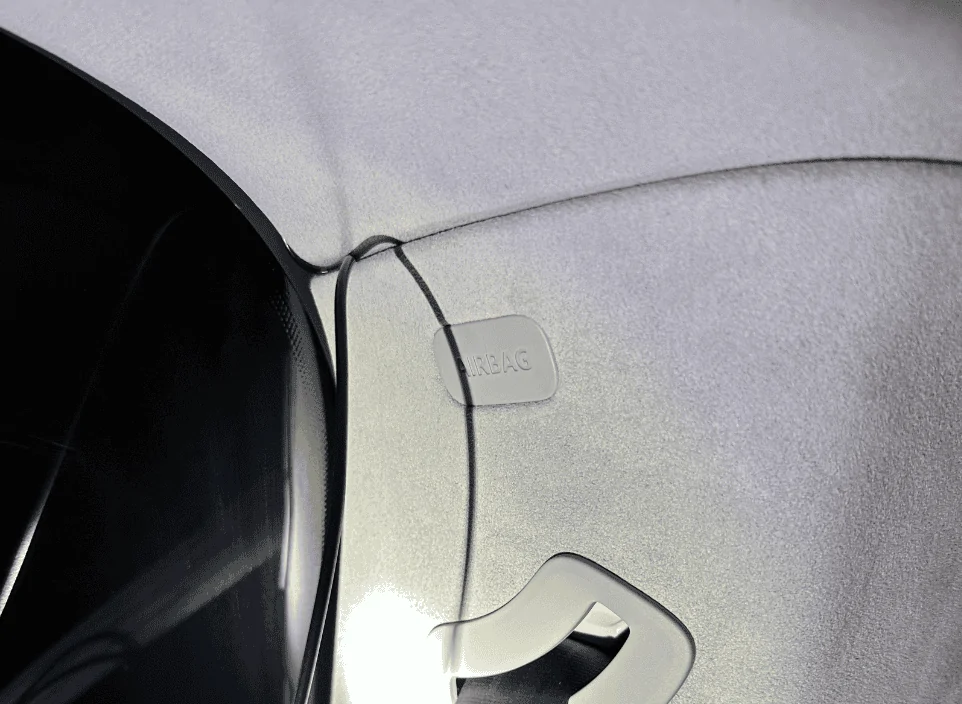
Run the wire up along the top of the rear passenger side window pane similar to what you did at the windshield. Then at the back of the R1S is where things get real fun. Note the airbag here.

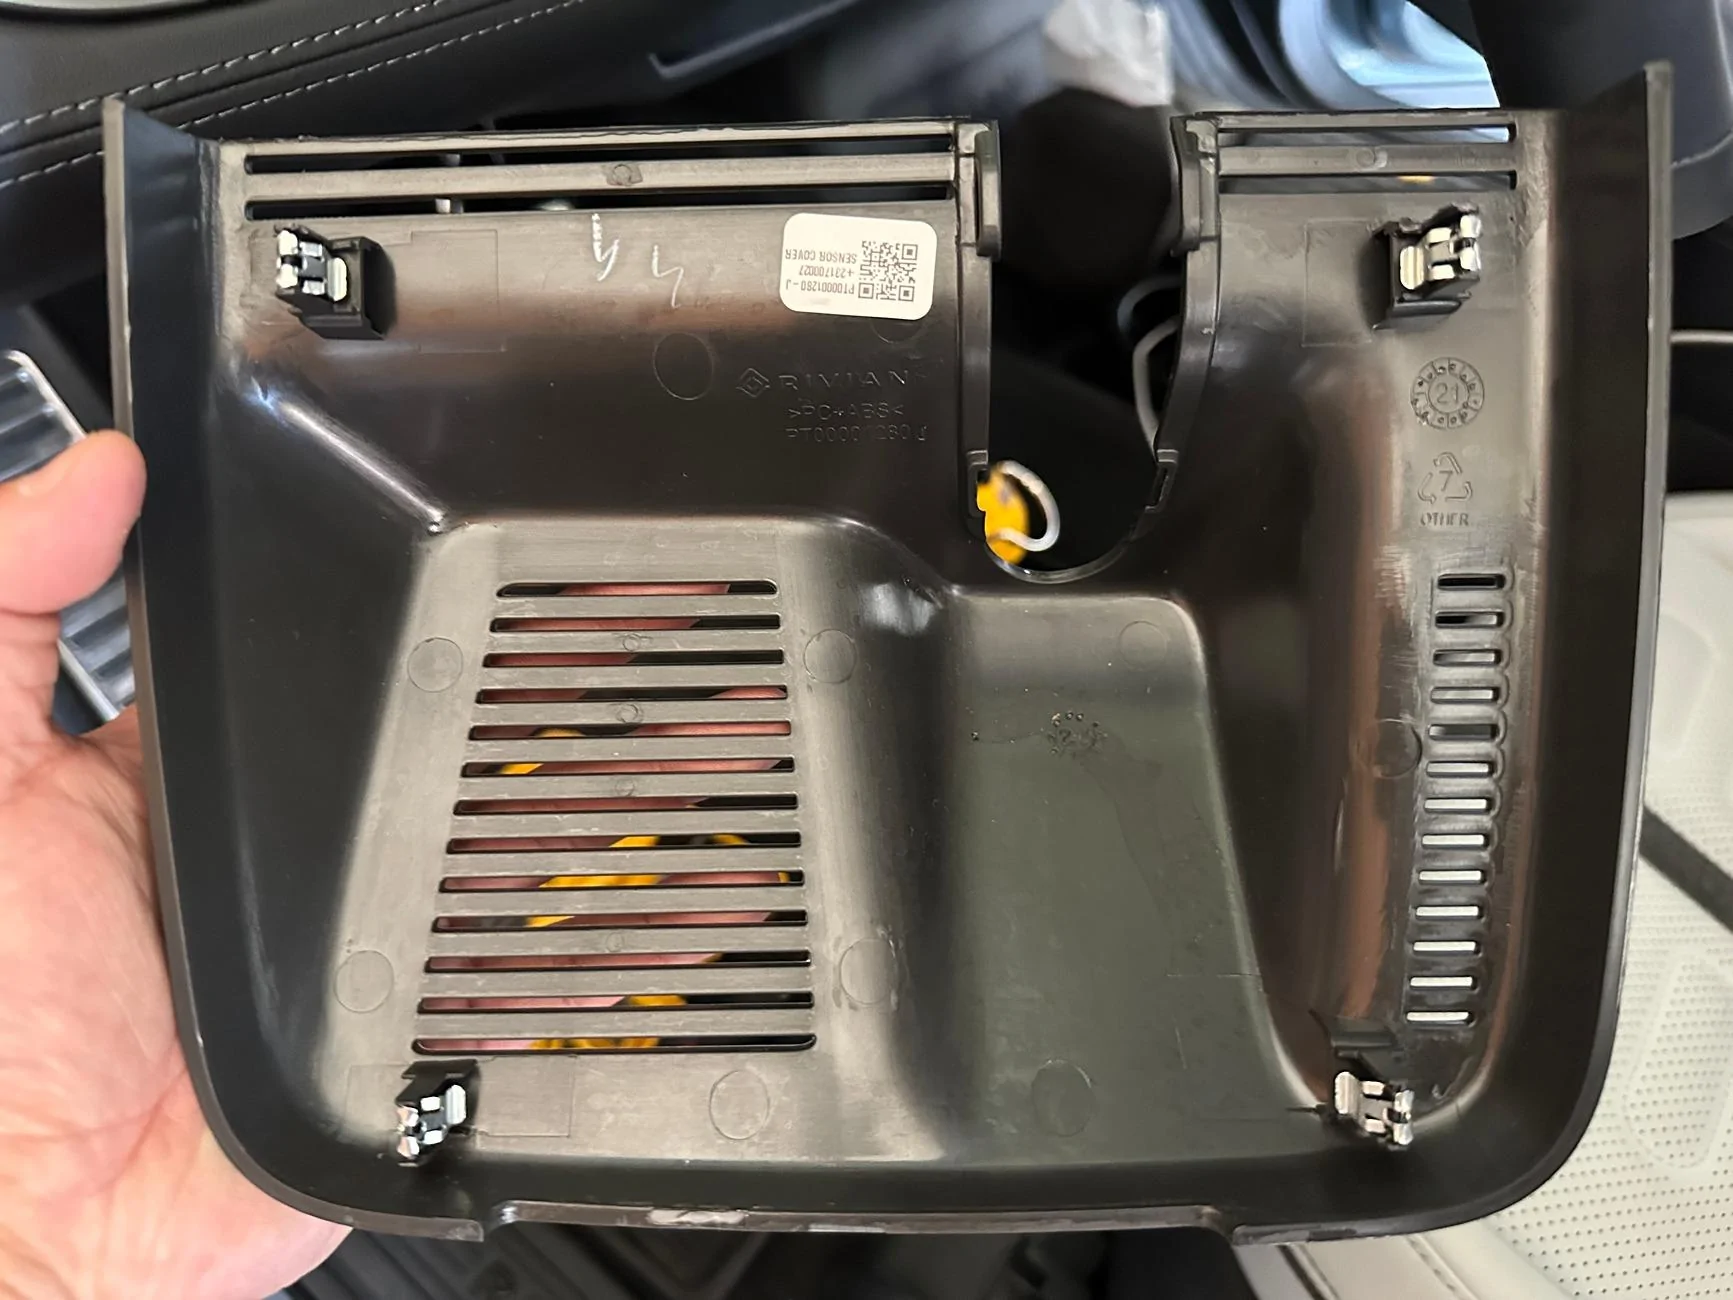
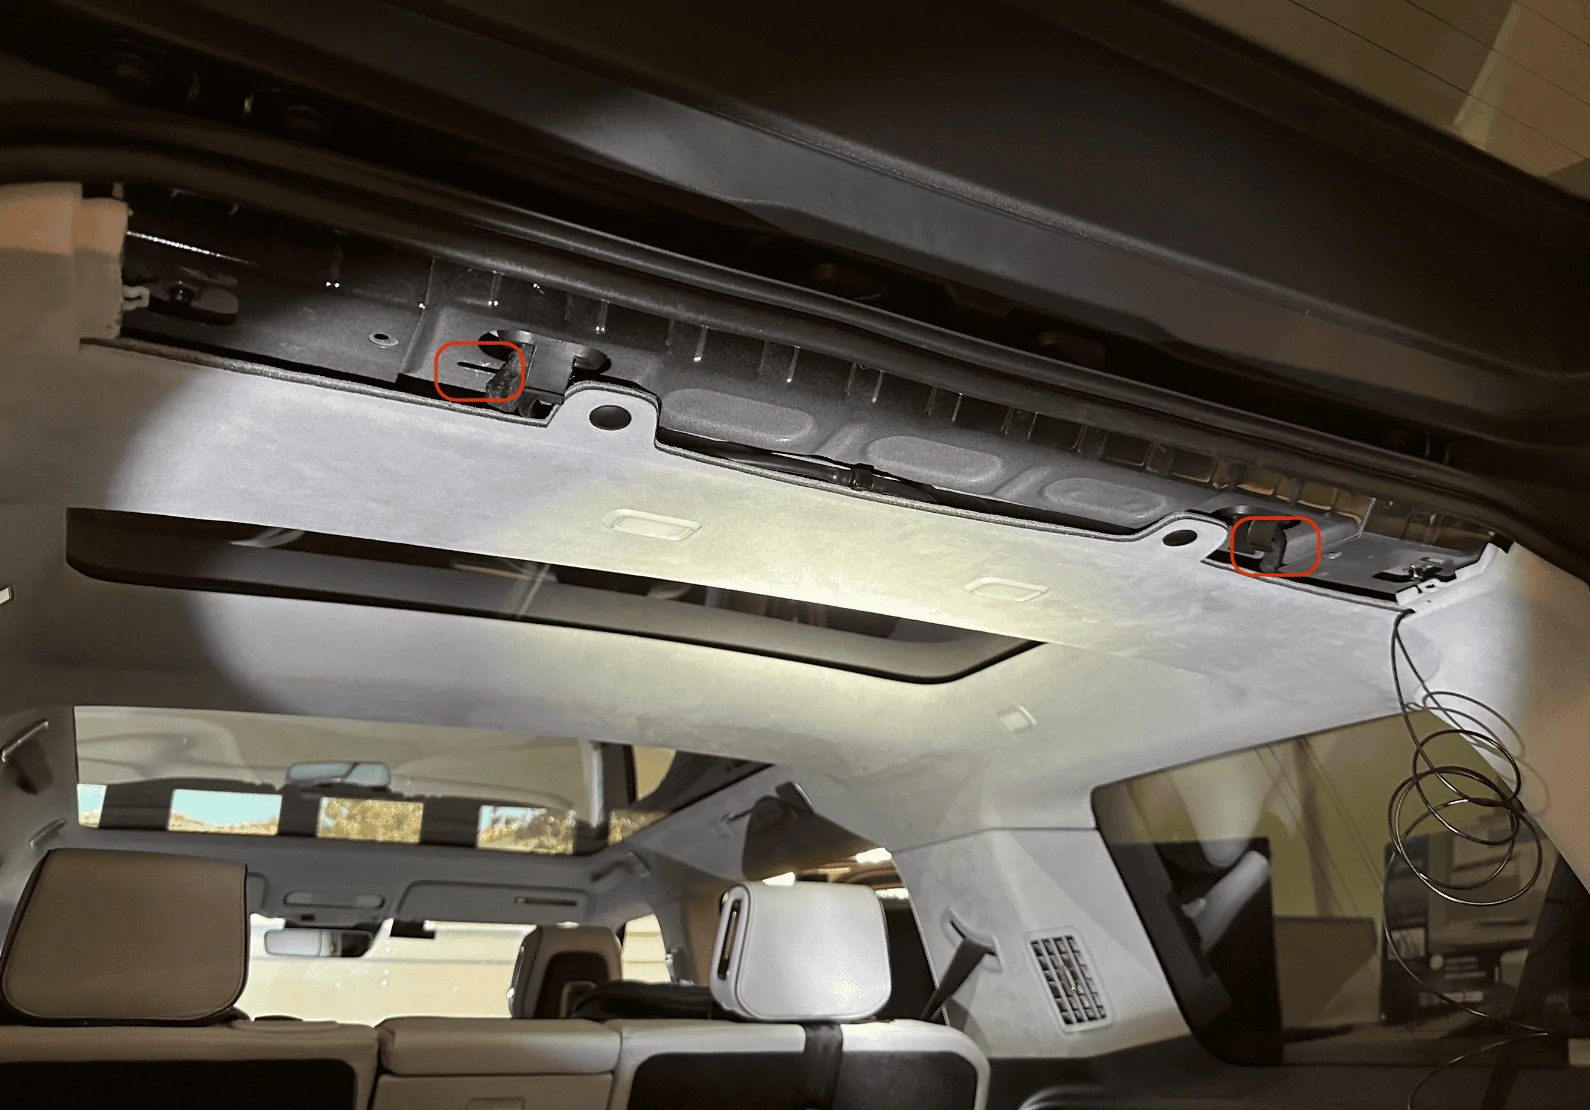
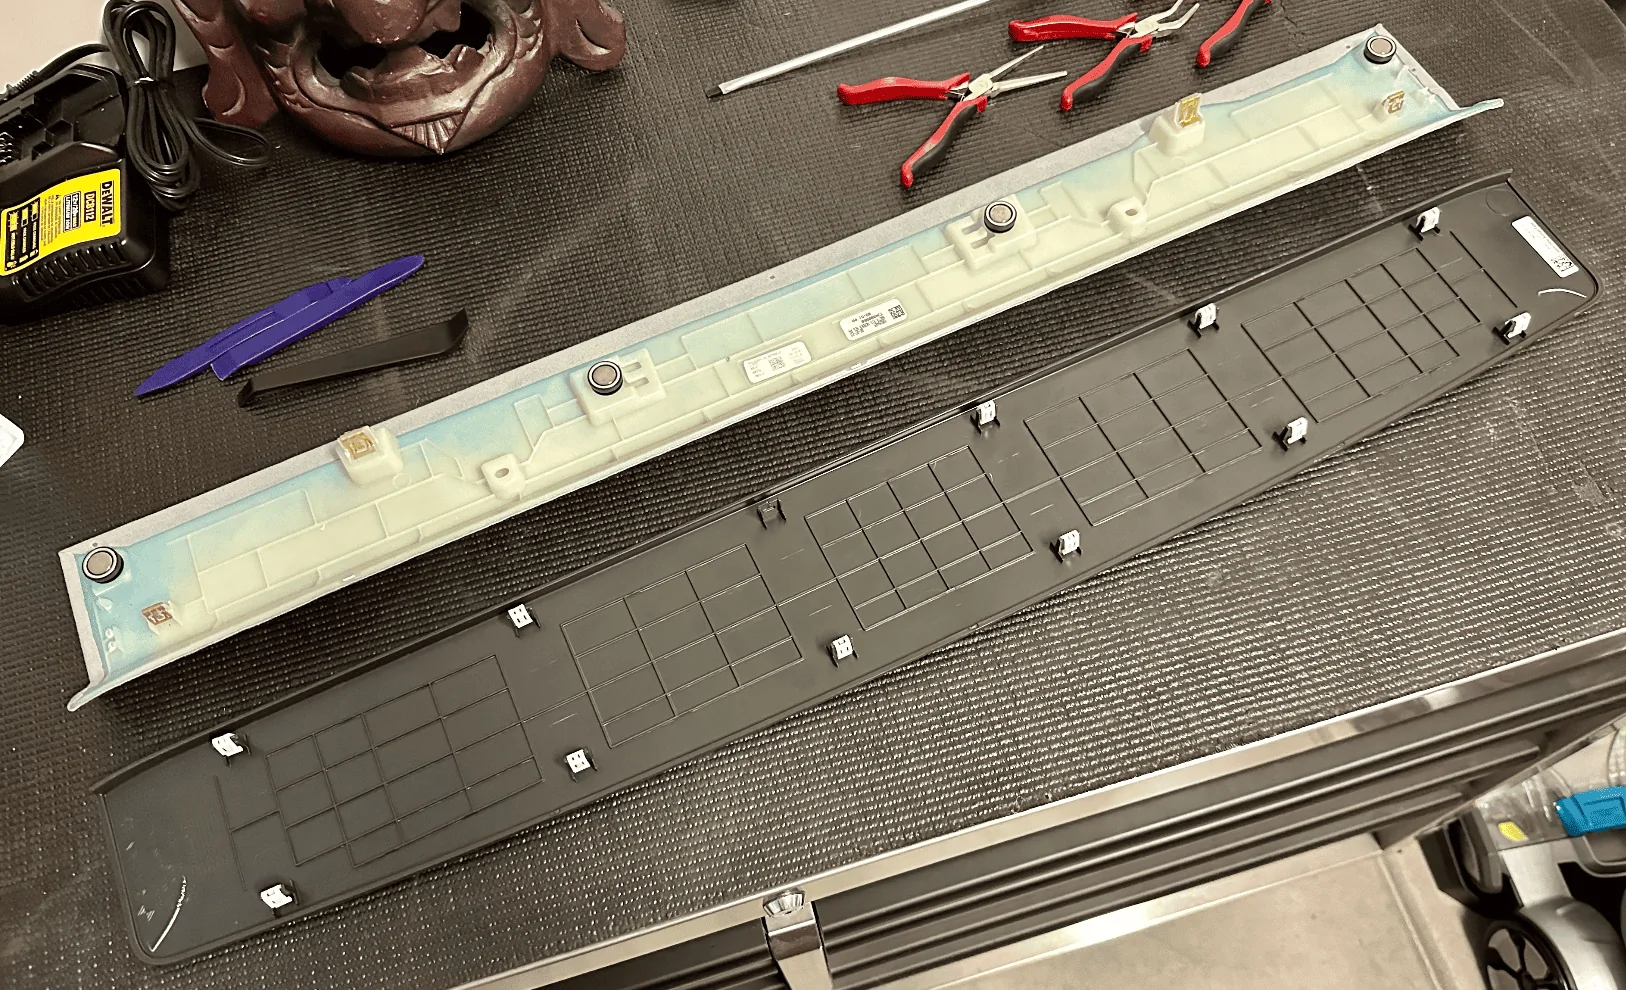
Remove the rear's top trim piece. There are two plastic tabs (circled in red) you'll need to be careful with, two more plastic tabs are towards the back that I found relatively easy to pull down, and the rest of the mounting points are just magnets:

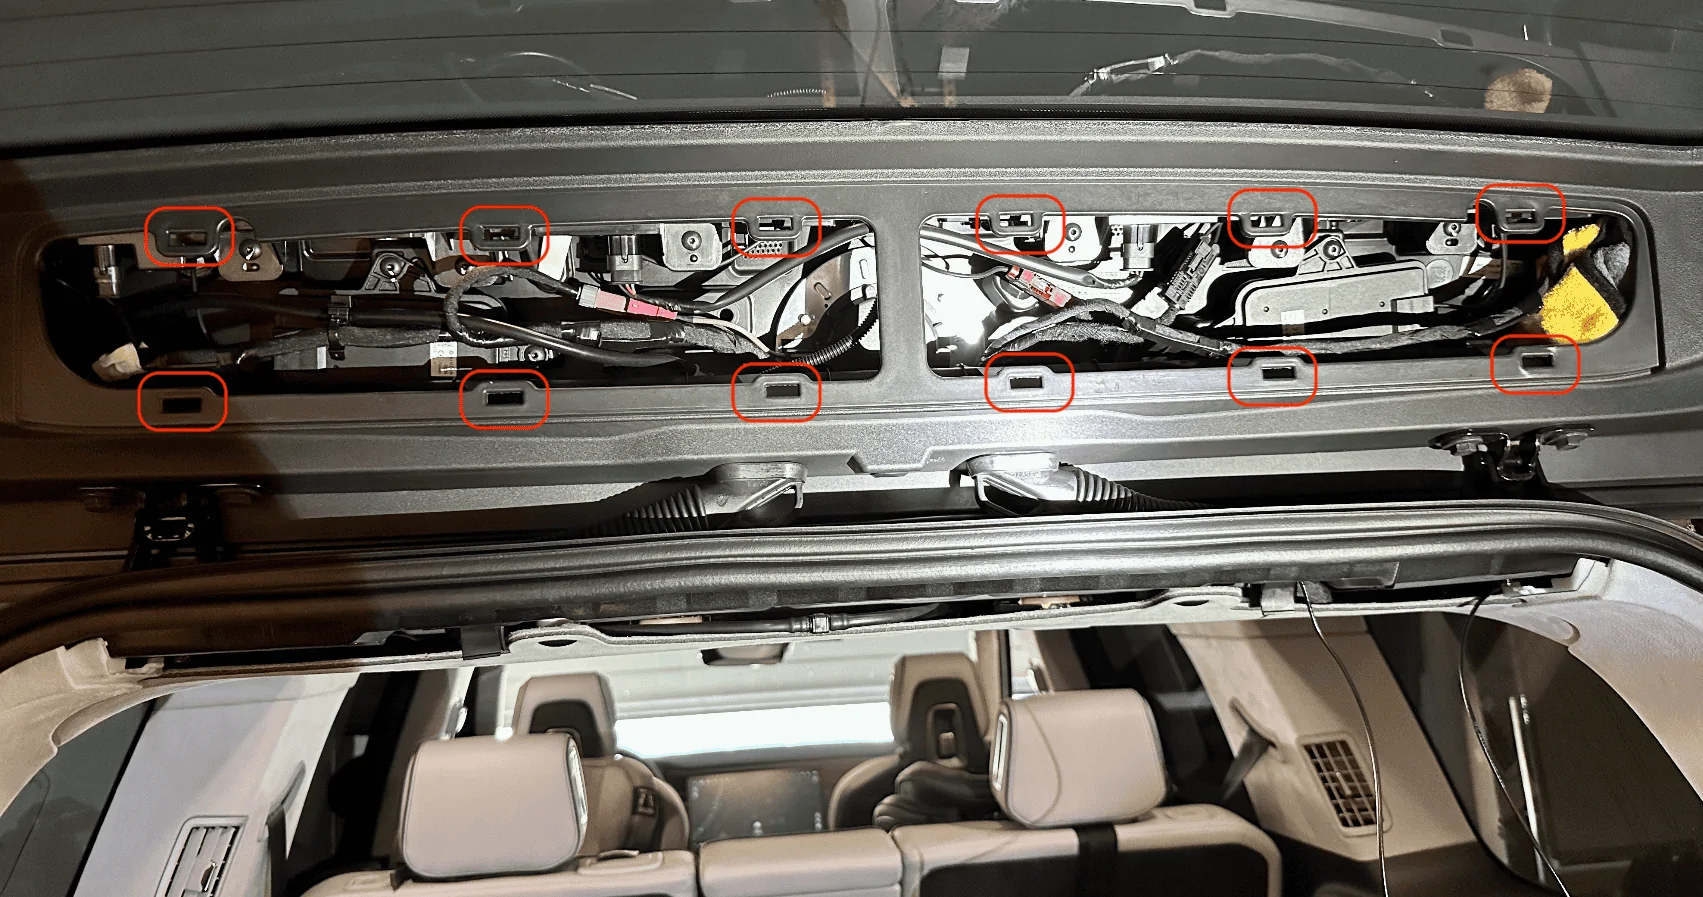
The opposite plastic trim piece on the liftgate will also need to come out, this one was the most difficult. I pulled a few plastic tabs off by accident and one of them even fell into a crevice which required a ton of patience and tweezers to pull back out. There are a dozen tabs. I started on the right bottom with a pry tool which caused the white plastic tab to fly off and into the crevice pictured in the next photo. Tip: After you get the bottom ones off, take an extra long flathead screwdriver and push against the two outer pins of the white tab for the ones at the top, it'll make it easier to dislodge those tabs:

One of the missing plastic white tabs which I probably wasted 20-minutes retrieving:

The two removed panels for your reference:

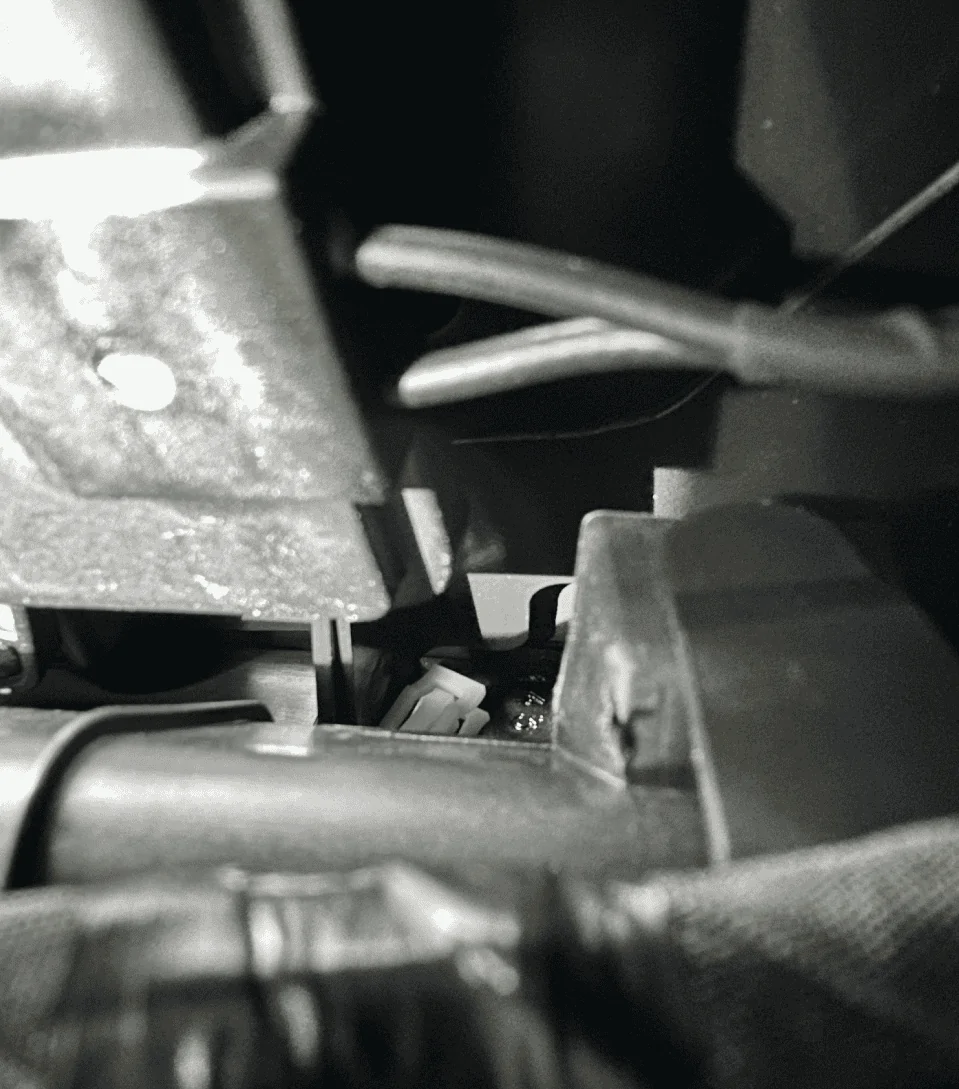
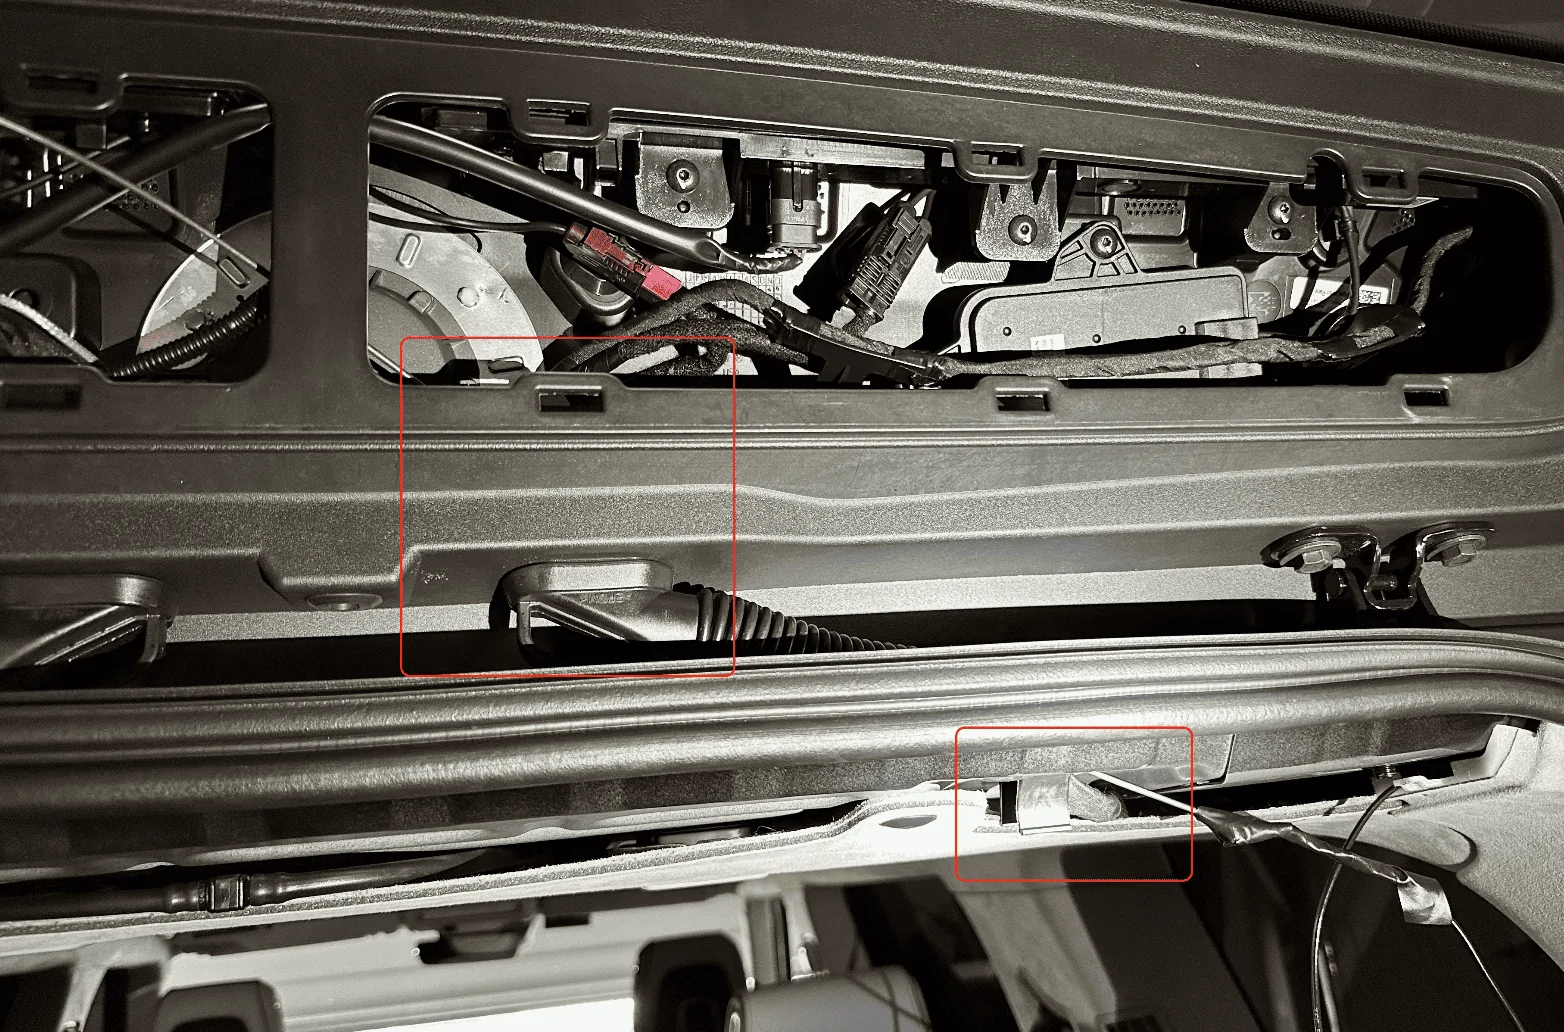
Next, shape a coat hanger to align with the path of the rubber cable housing as possible, push down into the housing, and try to thread the metal wire through to the other opening. You might need to forcefully move the existing cables in the housing around to give the wire some room to run through, it's really tight in there. Once you are through to the other end, tape up the cable/wire you need to run and fish it back through. I had to do this twice as the first time it got stuck and I ended up pulling the coat hanger out without the cable.

A better view of the bottom of that cable housing along with where the rear camera cable is coming out of the D-pillar:

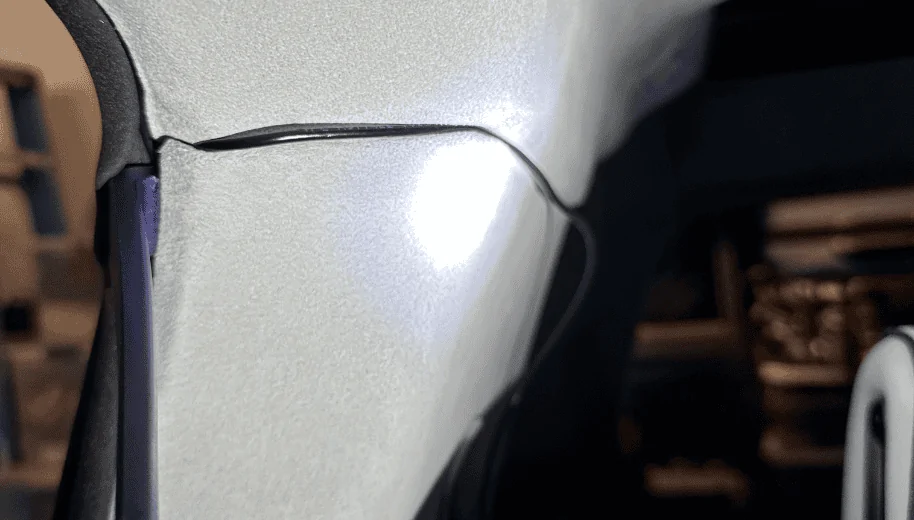
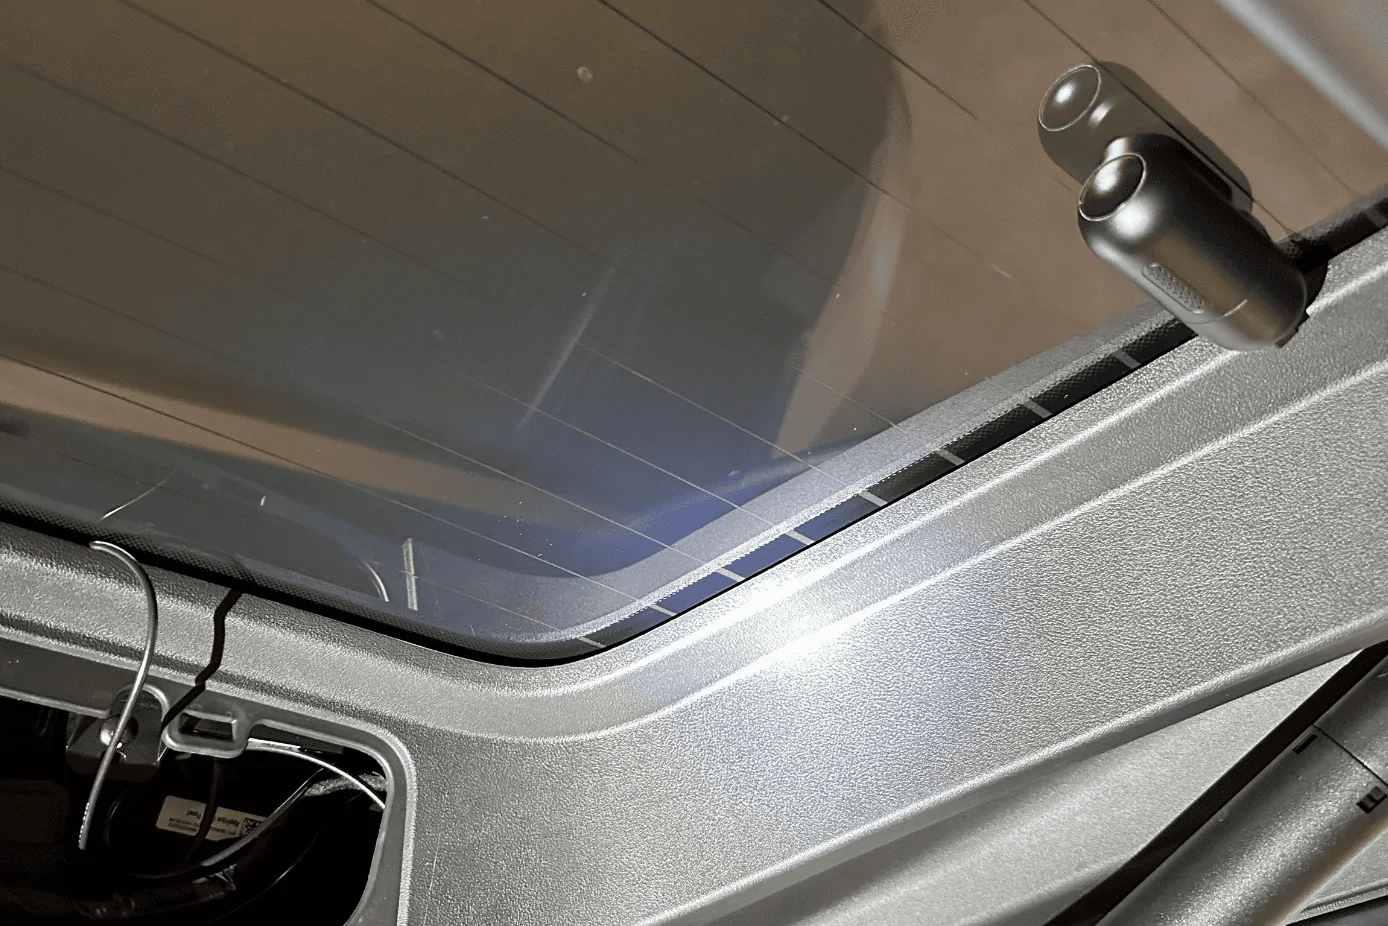
Once the wire was fished through, I ran it out of the top right corner of the liftgate and tucked the cable along the edge of the rear window. I positioned the camera towards the bottom above the two tightly spaced defroster grid lines:

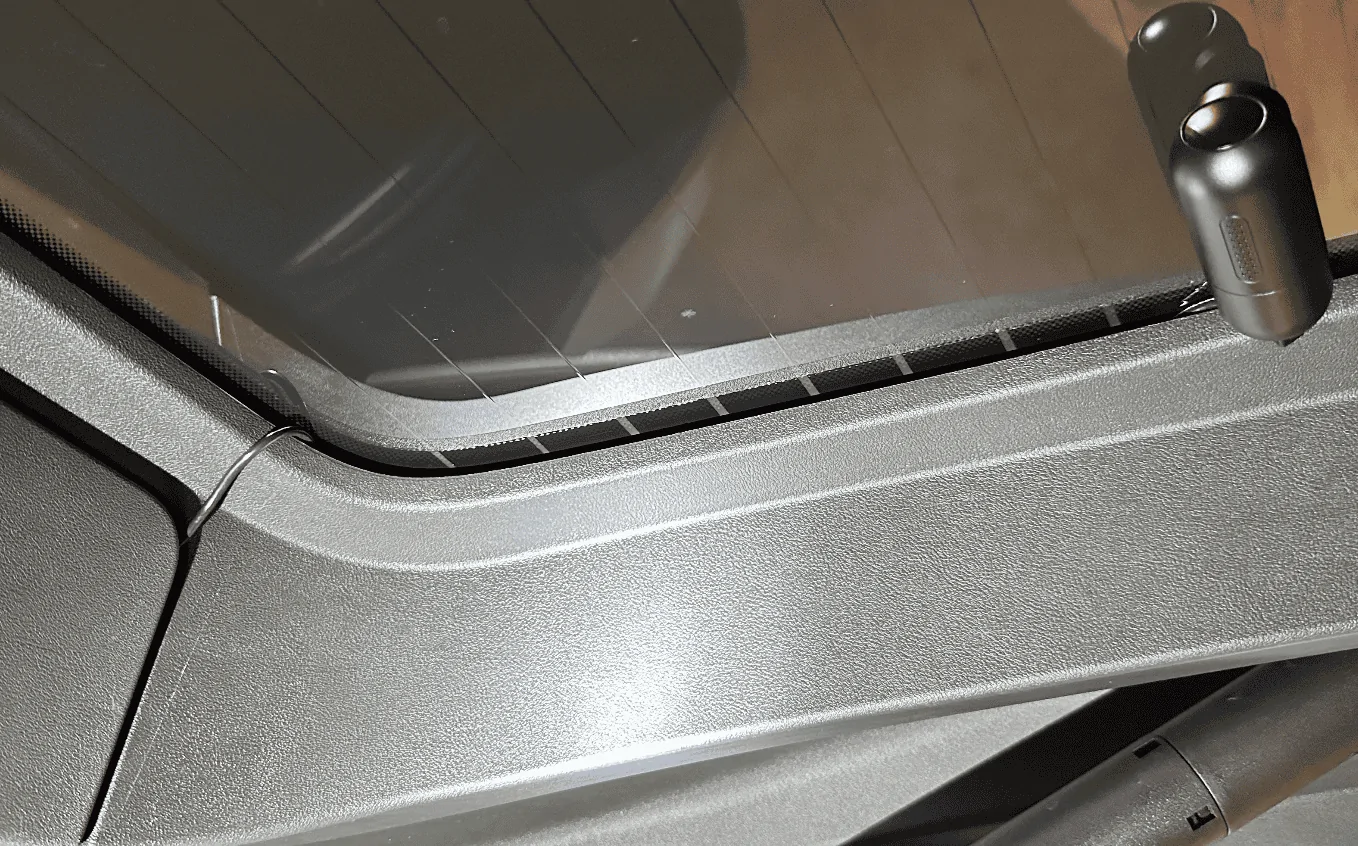
One thing I'll need to do but forgot until I snapped the trim back in place was to notch out a small hole so that the cable can run cleanly out. As you can see from the photo below, the trim piece isn't flush. I'll probably notch it on the right side since there's a small channel where the cable can run in. Or better yet, I find a better way to run it directly to the glass housing:

That's it! When complete, all your other A, B, C, D pillar trim pieces should show no signs of a cable pushing it out if you pulled it far enough into each cavity.

Brought a dashcam with me when picking up my FIL's car earlier in the year and had it mounted even before we left the dealership. For our R1S, one of the first two items I ordered was the 90-degree angle adapter and a Samsung memory stick. Made sure it was installed and Drive Cam was running before I left the service center.
But due to the low resolution of the Rivian cameras as detailed by @opnwide in this extremely helpful thread, I always knew I would be adding an aftermarket camera to augment Rivian’s system.
Thanks to this helpful thread and @opnwide's video, I was able to jerry-rig a mirror-tap for the Viofo A139 Pro front + rear dashcam and run the rear camera wire cleanly to the liftgate. Below is a write-up of what I did, hopefully, you'll find it helpful.
Disclaimer: I'm not responsible for anything that happens to you or your property. Be careful when working with the trim pieces near airbags. And as always, watch out for live / hot wires.
Mirrortap:
Whereas radar detectors seem to have a number of mirrortap options, there doesn't seem to be an equivalent if you just want a USB-C connection. For other vehicles, I've mirrortapped with a Dongar adapter (not available for the Rivian, though I did wonder if another brand's 10-pin Type H would work) or tapped the fusebox. Due to reports of Rivian not using standard size fuses I zeroed in on the mirrortap option early on.
Used the following two items and some heat shrink tubing for my mirrortap:
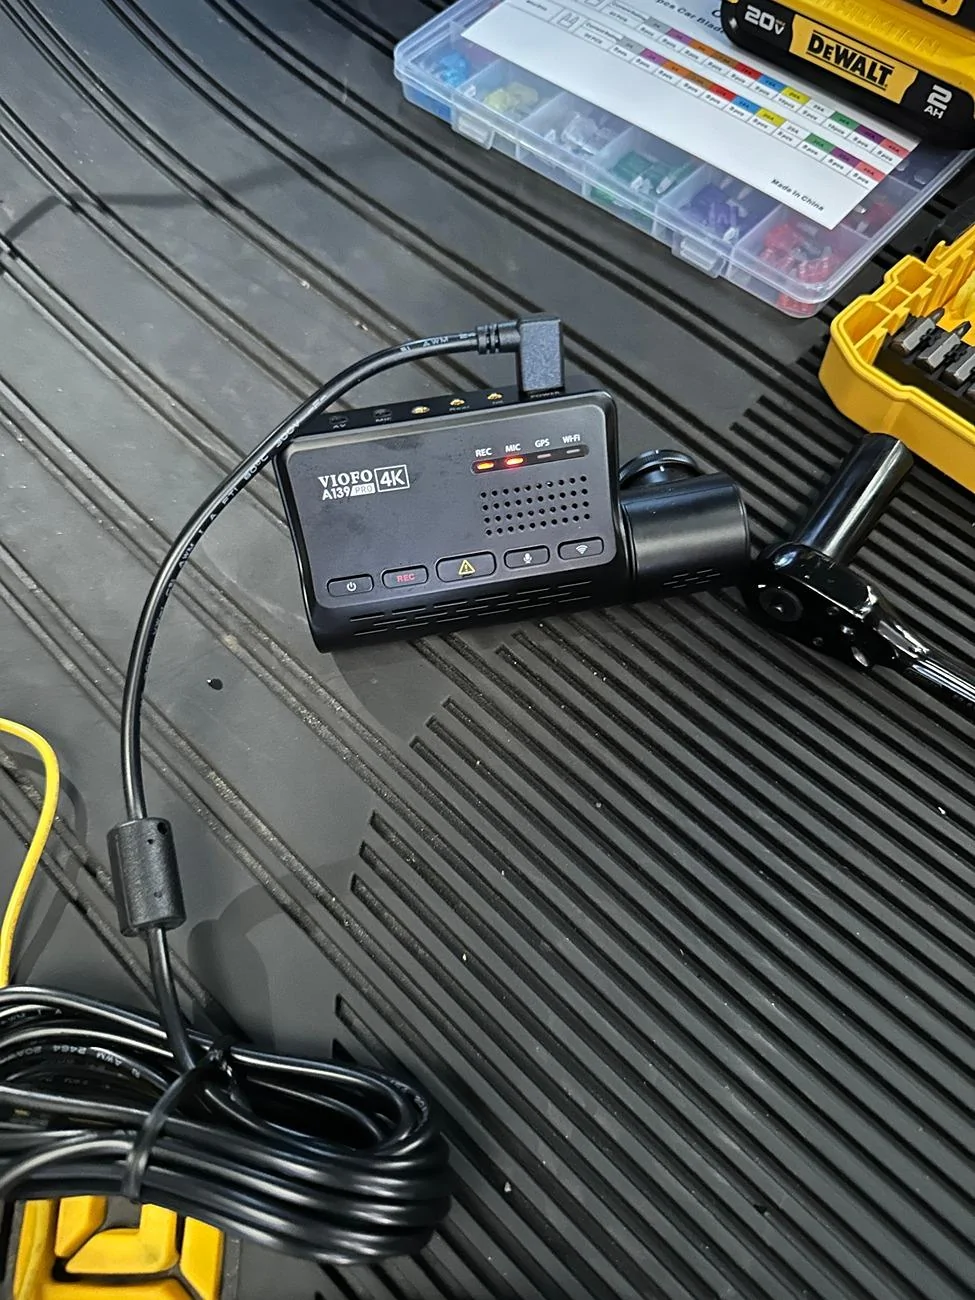
- Quick Charge QC3.0 USB C Converter DC 12V/24V to 5V 3A USB Type-C Buck Charging Module Step Down Voltage Regulator Car Power Converter Adapter (there's a dual USB-C option that I was tempted to install but didn't know how much power I could safely pull from the mirror assembly, especially since the Viofo A139 Pro is a very power hungry dashcam)
- Gikfun 100 Pairs Suitable for 22AWG Cable Male and Female Pins Connector Kit
After some unsuccessful attempts at tapping the rear of the molex connector, I ended up flattening the pins:
Tapping the mirror assembly:
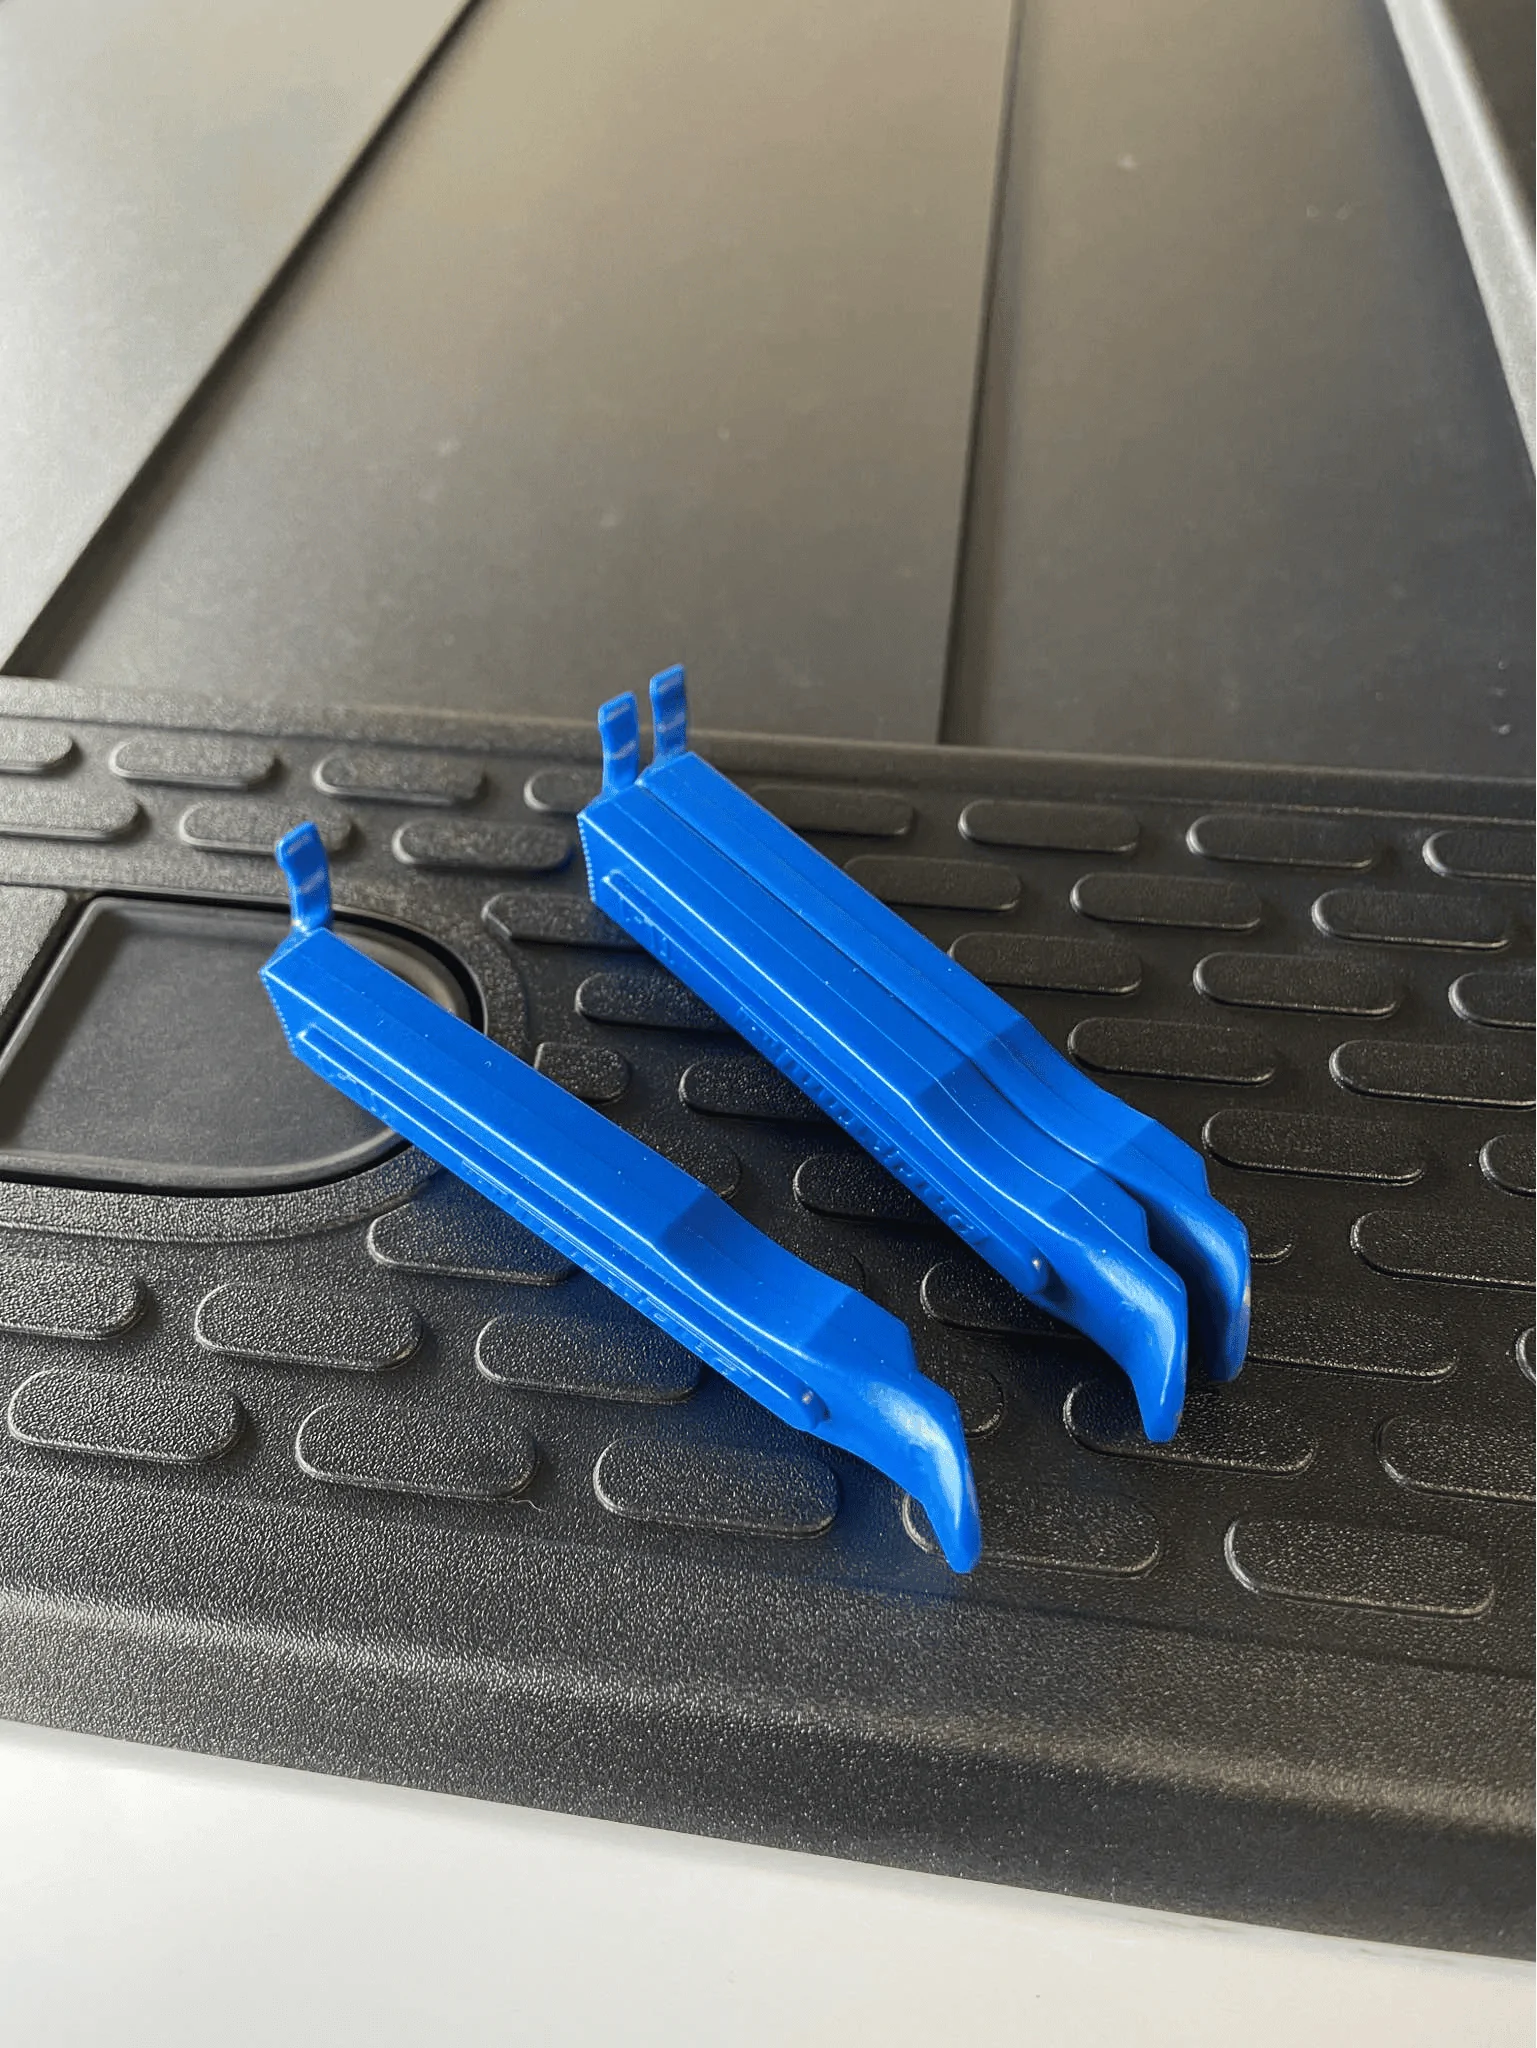
Using a pry tool, I would suggest removing the housing cover in the order as labeled in the photo. The passenger side has more room to work with. Note that the front of the enclosure has a cut out which might make it more prone to damage, so I would suggest focusing on prying from the side. In this view, you can clearly see the molex connector you'll be tapping (labeled T / 260). Note that there have been numerous reports of the mirror falling off so just be careful when working in this area.
Better shot of the back of the connector we'll be tapping, if the yellow wire is overlapping, disconnect the connector and reorient it so you get as clean of a setup as possible:
If Dongar or anyone else wants to offer a productized connector, here's what the connector looks like, there are a few 10-pin connectors used by the other car manufacturers, wasn't sure which mapped closest to the one Rivian uses:
Tap red to red and black to black, you might need to attempt it a few times to get it seated correctly and drawing power:
Test your connection to make sure everything is working as expected:
This is what the mirror housing looks like, there's a nice little void in the middle but don't touch the silver box, it's hot!
Buck module all tucked in, also used some extra electrical tape around the molex tap to make sure it doesn't get unseated accidentally:
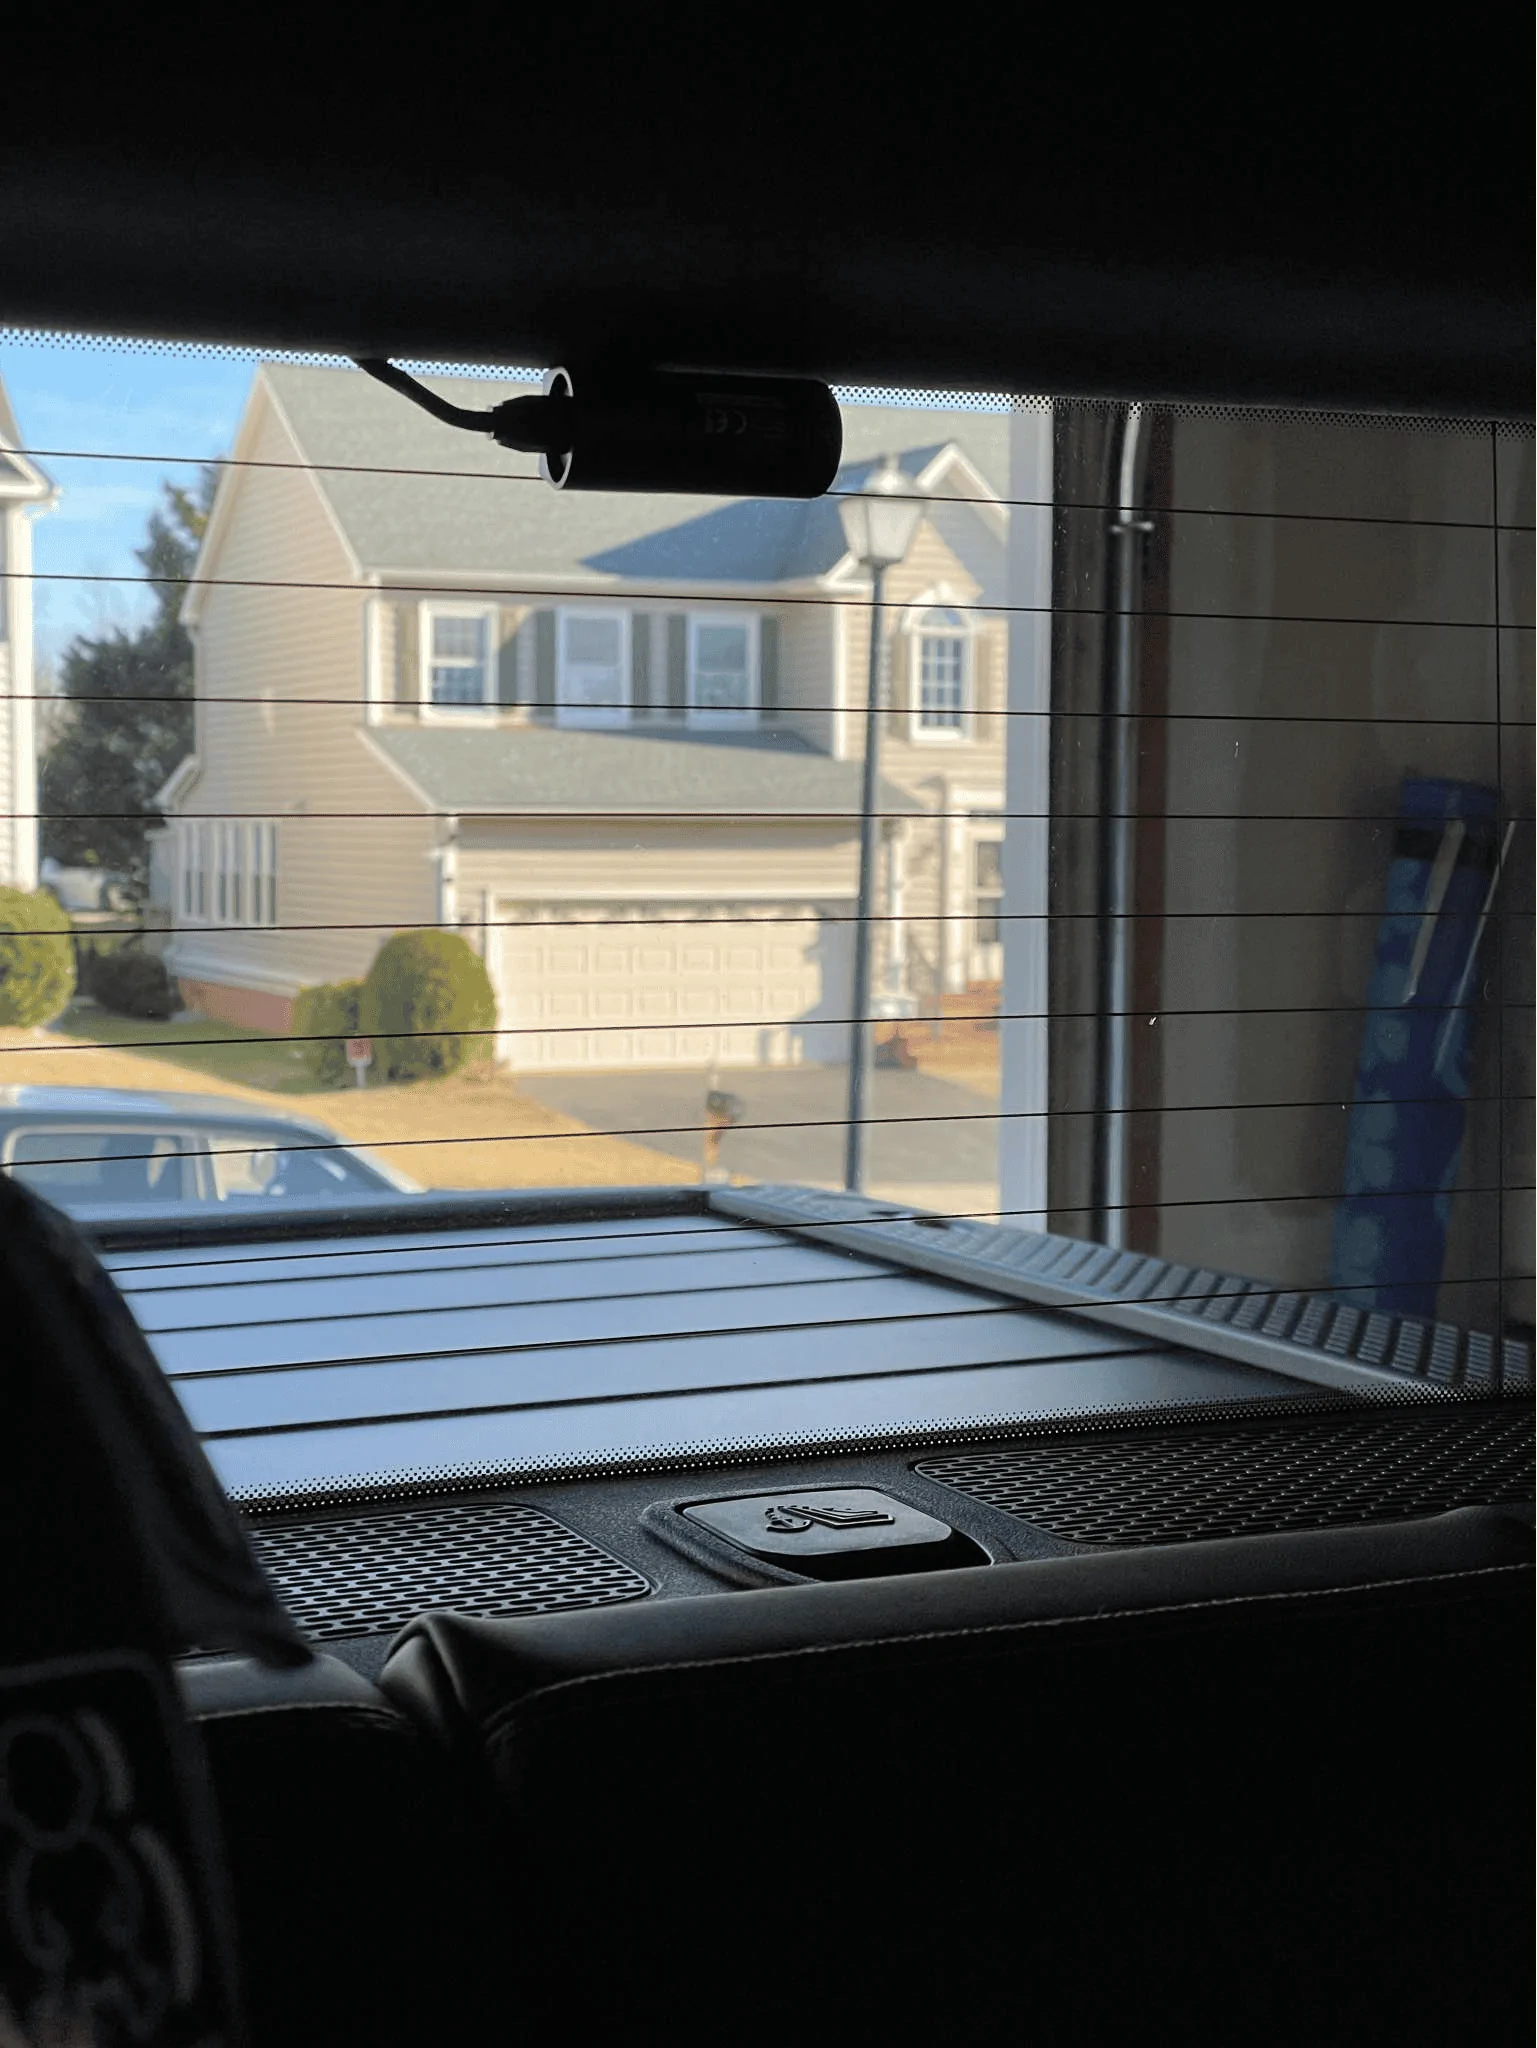
Now just route the USB-C wire up towards the roof and reattach the housing cover when you feel like everything is working as expected. Onto the next step.
Wiring up the rear camera:
The process is super easy in the front and gets tougher as you work your way towards the rear. There's plenty of room at the top of the windshield so just run the cable until you hit the A-pillar:
For all trim pieces, prying from under the weather seal makes life a little easier. At the A-pillar, lift up the seal and pry from there, you'll get plenty of leverage and will be able to open a large cavity to run the wire through.
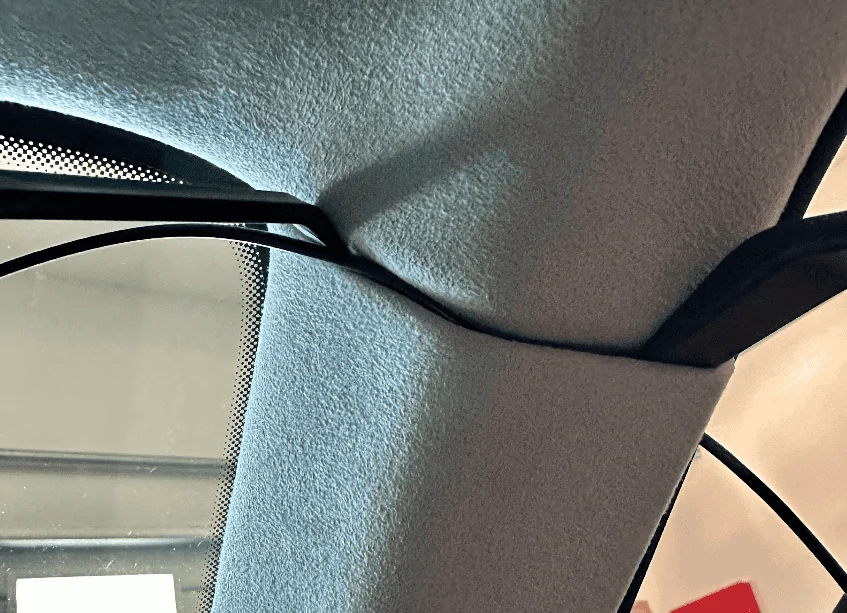
Once the cable is deep behind the trim piece, run it up along the door seal to the B-pillar:
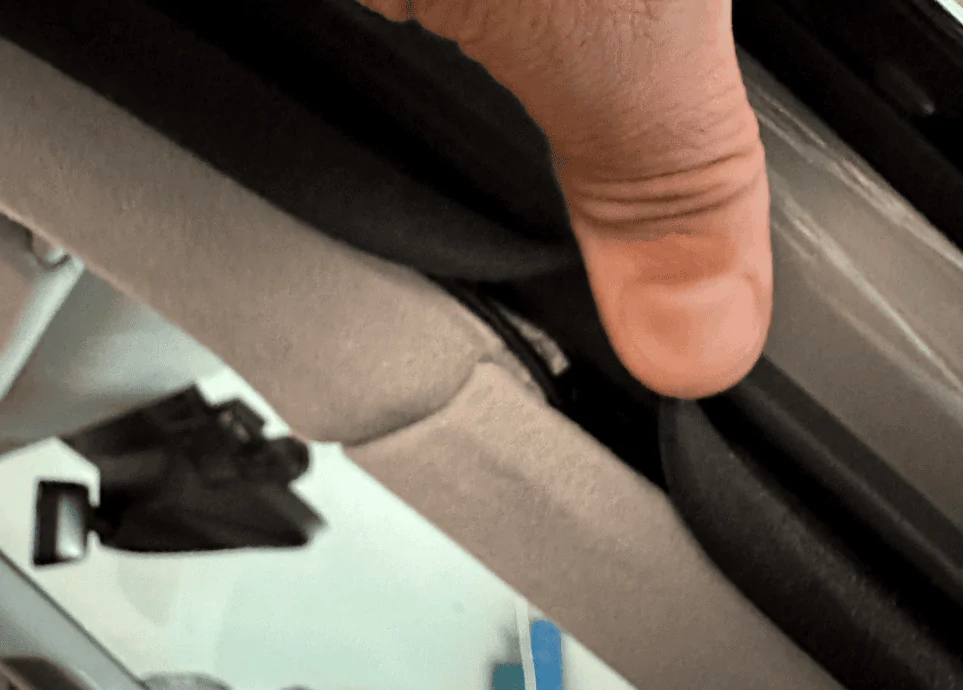
At the B-pillar, again work from the portion underneath the weather seal, I found that the bottom piece was easier to pull out than the top piece. You won't be able to pry the trim out as far as the A-pillar but it'll be enough to get the wire behind it. Once you've gotten the wire deep behind the B-pillar trim piece, run it up along the door seal to the C-pillar.
The C-pillar was similar if not a little tougher than the B-pillar, follow the same steps. Focus on the bottom trim piece and pulling from under the seal:
Run the wire up along the top of the rear passenger side window pane similar to what you did at the windshield. Then at the back of the R1S is where things get real fun. Note the airbag here.
Remove the rear's top trim piece. There are two plastic tabs (circled in red) you'll need to be careful with, two more plastic tabs are towards the back that I found relatively easy to pull down, and the rest of the mounting points are just magnets:
The opposite plastic trim piece on the liftgate will also need to come out, this one was the most difficult. I pulled a few plastic tabs off by accident and one of them even fell into a crevice which required a ton of patience and tweezers to pull back out. There are a dozen tabs. I started on the right bottom with a pry tool which caused the white plastic tab to fly off and into the crevice pictured in the next photo. Tip: After you get the bottom ones off, take an extra long flathead screwdriver and push against the two outer pins of the white tab for the ones at the top, it'll make it easier to dislodge those tabs:
One of the missing plastic white tabs which I probably wasted 20-minutes retrieving:
The two removed panels for your reference:
Next, shape a coat hanger to align with the path of the rubber cable housing as possible, push down into the housing, and try to thread the metal wire through to the other opening. You might need to forcefully move the existing cables in the housing around to give the wire some room to run through, it's really tight in there. Once you are through to the other end, tape up the cable/wire you need to run and fish it back through. I had to do this twice as the first time it got stuck and I ended up pulling the coat hanger out without the cable.
A better view of the bottom of that cable housing along with where the rear camera cable is coming out of the D-pillar:

Once the wire was fished through, I ran it out of the top right corner of the liftgate and tucked the cable along the edge of the rear window. I positioned the camera towards the bottom above the two tightly spaced defroster grid lines:
One thing I'll need to do but forgot until I snapped the trim back in place was to notch out a small hole so that the cable can run cleanly out. As you can see from the photo below, the trim piece isn't flush. I'll probably notch it on the right side since there's a small channel where the cable can run in. Or better yet, I find a better way to run it directly to the glass housing:
That's it! When complete, all your other A, B, C, D pillar trim pieces should show no signs of a cable pushing it out if you pulled it far enough into each cavity.
Sponsored
Last edited: