Sponsored
Riviot
Well-Known Member
- Joined
- Mar 29, 2021
- Threads
- 121
- Messages
- 6,441
- Reaction score
- 10,894
- Location
- Kitsap, WA
- Vehicles
- R1T
UNWORTHY


raylepper
Well-Known Member
- Joined
- Sep 20, 2023
- Threads
- 8
- Messages
- 174
- Reaction score
- 255
- Location
- Midlothian, VA
- Vehicles
- 2024 R1S, 2013 Grand Cherokee
- Occupation
- Random Maker
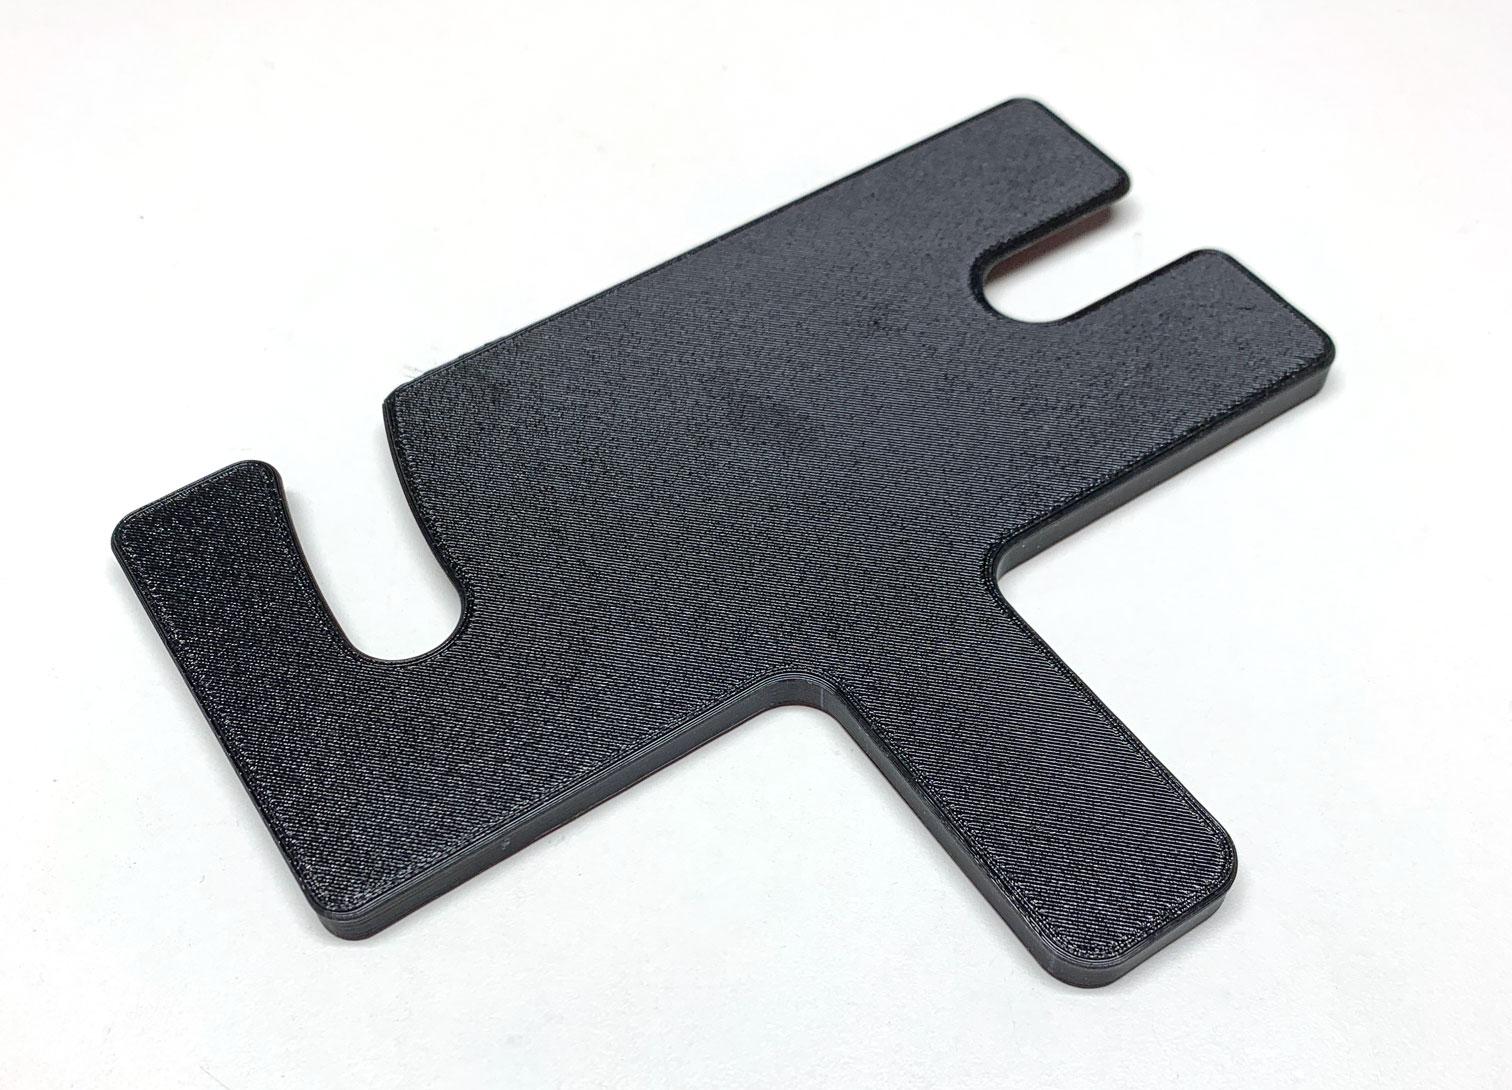
I struggled to get both the left 'button' (which protrudes from the flange surrounding the rod) and the right button (which is flush with the flange and must be pushed in past the edge) pushed in at the same time. So I designed a simple tool that presses both buttons. The slot on the right side of the tool is lined up with the right post (perpendicular to the head restraint) and pushed in until it stops. Then the tool is rotated clockwise so that the curved slot on the left of the tool engages the left rod of the head restraint.I am having a difficult time removing the 2nd row headrests. Is there a better way to remove them? It’s very difficult pushing the right indented button. Not sure why they designed it this way.
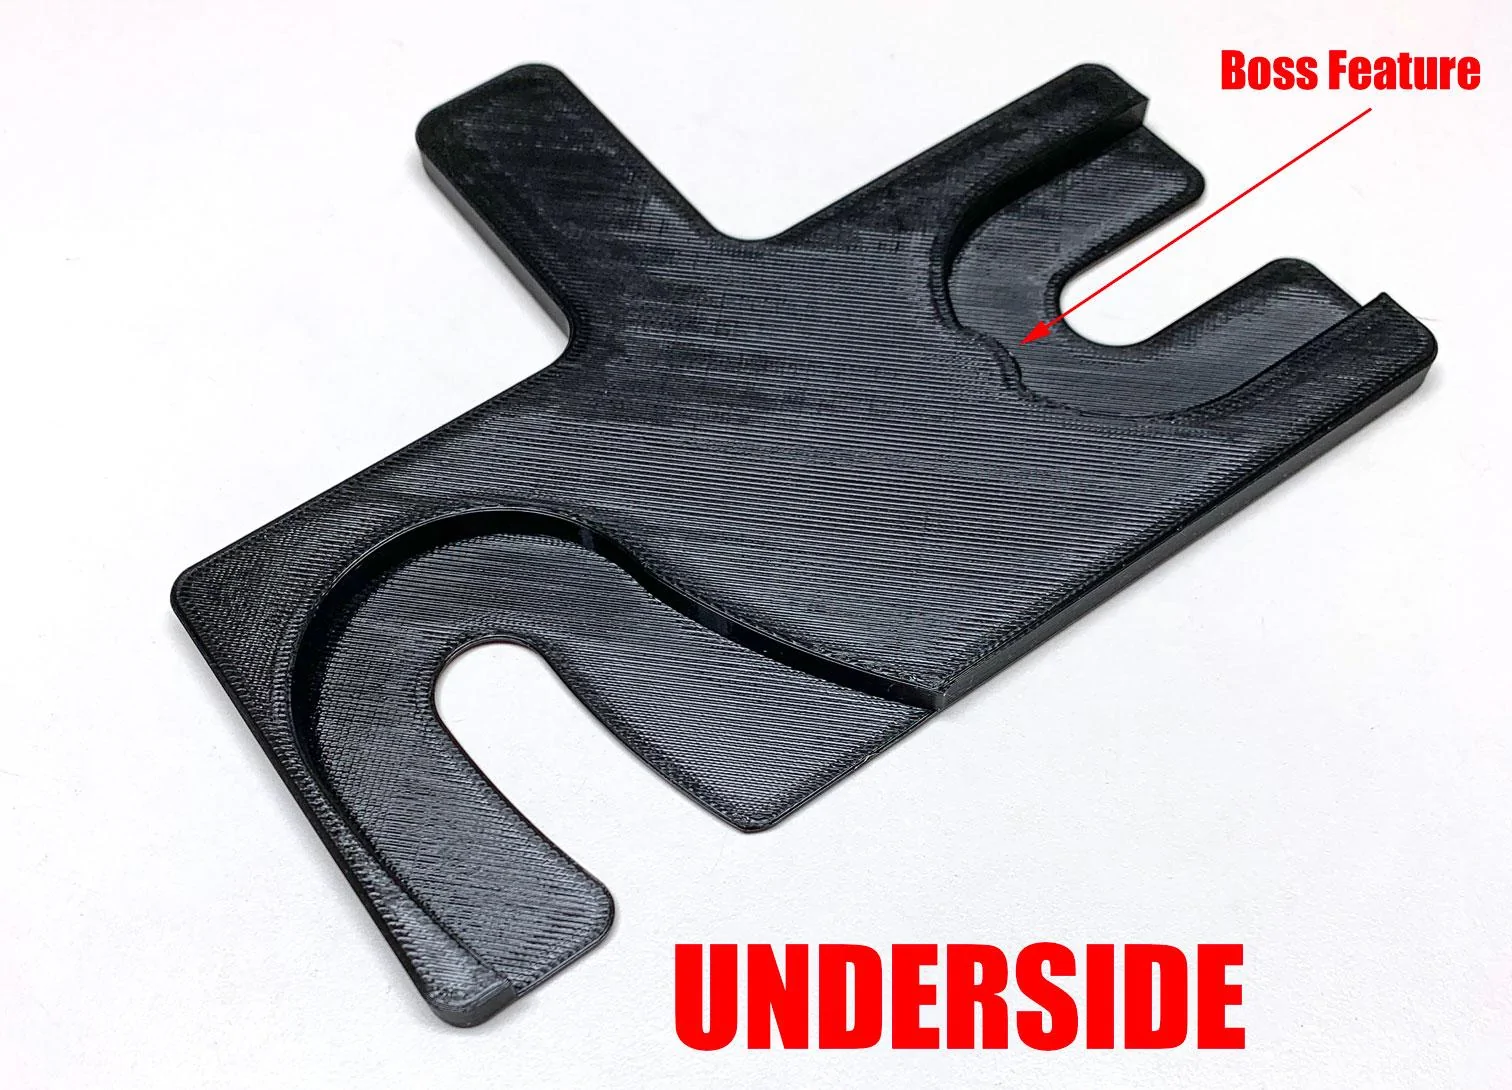
As you can see from the photo of the underside of the tool, as the tool is rotated in and under the head restraint the right button is pressed in by the boss feature and the left button is pressed in by the edge of the arc/recess. It took three tries to get the dimensions just right but it's ridiculously easy to use and works as intended.
I can post the stl file and/or the Solidworks file if folks want to print or remix the design.
raylepper
Well-Known Member
- Joined
- Sep 20, 2023
- Threads
- 8
- Messages
- 174
- Reaction score
- 255
- Location
- Midlothian, VA
- Vehicles
- 2024 R1S, 2013 Grand Cherokee
- Occupation
- Random Maker
I figured a video would better explain how the tool works.
Sponsored
SSteveEV
Well-Known Member
I don't recall the perfect method but I remember holding some upwards pressure with one hand on the headrest and then fiddling with each button separately with the other hand one at a time. Came right out.
ealberton
Well-Known Member
Please post where to find this file... I would love to print one up. thank you for doing the leg work on thisI struggled to get both the left 'button' (which protrudes from the flange surrounding the rod) and the right button (which is flush with the flange and must be pushed in past the edge) pushed in at the same time. So I designed a simple tool that presses both buttons. The slot on the right side of the tool is lined up with the right post (perpendicular to the head restraint) and pushed in until it stops. Then the tool is rotated clockwise so that the curved slot on the left of the tool engages the left rod of the head restraint.
As you can see from the photo of the underside of the tool, as the tool is rotated in and under the head restraint the right button is pressed in by the boss feature and the left button is pressed in by the edge of the arc/recess. It took three tries to get the dimensions just right but it's ridiculously easy to use and works as intended.
I can post the stl file and/or the Solidworks file if folks want to print or remix the design.

COdogman
Well-Known Member
I usually

I do this and usually spend about 5 minutes cursing before giving up and just trying to slide the straps for my dog hammock between the upper and lower partsI don't recall the perfect method but I remember holding some upwards pressure with one hand on the headrest and then fiddling with each button separately with the other hand one at a time. Came right out.
Sponsored
raylepper
Well-Known Member
- Joined
- Sep 20, 2023
- Threads
- 8
- Messages
- 174
- Reaction score
- 255
- Location
- Midlothian, VA
- Vehicles
- 2024 R1S, 2013 Grand Cherokee
- Occupation
- Random Maker
Here are the files for the tool (They are dropbox links-seems the forum software doesn't like these file types). The .stl you can load up into your preferred slicer and the Solidworks file if you can use it for a remix. If you want me to print one for you I'm happy to do it for $25 shipped USPS CONUS. Message me with your shipping address and I'll give you my PayPal or send you a PayPal invoice, your choice.
SSteveEV
Well-Known Member
You should sell that to Rivian, nothing like it here.Here are the files for the tool
https://rivianservicetools.com/
Will save us all a lot of post warranty billing in the end. They had to replace my rear shelf and I assume removed those for that work recently. My loaner had the same warping.

raylepper
Well-Known Member
- Joined
- Sep 20, 2023
- Threads
- 8
- Messages
- 174
- Reaction score
- 255
- Location
- Midlothian, VA
- Vehicles
- 2024 R1S, 2013 Grand Cherokee
- Occupation
- Random Maker
You should sell that to Rivian, nothing like it here.
https://rivianservicetools.com/
Hahaha. They can download it they don't already have it or something way better.")
AllInev
Well-Known Member
- Joined
- Nov 22, 2021
- Threads
- 37
- Messages
- 1,267
- Reaction score
- 2,120
- Location
- Oakland, CA
- Vehicles
- Prius V, 2022 R1T
I ordered one from @raylepper and I'm extremely glad I did. Works perfectly on my R1T back row headrests!!!I struggled to get both the left 'button' (which protrudes from the flange surrounding the rod) and the right button (which is flush with the flange and must be pushed in past the edge) pushed in at the same time. So I designed a simple tool that presses both buttons. The slot on the right side of the tool is lined up with the right post (perpendicular to the head restraint) and pushed in until it stops. Then the tool is rotated clockwise so that the curved slot on the left of the tool engages the left rod of the head restraint.
As you can see from the photo of the underside of the tool, as the tool is rotated in and under the head restraint the right button is pressed in by the boss feature and the left button is pressed in by the edge of the arc/recess. It took three tries to get the dimensions just right but it's ridiculously easy to use and works as intended.
I can post the stl file and/or the Solidworks file if folks want to print or remix the design.
Sponsored
Similar threads
- Replies
- 1
- Views
- 506