Sponsored
OP
OP
RWerksman

RWerksman

Well-Known Member
Site Sponsor
First Name
Rob
Joined
Nov 13, 2020
Threads
58
Messages
1,413
Reaction score
3,162
Location
Pittsburgh
Vehicles
Jeep & R1T
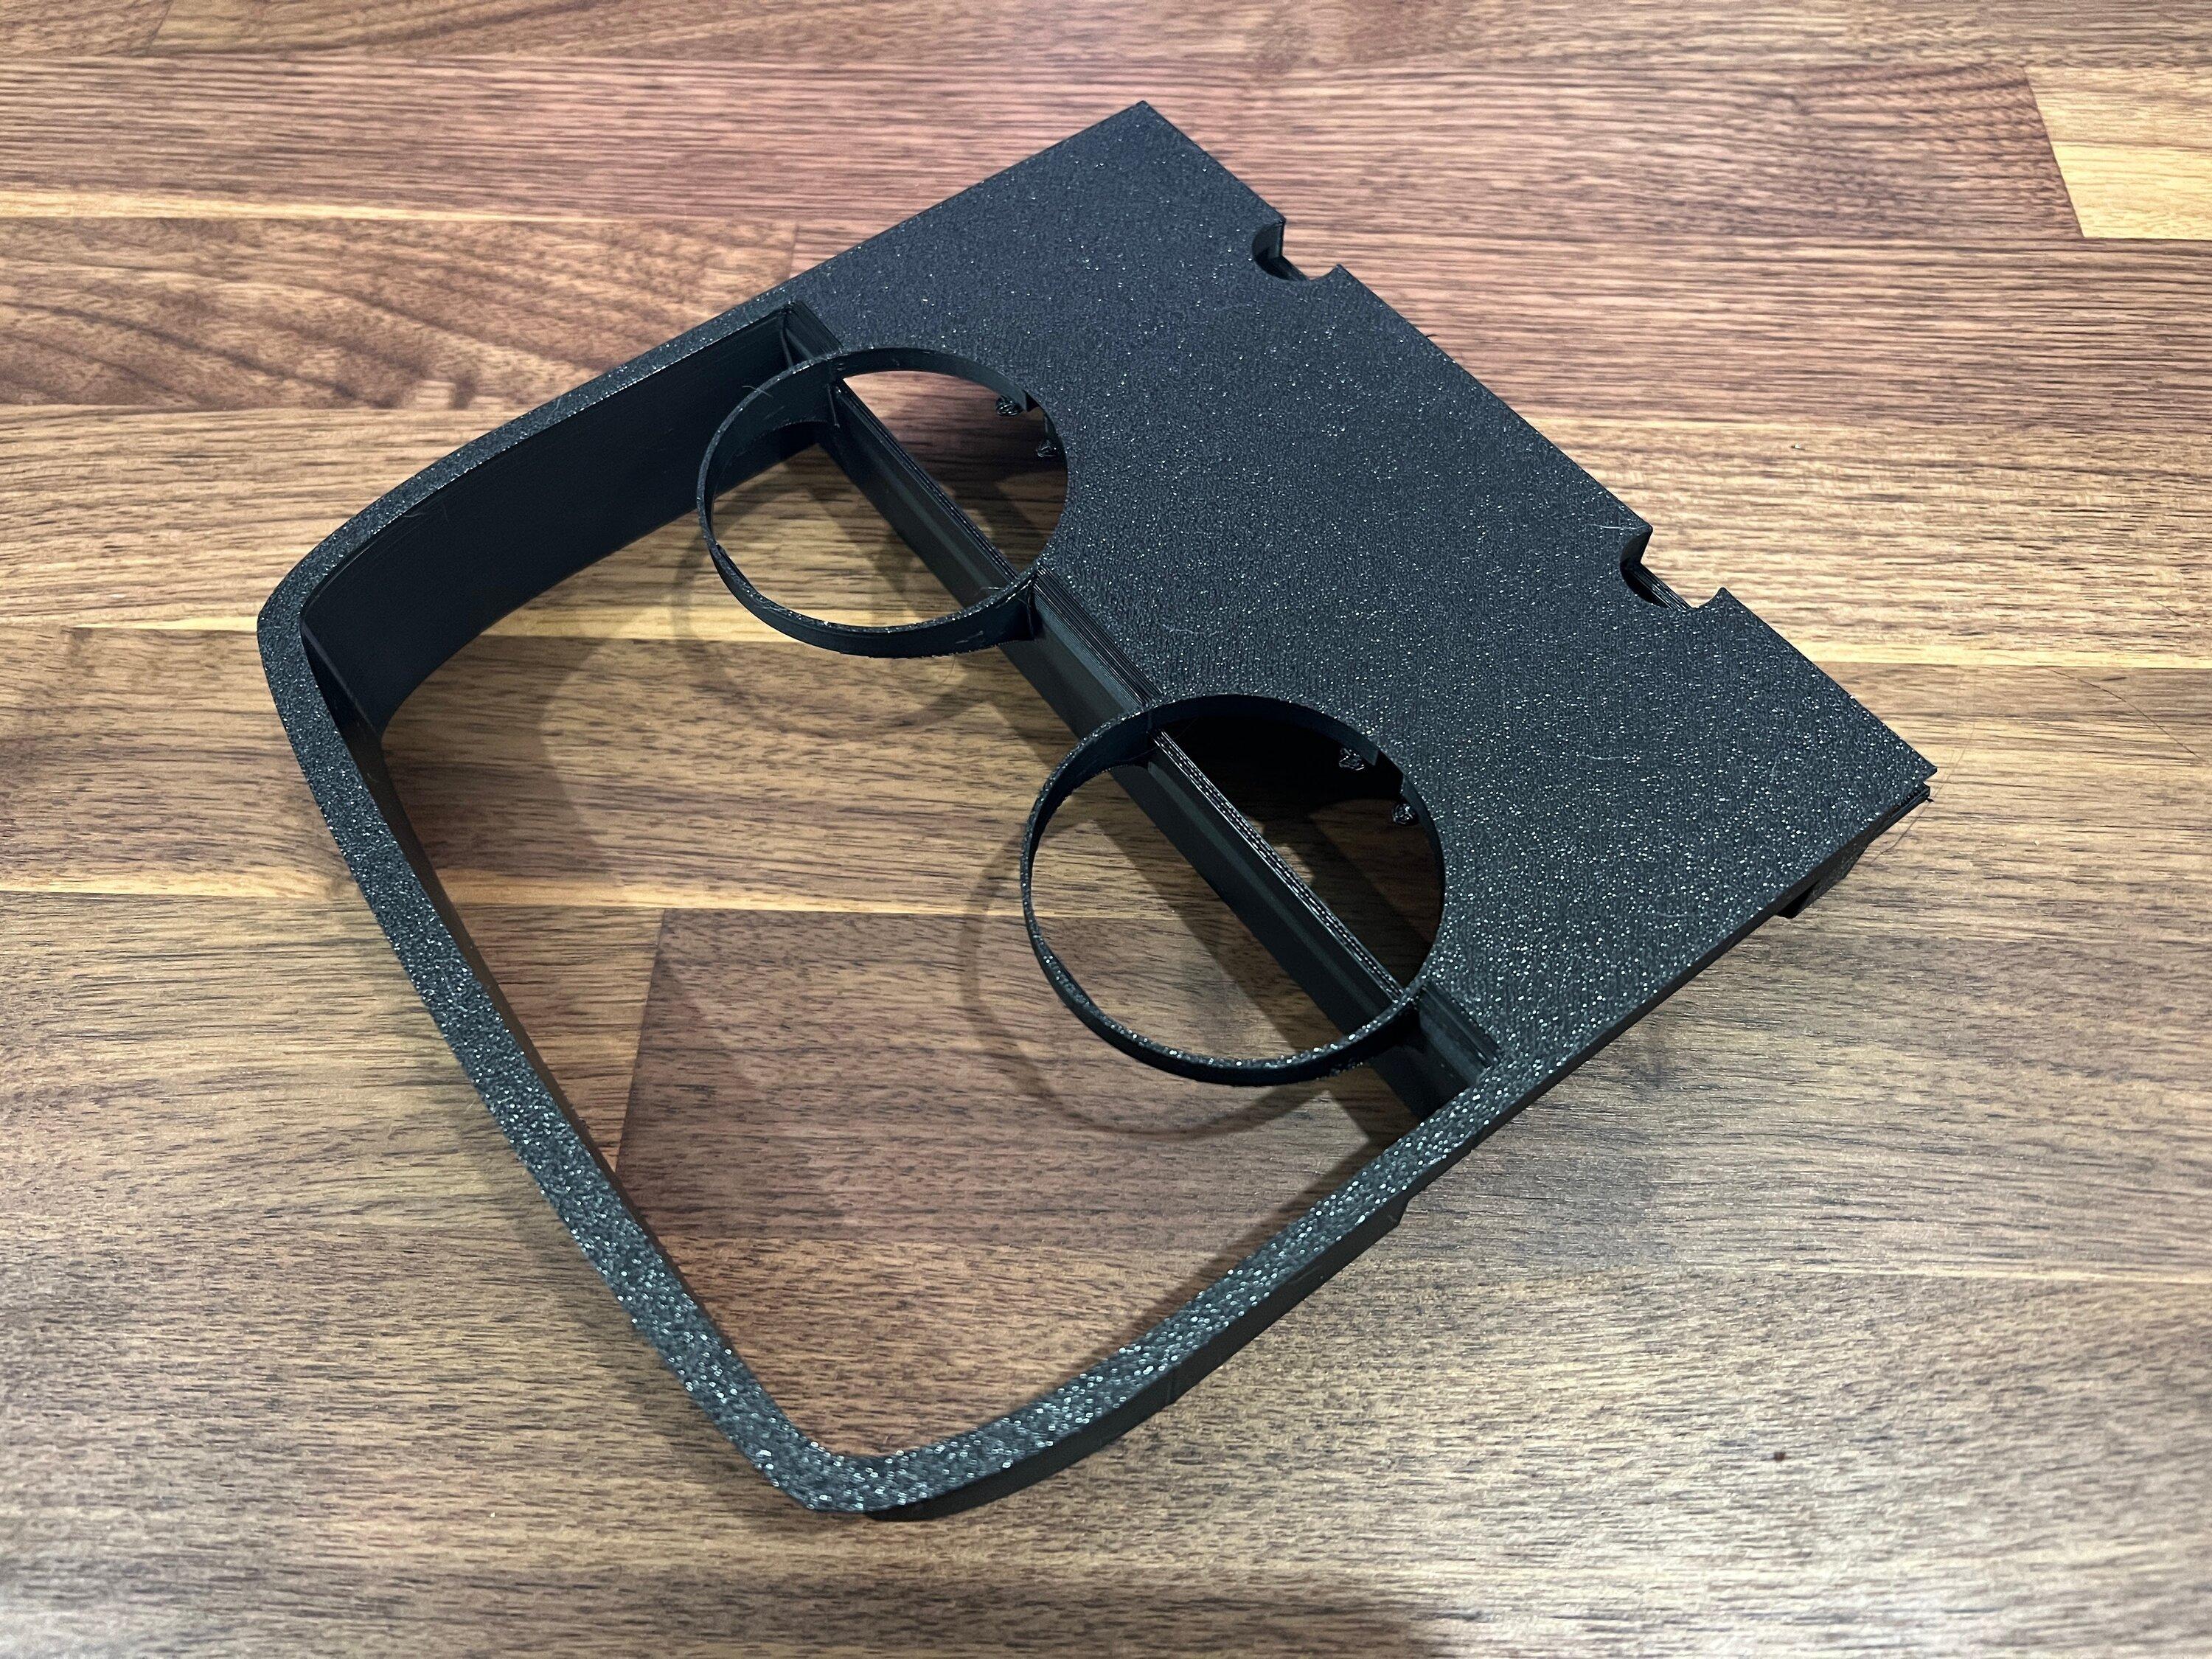
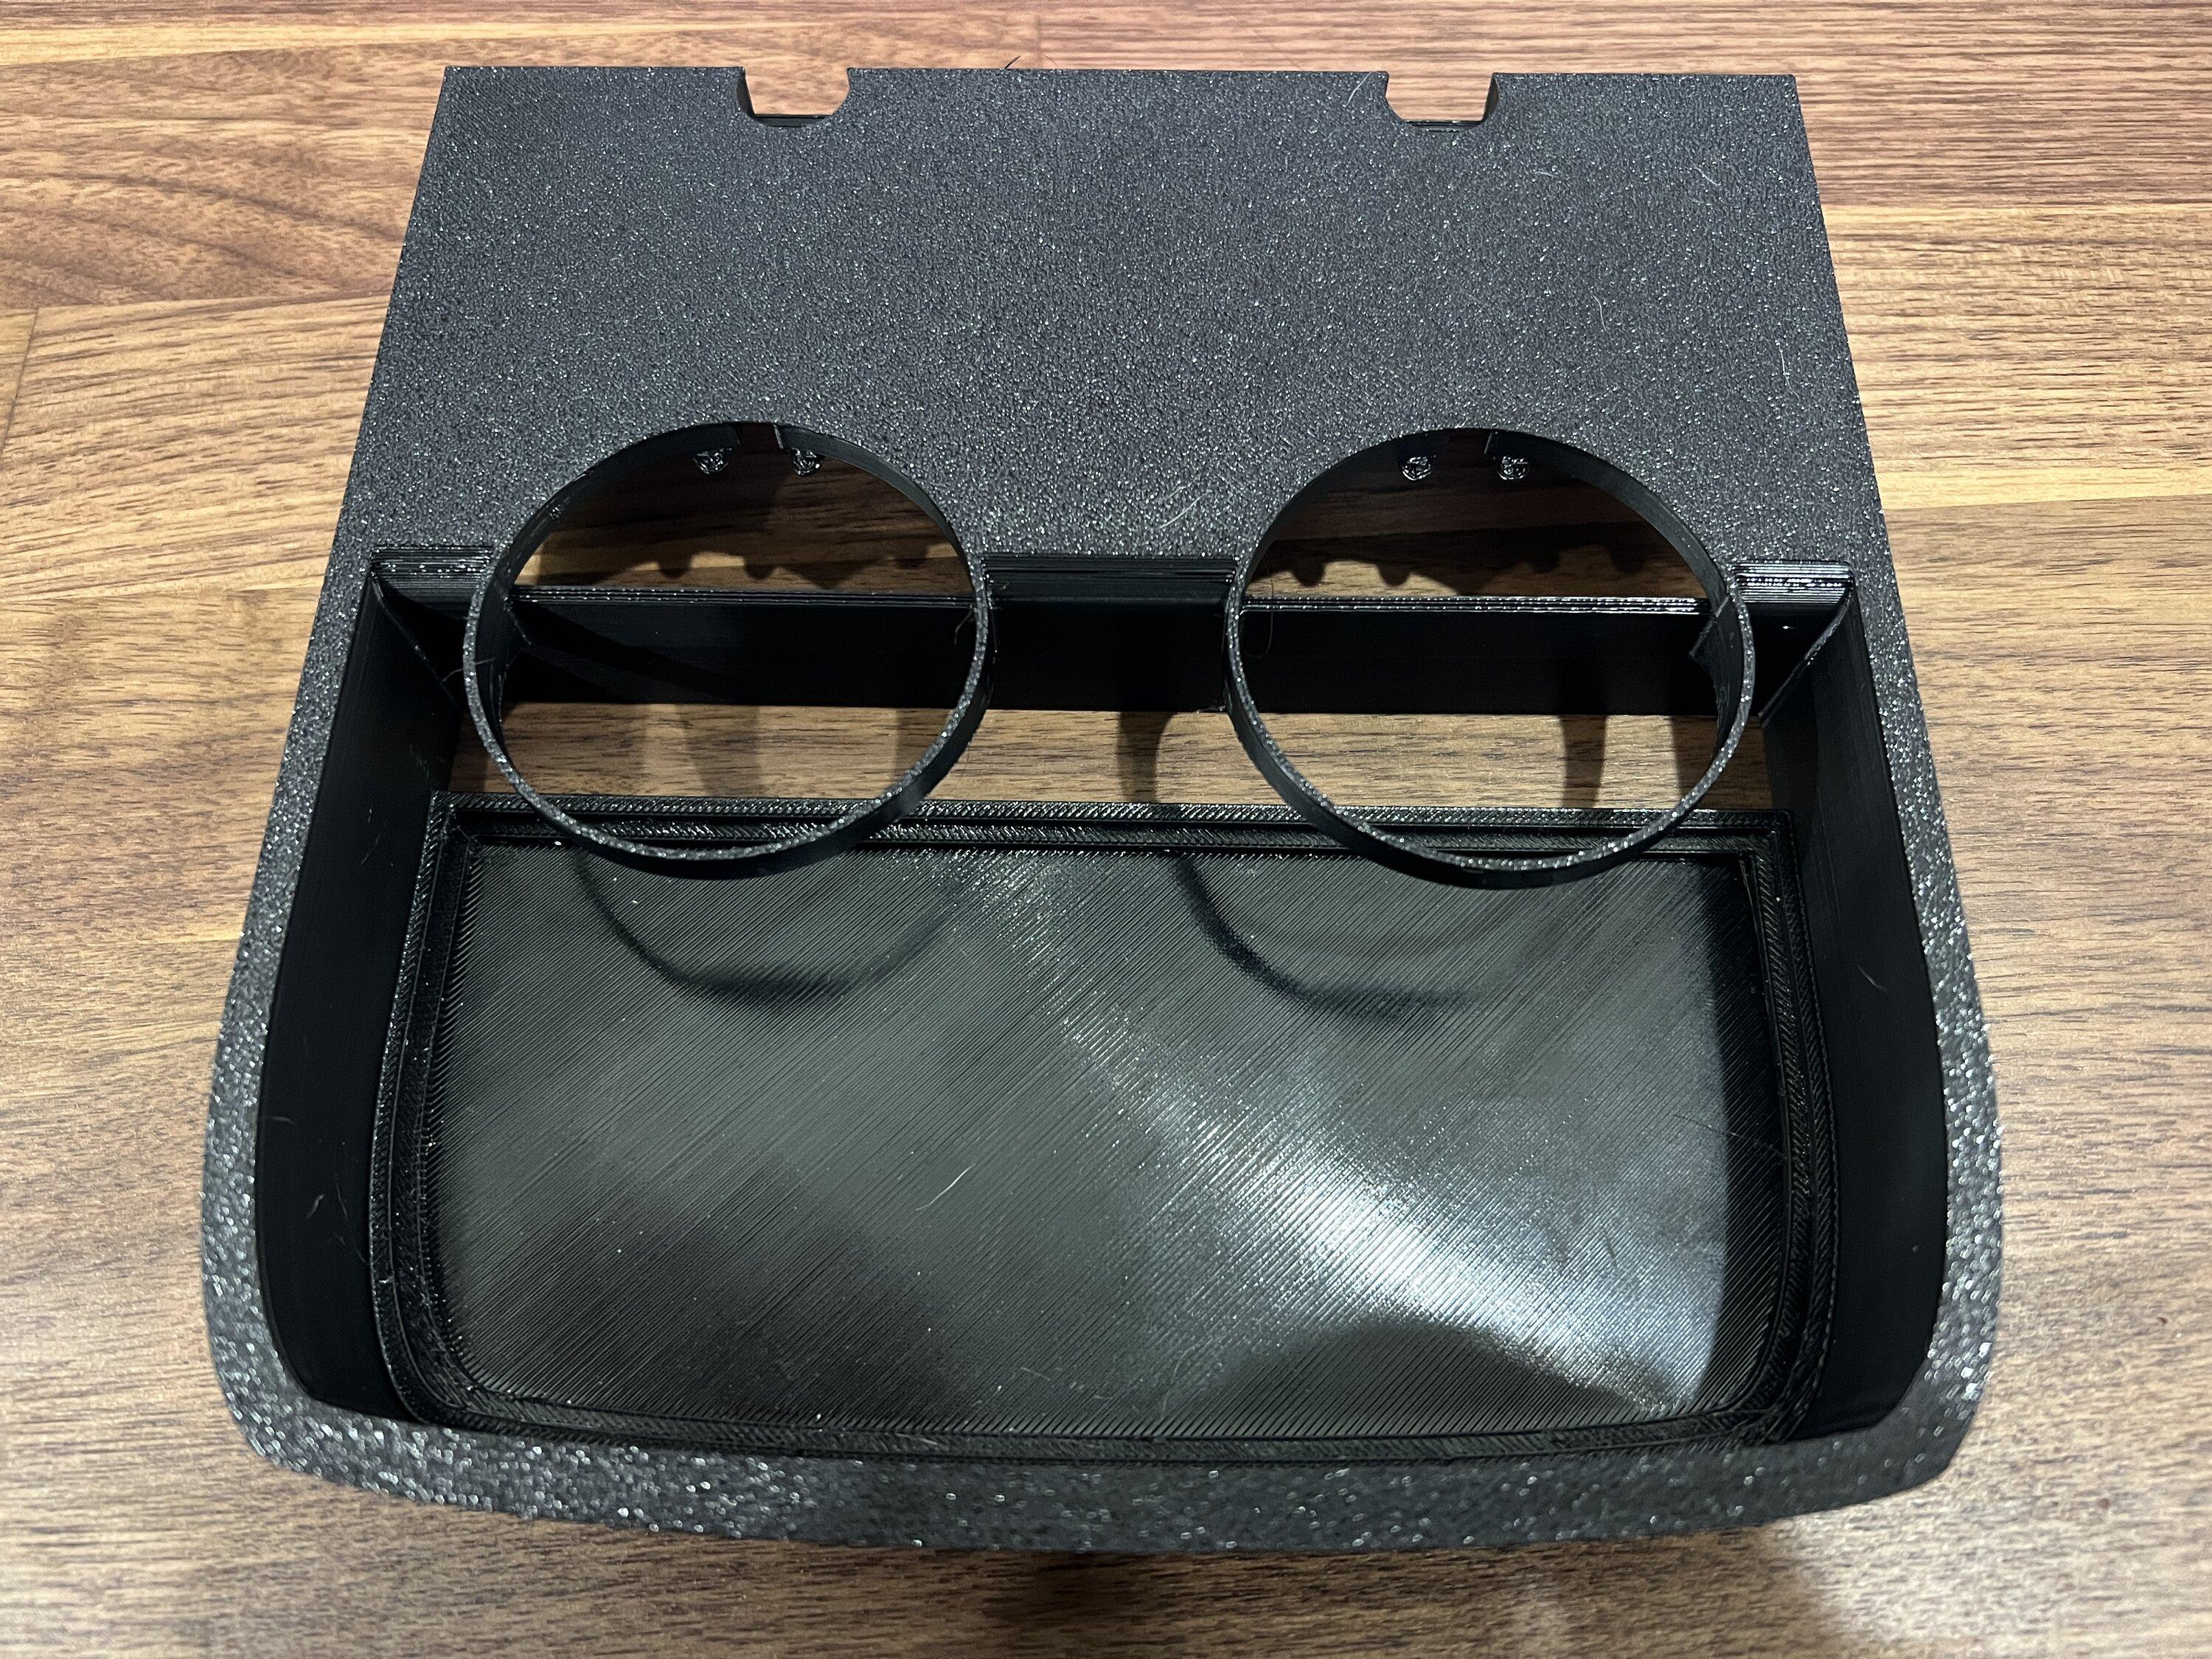
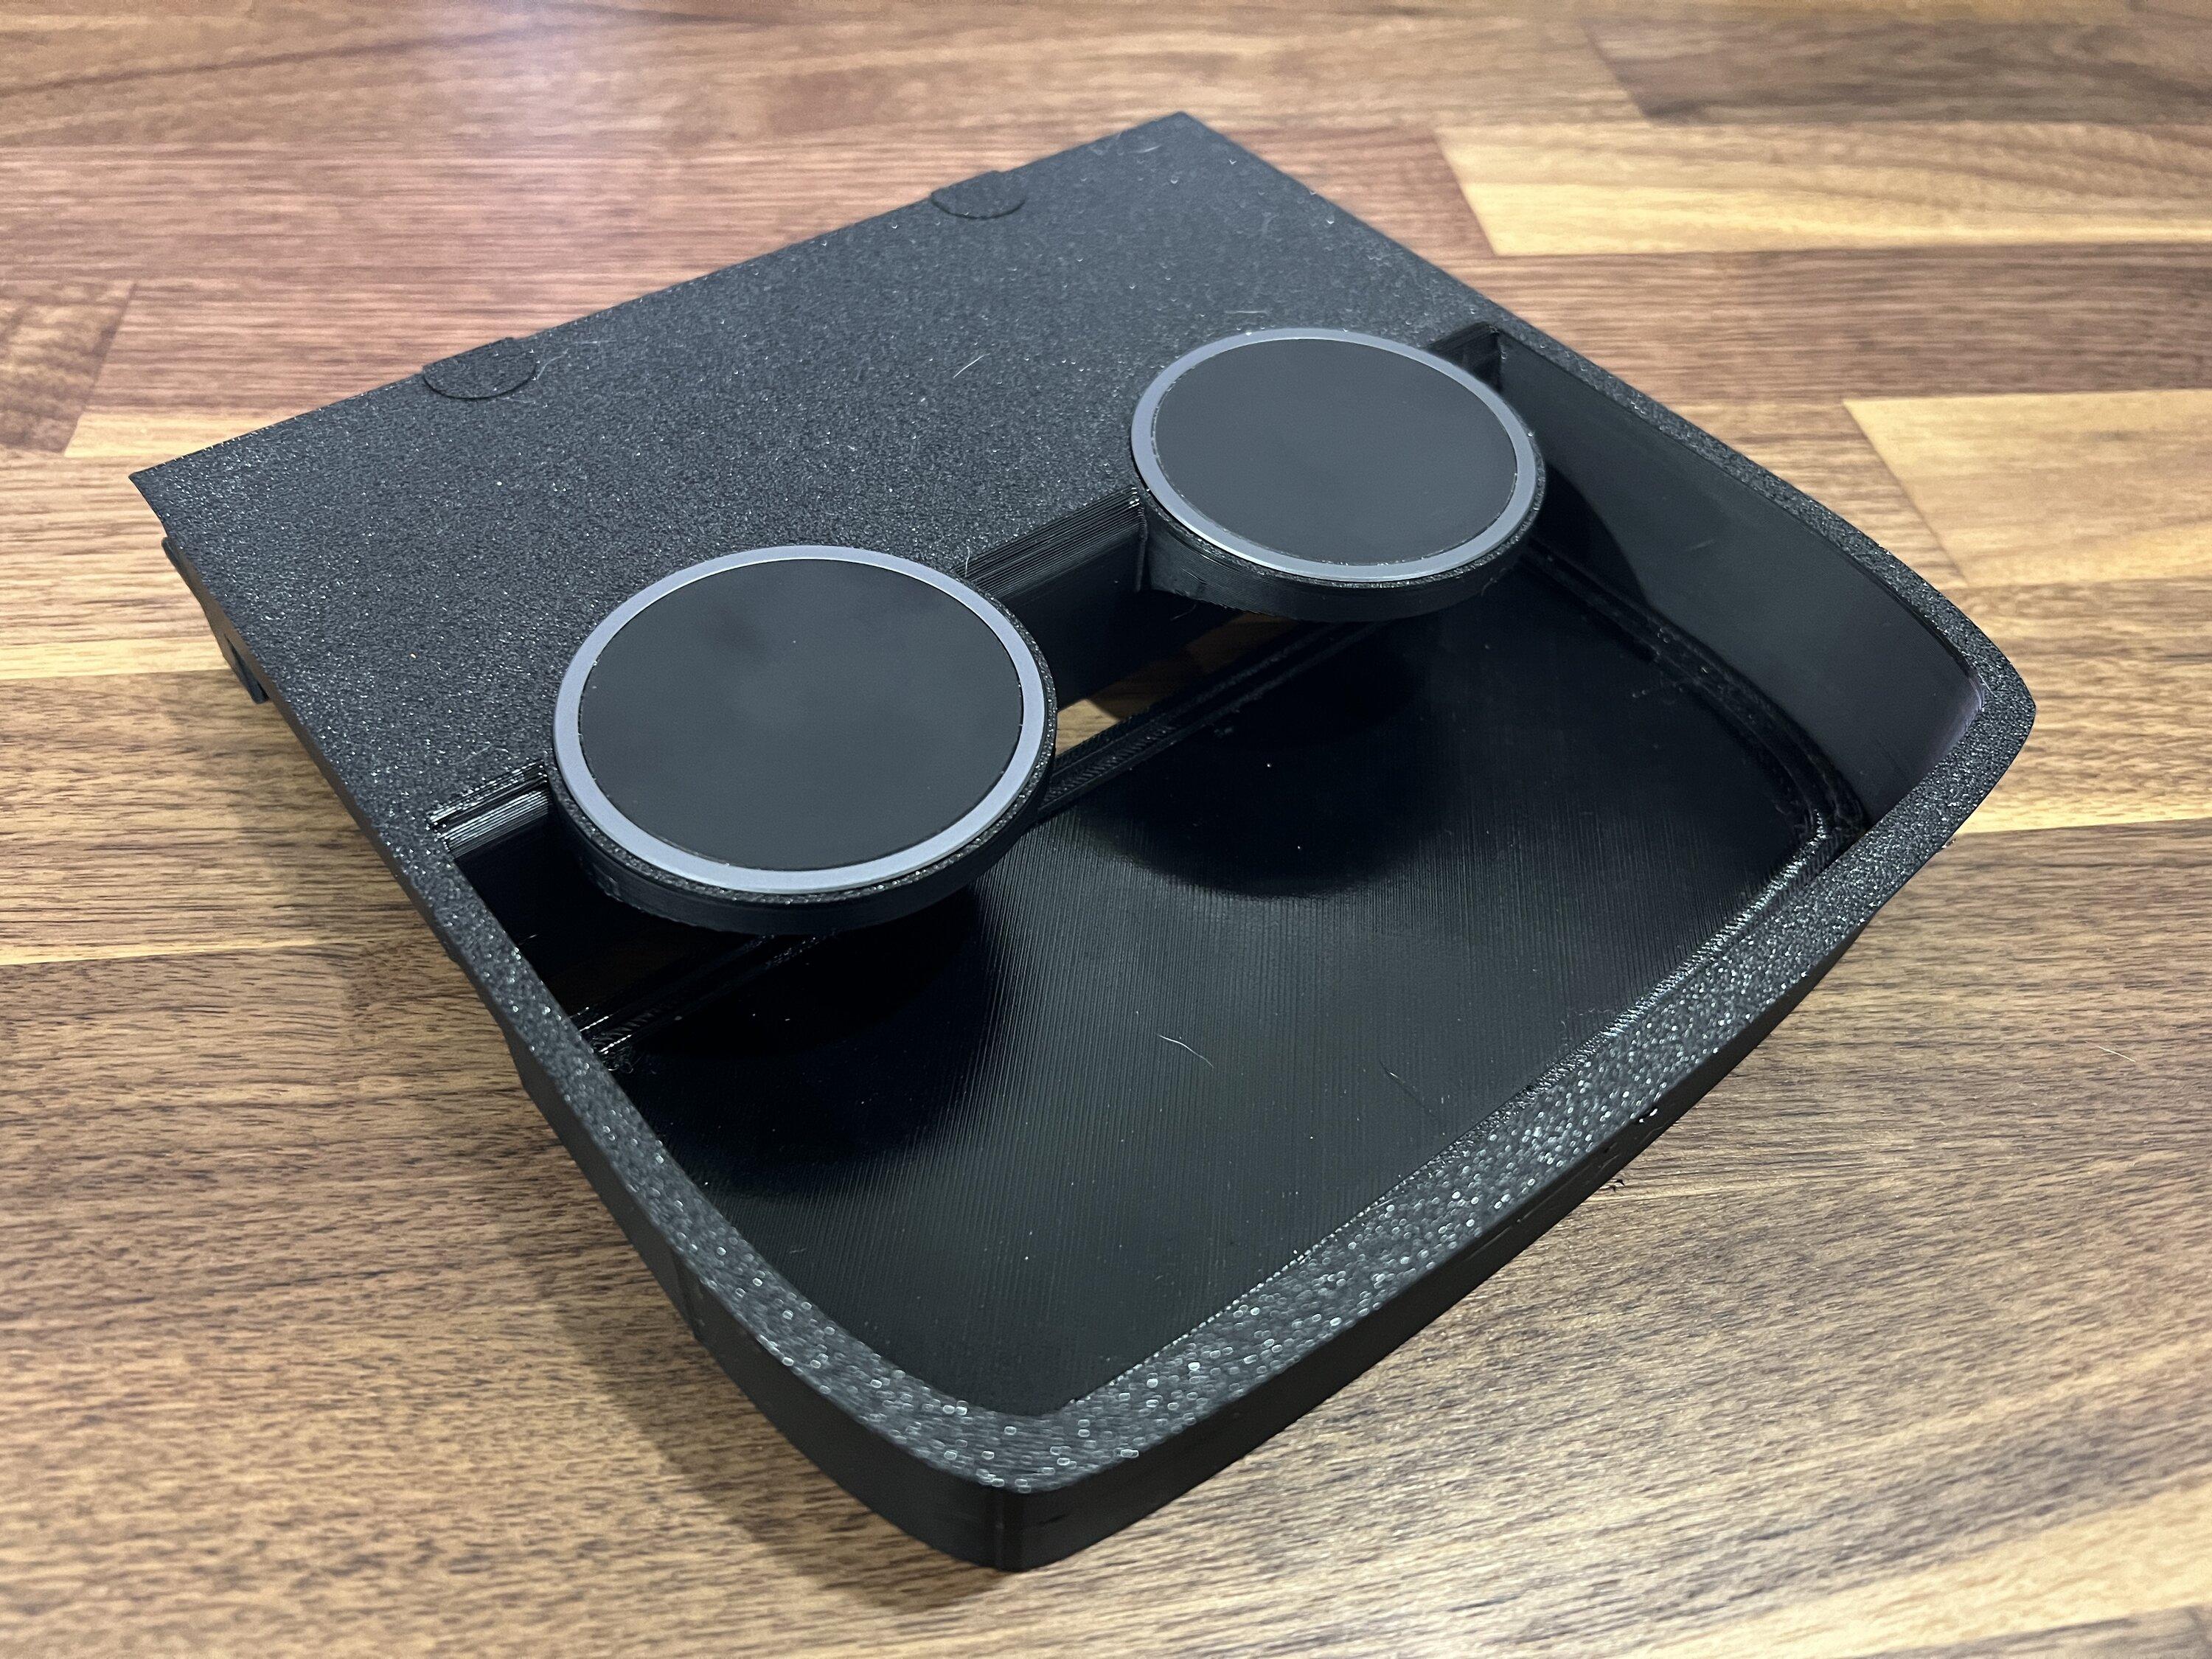
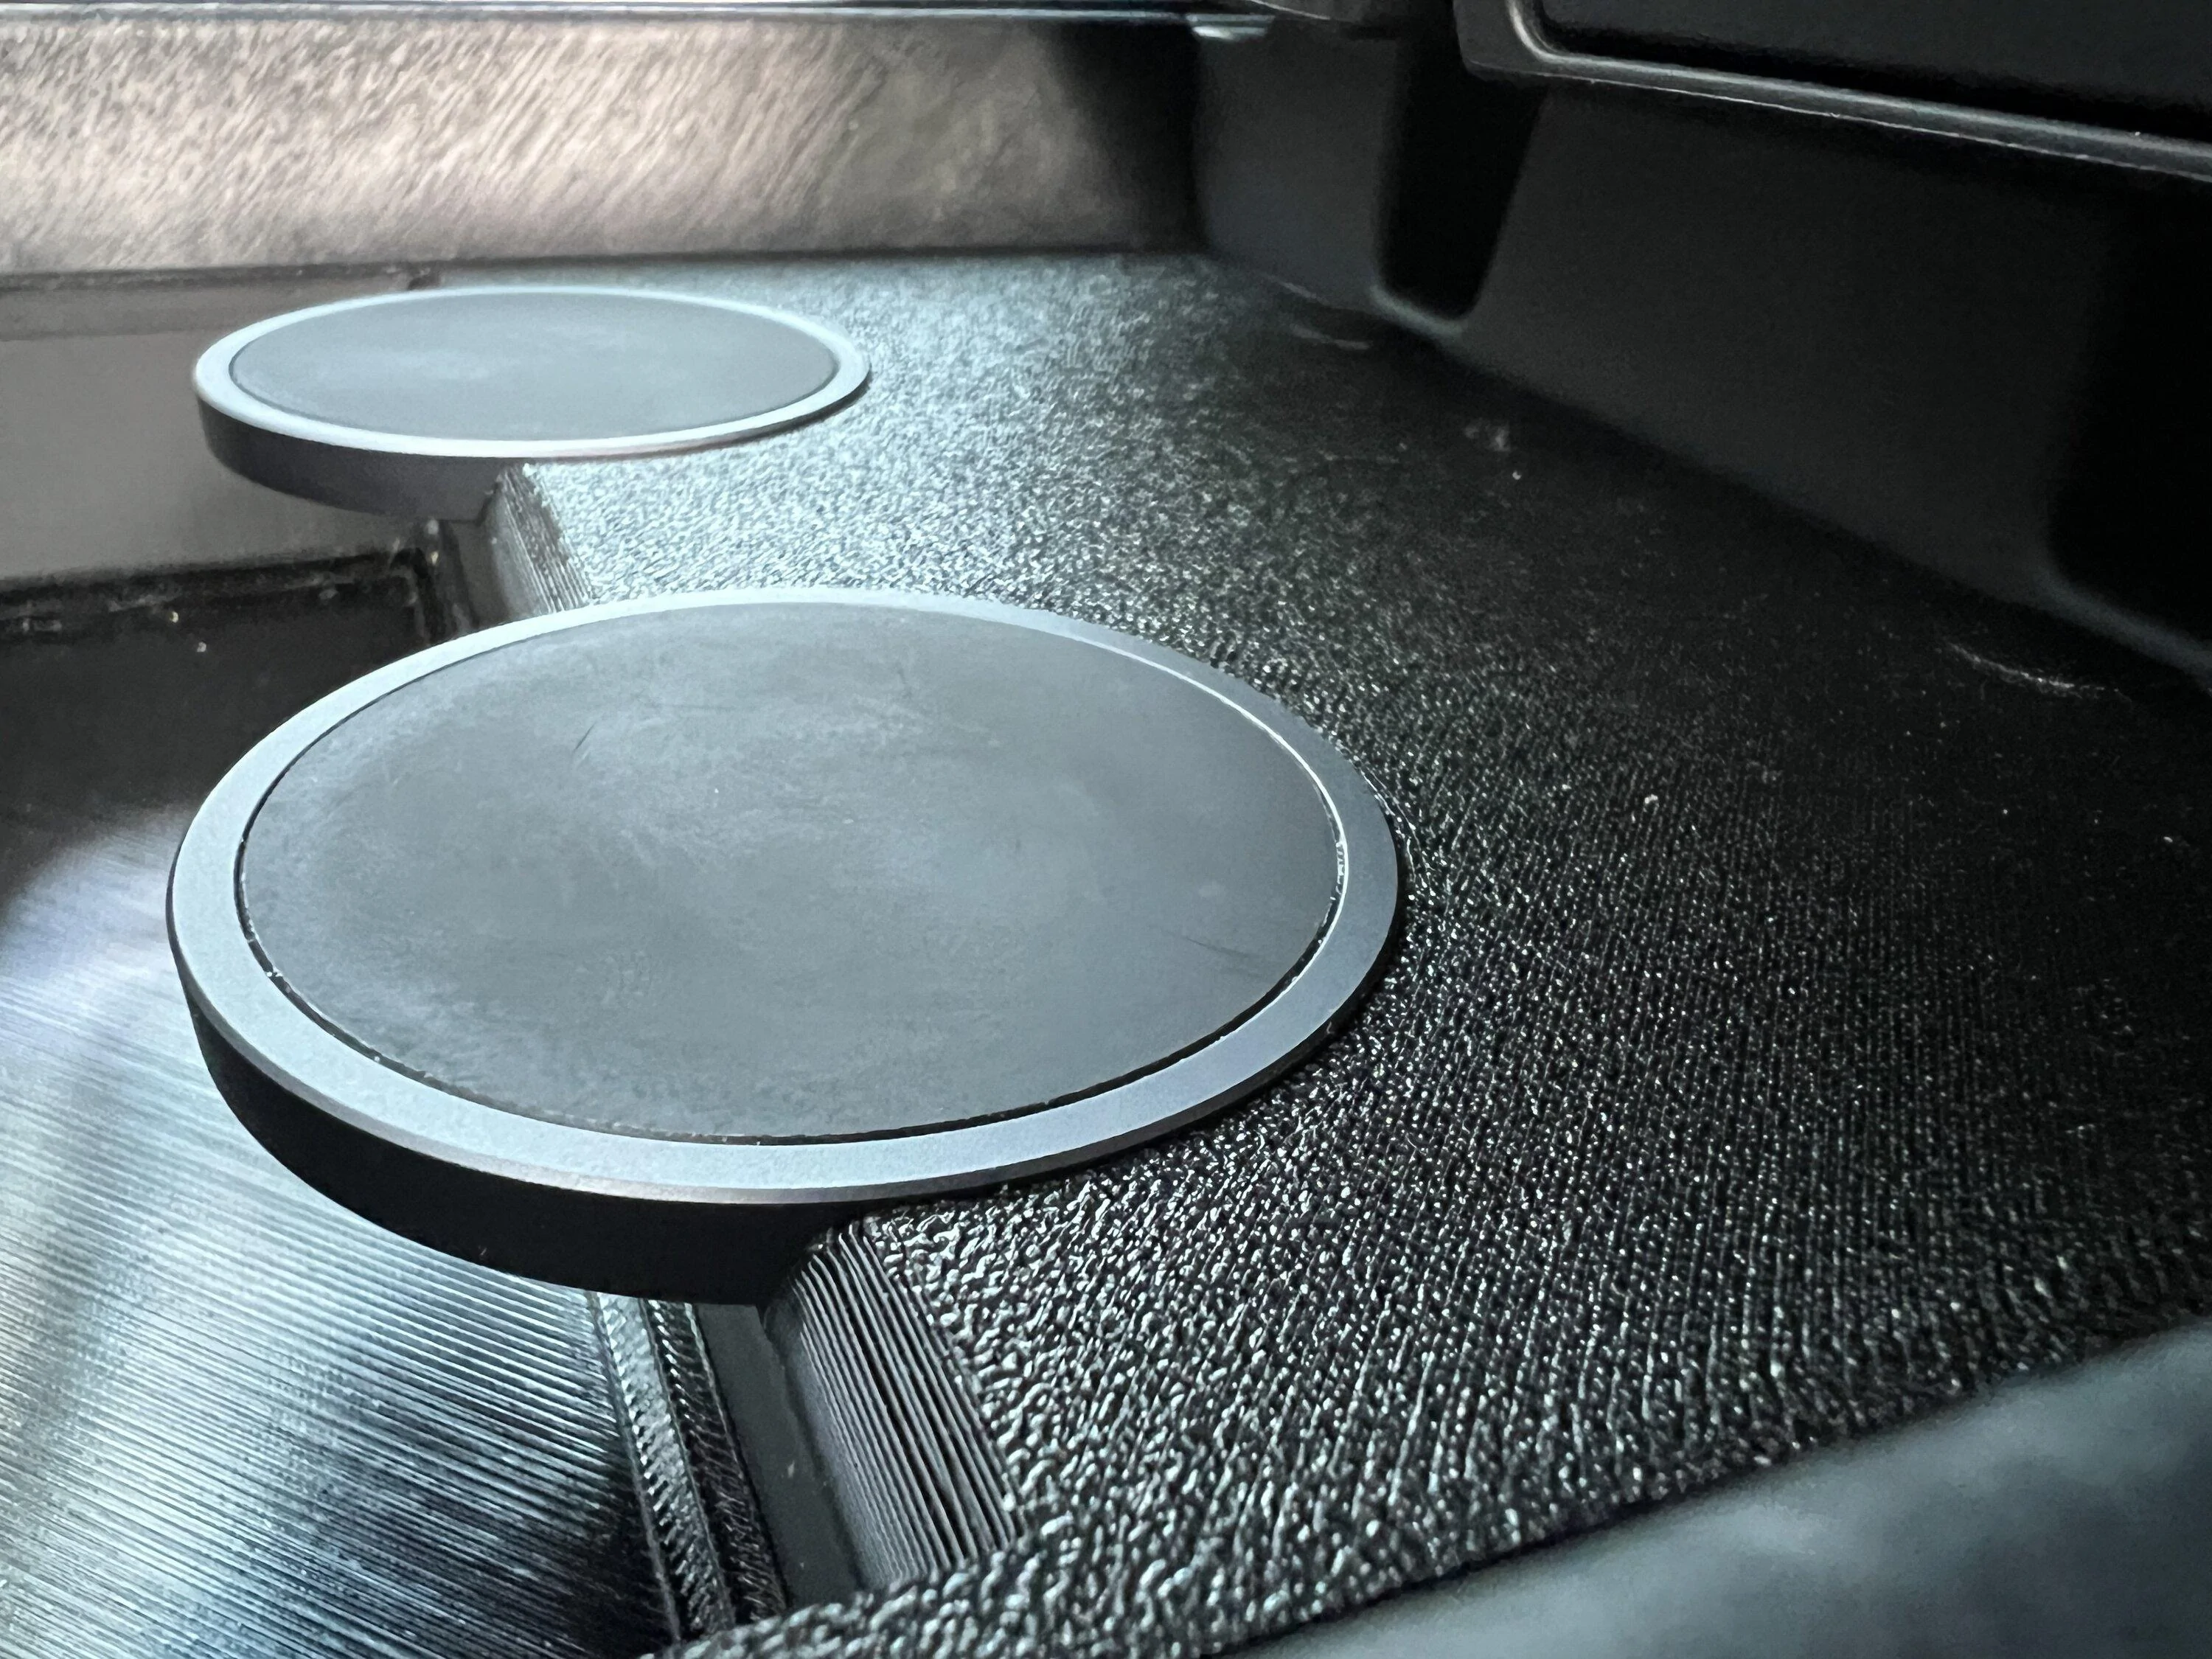
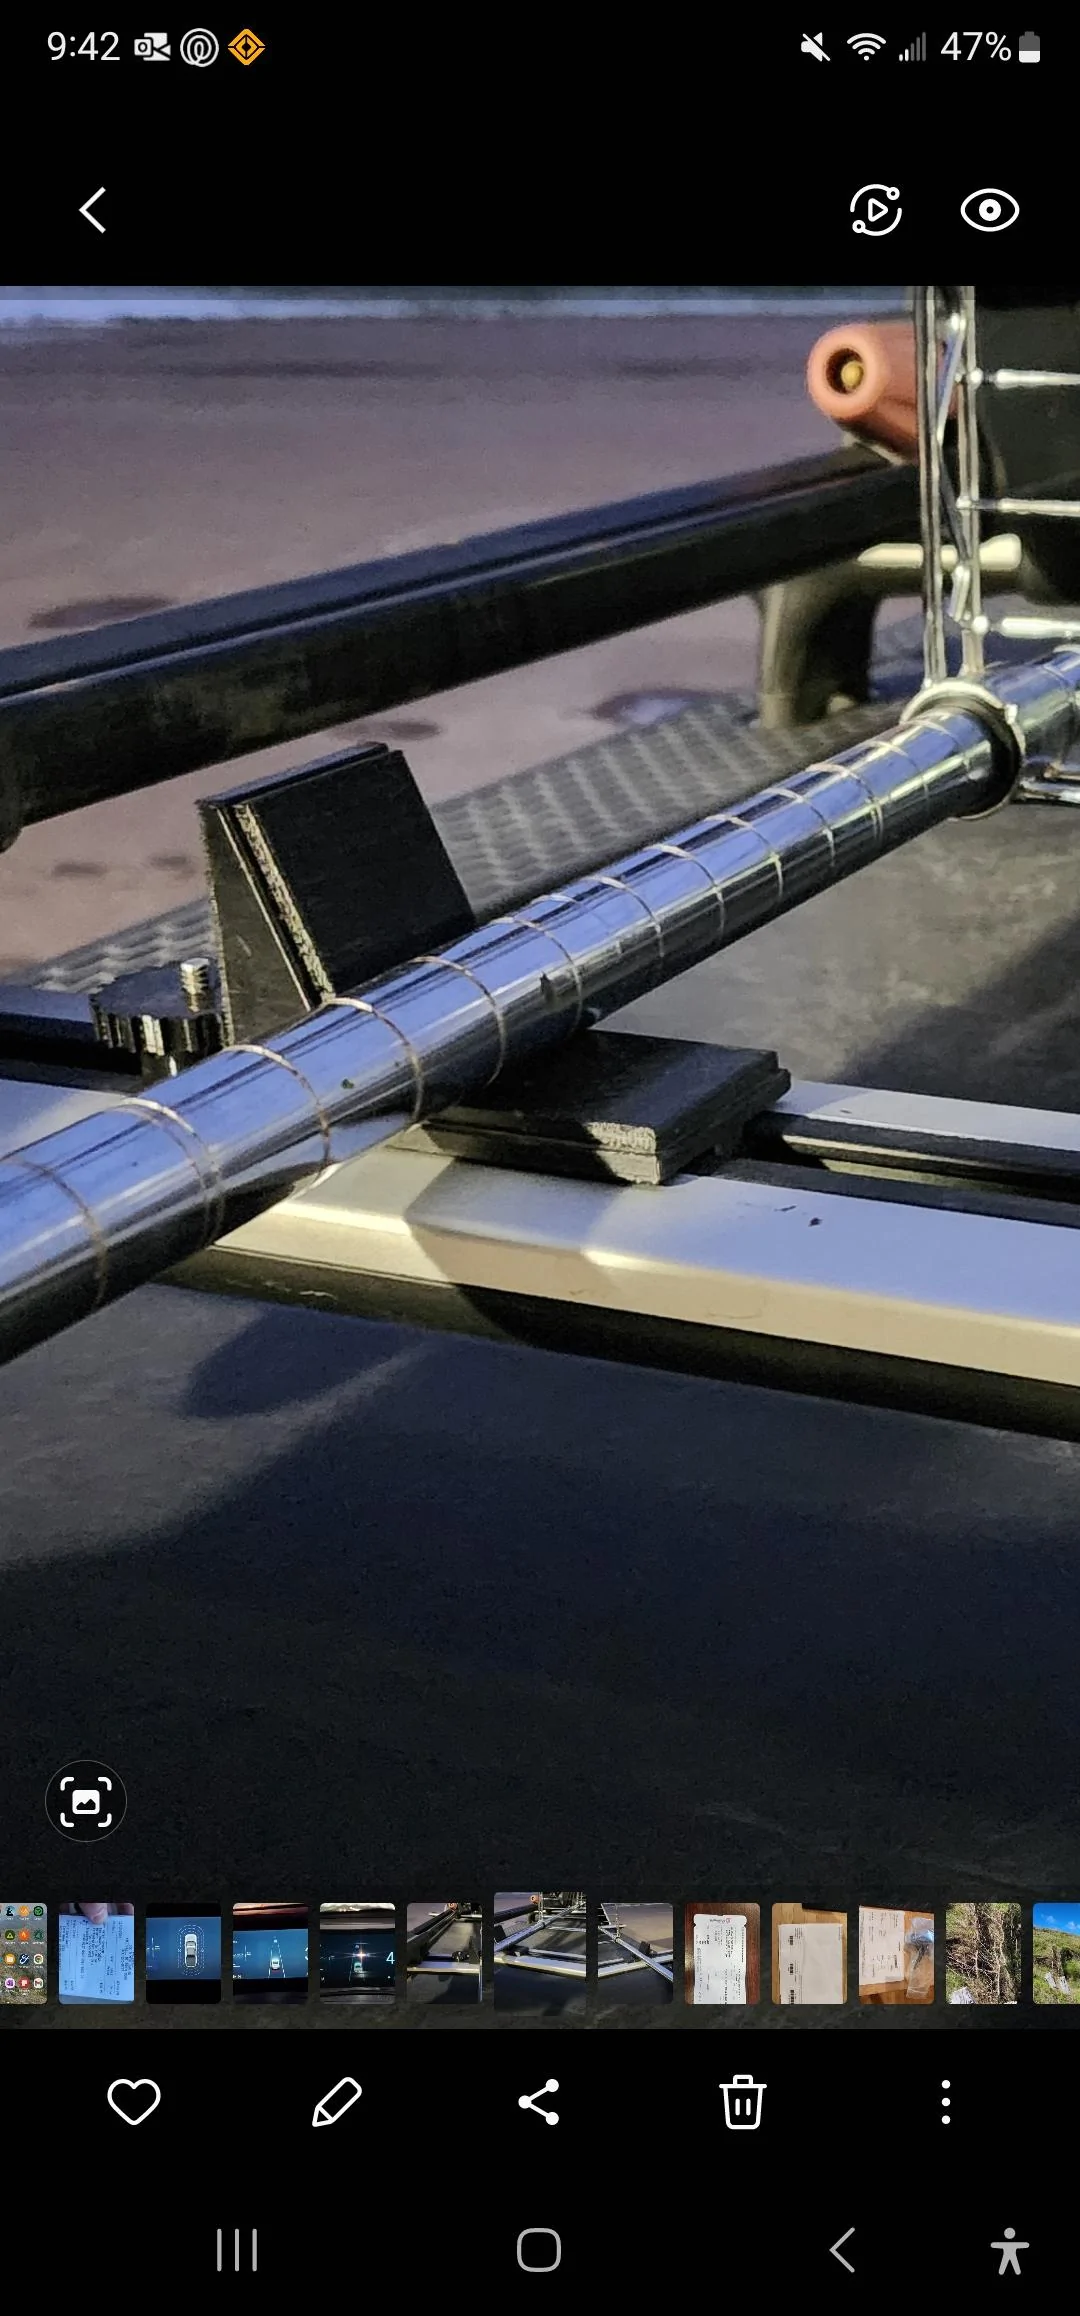
Quick photo of the wrinkle finish on the top:

Rivian R1T R1S NEW - RIVIPARTS Ultimate MagSafe Charging Pad Kit IMG_1257.JPG
Sponsored


tiltedandsaltyaf

Well-Known Member
Joined
May 2, 2022
Threads
3
Messages
118
Reaction score
94
Location
Los Angeles, CA
Vehicles
R1T
Clubs
 
any chance to do a smooth version where we can apply a wrap or texture to it?
 

ipadl

Active Member
First Name
Seth
Joined
Apr 3, 2022
Threads
3
Messages
40
Reaction score
57
Location
Montana
Vehicles
Rivian R1T
Occupation
R&D
Curiously - I designed and printed a set of load stops for the rack that are a mixture of nylon and TPU. The main load stop body is in nylon with two pads printed in tpu on the top faces of the nylon. I haven't run into any adherence issues yet - any reason why it wouldn't work to print the main body in PETG and a top layer in TPU? Attached are images of my load stop print. The silver tube is a Costco wire rack I was hauling...

Rivian R1T R1S NEW - RIVIPARTS Ultimate MagSafe Charging Pad Kit Screenshot_20230127_214309_Gallery


Rivian R1T R1S NEW - RIVIPARTS Ultimate MagSafe Charging Pad Kit Screenshot_20230127_214258_Gallery


Rivian R1T R1S NEW - RIVIPARTS Ultimate MagSafe Charging Pad Kit Screenshot_20230127_214244_Gallery
 

Andoman

New Member
First Name
John
Joined
Dec 25, 2022
Threads
1
Messages
4
Reaction score
2
Location
Hilliard
Vehicles
R1T
Occupation
Information Security
Perfect example of necessity is the mother of invention! The price is right and the design is awesome. I would be a buyer (no printer) of a plug and play design with installation video and details on what additional purchases (pads?) are needed. I would want dual chargers. The OEM design is simply not usable.
 

nc10

Well-Known Member
Joined
Sep 24, 2021
Threads
33
Messages
492
Reaction score
539
Location
South Carolina
Vehicles
R1T LE, EV6 GT Line
Occupation
Engineer
  1. Is this an interesting item and is there anything additional that would make it more compelling? Yes, interesting. Nothing I feel too strongly about, maybe Rivian or other logo's (sports teams, cities) . May suggest more after a trial print.
  2. Is TPU rubber OK for the tray? It could be all plastic for a reduced cost. I've printed a few things with TPU for indoor use. But I'd worry about outdoor summer temps but don't have any experience. I guess you're using a relatively hard TPU?
  3. Is splitting up the direct wiring kit for the pad kit okey doke? Yes, but If I understand, we'll need to remove the existing Qi plate in any case?
  4. Is pricing reasonable (starting around $60 with two JSAUX pads)
    Yes. I can't imagine finding a dual charging option less expensive.
  5. Should I optionally sell the pads with it? (hopefully no :)) Some customers might want a complete all in solution in a package, I think its just a question of how much service you want to provide. Either is fine by me.
  6. Should I include the blanks, or will no one install just one pad. Include a blank with the Rivian logo?
  7. Should I include both options with the wiring kit? I think thats helpful. Though customers ordering the pads isn't much of a hurdle, I think you could drop that. I can't imagine you could mark the pads up enough to justify the trouble for yourself, but just guessing.
Good luck.
 

Sponsored

MichaelD

Well-Known Member
Joined
Apr 21, 2022
Threads
5
Messages
179
Reaction score
324
Location
LA
Vehicles
Sprinter 4x4 camper van (170)
I would love one of these.

- I'll buy the Apple chargers for it
- TPU (or softer) is fine for the lower tray
- I'd prefer to hard-wire but without soldering if possible
- I'll add my own non-slip mat up top, probably cut from a phone dash pad, so it works with Android too w/o a case
- Price is more than fine; I'd happily pay more to help finance build upgrades and stuff to make your life easier
 

mike813

Well-Known Member
First Name
Mike
Joined
Dec 4, 2020
Threads
4
Messages
288
Reaction score
436
Location
JAX FL
Vehicles
2023 R1S GW/OC/20 | 2020 Tesla Model Y
Clubs
 
Great design! As I've said on other threads of yours, the console basket, sunglass holder, and ball mount made the trip with me to pick up my Rivian - my delivery specialist was very impressed with the designs! I use your cell phone ball mount and couldn't live without it. As we all know the Rivian software isn't quite far enough along to let us keep phones out of view, so I really like to have the phone up in my line of sight while driving. (Not a knock on Rivian, an expected component of early adoption while we wait for the software to improve - text messaging, anyone?).

I actually like the flexibility of having my phone connected to the magsafe charger with the cable - this lets me pick up my phone as needed while the phone is still charging. Magsafe is so fast that I typically just leave a magsafe puck plugged in to the center console ports and pull it up onto this shelf as needed. What I would really love to see is an iteration of this design that doesn't incorporate magsafe charging, and instead maybe adds two shallow cupholders (whatever depth will fit) and a larger pocket or two. I would opt to take out the fully wireless charging pad and replace it with usable storage space. I would also love to see a drop-in organizer tray for the purse shelf area - something that has multiple pockets and maybe two big deep nalgene bottle holders. Now that my kid has a 3D printer, we're trying out all of your designs. (which by the way, are priced great - 3D printing filament is expensive!) Please keep up the great work!

I would ask if you could look at storage tray options for the top of the dash, but right now this area holds my Mack truck cigar ash tray just right....

Rivian R1T R1S NEW - RIVIPARTS Ultimate MagSafe Charging Pad Kit IMG_8920 (1)
 

Tonicart

Well-Known Member
Joined
Jun 14, 2022
Threads
5
Messages
125
Reaction score
62
Location
Richmond, CA
Vehicles
2022 Rivian R1T
I would do some soldering and install 2 charging pads - no blank. This looks like the most promising charging pad replacement yet!
 
OP
OP
RWerksman

RWerksman

Well-Known Member
Site Sponsor
First Name
Rob
Joined
Nov 13, 2020
Threads
58
Messages
1,413
Reaction score
3,162
Location
Pittsburgh
Vehicles
Jeep & R1T
Little bit of an update:

I've tweaked the design to add a bit of under-pad support. This will prevent wrenching out the pads if you need to remove something from underneath them in a hurry.

Like my 11 year old did.

Anyway, here is what it currently looks like:

Rivian R1T R1S NEW - RIVIPARTS Ultimate MagSafe Charging Pad Kit 1675135712067


I've not printed and I won't be posting this quite yet, because I want to investigate an idea more so. I *think* I can remove MORE of the top plastic pad and make the storage area even bigger. It will involve some surrounds to the left and right of the pad to keep the friction, but it seems doable for the time being.

More shortly...
 

Sponsored

OP
OP
RWerksman

RWerksman

Well-Known Member
Site Sponsor
First Name
Rob
Joined
Nov 13, 2020
Threads
58
Messages
1,413
Reaction score
3,162
Location
Pittsburgh
Vehicles
Jeep & R1T
As promised, I have a big update. This is likely a very close approximation as to what the final product will be:

Rivian R1T R1S NEW - RIVIPARTS Ultimate MagSafe Charging Pad Kit IMG_1263.JPG

Rivian R1T R1S NEW - RIVIPARTS Ultimate MagSafe Charging Pad Kit IMG_1264.JPG

Rivian R1T R1S NEW - RIVIPARTS Ultimate MagSafe Charging Pad Kit IMG_1265.JPG

Rivian R1T R1S NEW - RIVIPARTS Ultimate MagSafe Charging Pad Kit IMG_1266.JPG


There are a few important changes to this version:
  • The MagSafe charging pads are now both more floating and have a support structure around them. They are better supported (front, rear, mid) and are protected should you need to unload something rapidly.
  • The storage area has been expanded. It's now 170.2mm wide x 96.2mm long x 32mm tall. That's a smidge wider than before, but it's now better longer front to back. (viewable with the old liner above)
  • The liner has been upgraded per feedback by @Snazzy Labs over at Printables. It's now thicker and slight better proportioned to fit in the storage area better with less deflection due to the uneven surface underneath.
  • The cutout for the charging pad cable has been slightly enlarged to better accommodate the insulation of the OEM cable.
  • The rear support has been refactored to not be as thiccc. It's now sculped out to allow for installation of the USB power block. (more on that below)
  • The top surround has been slightly tweaked to fit just a bit better.

Speaking of power, I've determined what the power will look like. Here it is pictured with the terminal block and sleeve connection method as mentioned earlier in this thread:

Rivian R1T R1S NEW - RIVIPARTS Ultimate MagSafe Charging Pad Kit IMG_1267.JPG

Rivian R1T R1S NEW - RIVIPARTS Ultimate MagSafe Charging Pad Kit IMG_1268.JPG


This power method is significantly superior to what I had before. Each USB port puts out 24W of total power. That's more than the 15W from each USB-C port, including the one in the center console. For reference, that means that the OEM pads connected to this (you'll need a C to A adapter) will run at a full 15W charging your iPhone. If connected to vehicle directly, they negotiate down to 7.5W.

Here is that block installed:

Rivian R1T R1S NEW - RIVIPARTS Ultimate MagSafe Charging Pad Kit IMG_1271.JPG


If it's working, it has a blue LED. It will automatically turn off after a period of inactivity, like everything else in the truck.

Here is the whole deal installed, except for the TPU cargo area liner which is still printing. The updated design has a rather significant reduction in the top plastic area, which is a good thing. From the driver's seat:

Rivian R1T R1S NEW - RIVIPARTS Ultimate MagSafe Charging Pad Kit IMG_1272.JPG


With all that said, here is where we stand:
  • There still needs to be a decent amount of optimization. Specifically, I don't like the exit ports should you want to plug into the center console USB C ports. They need refactored and a bunch of other items need just a bit more massaging.
  • I need to determine what will be offered for power. Based on feedback, I think this will be the optional 'Power Kit'
    • 1 x Molex connector
    • 1 x Bit o' shrink wrapping (for the Molex / soldering)
    • 1 x Terminal block
    • 1 x Terminal block sleeve (for the screw-together option -- both will be included)
    • 1 x USB Power block w/ connector and bit o' double-sided tape
  • Printability validation
  • Final Pricing
At this point, it looks like preorders will open in February with deliveries ideally at the end of the month.
 

bhlackey

Well-Known Member
Joined
Feb 28, 2022
Threads
3
Messages
89
Reaction score
179
Location
San Diego
Vehicles
R1T, KTM SX-450F
Great progress. It really sounds like you are having fun getting this right. Which is good for all of us without your tools/expertise!. Thank you.
 

astonius

Well-Known Member
Joined
Oct 5, 2021
Threads
53
Messages
1,434
Reaction score
3,062
Location
US
Vehicles
Cars
Out of curiosity, if you remove the OEM charging pad are the pop-out cup holders immediately beneath? Is there anything in between?

I know this is a bit off-topic, but I would love an option to turn this charging area into cup holders. From there I have this idea to use the old pop-out cup holder space as a mounting point for a “bridge” over to the bottom of the center air vents. This bridge would have some open storage space and two upright chargers just below the vents (kinda like what Tesla has). The bridge would also still allow use of the open space below for a bag or for camp speaker access.
 
OP
OP
RWerksman

RWerksman

Well-Known Member
Site Sponsor
First Name
Rob
Joined
Nov 13, 2020
Threads
58
Messages
1,413
Reaction score
3,162
Location
Pittsburgh
Vehicles
Jeep & R1T
Out of curiosity, if you remove the OEM charging pad are the pop-out cup holders immediately beneath? Is there anything in between?
Yes, they are directly beneath. There is a plastic bit in the way - It's actually pictured in the last photo I posted. There is not a way to remove it. The holes you see there are likely ventilation so when you slam the cup holders back in the air that was occupying the space has somewhere to go.

While a bridge could theoretically work, the issue that you'll likely experience is that there isn't a good mounting spot near the vents. All you have there is small lip mostly made of ornamental plastic that will likely not support the structure need for stability holding multiple big-gulps.

I also wish they would have connected it like a bunch of other vehicles have. At the end of the day, I feel like Rivian was deliberatively conservative in what they did, and they even screwed that up in some key places, like the wireless charging pad.

That said, one thing that I've thought about is using the much larger space in this project to add another cup holder. It could be a pretty simple ring with a magnet in the bottom of it. It would attach to a plate (or similar) below the TPU pad.

Not sure if that helps at all...
 

astonius

Well-Known Member
Joined
Oct 5, 2021
Threads
53
Messages
1,434
Reaction score
3,062
Location
US
Vehicles
Cars
Yes, they are directly beneath. There is a plastic bit in the way - It's actually pictured in the last photo I posted. There is not a way to remove it. The holes you see there are likely ventilation so when you slam the cup holders back in the air that was occupying the space has somewhere to go.

While a bridge could theoretically work, the issue that you'll likely experience is that there isn't a good mounting spot near the vents. All you have there is small lip mostly made of ornamental plastic that will likely not support the structure need for stability holding multiple big-gulps.

I also wish they would have connected it like a bunch of other vehicles have. At the end of the day, I feel like Rivian was deliberatively conservative in what they did, and they even screwed that up in some key places, like the wireless charging pad.

That said, one thing that I've thought about is using the much larger space in this project to add another cup holder. It could be a pretty simple ring with a magnet in the bottom of it. It would attach to a plate (or similar) below the TPU pad.

Not sure if that helps at all...
Thanks Rob for the detailed response. Bummed to hear about the non-removable vent panel. Any sign it could be removable with a broader tear down of the console?

I concur on the lack of a solid mounting position under the vents. There’s a couple of potential workarounds. One is to remove the panel covering the underside of those vents to see if there’s a potential mounting position or a way to fashion a mounting bracket. Of course this would require permanently modifying or replacing that panel, but depending on the outcome it could be worth it. The other option is to fashion legs for that end of the bridge which would curve under the vents and mount to the open console area beneath.
Sponsored

 
Last edited:


Top