HaveBlue
Well-Known Member
I did a fix on my axles. Today was tire rotation day so I thought I would take the opportunity to address the noise. Every time I came to a stop or pulled away from a stop, there would be a creaking/tocking sort of spring sound. From previous investigation I already knew it was coming from where the outer axle CV enters the suspension upright.
Tools I used beyond removing a wheel for rotation:
Ratchet with a 13mm socket
Any size deep socket that's smaller than the splined axle
Single jack Hammer
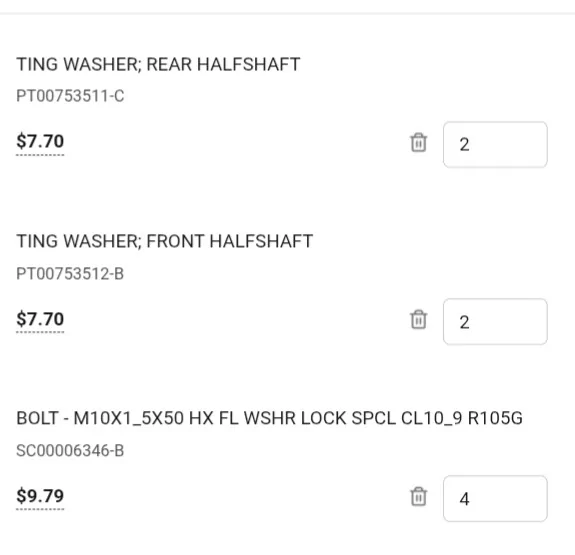
Locktite red, blue in my case
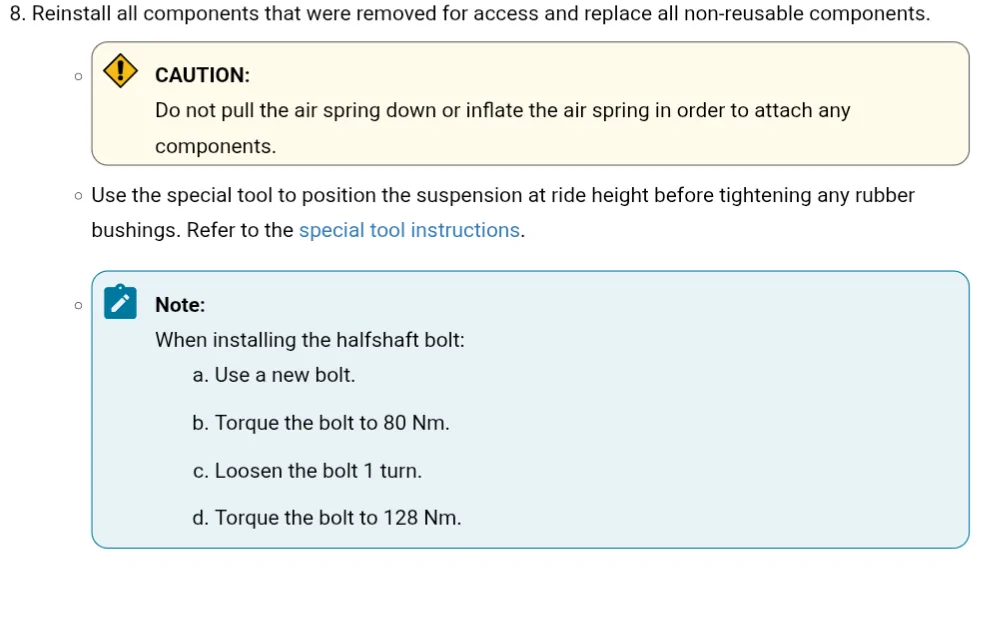
Drive axle grease
A bent piece of wire or coat hanger
Crow bar
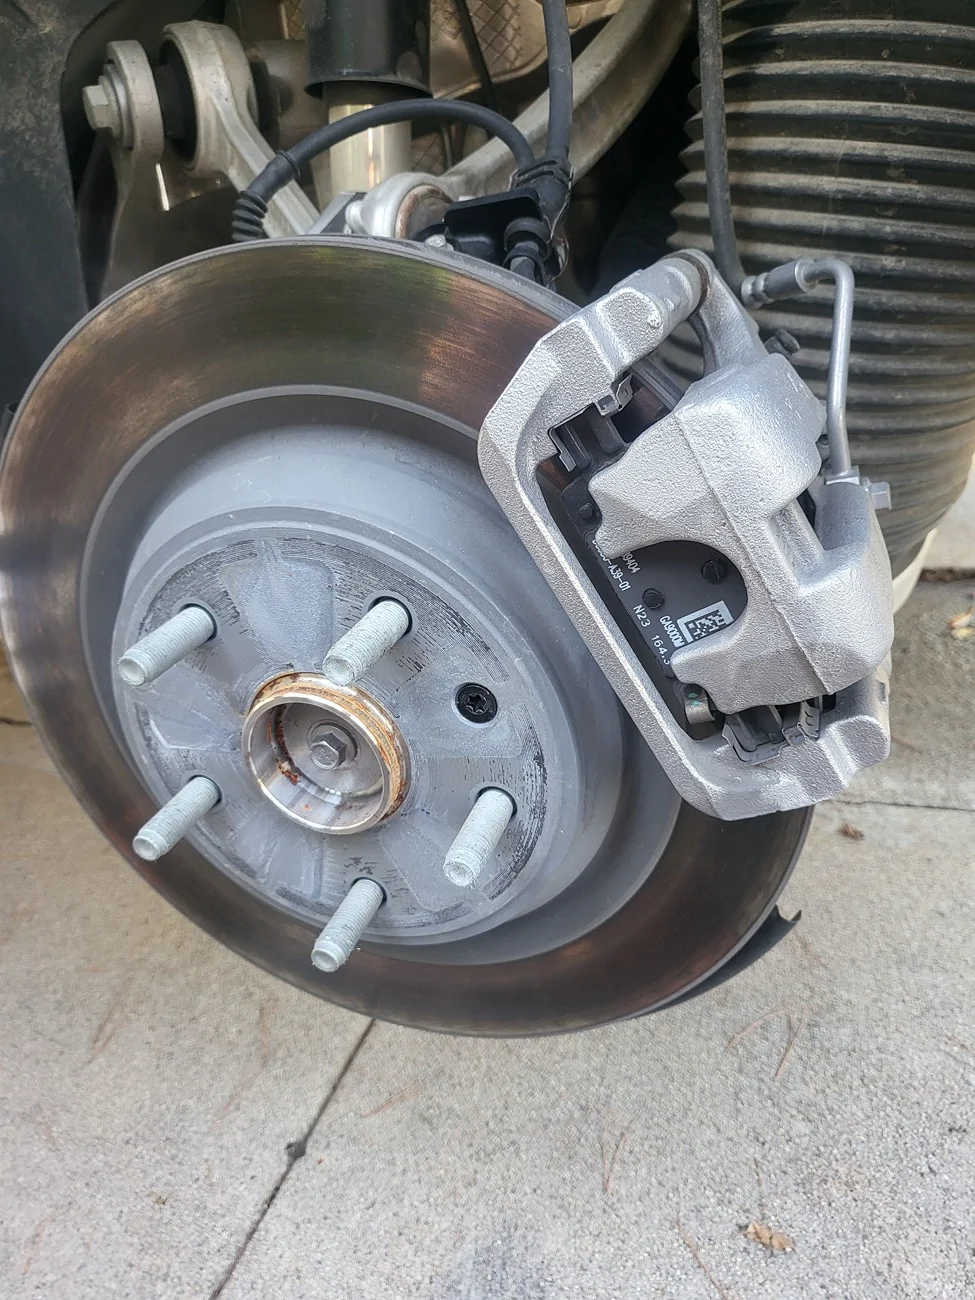
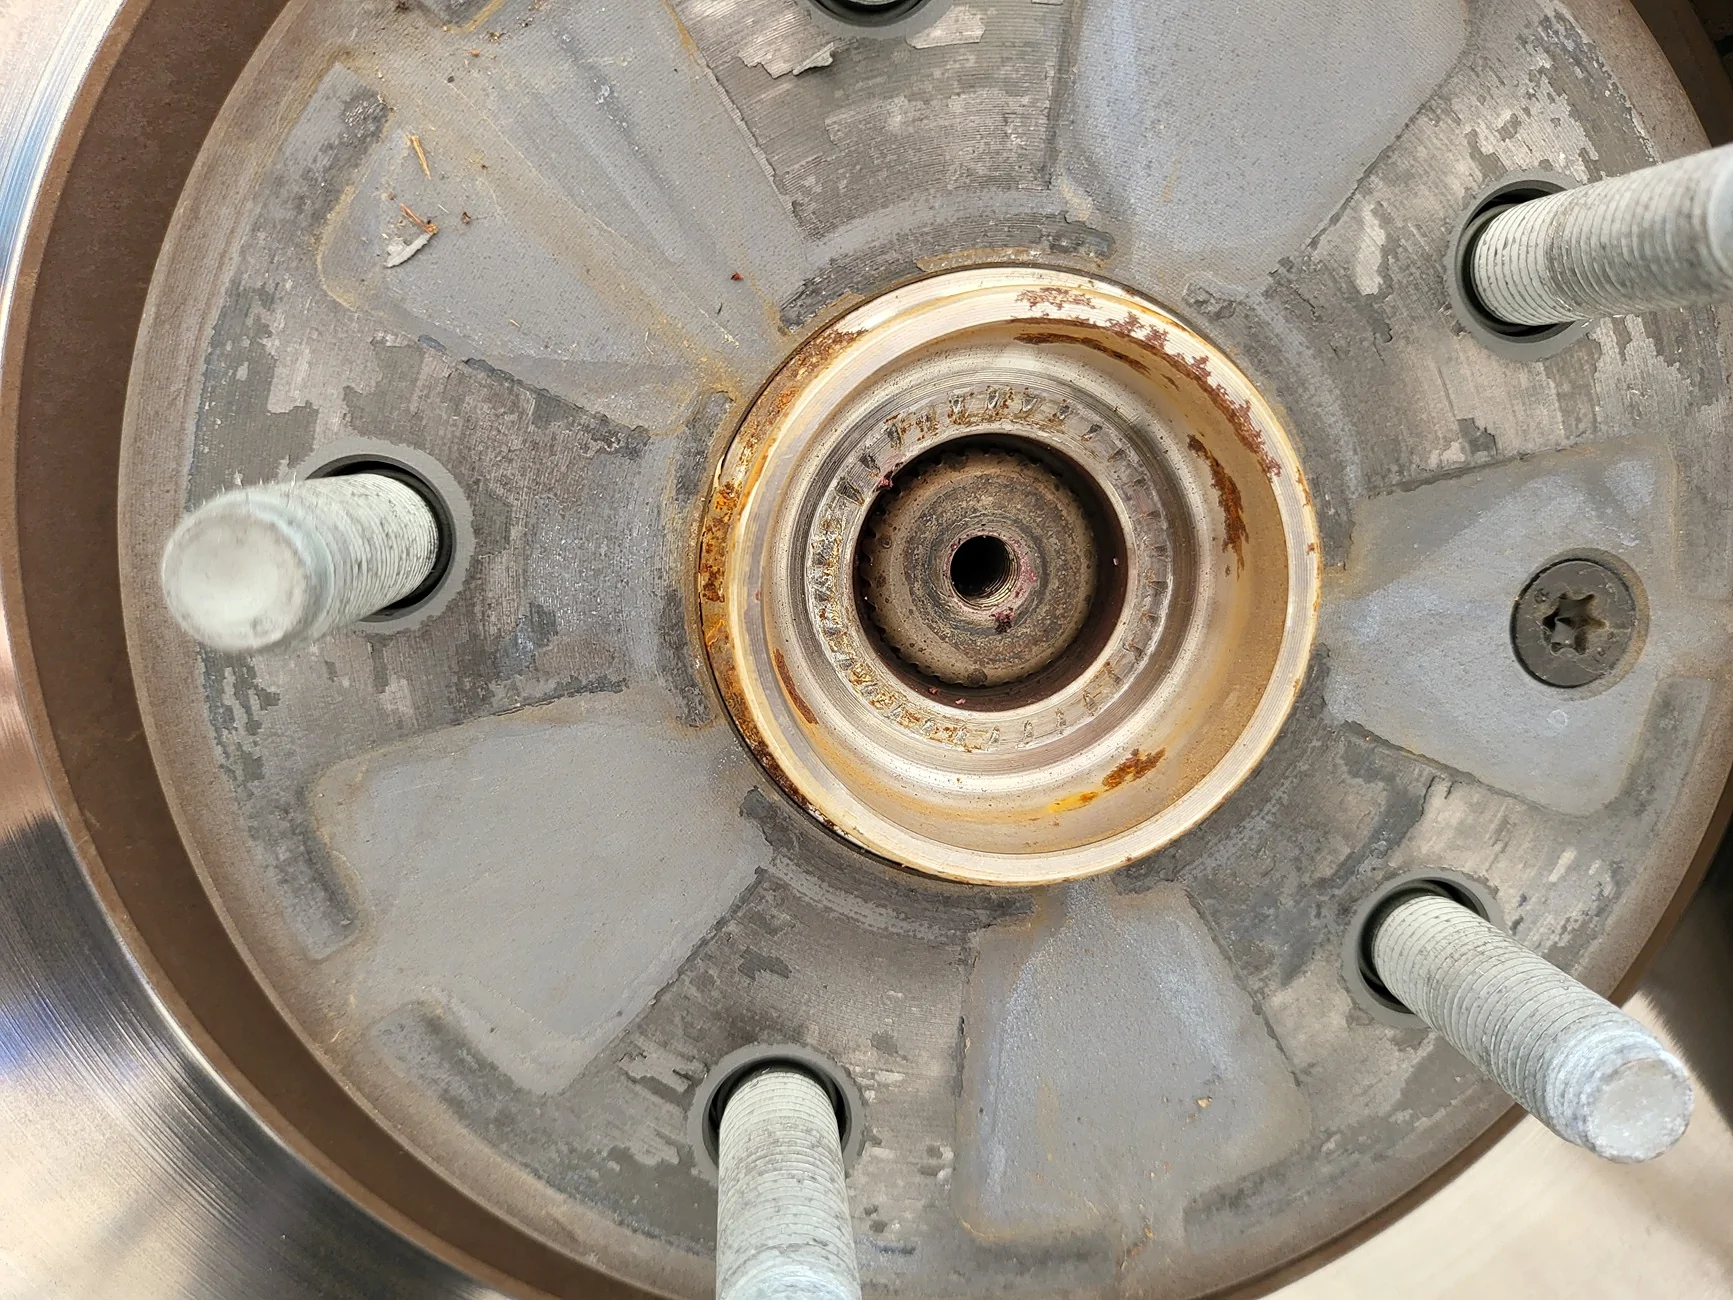
With the wheel off you will see the self locking bolt and washer that retains the outer stub. I used a crow bar between the wheel studs to prevent the rotor from turning and removed the retainer bolt and washer as seen below.


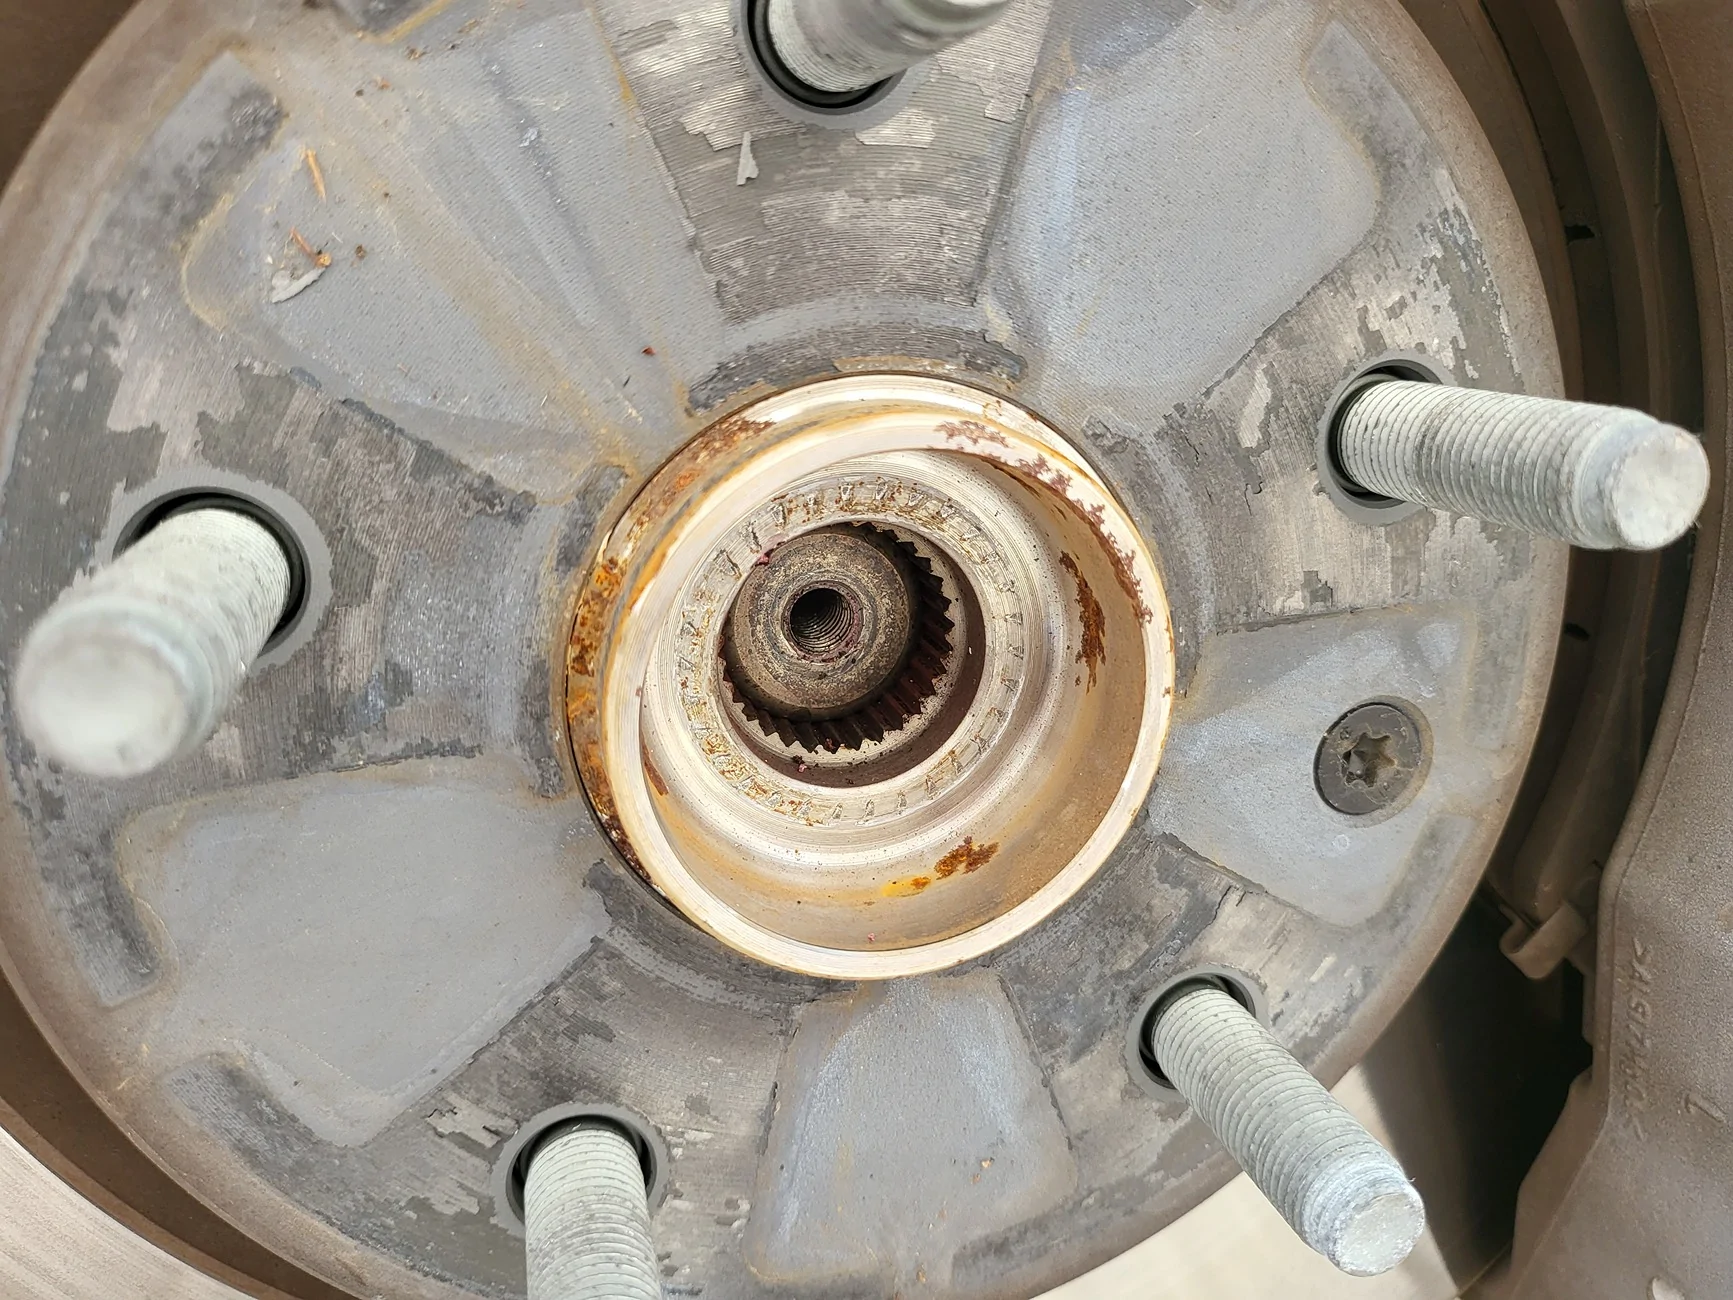
With this removed, the stub shaft needs to be pushed inward about an inch. One of mine I was able to simply pull it from the backside CV. The others, I put a deep socket against it and knocked it back with a hammer as they were tight. You'll then have something like this.
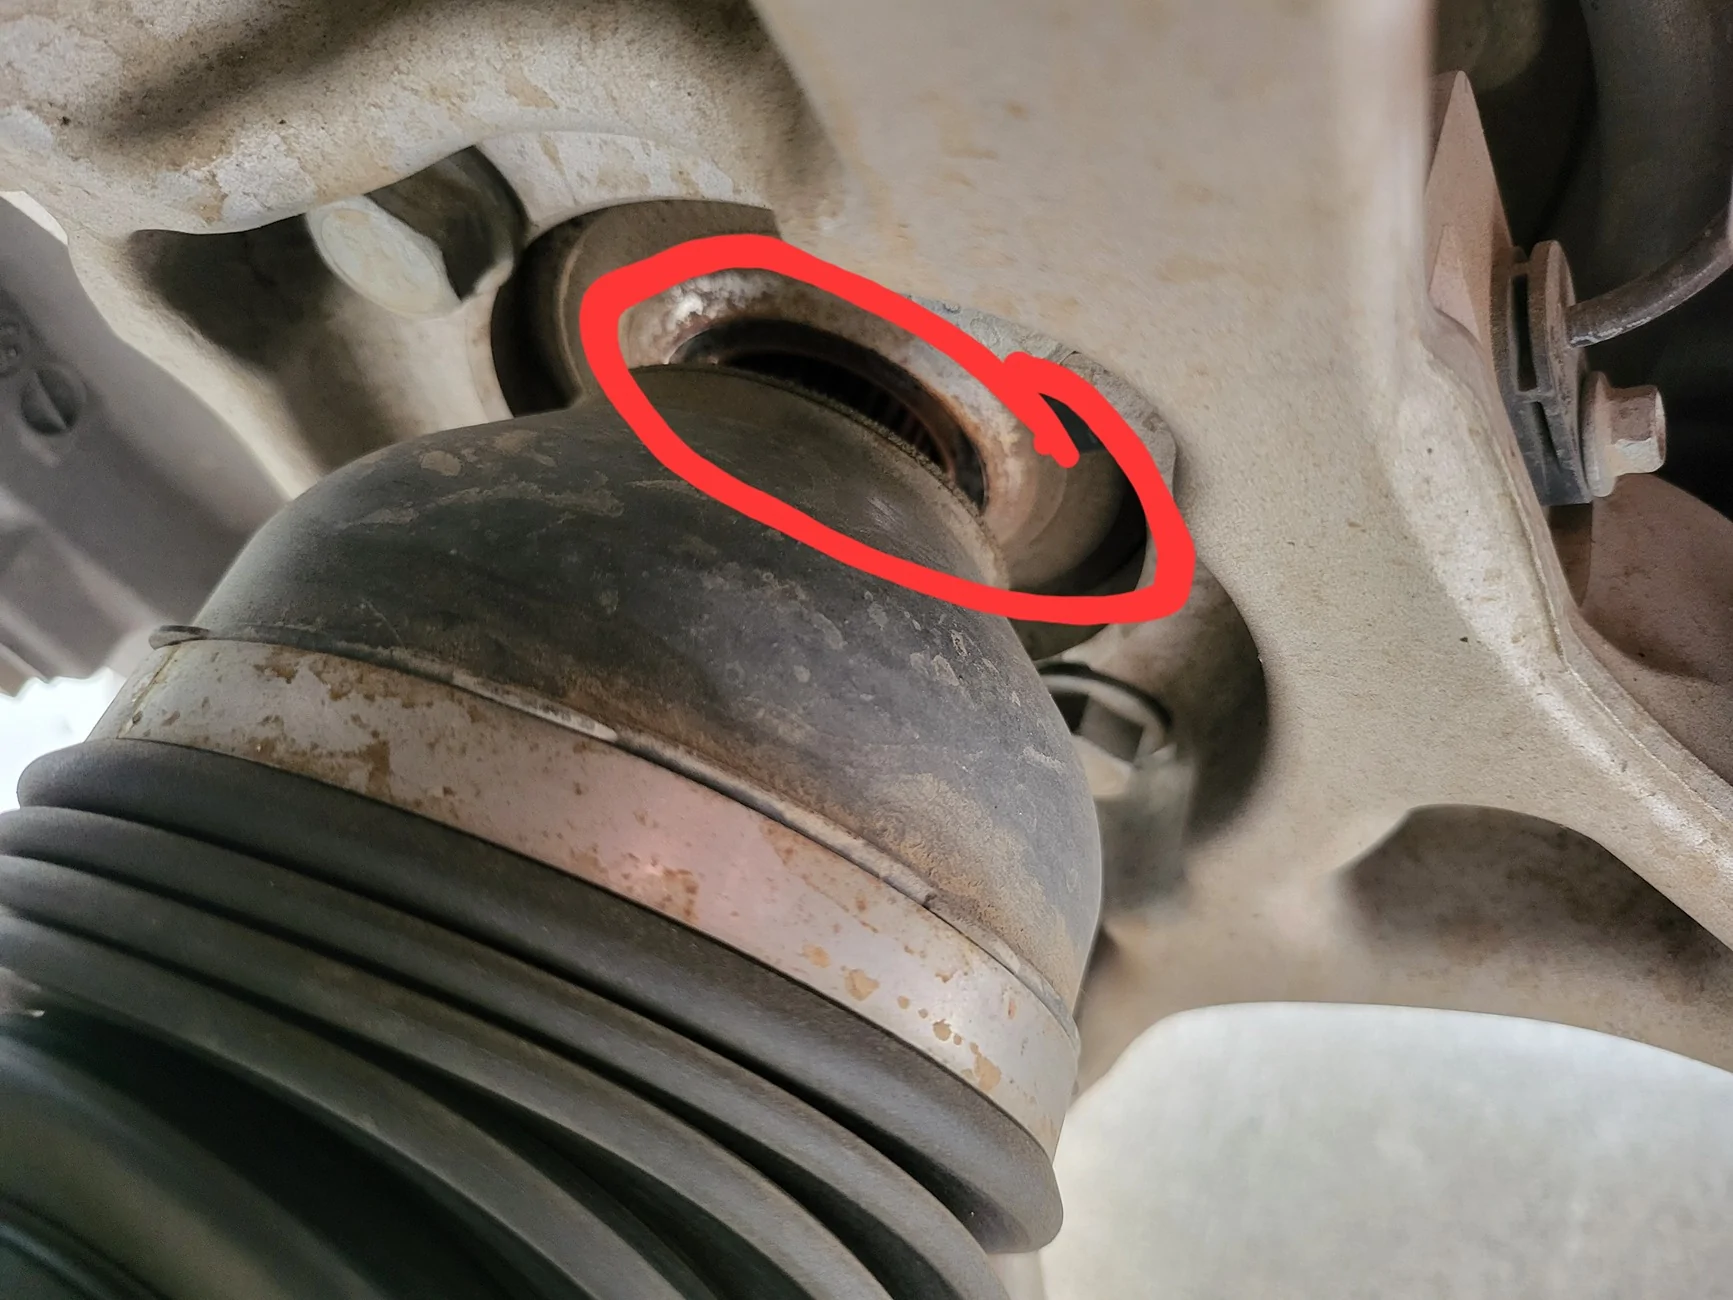
This will create a gap on backside between the CV and spindle upright. You will see bare shiney metal where the parts meet; circled in red below. This is actually the dark area in the image below due to lighting. Depending on your model you may also have a large thin flat washer on the CV end. These two mating surfaces are what need grease. It should be a silicone based one but I have a grease gun for regular drive axles with the red stuff and that has served well for decades so that's what I used. I was able to put a glob on my finger and coat that entire mating surface between the two parts. Even the washer spins so you can coat a section and move it to coat more if that is easier. The rear axles are a bit tighter for space and I globbed a piece of bent wire and reached in to coat.
Reassembly is pretty simple just applying a bit of locktite on the thread and installing the retainer bolt with washer. They ratchet and kind of stop at one gutentighter after everything is mashed back together.
This was a trivial undertaking while the car was in the air for a rotation. Took about as long to do one as write this. However this is a what I did, not a what you should do. No more squeaking though! Hopefully it lasts a while but I'll post up. My last attempt with a spray lube instantly made it much worse instead.
Tools I used beyond removing a wheel for rotation:
Ratchet with a 13mm socket
Any size deep socket that's smaller than the splined axle
Single jack Hammer
Locktite red, blue in my case
Drive axle grease
A bent piece of wire or coat hanger
Crow bar
With the wheel off you will see the self locking bolt and washer that retains the outer stub. I used a crow bar between the wheel studs to prevent the rotor from turning and removed the retainer bolt and washer as seen below.
With this removed, the stub shaft needs to be pushed inward about an inch. One of mine I was able to simply pull it from the backside CV. The others, I put a deep socket against it and knocked it back with a hammer as they were tight. You'll then have something like this.
This will create a gap on backside between the CV and spindle upright. You will see bare shiney metal where the parts meet; circled in red below. This is actually the dark area in the image below due to lighting. Depending on your model you may also have a large thin flat washer on the CV end. These two mating surfaces are what need grease. It should be a silicone based one but I have a grease gun for regular drive axles with the red stuff and that has served well for decades so that's what I used. I was able to put a glob on my finger and coat that entire mating surface between the two parts. Even the washer spins so you can coat a section and move it to coat more if that is easier. The rear axles are a bit tighter for space and I globbed a piece of bent wire and reached in to coat.
Reassembly is pretty simple just applying a bit of locktite on the thread and installing the retainer bolt with washer. They ratchet and kind of stop at one gutentighter after everything is mashed back together.
This was a trivial undertaking while the car was in the air for a rotation. Took about as long to do one as write this. However this is a what I did, not a what you should do. No more squeaking though! Hopefully it lasts a while but I'll post up. My last attempt with a spray lube instantly made it much worse instead.
Sponsored
Last edited:
 I thought it was a before and after retaining bolt removed, now I see it's before and after you pushed the halfshaft spline backwards.