gerrylum
Well-Known Member
- First Name
- Gerald
- Joined
- Apr 25, 2023
- Threads
- 5
- Messages
- 534
- Reaction score
- 763
- Location
- Providence Village
- Vehicles
- R1T
- Occupation
- Director of Marketing
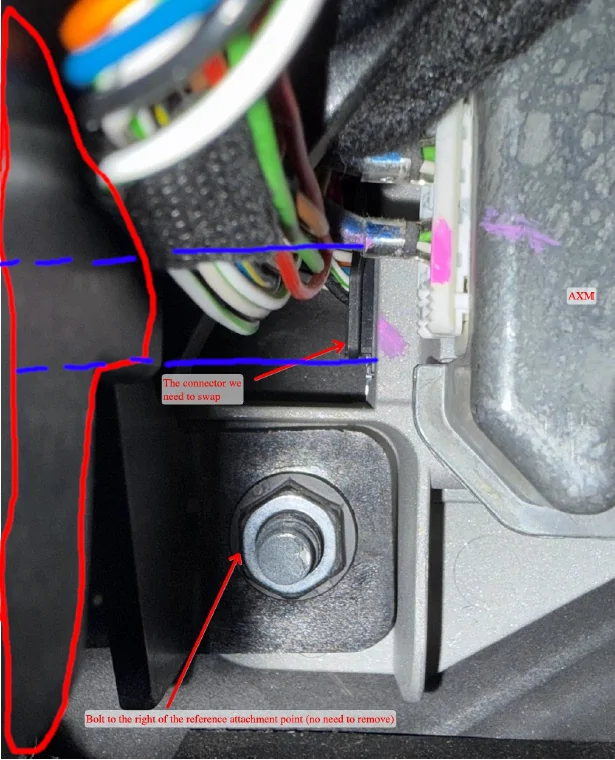
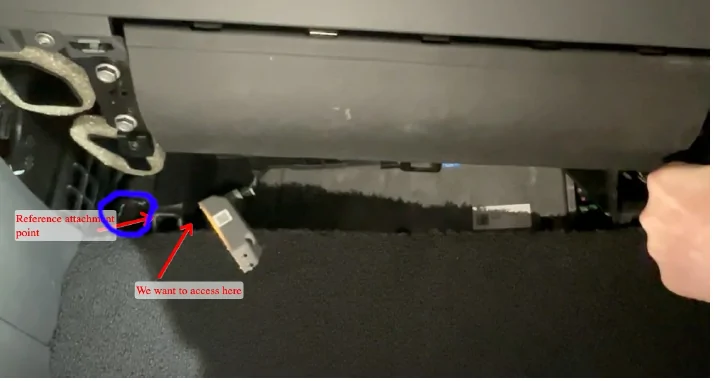
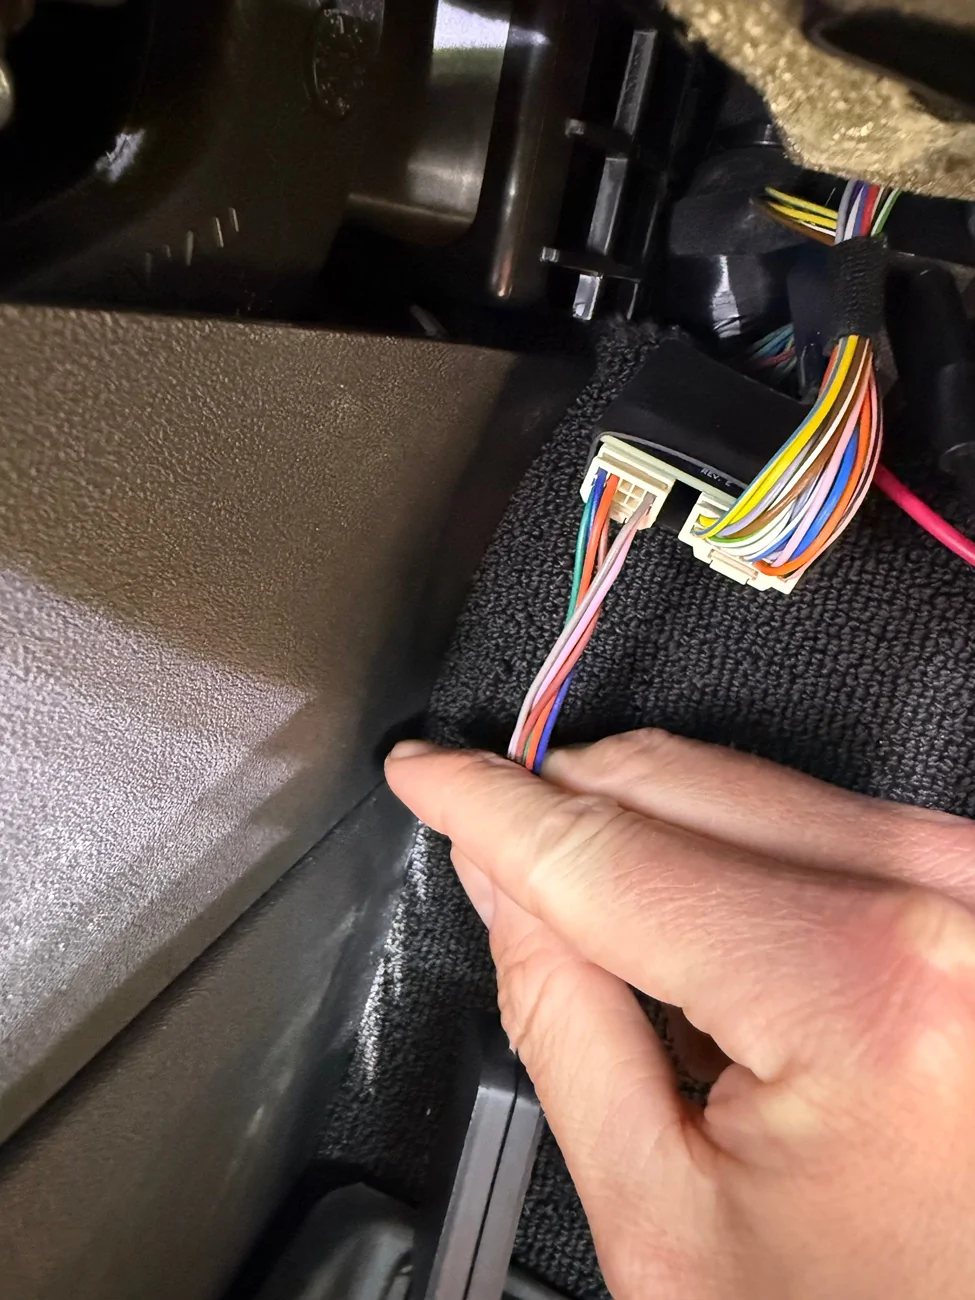
The fix will be integrated into sunnypilot, which will automatically flash updated firmware to the longitudinal upgrade. Once the new firmware is installed, the upgrade no longer needs to be connected to the Comma’s secondary port for data. It will still require power, though. You can leave it connected to the secondary port simply to supply power, or power it from another source. The Janka hub works well for this, but you will need to use a data blocker so it only provides power.I have a 3X and am running "release.sunnypilot.ai". Once the Panda-over-USB deprecation change is merged in, will I need to run a data blocker or will there be a change to SunnyPilot to fix it?
Sponsored